
A Tiled & Styled Bathroom Update
The house to home journey has been such a rewarding process for my husband and I over the last three years. Luckily, most of the work has been cosmetic. Our bathrooms have been last on the list and when I tell you they’re the hardest on the eyes -I mean it! Technically this is an adjoining bath with entrances from both the master and hallway. Because of that bedroom entrance, the goal was to make it feel as “master worthy” as possible.
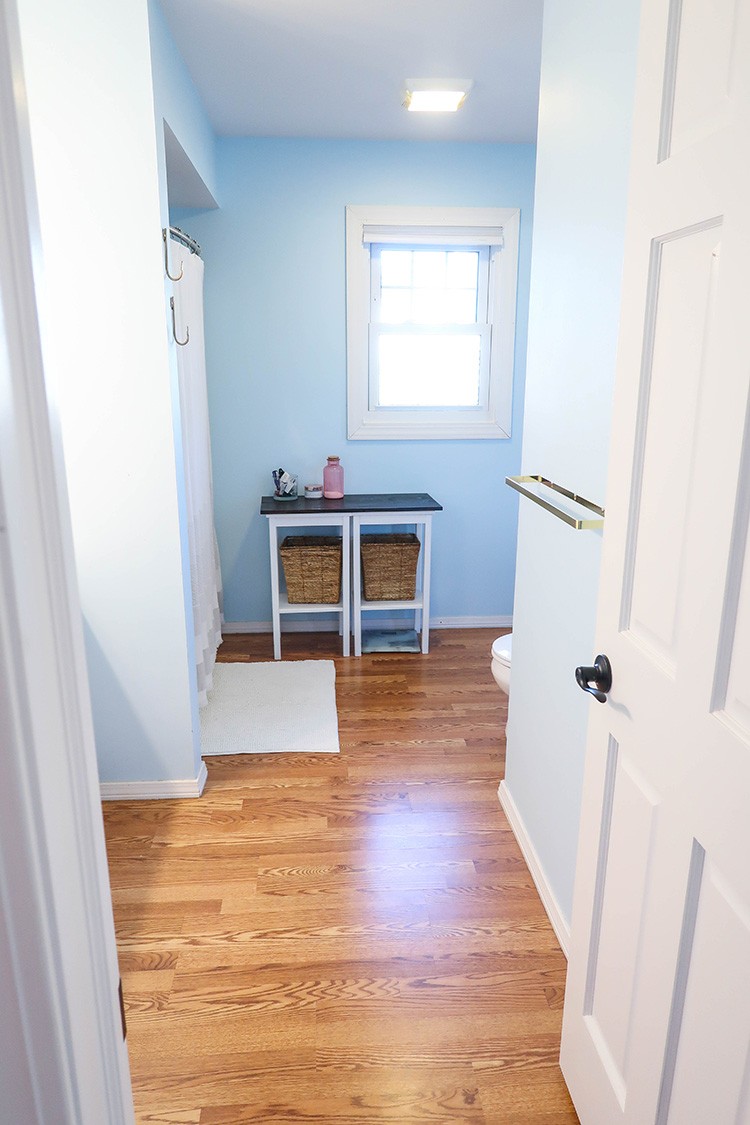

It’s easy to see this room was originally installed with purely base function in mind. No unique details or quality products were added. You’ll notice the lackluster finishes are very outdated, worn, and in major need of upgrades. Overall, this room has felt very bland and forgotten. Both by the last homeowners, and us!

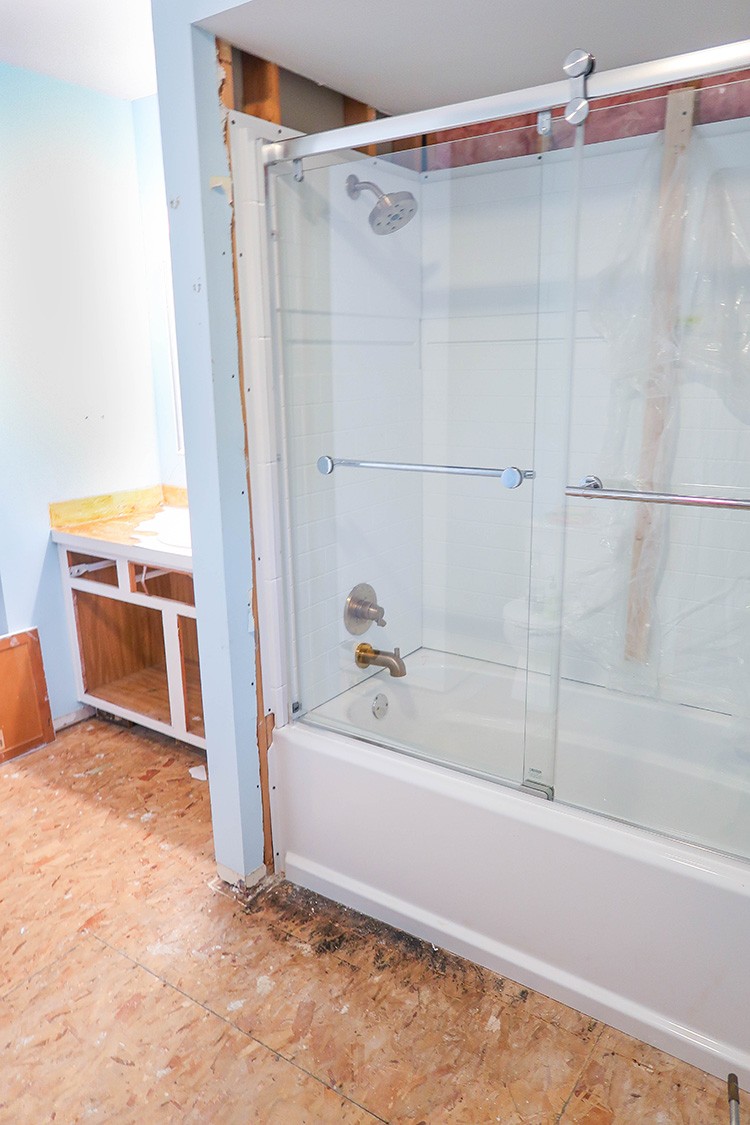
Removing all of the old shower elements and installing the new Delta Classic 60 inch Bathtub was a surprisingly quick process. I have to say, it already looks better! Once you’re down to the studs add 1×3 sections of common board across the studs. Then, apply a strong adhesive to those boards and press the UPstile walls to it. Pre-drill holes where your studs are on the top of the UPstile wall and secure with drywall screws. The directions included with this product are very easy to follow and should answer any questions you may have. I’d also like to note most of the Home Depot stores stock this product, but you’re able to order it for home delivery too which is amazingly convenient.

Once the three UPstile walls are secured you’re ready for caulk. Tape on both sides of your UPstile seams to ensure a clean caulk line. Run a bead of Dap 3.0 100% Waterproof Caulk (as recommended in the UPstile instructions) along all the seams. Smooth with a caulk tool. This will blend away any imperfections of both not enough or too much product. It took my amateur inconsistent lines to picture-perfect quality within one swipe. Then, allow to dry before moving on to the accent tile space.

I’ll admit I’m rather picky when it comes to just about anything home related. Instantly after the walls were in, I couldn’t believe how good they looked! Believe me when I tell you this is not your grandmother’s shower wall system. The faux subway tile shape and grout is as modern as can be, and the ProCrylic material feels silky smooth. It’s a much more affordable option when compared to completely tiling your bath and shower. However, it definitely doesn’t give off the budget-friendly appearance. Win-win!
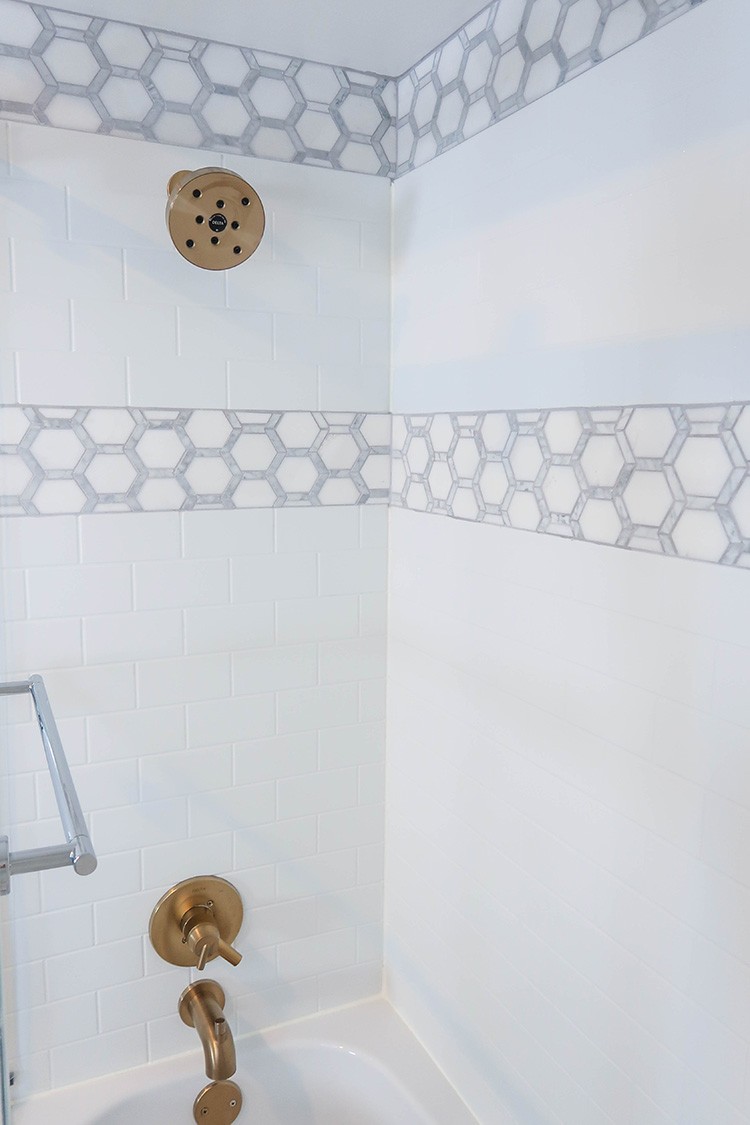
After caulking came the Delta Lyndall Semi-Frameless Contemporary Sliding Bathtub Door. tile channel inlay, and faucets.
As a self-proclaimed style rule-breaker, mixed metals is a concept I was excited to try out in this space. You’ll notice both champagne bronze and chrome elements. The shower door really makes the faucets pop that much more! A major bonus is the spot guard glass coating. With a few weeks of regular use already, I can safely say the doors have stayed clean much longer than expected.
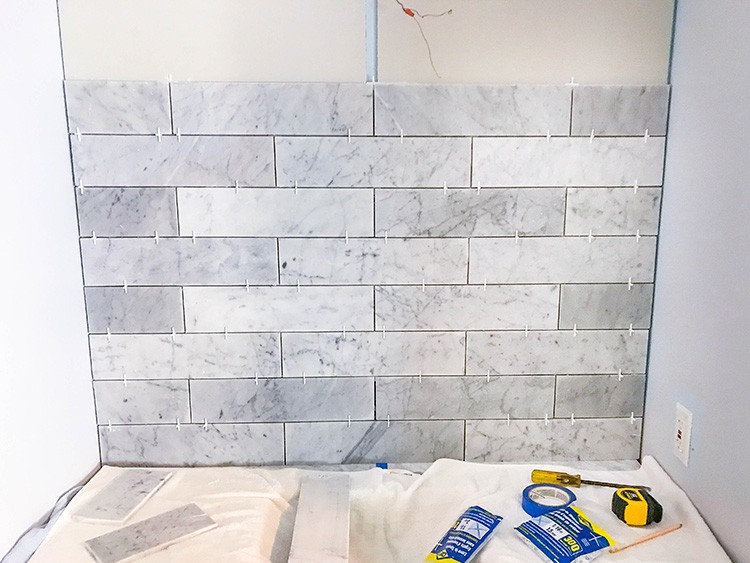
When you reach the channel inlay, I recommend using a tile that fits your unique style and personality. Home Depot has a wide selection of colors, patterns, and sizes so you’re sure to find several options that are right for you. Keep in mind this is a six-and-a-half-inch space. If you’re new to tiling a more uniform shape than what you’ll see here may be easier. Three different tiles were used in this space, all in coordinating hues.

Use the same Dap 3.0 adhesive to secure your accent tiles onto the UPstile. We let it dry for 24 hours before applying grout. This is Polyblend #115 in the color Platinum. It continues throughout all of the tile in the bathroom with an ⅛” space. Not only does it give a more modern look, it will also be much easier to care for when compared to white. Very simple directions are located on the back of the grout packaging. Here you see me wiping away the haze which is the last step.

My favorite detail in this bathroom has to be the Delta Faucets and hardware. Talk about a LOOK! This shower head features H2Okinetic technology, giving the feel of more water while actually using less. Its sleek modern design encompasses every wish I had for the space. All of this hardware is available in multiple color options if champagne bronze is a little too bold for you.


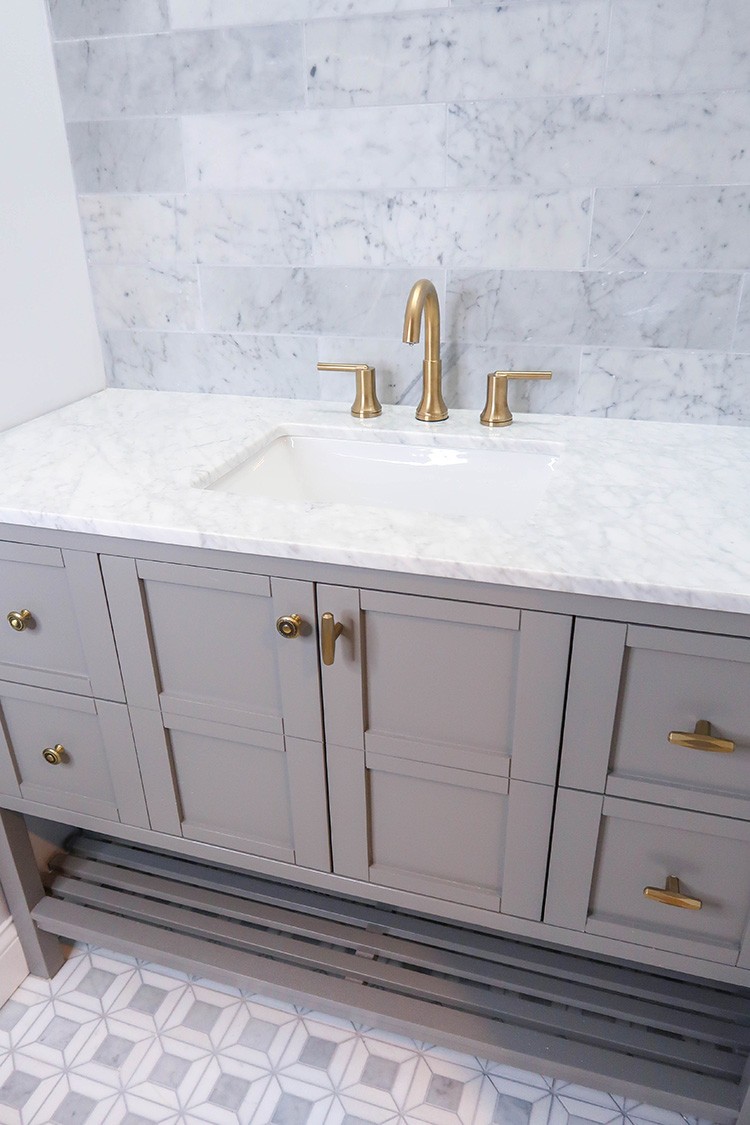
A large scale subway tile was added to the vanity wall from counter to ceiling. It brings the eye up, visually expanding this nook and making it a true statement wall. All of the tiles you’ll see here are from the Jeff Lewis Collection. Each option beautifully coordinates with the next making it easier than ever to create your own designer level look with confidence.
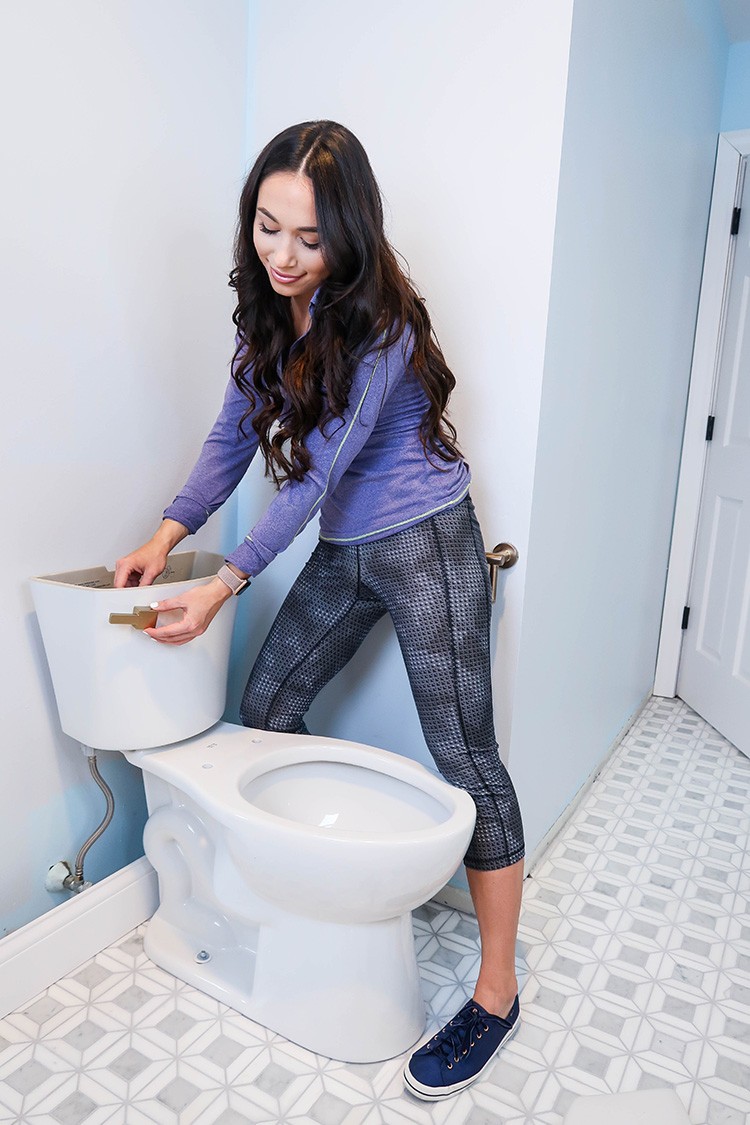
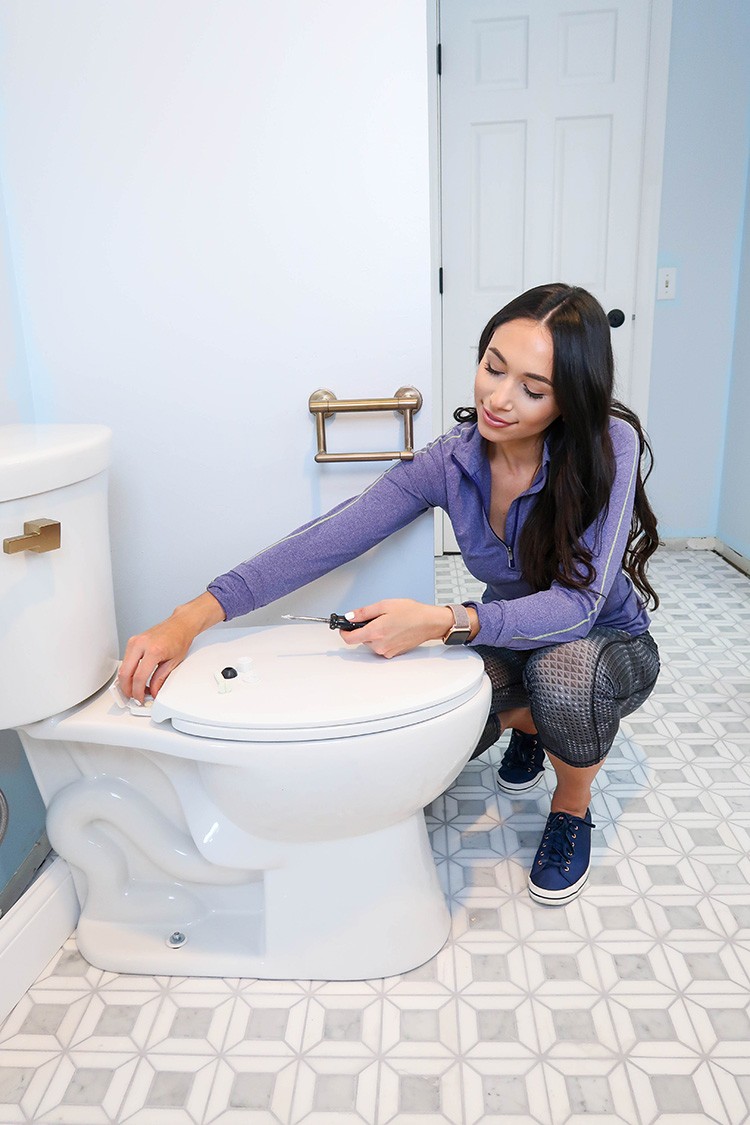
Next on the to-do list was the Delta Elongated Toilet. This upgrade was significantly narrower than our last, instantly adding a few additional inches of floor space and making the corner feel a little less cramped. Details are my favorite aspect of any design. The right ones will make a room feel finished and well thought out. One I have to highlight is the Delta Vero Universal Toilet Handle in Champagne Bronze. I was very impressed with the endless array of Delta bathroom hardware options. All come with easy to follow instructions and are up in minutes! Check them out here.
The Vinnova Florence Vanity in grey could not have been a more perfect fit. I was surprised to see it arrived fully assembled and even features soft closing drawers and doors with a stunning marble top. The left side is the included cabinet hardware, however champagne bronze knobs were added to coordinate with the Delta Trinsic Widespread Faucet. It’s so sleek and stylish, with clean lines and quality crafting. I’ve already referred to it as the “people pleaser” because it has a plethora or design qualities all wrapped into one. The open shelf on the bottom of the vanity is a wonderfully versatile aspect. I know its purpose will change over the years as our needs evolve, and I’m already looking forward to reinventing the look with baskets, towels, etc.
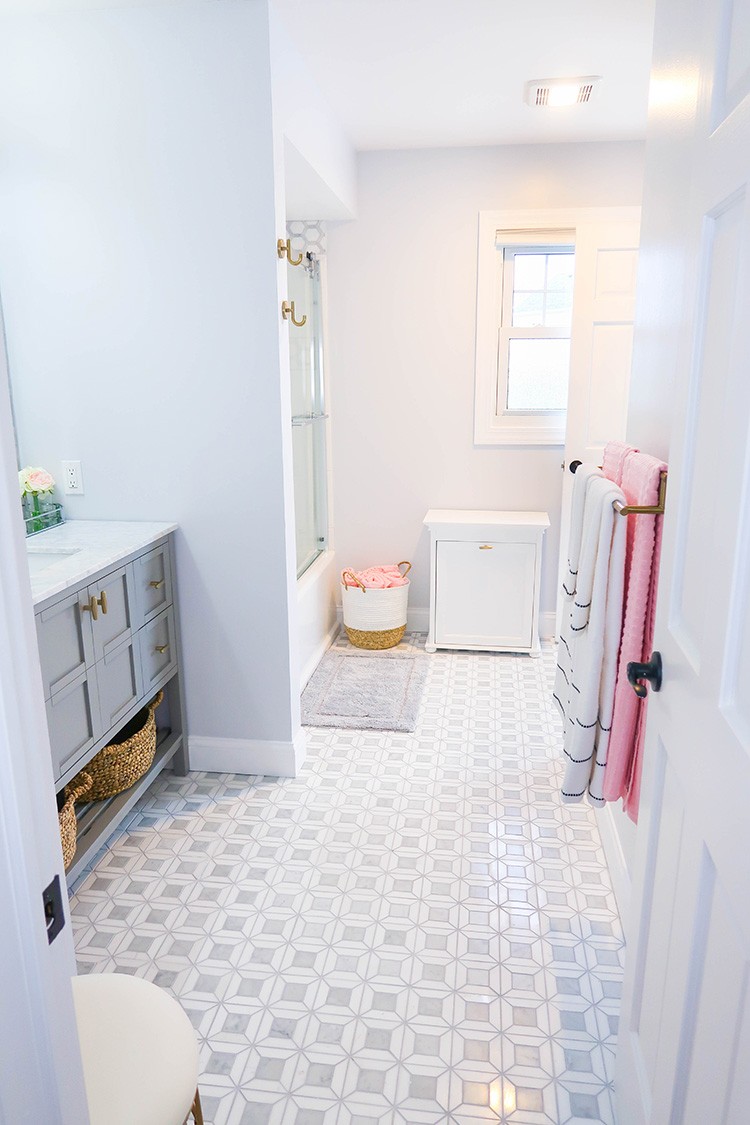
Overwhelming excitement and a can-do attitude transformed this instantly forgetful bathroom to a modern and inviting retreat to remember. Never ending details emulate on trend style and include just enough color for a truly unique space. The UPstile system is very affordable, yet looks anything but! I’m already looking forward to cleaning it (if you can believe it) because I know the care will be quick and painless.

If you’re on a budget, but love a more refined style, I highly encourage you to consider this option. There were much less hiccups than expected, which is why I encourage anyone with an experienced helping hand to take on a DIY bathroom renovation challenge.

The post A Tiled & Styled Bathroom Update appeared first on The Home Depot Blog.

