Back Porch Overhaul
Our back porch overlooks a quiet, wooded backyard with just the right amount of breeze. It’s a great place to unwind or start a day. That is, until all the critters that also enjoy our wooded backyard decide they want to hang out on the back porch, too.
After two summers of being attacked by unwanted pests, we knew it was time to not only screen in our porch, but to also give it a full-on overhaul. We did everything from refreshing all of the wooden surfaces to installing a Hunter ceiling fan and of course, screening in the space!
I’ve listed the materials, product and tools I used for this project at the end of the post for reference. Now let’s get to the project steps!
Cleaning
The first thing we absolutely had to do was clean everything.
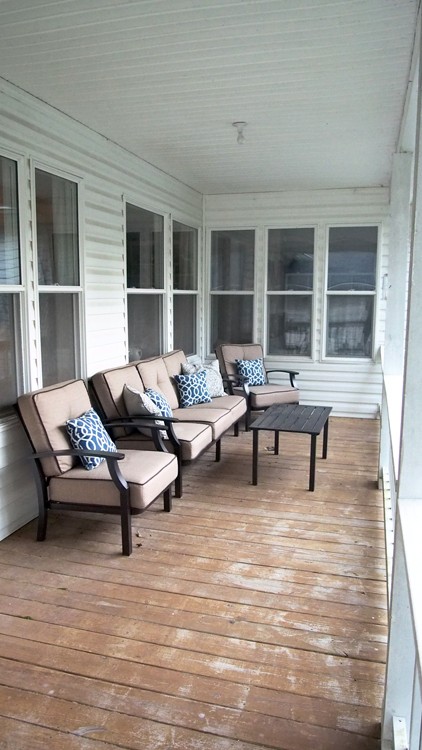
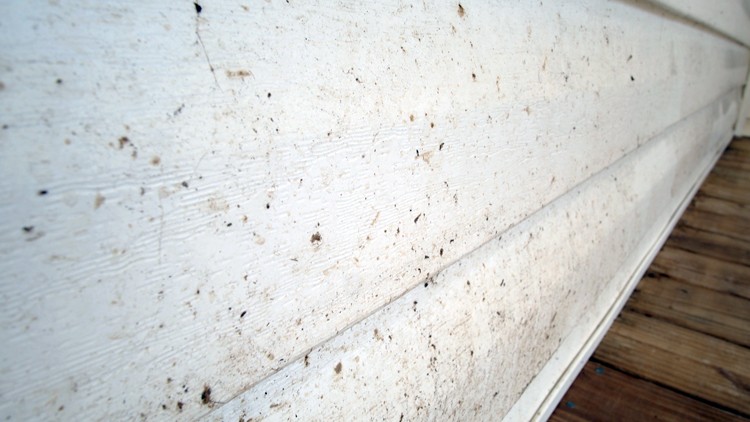
It’s pretty easy to see that the existing stain had seen better days and the white paint on our handrails and trim was in desperate need of some TLC.
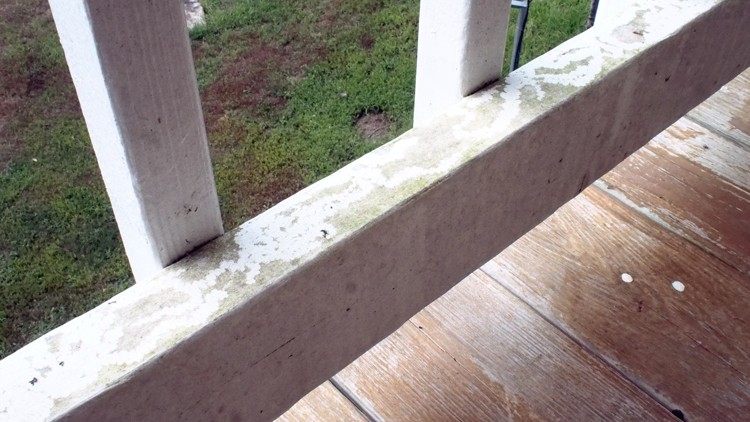
Our vinyl siding and ceiling was also crying for a good deep clean.
To knock all this out, I grabbed a handful of products to get the job done.
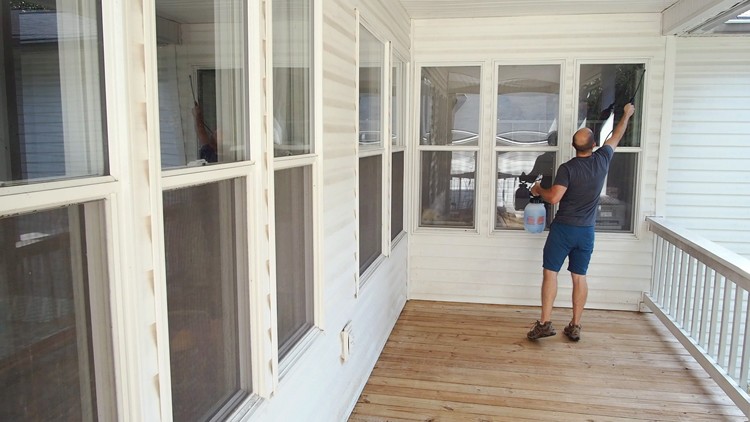
Vinyl Siding
The next thing to tackle was the siding. I’d recently heard of Wet and Forget and really liked the idea of not having to scrub too much to clean off our siding and ceiling. I mixed the product up in a low pressure sprayer and went to town. The typical application includes spraying it on your house and then forgetting about it. Rain will rinse your house and over the course of a few weeks or months, the cleaner will continue to wash away all of the filth. Since a covered back porch doesn’t see too much rain, I opted to spray on the product and follow it up a week later with an automotive detailing brush and light water spray from a hose.
The results speak for themselves and it was so easy! I hardly had to scrub at all.
Railing, Posts, & Trim
To clean all of the painted surfaces, I used TSP phosphate free and was completely blown away with how well it cleaned years of grime. I sprayed the surfaces down with TSP using a low pressure sprayer, let it set for a few minutes and then followed that up with a light scrub and rinse.

Decking
In the past, I’ve simply used a pressure washer to strip decks in preparation for new stain. I didn’t want to go that route for the back porch this time for a couple of reasons:
- The age of our deck had me concerned that intense pressure may cause more harm than good.
- Since our house has vinyl siding, I was concerned about potentially damaging the siding in the process.
So, I decided on Behr Wood Stain & Finish Stripper, which did a great job of removing the previous stain. Following the instructions, I applied the product with a polyblend roller and let it work for about 15 minutes before scrubbing the surface with a deck brush.
Major tip here: Shake the bottle before pouring it into a roller pan!
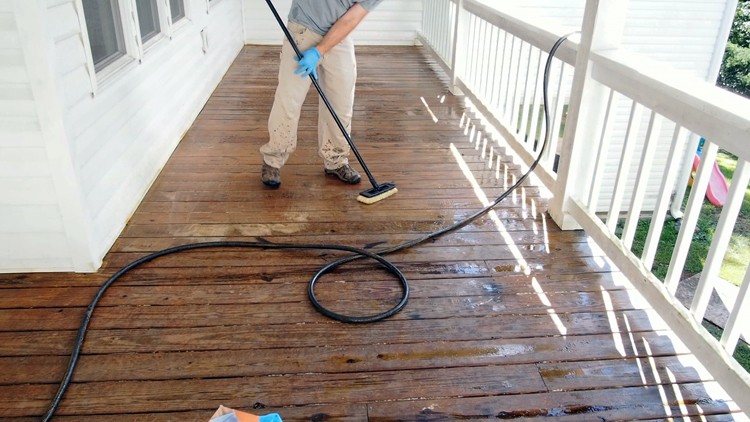
Then I fired up my pressure washer and lightly sprayed away the old, nasty stain for good! If you don’t have a pressure washer, don’t sweat it. You can also use a garden hose to rinse the deck clean – it’ll just take a bit longer.

My last step to prep the deck for new stain was to use Behr All-In-One Wood Cleaner. This product neutralizes any residual chemicals from the Wood Stain & Finish Stripper and conditions the wood to accept stain more consistently. For this product I again followed the printed instructions and applied the diluted product with a roller, let it work for about 15 minutes and then scrubbed with the deck brush.

After the entire deck had been treated, I hosed it all down again lightly with the pressure washer. Now all you have to do is let it dry for about 24 hours before staining!
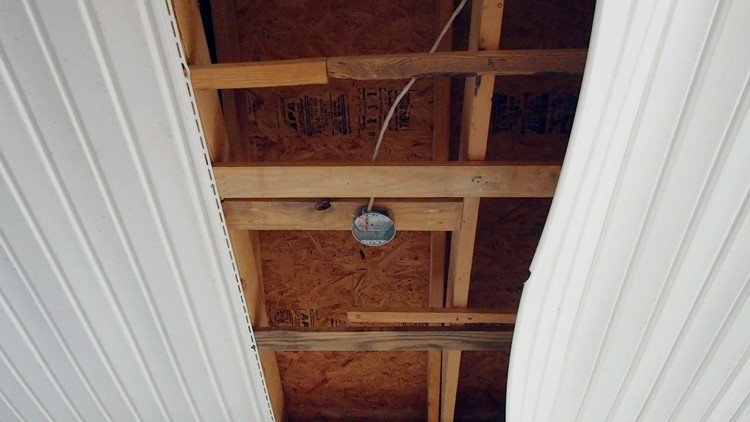
Ceiling Fan
Obviously, installing a ceiling fan and replacing a light fixture deals with electricity. If you are not comfortable doing your own electrical work, then hire a professional to help you with this step!
The original overhead light was a single bulb fixture with a pull chain that broke off in my hand the day we moved in. Needless to say, something had to be done. Since we live in Georgia, we knew that adding a ceiling fan was the right way to go! We chose the Hunter Mill Valley Fan and couldn’t be happier with the aesthetics and functionality.

There was a bit of work for to do before installing this fan, though. I had to add a brace to bear the load of the fan. Using a SideSwiper, I took down two ceiling panels.

I cut a 2×4 to fit between two rafters and used pocket hole joinery to secure the brace in place. Now I could secure my fan box to the brace with the supplied screws. Once the wiring was run into the fan box, I reinstalled the vinyl panels.
A huge bonus with this Hunter fan: It includes hang tabs for the motor housing to rest on while you secure the electrical connections – genius! No more balancing the motor on your head (or having a friend help) while you work as fast as you can.
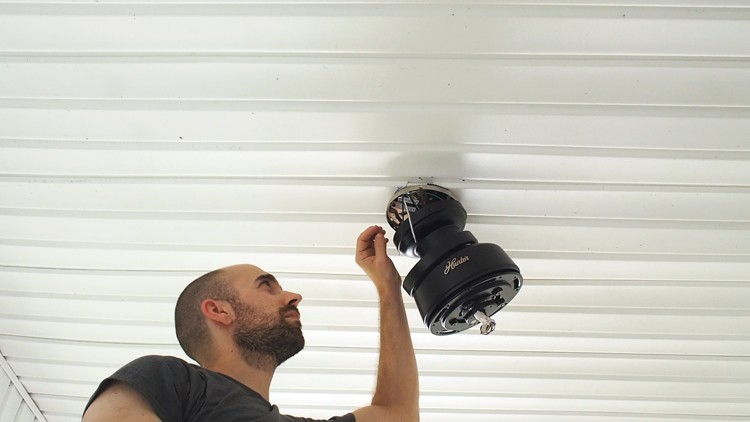
After about 20 minutes, the fan was assembled and running! The assembly instructions for this fan are very easy to follow, and even if you’re new to home electrical work, the diagrams make it very clear to understand.
Painting
Since our existing paint was oil based, we first used Gripper primer. It is a high-hide formula that is also suitable for going over oil based paints and is a good primer for latex paints.
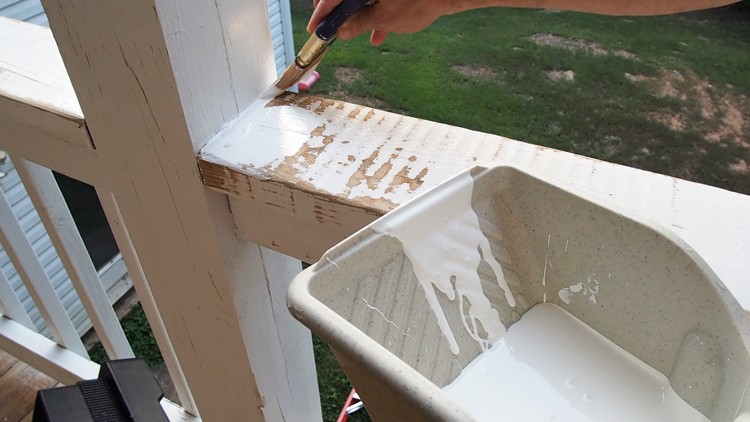
After about an hour, the primer was dry and we then applied PPG Timeless paint. Both of these products are very user friendly. They’re thick, but not difficult to apply and dry relatively quickly.

I used a Shortcut brush for corners and tight spots, a 4-1/2″ roller for all the flat surfaces and a Pelican bucket. This combination of items worked out really well to apply the paint. Also, I of course put down a drop cloth after all that cleaning I’d done!
Staining
Next up, it’s time to stain! Maybe I’m a bit excited, but I’m so happy with the results of PPG Timeless stain in Oxford Brown. First off, this is an oil based stain, which I prefer. This stain penetrates well and really makes our 21-year-old porch look new. While there are several options for applying stain, I chose to use a 5″ wide stain brush. You can buy an extension pole for this style of brush, but I prefer holding the brush in my hand. In areas against the house, I used a short cut brush to prevent slopping stain on the siding.
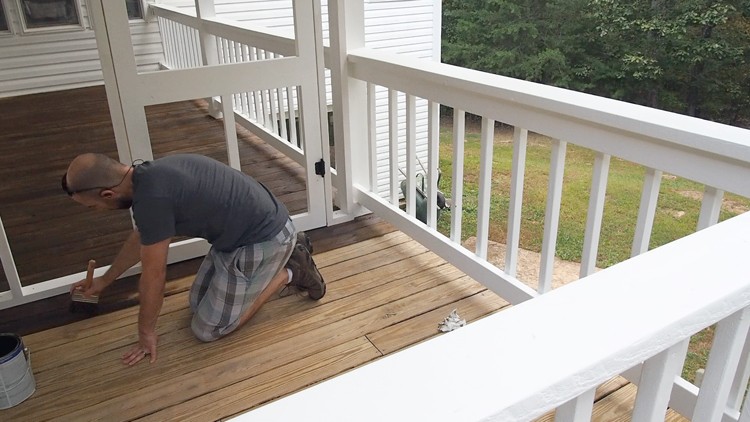
For us, this stain was dry to the touch in about 45 minutes (it was about 70°F and semi-humid, having rained for several days prior) and we didn’t have any issue walking on the back porch after 24 hours!
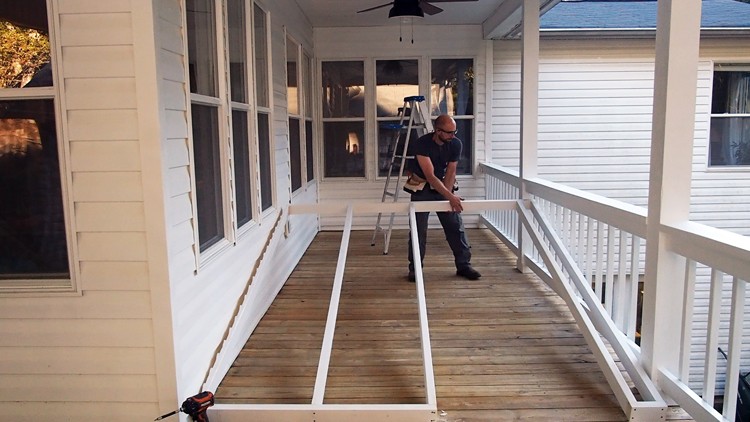
Partition Wall
To build this wall, I first needed to cut the pattern of our siding into a 2×4. I held a 2×4 against the wall and used a scribe to transfer the pattern, but you could also use a carpenter’s pencil. To cut out the pattern, I broke out my jig saw and went to work!
With the only “tricky” piece to cut out of the way, I set off to cut the remaining 2×4’s to length and then laid everything out for assembly. I used top and bottom plates that were the full length of the wall and ran two 2-1/2 exterior construction screws through them into the ends of each stud. With the wall framed up, I then cut out the portion of the bottom plate where the screened door would be hung with my multi-tool. Next, I just lifted the wall into place and secured it with 2-1/2″ screws every 8″ or so into the surrounding structure.
Frames for Screening
For our screened-in porch, we opted to build frames for each opening rather than apply the screening to the outside of our back porch. This is a fairly straight forward process and seemed to be the easiest method since the deck of our back porch is 14′ off the ground.
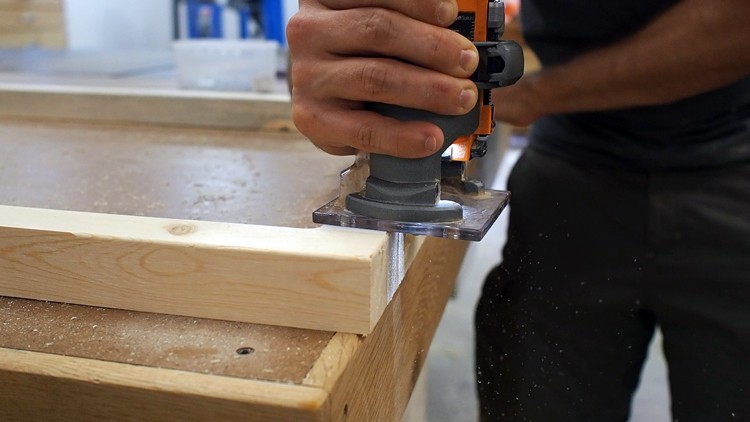
I ripped down 2×6’s into 2×2’s and used pocket hole joinery to build the frames. Once the frames were assembled, I ran an 1/8″ round over bit around all the edges with my palm router to reduce the likelihood of damage while stretching the screens.
The last thing to do before priming and painting is to pre-drill and countersink holes about every 18″ so that the frames can be secured to the surrounding structure.
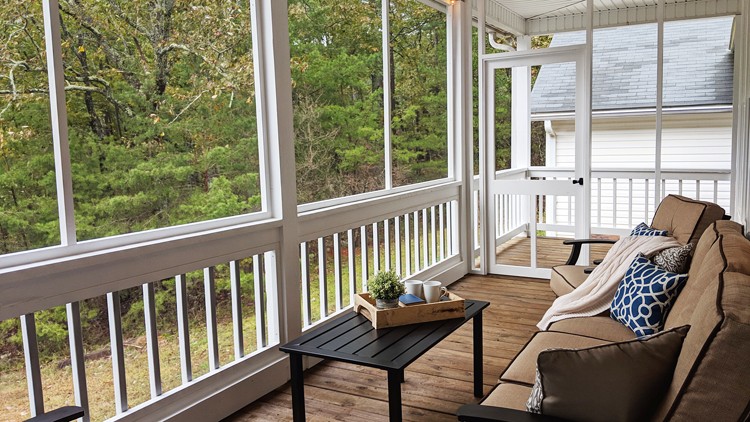
Installing Screen
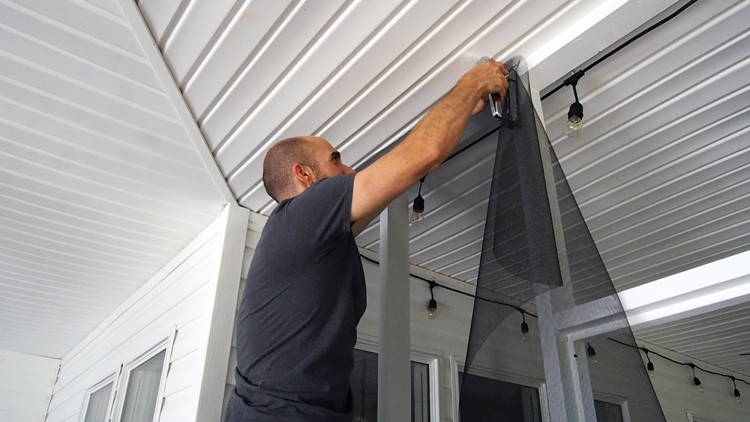
We went with Phifer Ultravue screen and are blown away at how transparent it is from a few feet away! I highly recommend this screening, especially if you’re worried about keeping as much light coming through your porch area as possible.
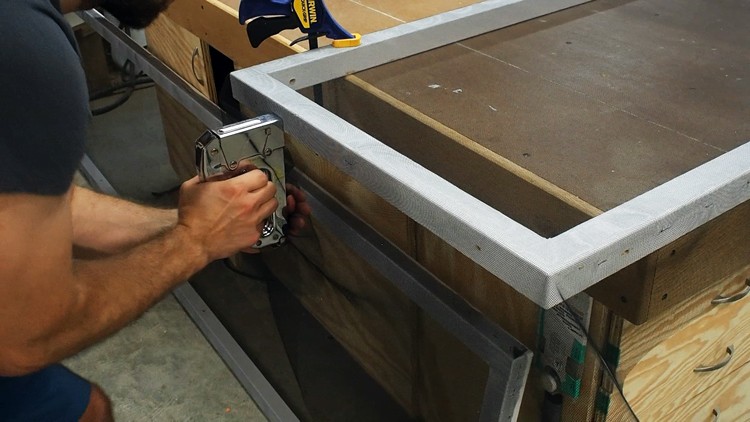
This process is very much like stretching a canvas for painting. I used an Arrow T50 stapler with 3/8 x 3/8 staples, and a good pair of scissors. Start by laying the frame on top of the screen so that the stitching lines up with the frame members. Pick one side and, starting at the center, wrap the screen around to the outside of the frame. Staple the screen every 6″ or so. Move to the opposite side and decrease the spacing to about every 3″, gently stretching the screen as needed. Now go back to the first side and staple as needed to have the screen under consistent tension. Next, just repeat this process on the remaining two sides.
With the frames screened, it’s time to move on to screening the partition wall. The installation is pretty much the same, except I attached the screen to the outer face of the wall.
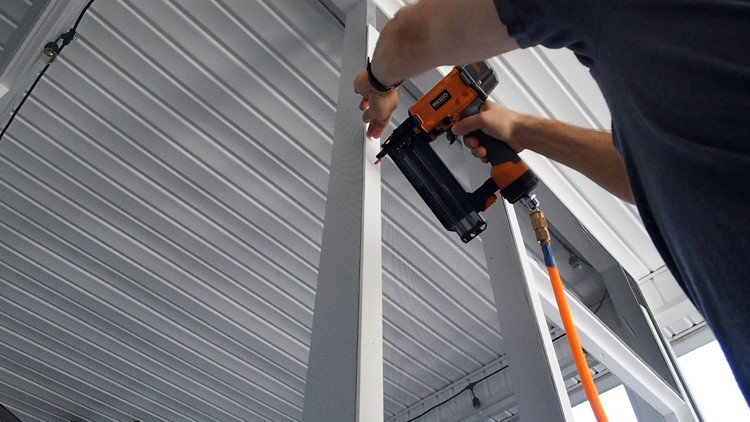
Once all the back porch screening was up, I used some 1-1/2″ wide x 1/4″ thick strips ripped from 2×6’s to cover the screening where it crosses over the studs. All that’s needed to secure this trim are 1″ brad nails every 10″ or so.
The only remaining section that needed to be sealed off was the bottom of our porch railing. There’s a gap about 4″ tall below the rail, so I simply grabbed a 2×6 and cut it to fit the area.
Screened Door
For our screened door, we opted to build one. This was a really easy project that can be knocked out over a weekend, and you can check out my post on How to Make a DIY Screen Door here! If you’re not up to building a door, no sweat. There are tons of options for prefabricated screen doors.
Installing the door was a pretty easy task. We picked up these sweet spring loaded door hinges and spaced them about 14″ in from the top and bottom.
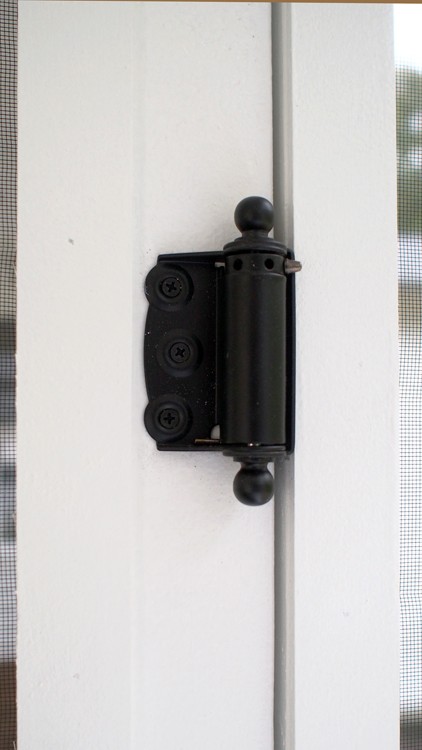
I simply held the hinge parallel with the door frame and secured it in place with the provided screws. Once the hinges were attached to the frame, I set the door on some 3/8″ scraps to lift it off the deck enough that it wouldn’t drag while opening the door.
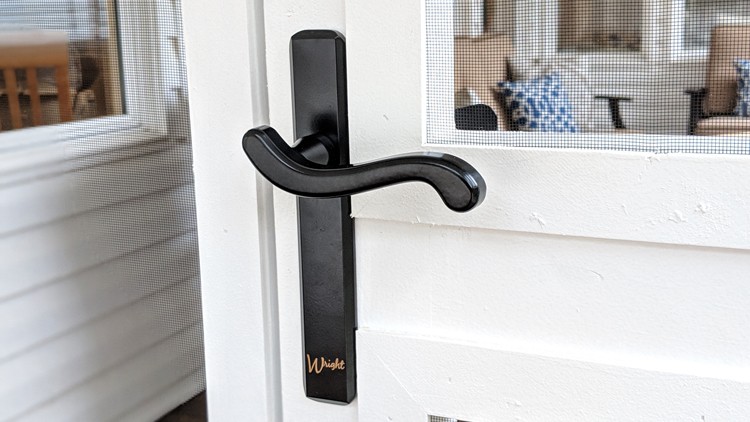
With the door hung, it was time to add the door handle by Wright Products. This hardware was very easy to install and feels solid. I only needed to drill three holes and then attach the catch plate on the door frame. Done and done!
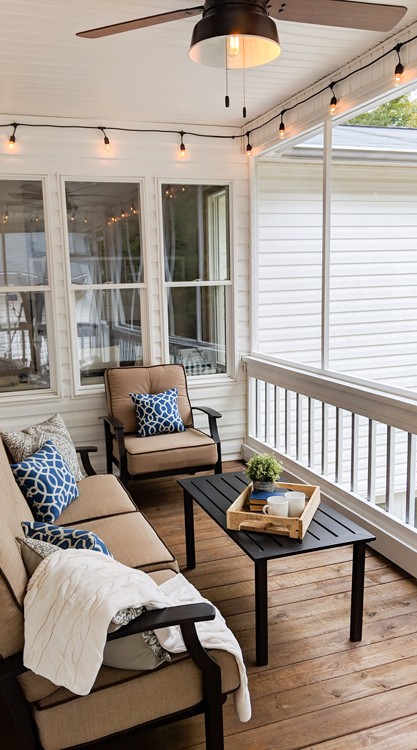
Lights
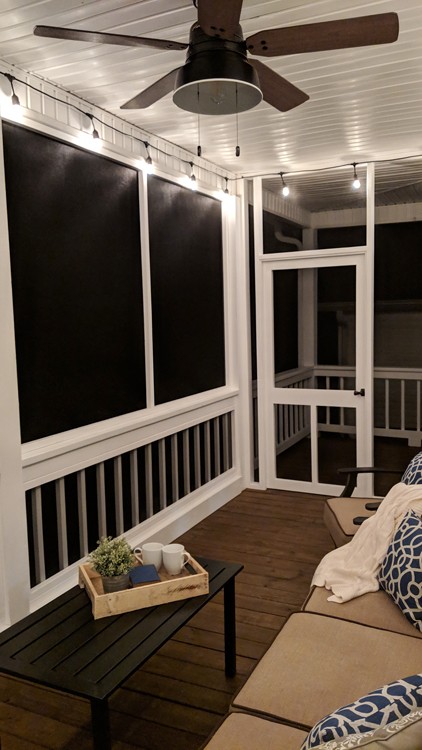
With all of the “hard work” complete, it’s time to add the final touches and start enjoying this transformed back porch space!
We hung some farmhouse style string lights around the perimeter of the screened in area with several screw hooks. These add a nice touch to the ambiance of this space each evening. To make turning our lights on and off more convenient, this outdoor lighting switch fit the bill!
Overhaul Complete!


Thank you for checking out our back porch overhaul project! I hope you’ve been inspired to take on a project like this and as always, let me know if you have any questions!
Materials & Products
- Wet and Forget
- TSP phosphate free
- low pressure sprayer
- Scotch Brite pad
- Behr Wood Stain & Finish Stripper
- Behr All-In-One Wood Cleaner
- fan box
- Hunter Mill Valley Fan
- PPG Timeless stain
- Gripper primer
- PPG Timeless paint
- 2″x6″x10′
- 2″x6″x8′
- 2-1/2″ pocket hole screws
- 3/8 dowel
- Phifer Ultravue screen
- 1″ brad nails
- 2-1/2 exterior construction screws
- door hinge
- door handle
- string lights
- screw hooks
- extension cord
- outdoor lighting switch
Tools Used
- IsoTunes
- table saw
- miter saw
- pressure washer
- K5
- Kreg Jig clamp
- drill
- impact driver
- jig saw
- multi-tool
- palm router
- 1/8″ round over bit
- dead blow hammer
- square
- Shortcut brush
- 4-1/2″ roller & frame
- polyblend roller
- roller frame
- paint bucket
- paint tray
- stapler
- staples
- scissors (my favorite shop scissors!)
- utility knife
- brad nailer
- deck brush
- Malco SideSwiper
- stain brush (not the one I used, but similar)
- extension pole
The post Back Porch Overhaul appeared first on The Home Depot Blog.


