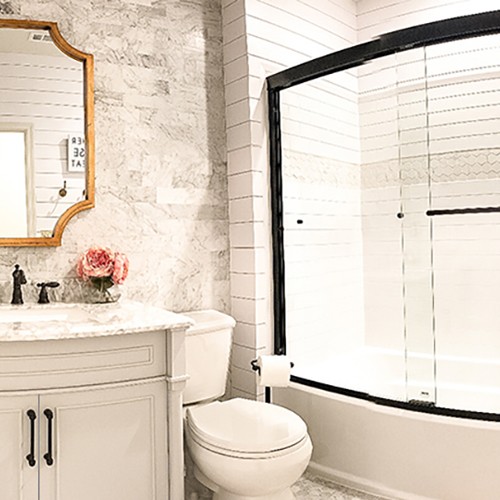
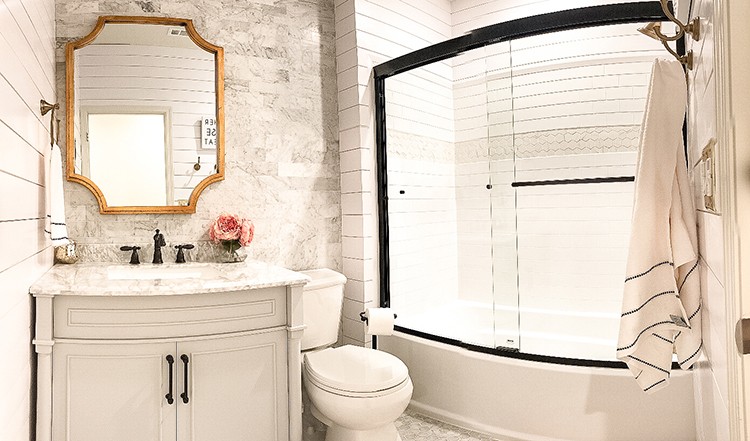
Katelyn Jones of A Touch of Pink takes on a bathroom remodel starring the Delta UPstile Wall System. Read below to see the full transformation from the demo to the final finished space.
Beautiful Bathroom Remodel
Our family moved into our house not even 6 months ago which had a standard track-house bathroom with basic materials. With a new baby on the way, I wanted to add my own personal touch to the kid’s bathroom. After 4 weekends of working and non-stop visits to our favorite place in orange, my husband and I converted our standard track-home bathroom into a custom modern masterpiece using the Delta UPstile shower system and products. I will show you step-by-step how we completed this!
Products Used
Delta UPstile: 32 in. x 60 in. x 60 in. 3-Piece Direct-to-Stud Alcove Tub Surround with Customizable Design in White
Shower Door: Delta Simplicity 60 in. x 58-1/8 in. Semi-Frameless Sliding Bathtub Door in Bronze with Clear Glass
Shower Inlay Tile: Jeffrey Court Whisper Valley 11 in. x 12.687 in. x 6 mm Porcelain Mosaic Tile
Shower Handle: Delta Victorian Lever Handle for Tub and Shower, Champagne Bronze
Shower Valve: MultiChoice Universal Tub and Shower Valve Body Rough-In Kit
Toilet: Delta Luxford 2-Piece 1.28 GPF Single Flush Round Front Toilet in White
Tub: Delta Classic 400 60 in. Right-Hand Drain Oval Alcove Non-Whirlpool Bathtub in High Gloss White
Vanity: Home Decorators Collection- Aberdeen 36 in. W x 22 in. D Single Bath Vanity in Dove Grey with Carrara Marble Top with White Basin
Vanity Mirror: Artistic Weavers Koud 40 in. x 29.75 in. MDF Framed Mirror
Floor Tile: MSI Carrara White Hexagon 12 in. x 12 in. x 10mm Polished Marble Mesh-Mounted Mosaic Floor and Wall Tile (10 sq. ft. / case)
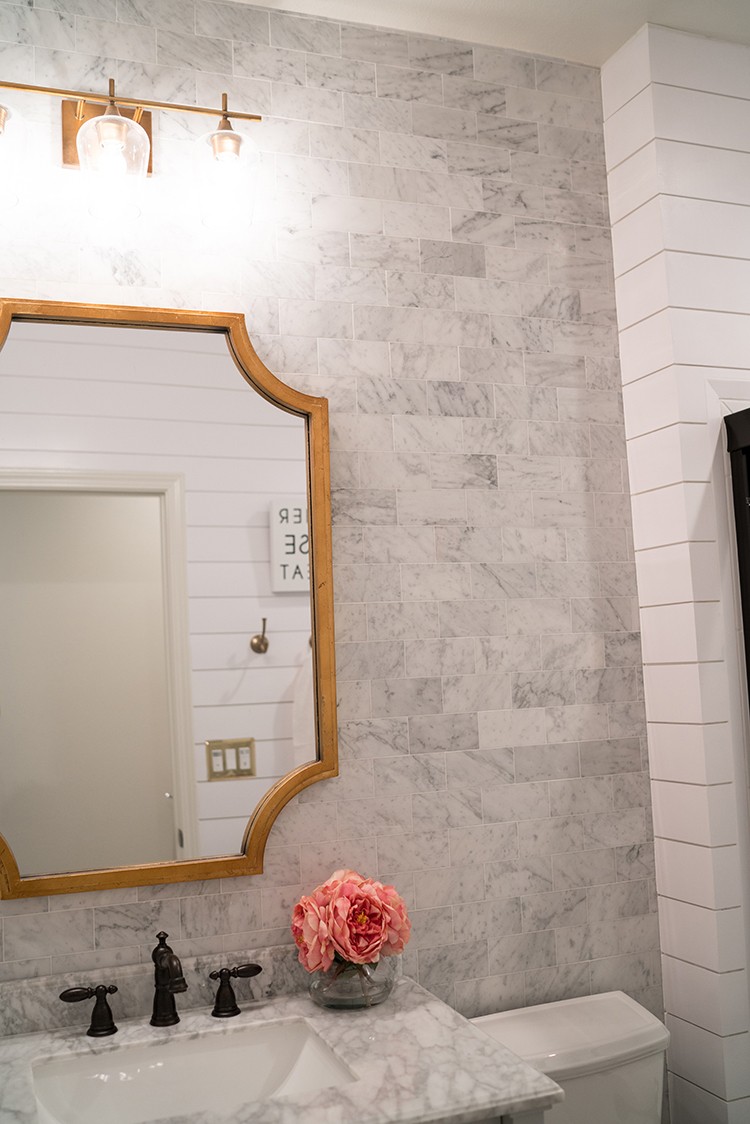
Wall Tile: Jeffrey Court Carrara 3 in. x 6 in. Honed Marble Wall Tile (8-Pack)
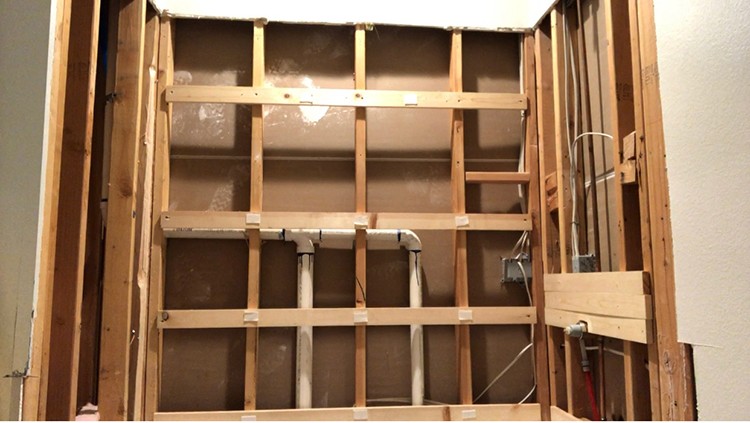
Step 1: Demo Day
Obviously this part is the most fun! Who doesn’t like making a mess and tearing up a space?! We used a number of tools to remove everything from the bathroom.
We first started with the removal of the vanity, sink, toilet and other fixtures. We were then able to remove the shower. For this, we had to remove the drywall around the edges, take out the screws that secured the shower to the studs, then used a reciprocating saw to do the heavy lifting. Our shower was 1 piece so we first cut off the shower walls at the base where they met the tub. For the tub, it was tightly fit in the alcove and needed to be cut into multiple pieces for removal.
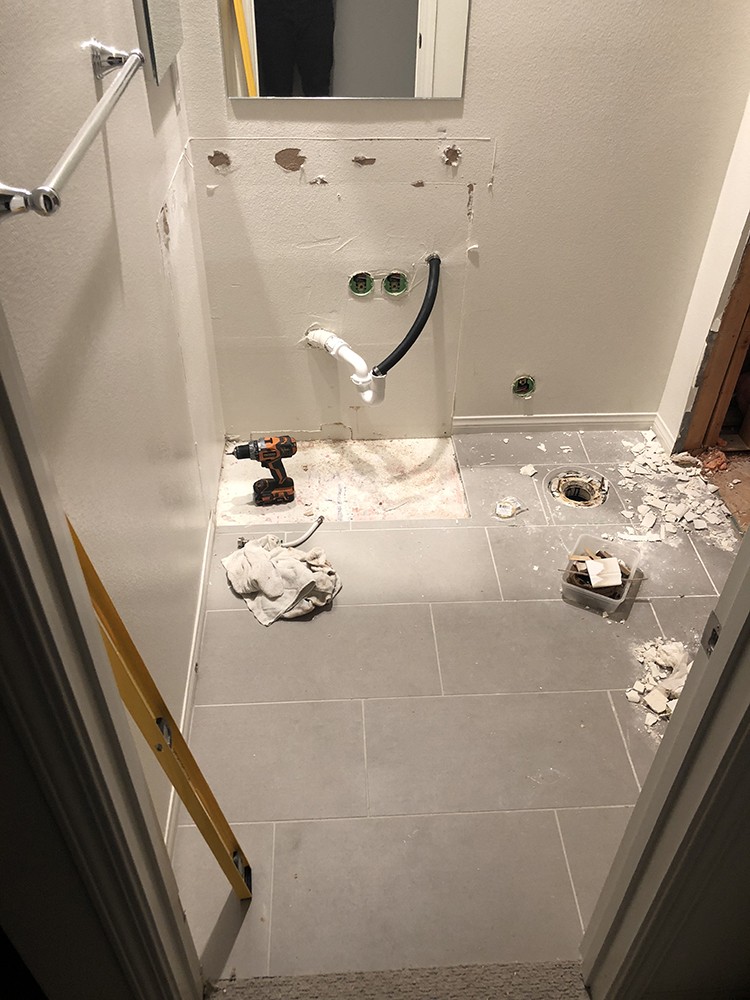
Step 2: Tub Installation
The first part of installing the Delta UPstile Wall System is placing the tub, which is the base of the wall system. It is important that the existing plumbing connections are in the correct spot before placing the tub. Once the tub is placed, you can hook up the drain and overflow connections and pre-drill the holes in the flanges. You will want to make sure the tub is level before securing it into the alcove wall studs.

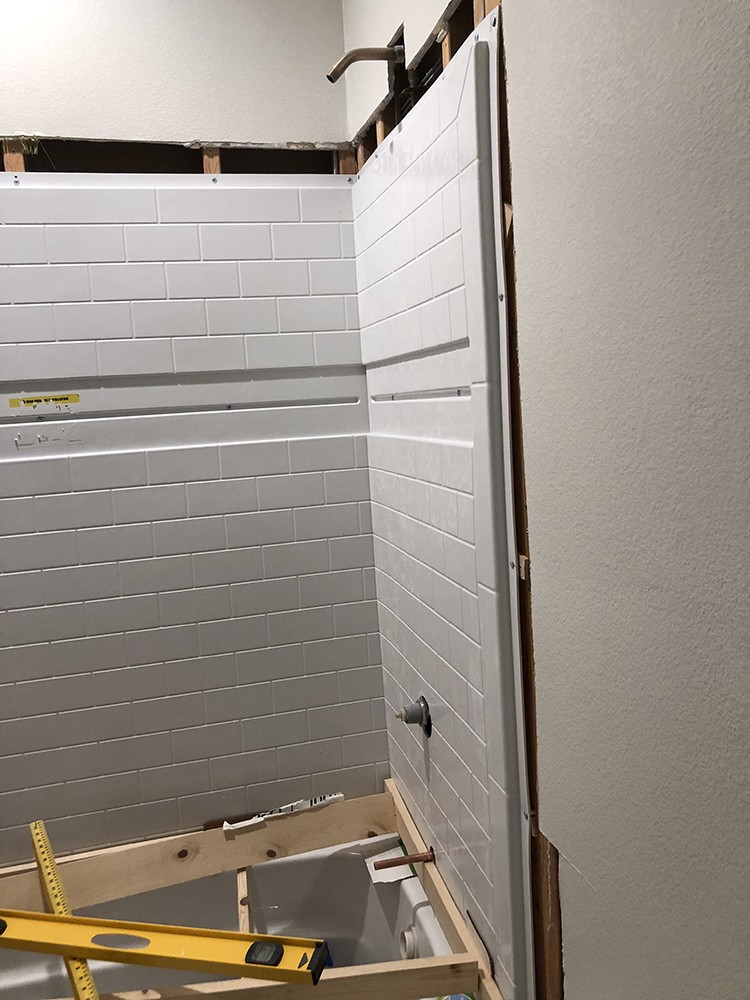
Step 3: Shower Wall Installation
Starting with the large middle wall, place the walls on the tub and dry fit them into place. This will make the actual installation of the walls much easier and prevent mistakes. For the wall with the spout and mixer valve, measure the plumbing connections, cut 2 holes with a hole saw and place the provided retardant pad on the inner side of the wall. I also had to replace the existing valve with the MultiChoice Universal Tub and Shower Valve which was compatible with my shower products.
Step 4: Install Bracing for Shower Walls
The Delta UPstile Wall System is secured by an upper flange and additional screws placed in a groove along the tile section. You may need to install additional 2”x4” posts around the alcove frame before securing the supports. Using 1” x 3” pieces of pine wood, install supports around the shower. I equally spaced them by placing the first support on top of the tub flange then separating the following 2 supports by 12” and finally placing the top support 46” from the bottom brace.
Step 5: Securing the Walls
Starting with the middle wall, evenly place the provided double-sided tape along the supports and apply the suggested adhesive (DAP 3.0). The double-sided tape helps the wall remain firmly pressed against the wall as it dries.
After placing the wall, insert panhead screws in the pre-drilled holes that were completed during the dry-fitting stage. Both in the upper flange along with the screw groove within the tile area.
Once the walls were installed, I used my remaining 1”x3” supports to firmly push against the walls and letting it sit for 24 hours so the adhesive could cure.
Step 6: Install Custom Shower Inlay Tile
My favorite part of the Delta UPstile Wall System is the custom wall tile section. I decided to use the Jeffrey Court Carrara 3 in. x 6 in. Honed Marble Wall Tile which matched well with the rest of the bathroom. Before cutting the tile with my wet saw, I laid it out across the floor and marked lines on the tile with a pencil. This makes it easy for the tile pattern to remain cohesive throughout the shower. For the installation of the tile, you will need to use the same caulk (I used the DAP 3.0) instead of a typical thinset and place tile spacers at the bottom of the tile to prevent sliding. Let the installed tile sit for at least 24 hours before grouting.
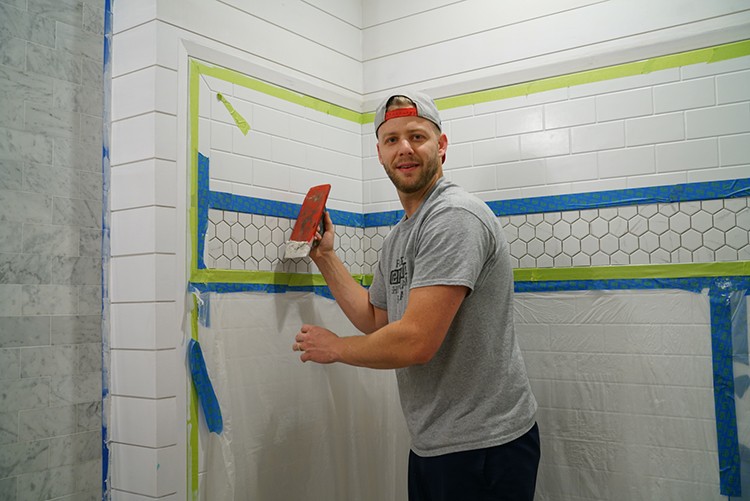
Step 7: Install the Grout
Before grouting, I placed painters tape and plastic around the tile inlay which prevented mess and allowed for a smooth and straight grout line. Any particular grout can be used for the tile and shower system. Using a rubber bottom float I pressed the grout in between the tile spaces and cleaned it off with a large yellow sponge. After grouting all of the tile, I pulled off the painters tape and did any necessary cleanup with the sponge and let grout cure for 24 hours.
Step 8: Final Caulking
To finish up the Delta UPstile Wall System I caulked all of the seams on the shower to keep it water tight. Using painters tape as a guide will be your best friend, making the lines perfectly straight.
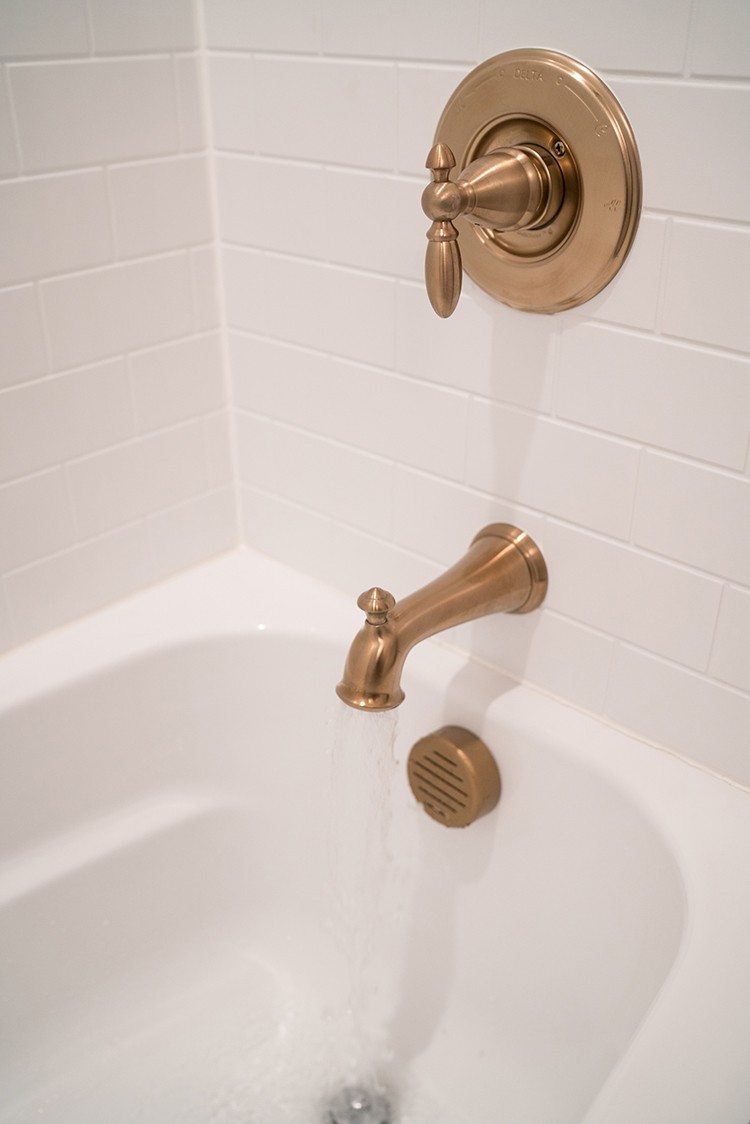
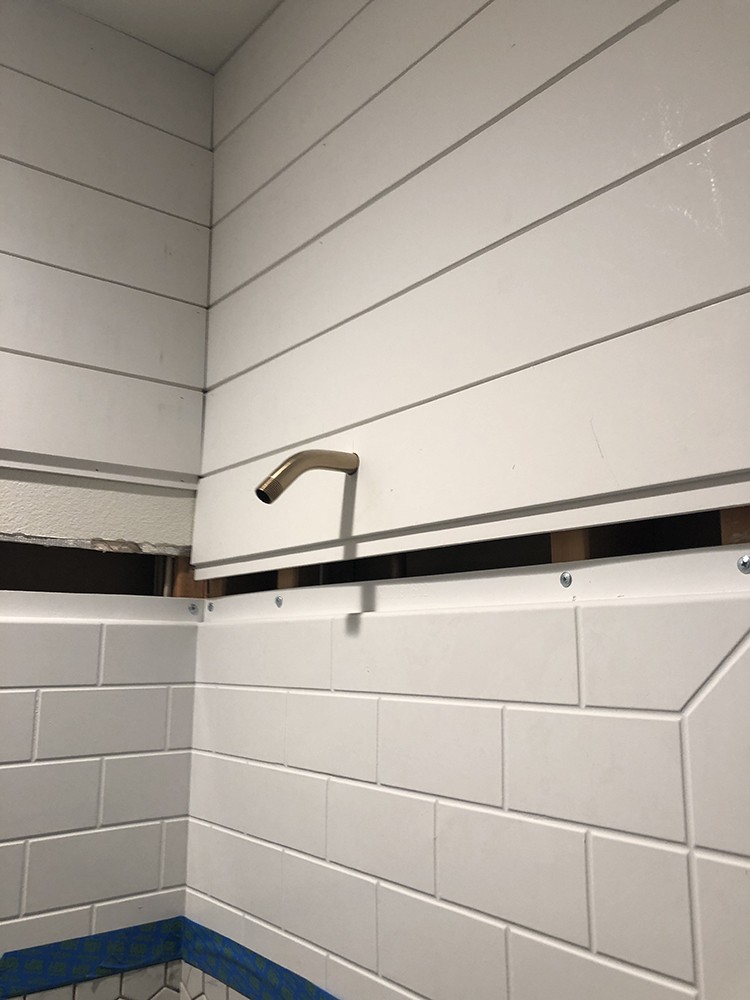
Step 9: Installing Shower Fixtures
We chose the Delta Victorian Shower Fixtures in the Champagne Bronze color which included the shower head, valve handle set and spout. Since the existing overflow cap did not match the other shower fixture products, we decided to spray paint the overflow cap, which came out very well.
Other Products Installed:
Shower Glass Door Install
The installation directions for the glass shower doors are very easy to follow. I would suggest to have a miter saw box or a the correct blade on your miter saw to cut the glass door frames.
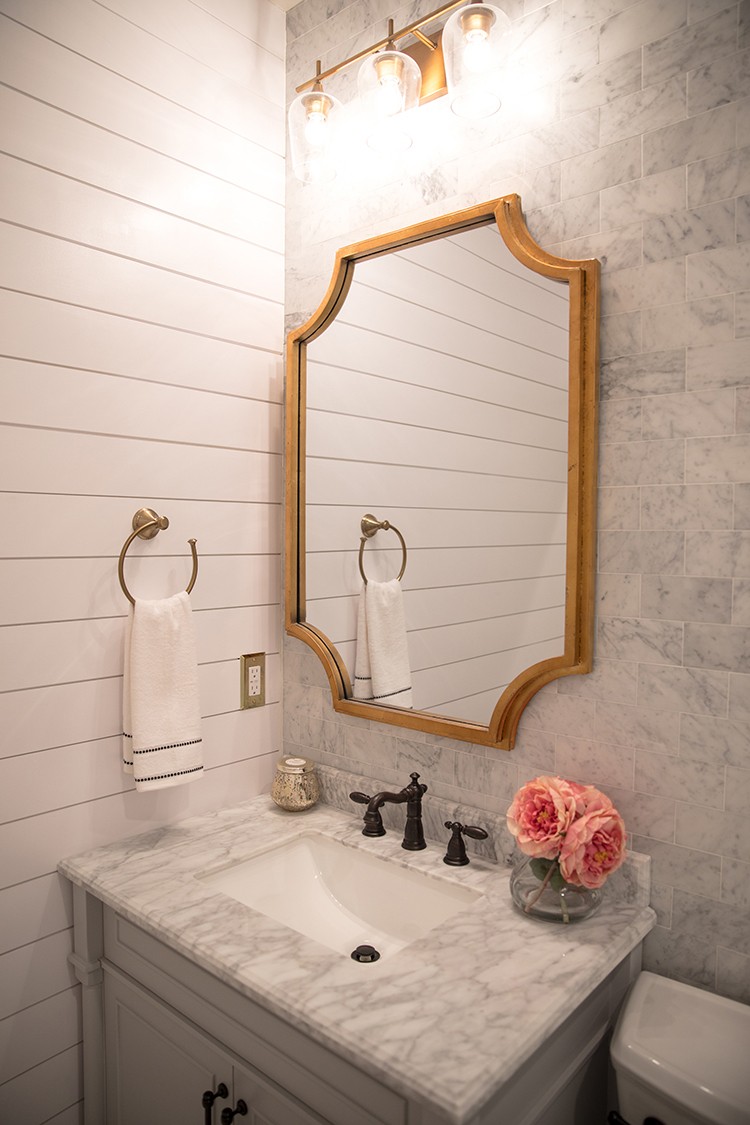
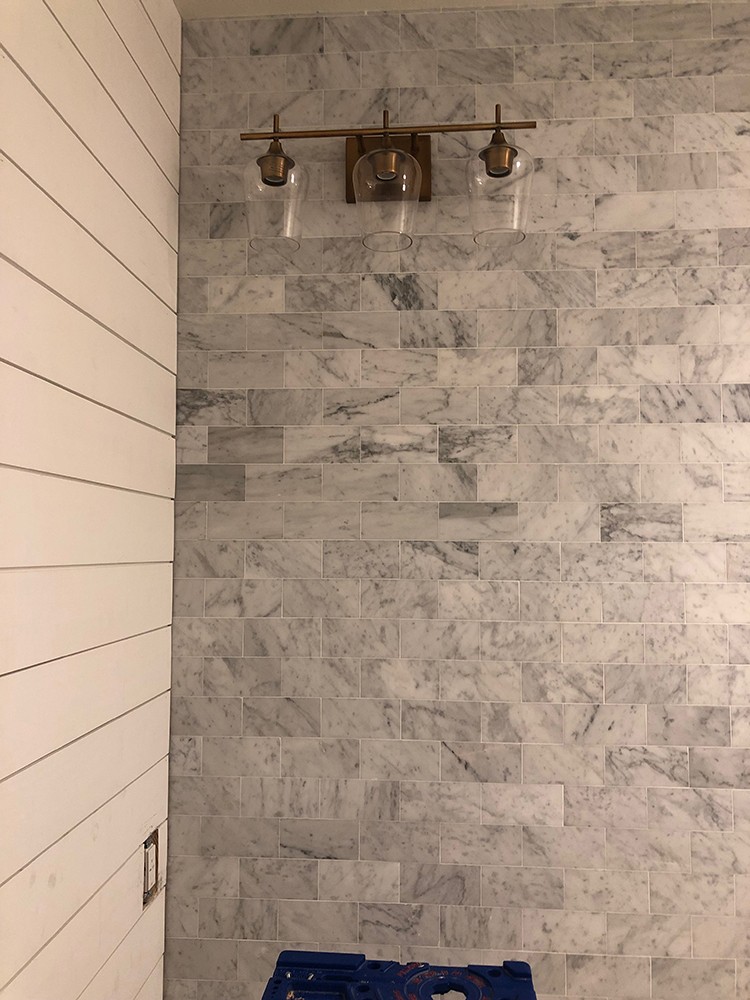
New Light Fixture
Before installing the backsplash, we installed a new light fixture to go above the vanity. We went with the Filament Design 3-Light Warm Brass Bath Light. We used the existing wiring from the ceiling can light and redirect them to the new location above the vanity. That way we did not have to install a new switch.
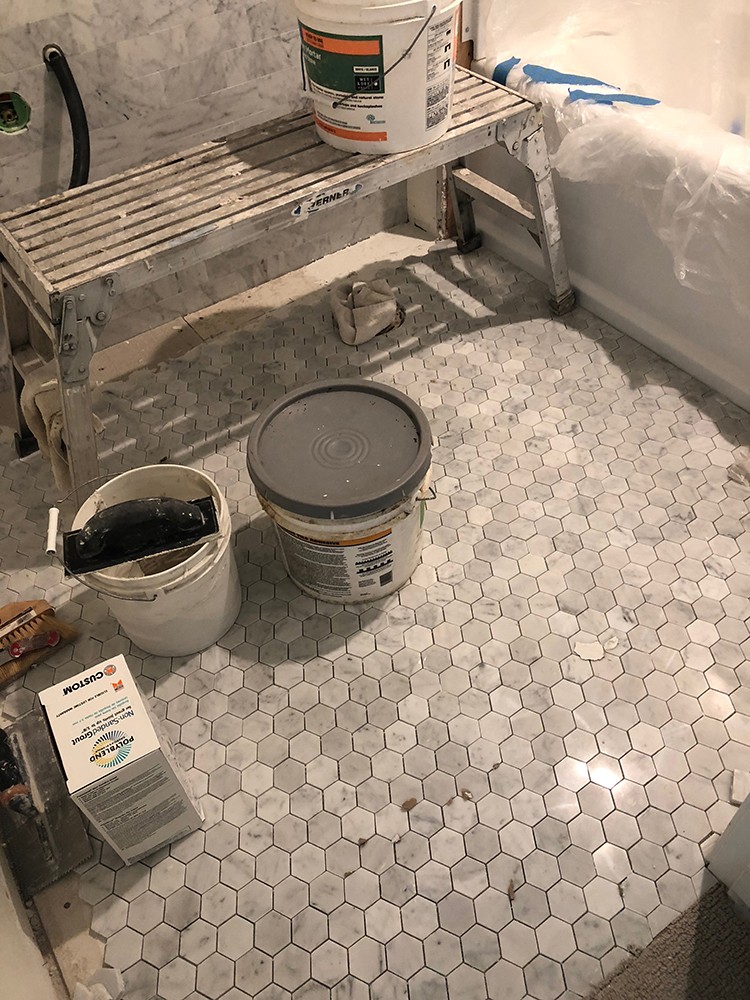
Carrera Marble Backsplash + Hexagon Floor Tile
We installed the backsplash without spacers giving the wall a fresh smooth look. To seal the spaces in between tiles, we used an unsanded grout. For the floor tile, we used the Carrara Marble Hexagon tile. This color and tile brings an additional pop to our smaller bathroom.


Vanity
Before installing the sink faucet, make sure the plumbing connections will fit. We had to make a small cutout on the shelf to fit the plumbing. Also, the front door pulls of the vanity came with chrome finish. For the door pulls to match the rest of the bathroom decor, we spray painted them black.
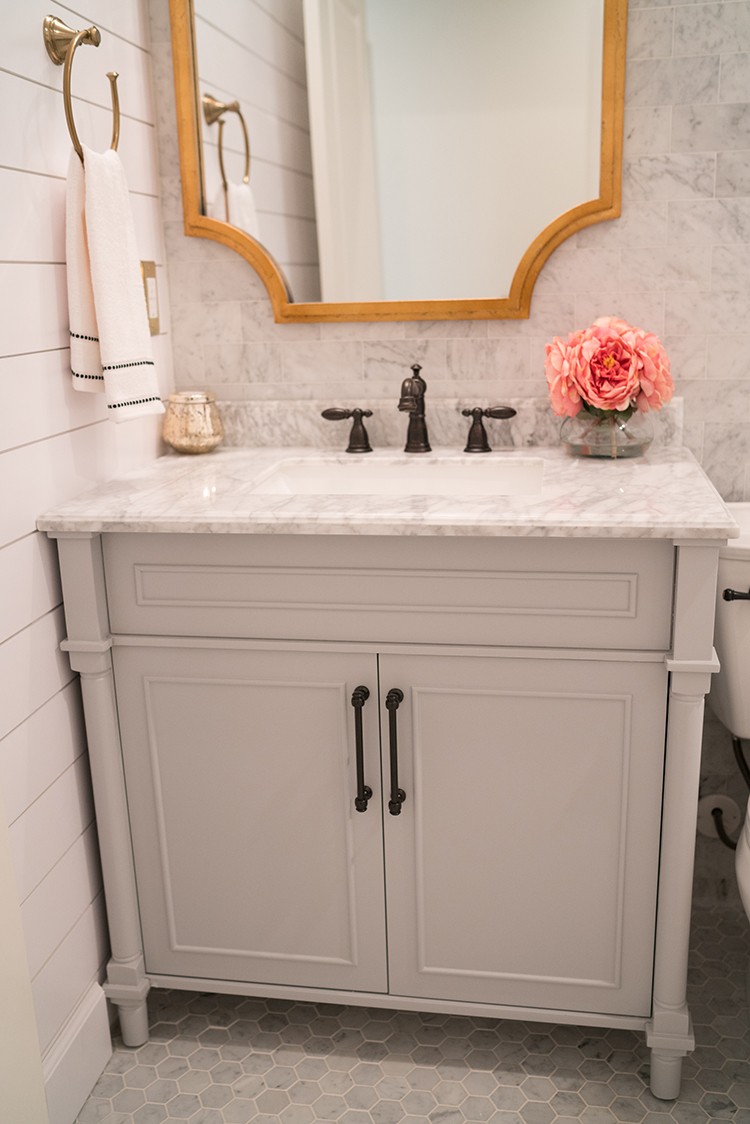
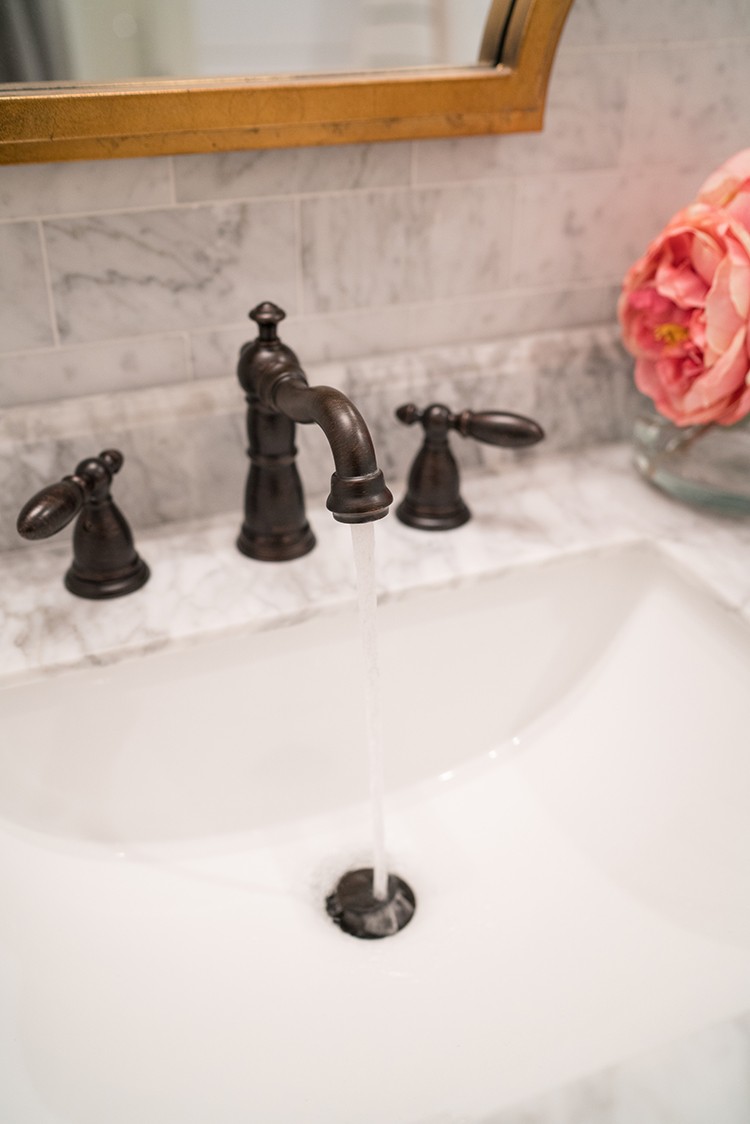
Vanity Faucet
The instructions given with the product make for an easy install. Make sure to have the correct materials and tools for the plumbing when installing. Also, you will need to caulk with silicone on the inner-lining of the sink before using.
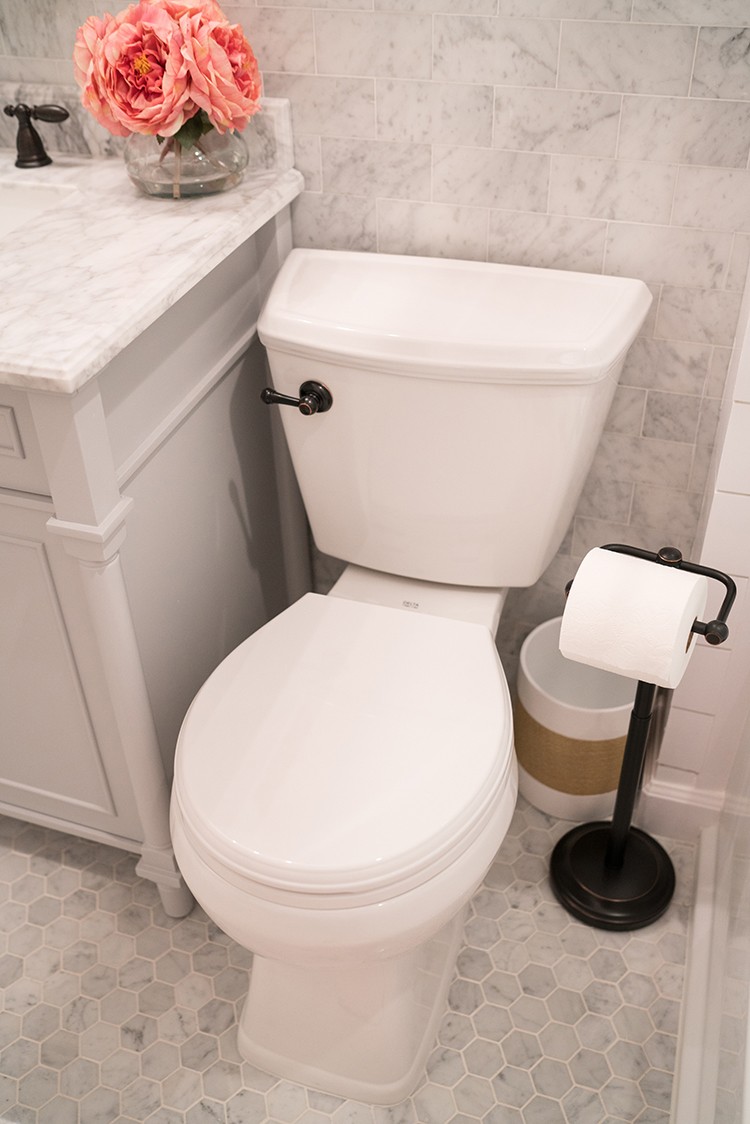
Toilet Installation
The instructions that came with the toilet were easy to follow. One thing to consider when installing the wax ring. Given the new floor tile, the bottom toilet flange was not flush with the floor which required us to use two (2) wax rings. You will know if an addition wax ring is needed when placing the toilet if it simply lays flat without any pressure. You should have to apply moderate pressure to place the toilet, which makes for a tight seal.
We also decided to upgrade the water connection hose for the toilet. Our plumber highly recommended this since the prior ones installed did not include additional safety features and could easily burst.
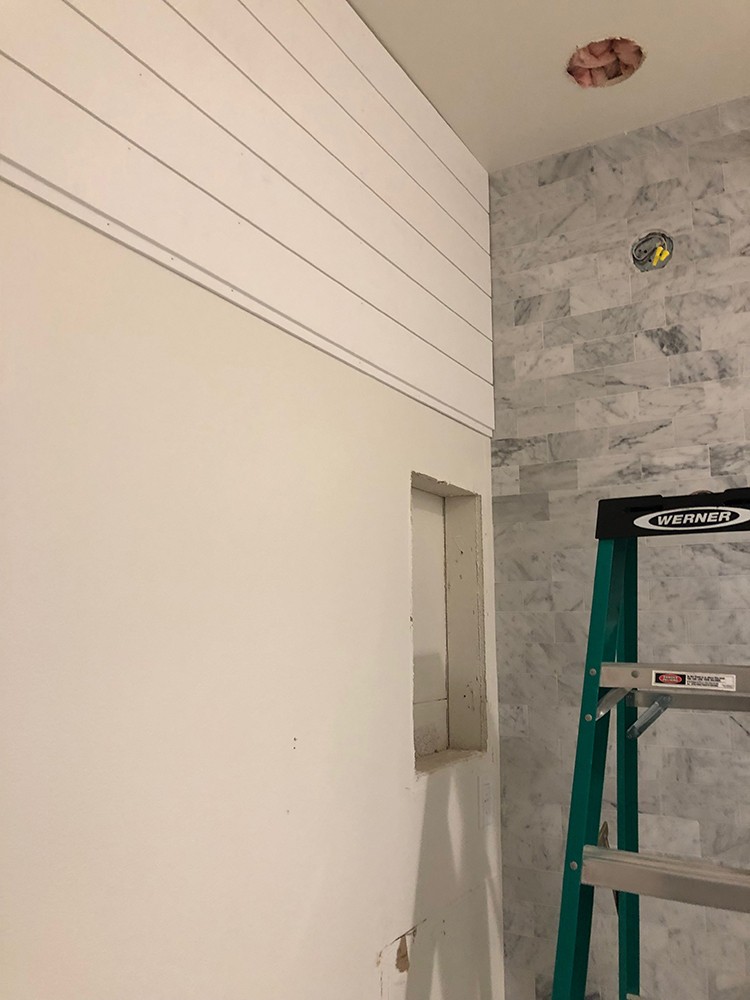
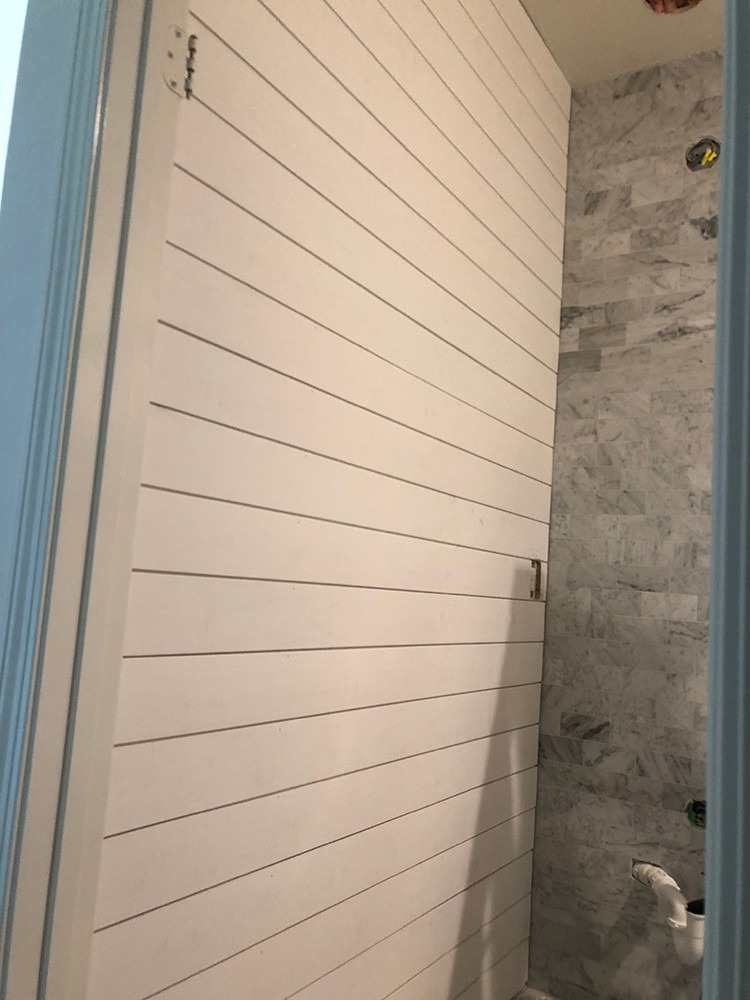
Shiplap
Installing shiplap in the bathroom added a lot of extra time to the project but was definitely worth it. we installed a small basic trim around the shower and filled the rest of the walls with shiplap. I used Behr Acrylic Paint which is water resistant and appropriate for the moisture in the bathroom.
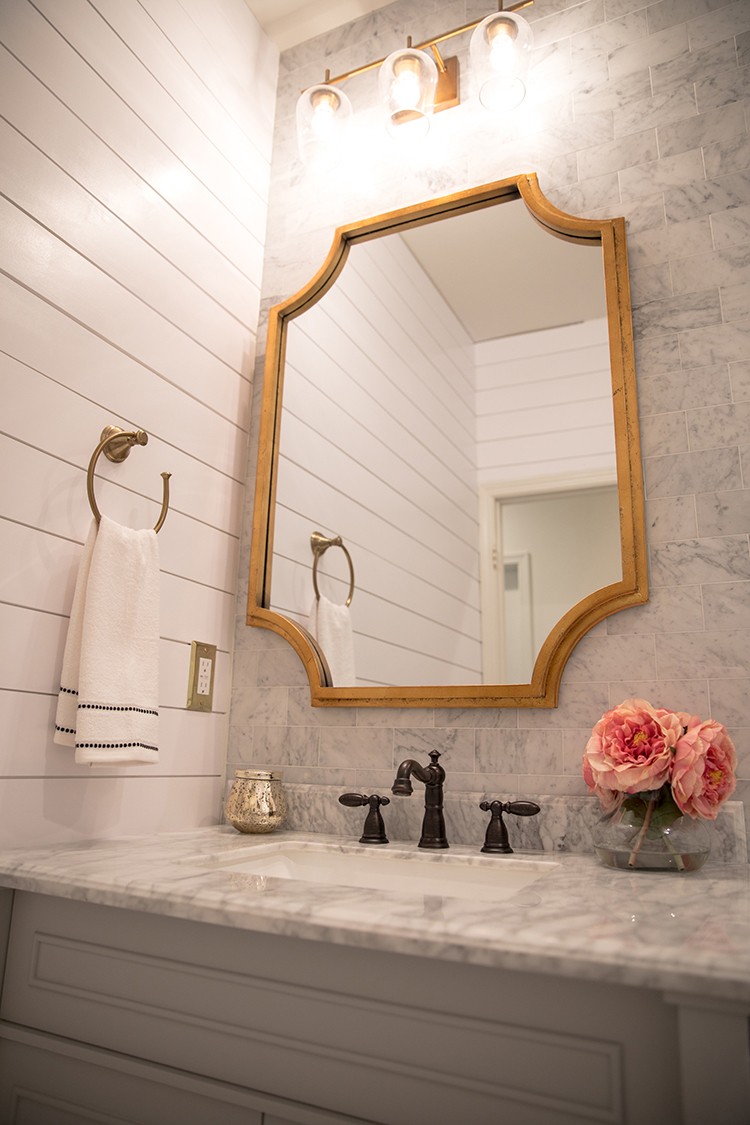
Vanity mirror
To install this mirror, we first installed a heavy duty metal wire on the back of the frame. We then used a wall screw anchor kit which came with the appropriate drill bit for the wall tiles. We also applied double-sided tape towards the bottom of the frame to keep the mirror from moving around.
The post Beautiful Bathroom Remodel appeared first on The Home Depot Blog.
