
Chari Herndon of Chic Home Style loves the holiday season. It was no surprise that she embraced the Christmas spirit and decorated her house to the nines for this years Holiday Style Challenge.
Check out how Chari transformed her living room to make it feel like Christmas morning.
Create the Perfect Christmas Morning Scene
Christmas has been my absolute favorite holiday since I was a kid! I have the fondest memories of opening presents, writing letters to Santa, and leaving out milk and cookies. I distinctly remember reading the classic book The Night Before Christmas, watching my favorite movies like Home Alone, and being so anxious about Christmas morning. When The Home Depot asked me to join their 2017 Holiday Style Challenge I immediately knew that “Christmas Morning” would be my theme for the challenge. My parents always made a big deal of Christmas. Believing in the magic of the holiday was everything to me as a child. I wanted to incorporate some of the nostalgic memories I had into my styling.

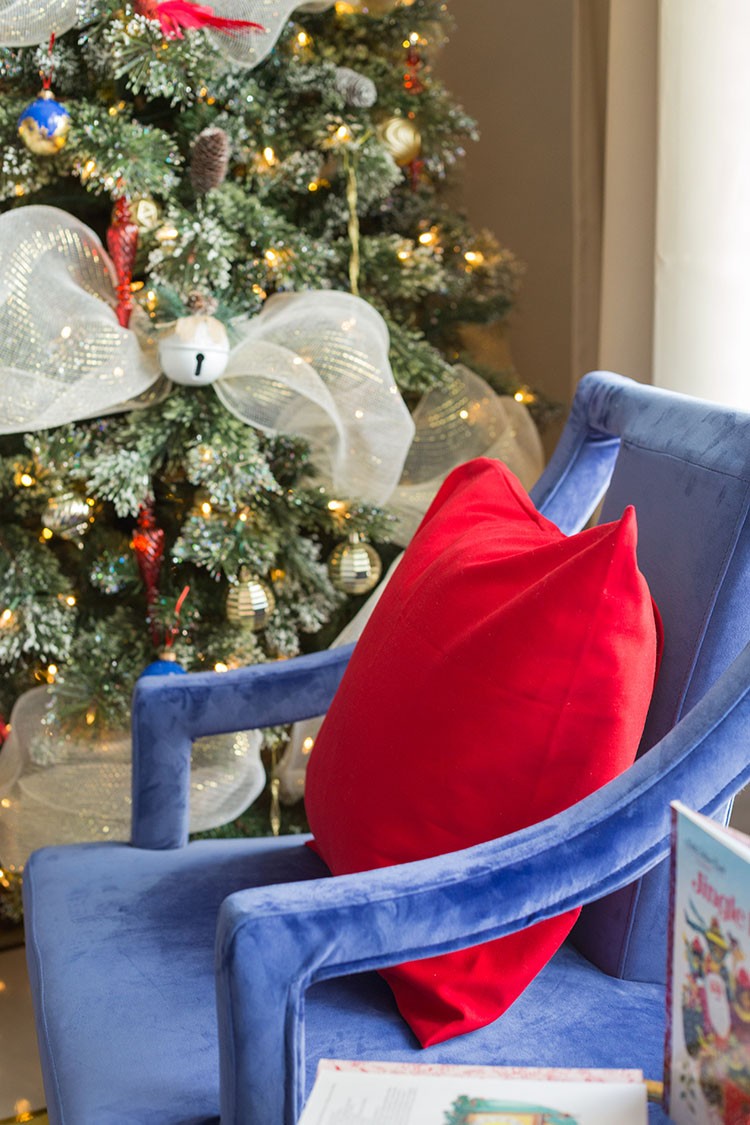
I started with deciding on a color scheme for my space. Lately, I’ve been into cobalt blue and gold, so I thought it only made sense to incorporate the colors into my holiday decor. When I was a kid, red was a color we used most often for the holidays. I opted to add pops of reds to my space for a bold contrast.
Red Metal Bow
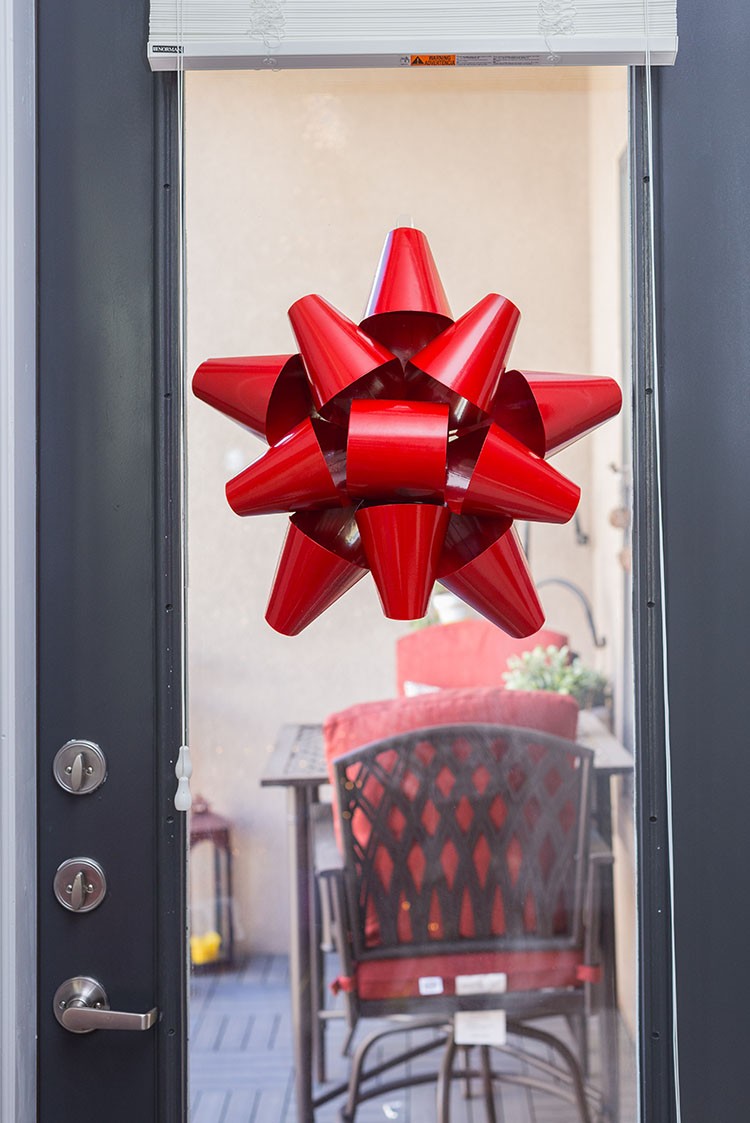
The Home Depot sent me the Martha Stewart Living 19 in. Red Metal Bow. My task was to incorporate this piece into my decor: I decided to hang in on my balcony door. I measured to find the center of the window, then I hung the metal bow using a Command Hook.

Christmas Tree
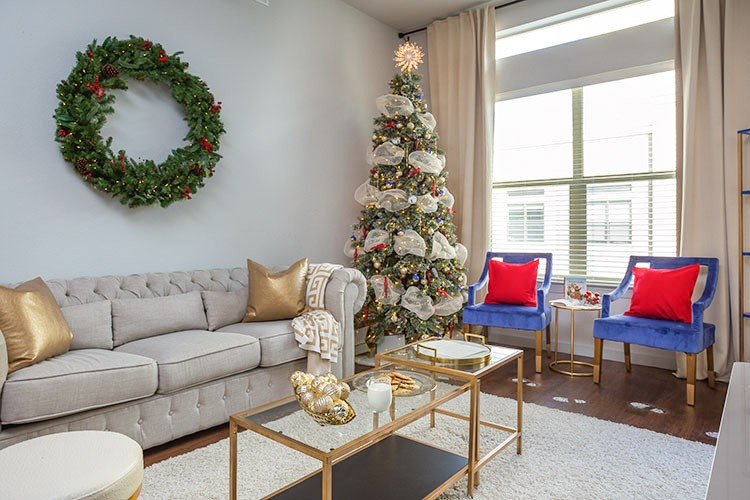
Next, I made a list of items I wanted to purchase for my space. A Christmas tree was at the top of my list. Since my ceilings are 11-ft. high, I knew I would need one a little taller than average. I chose the gorgeous Martha Stewart 9 ft. Pre-Lit LED Sparkling Pine Artificial Christmas Tree for my space. The tree was super easy to assemble, and it comes pre-lit and lightly flocked with “snow” and glitter. Have your vacuum cleaner handy, as the glitter can get a little messy. I have to say that this is the best artificial tree I’ve ever owned! I was amazed at how real it looked!

Determining the right size tree for the height of your ceilings is very important. A good rule of thumb is to allow at least 1½ ft. between the top of the tree and your ceilings; and remember to account for the height of the tree topper you want to use. Also, equally as important is making sure that you account for the girth of your tree. My tree has a 52 in. base diameter so I made sure I had enough room for about 5 ft. This gave me ample area to fit my tree in the corner and to give enough space between the furniture.
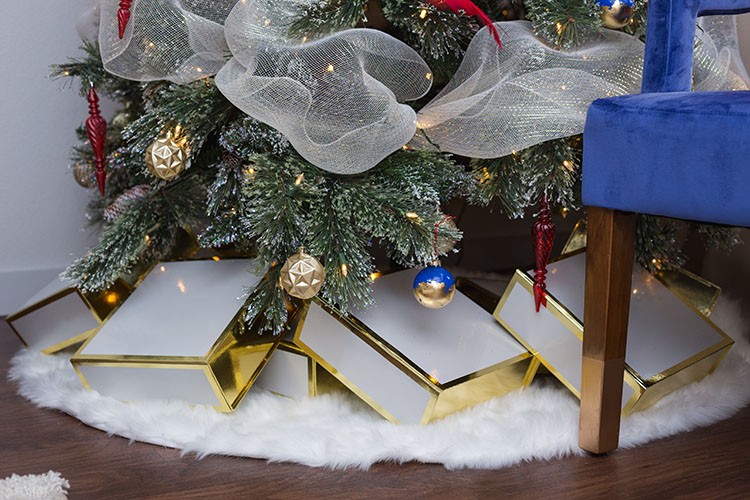
I chose a few items to decorate my tree, including the Home Accents Holiday 2.3 in. Shatter Proof Ornaments in Gold, and I added a few festive gold and white gift boxes underneath the tree.
Wreath

I thought it would be neat to add a large wreath inside the apartment. I was excited to find the Martha Stewart 48 in. Battery Operated Pre-Lit LED Winslow Artificial Christmas Wreath. The wreath was already pre-decorated so all I needed to do was hang it, fluff it, and add batteries. I love that it has a timer setting which automatically turns the lights on/off every 12 hours. It really makes a great impact in my living room and complements the Martha Stewart 9 ft. Pre-Lit LED Sparkling Pine Artificial Christmas Tree really well!
DIY Ornaments

I was on the hunt to find cobalt blue ornaments to match my décor, but couldn’t find the right tone of blue. So, I opted to make my own DIY ornaments using Americana 2 oz. Cobalt Satin Multi-Surface Acrylic Paint. This is how I created the perfect ornaments to complement my space.
Materials

- Americana 2 oz. Cobalt Satin Multi-Surface Acrylic Paint
- 2 Small Brushes
- Gold Metallic Spray Paint
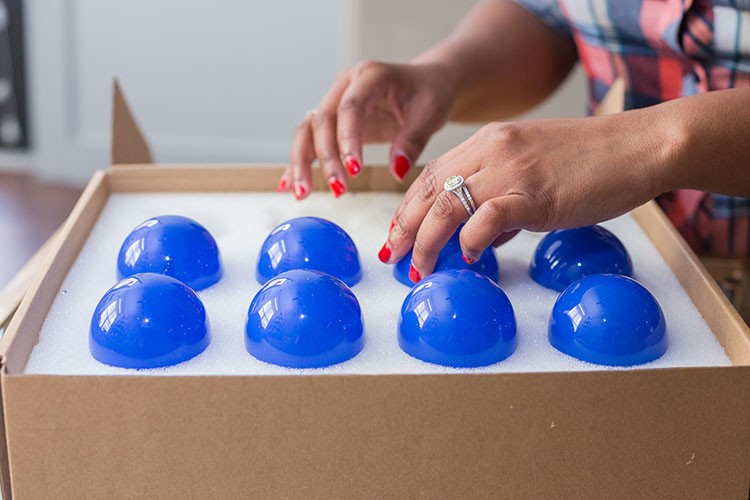
- 60mm Glass ornaments
- Gold Gilding Sheets
- Gilding Adhesive
- Thin Satin Ribbon of your choice
- Scissors
Step 1: Remove Ornament Tops
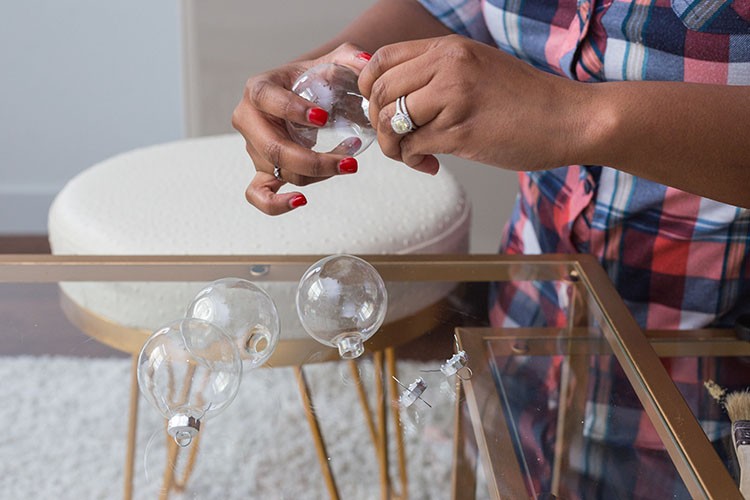
First, start by removing the tops of your ornaments and set them aside.
Step 2: Paint Ornaments

Next, squirt a generous amount of paint into the ornament.

Cover the top of the ornament with your finger and shake until the paint is evenly covered.
Step 3: Allow Paint to Dry
Turn the ornaments upside down and let them sit for at least 24 hours to allow all the excess paint to drain completely. I used my ornament storage box as a “drying station” you can use a plastic cup or another alternative for this step.
Step 4: Add Gilding Adhesive

Now you’re ready to add the gilding adhesive.

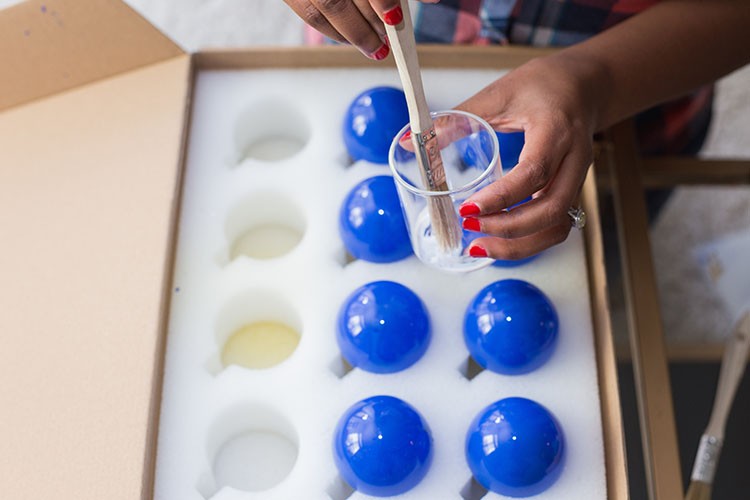
I used a water based adhesive so a little goes a long way. I applied a small amount to my cup and lightly dipped my brush into it. Be careful not to over saturate your brush, a little dab is plenty.

Next, apply a thin layer of the adhesive to your ornament in the spots you want the gold foil to cover.
Step 5: Apply Gold Leaf Foil

Allow the adhesive to dry until it becomes tacky. While I waited for my adhesive to dry I went ahead and cut my gold sheets to prep them for application.

I used Martha Stewart’s gilding sheets which worked the best for me. Each foil sheet has a wax paper backing making it easy to apply.
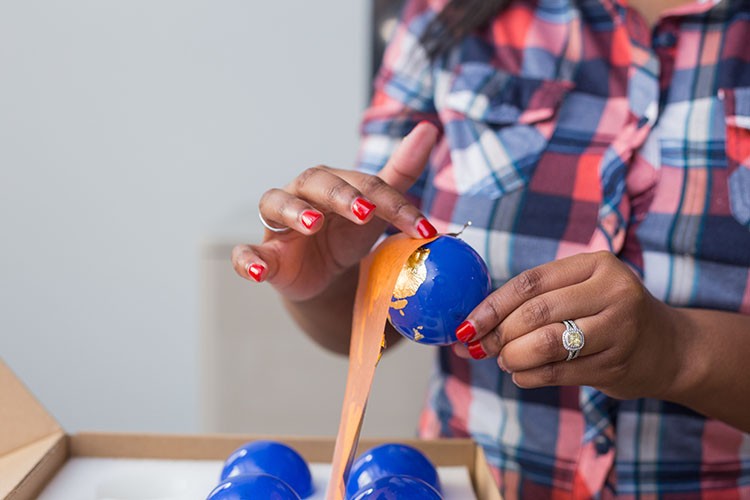
Gently place your foiling sheet onto the ornament with the wax side up. If you missed any spots simply use any excess gold foil to cover any gaps.

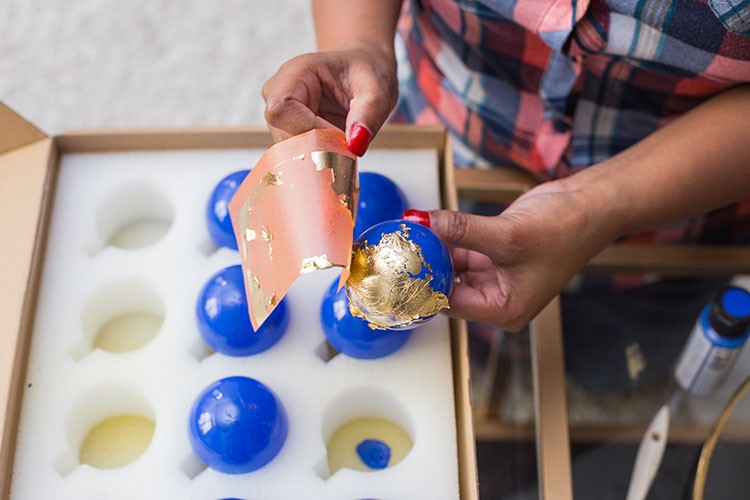
The wax paper will easily separate once the gold leaf has been applied. Set aside any excess to use later.
Step 6:

Use your clean brush to burnish the gilding and brush away any excess flakes for a clean look
Step 7: Add Ribbon

Finally, spray paint the tops using a gold metallic spray paint, add ribbon of your choice and you’re all set to hang these beauties on the tree!

Festive Christmas Morning Décor

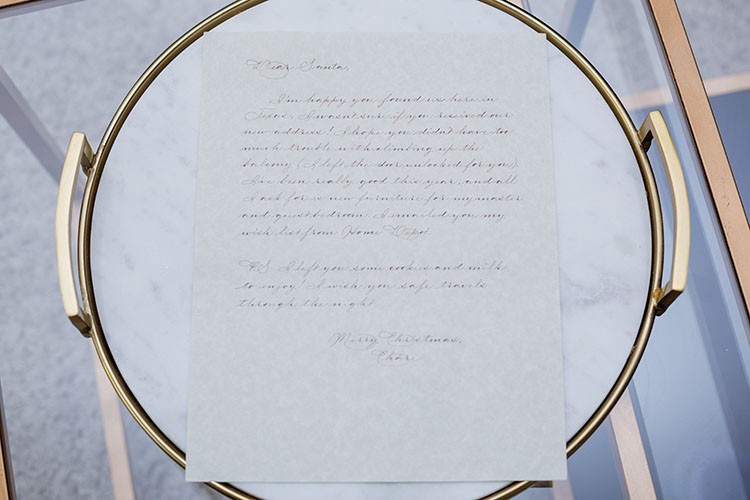
After decorating my tree, I focused on some of the fun details I remembered as a child. I incorporated a couple of my favorite books and a handwritten note to Santa that was written for me by a calligrapher.
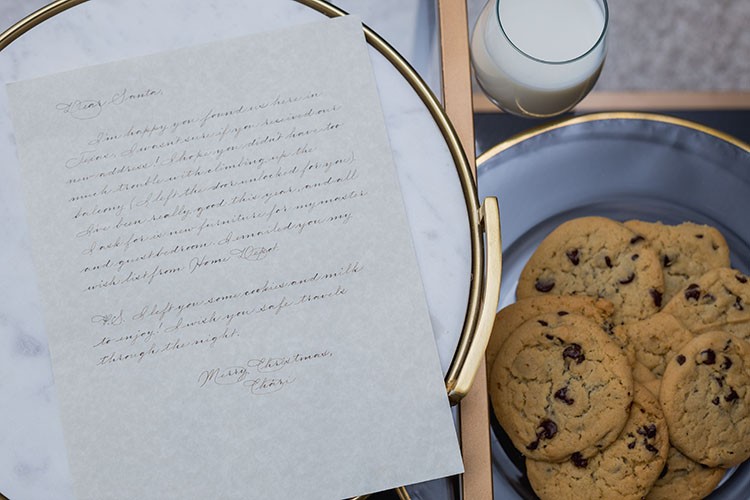


Leaving milk and cookies out for Santa was a must. I couldn’t resist a little magic by adding Santa’s footprints.
Wall Decal

On the opposite wall, I decided to switch things up a bit by bringing in a little holiday cheer with a decal. I found this Happy Holidays Wall Decal at The Home Depot and it was the perfect fit for my blank wall space.
Christmas Morning Hot Chocolate Bar

To complete my Christmas morning scene, I styled a self-serve hot chocolate bar cart for entertaining! I love to entertain so I thought this would be the perfect way to “bring good cheer.”

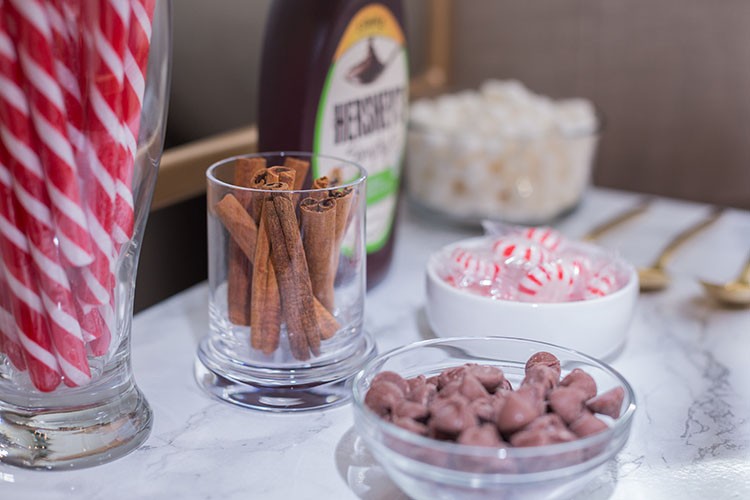
Add a few hot cocoa K-cups and topping options for an easy way to make the perfect cup of goodness in a matter of minutes.
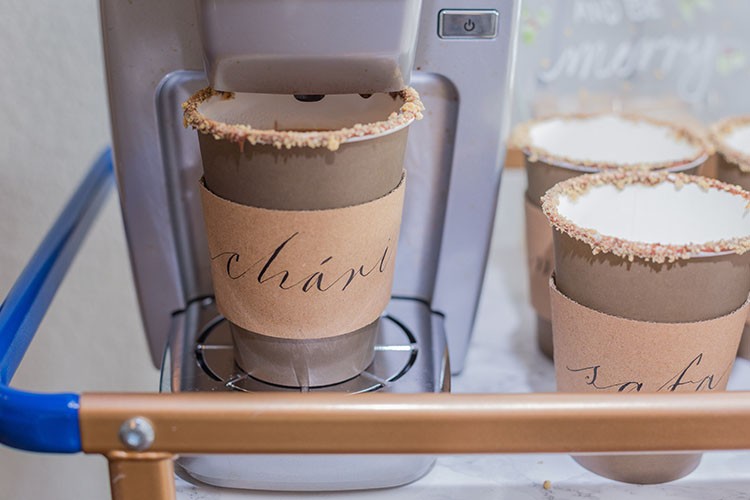
I had personalized cup sleeves written for me and my girls by a local calligrapher for a unique touch.
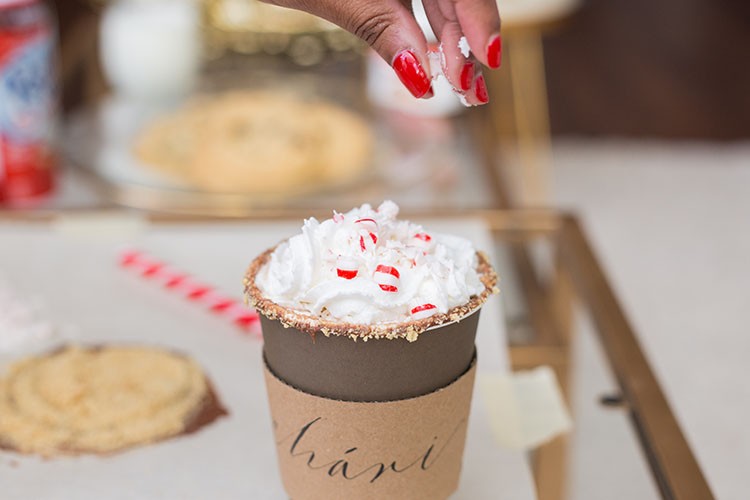
Head over to my blog for a complete tutorial on how to make these hazelnut-chocolate spread flavored rims for your hot chocolate cups. It’s going to be a hit for the holidays, I’m sure!

A special thanks to The Home Depot for inviting me back for another fun Holiday Style Challenge. My Christmas morning scene wouldn’t be complete without them! I look forward to having a wonderful season in my newly decorated living room.
For more DIY holiday ideas, see other articles in our Holiday Style Challenge series, and follow our Holiday Style Challenge board on Pinterest.
Visit The Home Depot’s online Holiday Decor Department for more decorations to spruce up your living room and create the perfect Christmas morning scene.
The post Create the Perfect Christmas Morning Scene appeared first on The Home Depot Blog.


