Megan Brame of The Beige House was looking for a creative way to show off her jewelry. That’s when she decided to build wood crate shelves. Whether you are looking to add more storage to your home or wanting to display products at a trade show, these DIY wood crate shelves is the perfect fit for you!
Read on to see Megan’s step-by-step tutorial on how to build modular wood crate shelves with a chalkboard counter.
DIY Wood Crate Shelves with a Chalkboard Counter
My first craft show was back in 2005. There wasn’t much effort put into displays back then. I laid out my jewelry flat on the table with a velvet tablecloth and hoped for the best.
Most people would just throw up their 10 x 10 ft. tent, configure a few tables with some staggered displays and call it a day. Since then, I’ve seen display and booth setups blow up. Now, I’ve seen amazing booths created out of metal pipe, wood planks, shipping crates, you name it! It amazes me to see so many skilled crafters taking their displays up a notch for retail shows. Previously, the real effort was only put into professional wholesale displays for trade shows. Shout out to those crafters inspiring us all to do better.
Creative Display Cases
This is my roundabout way of saying if you’re planning on selling crafts or handmade items in public this holiday season, you’ve got to go beyond the standard table and tablecloth setup if you want to smoke your competitors.
I’ve had this idea in my head for a while. I wanted to create a standalone display for my brand, Reserved Stock, that could showcase the natural elements of the jewelry. However, I kept running into the same problem: there were limitations to the size of the display I could make for each show. Most shows run with one of three standard booth sizes: 4 ft., 6 ft., or 8 ft. That was the good news.
The bad news is the obvious problem of trying to create a “one size fits all” option that would look good in any of those size setups. Whatever display table I wanted to make, I had to either go with a small setup (4 ft.) and make multiple options (which seemed way cumbersome), make a middle range setup (6 ft.) and fill in the gaps with other displays. Or, I could try to create a modular setup.
Modular Wood Crate Shelves
Clearly the modular option was the best solution. That came its own challenges: complexity, use of space, and aesthetic. I would consider myself a builder newbie, so any plans I was finding for displays were too intimidating for me to handle, especially in my tiny workspace. I had to get creative and find a way to utilize pre-made pieces as much as possible.
That’s when the idea of using crates came to mind. I loved the idea of using wood crates because of the rustic/industrial look they gave, but also because I’d be able to actually use them as totes, removing any unnecessary bins or storage that would need to be hidden in my setups. My wee little hatchback can only handle so much, you know.
Okay, long-winded, I know. Let’s just get right down to what I came up with. It’s ridiculously easy to make (even though I own power tools, I can still be intimidated by them, so I totally get it!). It can also be configured to fit any of the three standard booth sizes, plus can cut down on unnecessary lugging of totes and boxes. Ready? Let’s go!
Materials
- Varathane Kona wood stain (I used ~1.5 quarts)
- 2 x 4 ft. Chalkboard (x2)
- Paint brush or foam brush for stain + cloth
- Light It! Bronze 9-LED Anywhere Puck Light
- VELCRO Brand 8 in. x 1/2 in. Reusable Ties (50-Pack)
- Crates and Pallet 27 in. x 12.5 in. x 9.5 in. X-Large Wood Crate Storage Tote Natural Pine (my setup uses 3)
- Crates and Pallet 18 in. x 12.5 in. x 9.5 in. Large Wood Crate (my setup uses 12)
- 1 in. x 2 in. x 8 ft. Furring Strip Board (x4)
- 48 in. Oil Rubbed Bronze Piano Hinge
- Gorilla Glue
- Chalkboard Spray Paint
- Everbilt ½ x 36 in. Aluminum Rod (x4)
- 1/2 in. copper tube strap pack of 10 (x2)
Tools
- Circular Saw
- Miter Saw
- Clamps
- Hack Saw + metal file or Dremel with metal saw wheel
- Measuring tape
- Pencil/Pen
- Safety goggles
- Sawhorse set
Cuts
Here are the cuts I made, but always measure against your own chalkboard panels as there can be slight variations:
- (12) 1 in.
- (8) 5 in.
- (4) 9 in.
- (2) 22 in.
- (4) 24 in.
- (2) 48 in.
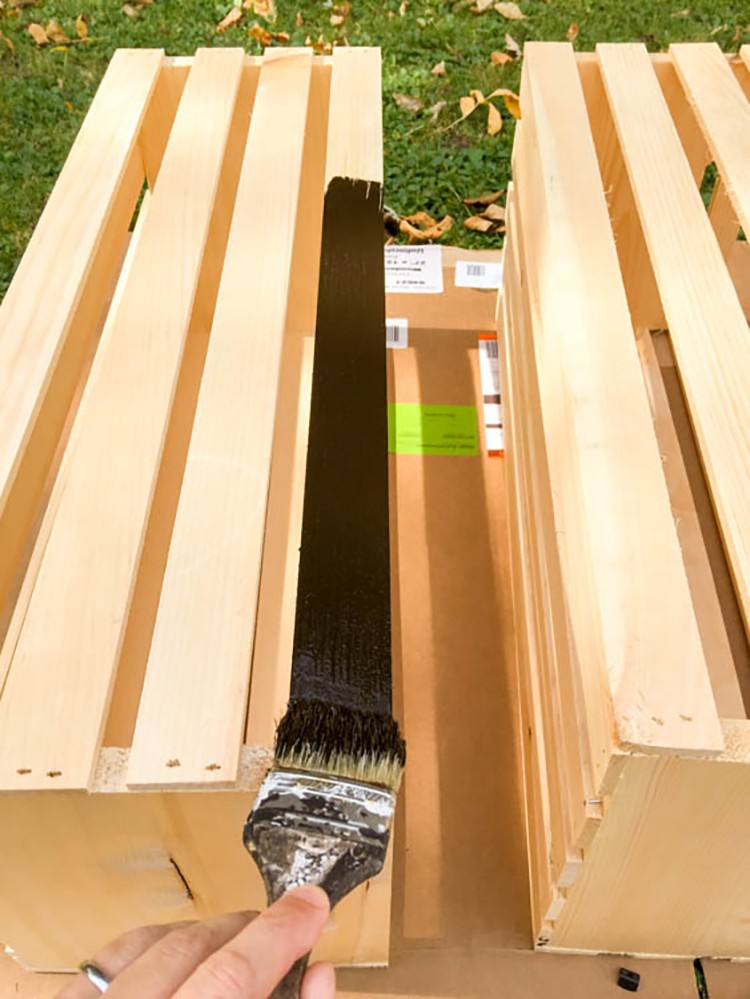
Step 1: Stain the Crates
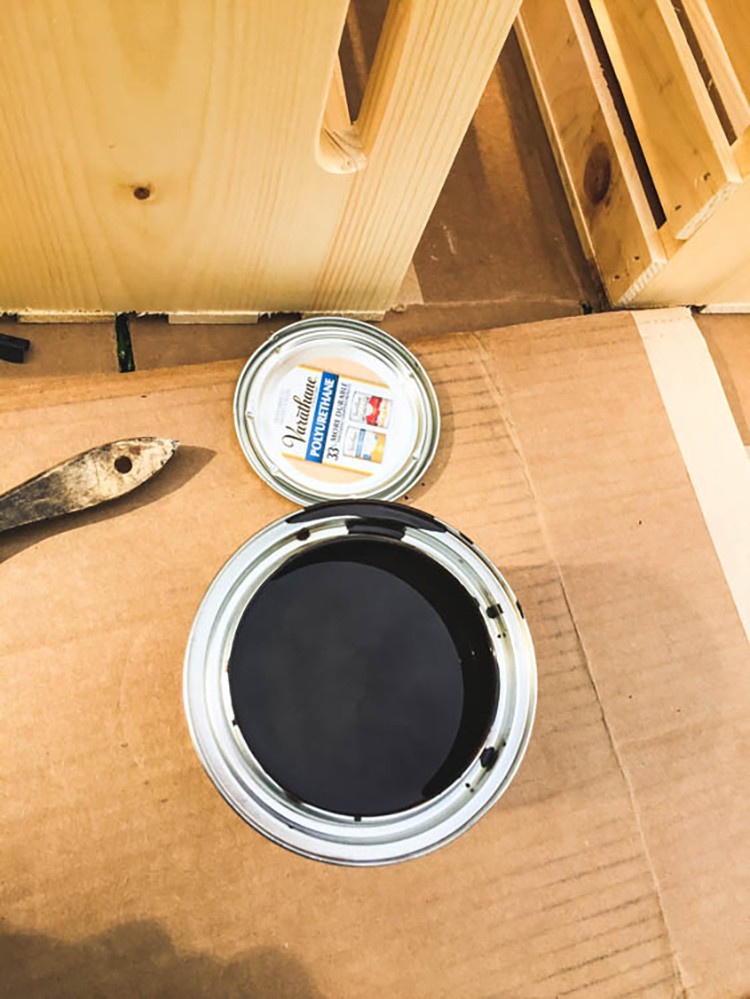
By far the longest part of this project is staining all of your crates. The Kona stain is my go-to stain color because of its richness and idiot proof-ness; I’ve used it on my bathroom vanity, kitchen cabinets and will probably find more reasons to use it in my house. Use whatever stain best matches your business or home’s branding. Remember that thicker stains can get tacky if you pile it on. Make sure you’re wiping the excess stain away with a cloth (or have ample time to let it dry).
Note: If you decide to order the large crates from homedepot.com, they’ll come in corrugated boxes that can double as a base to use for staining.
Step 2: Cut the Chalkboard, Furring Strips, & Piano Hinge
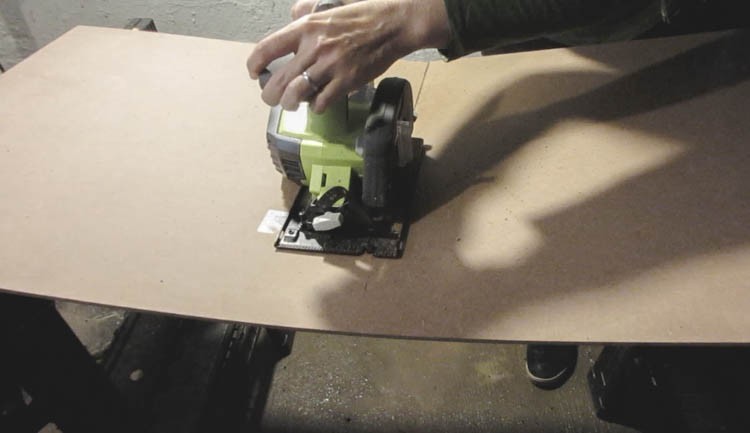
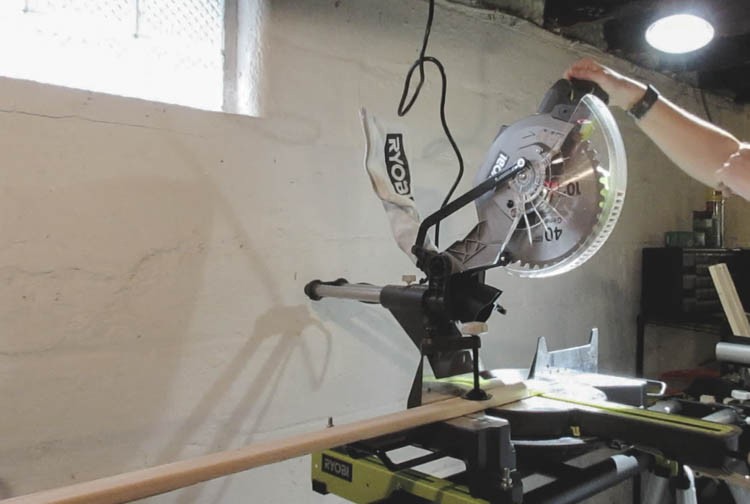
First, you can totally skip this step and have The Home Depot take care of it for you. I used my cordless circular saw to cut one chalkboard panel in half, then my compound miter saw to cut the furring strips to size.
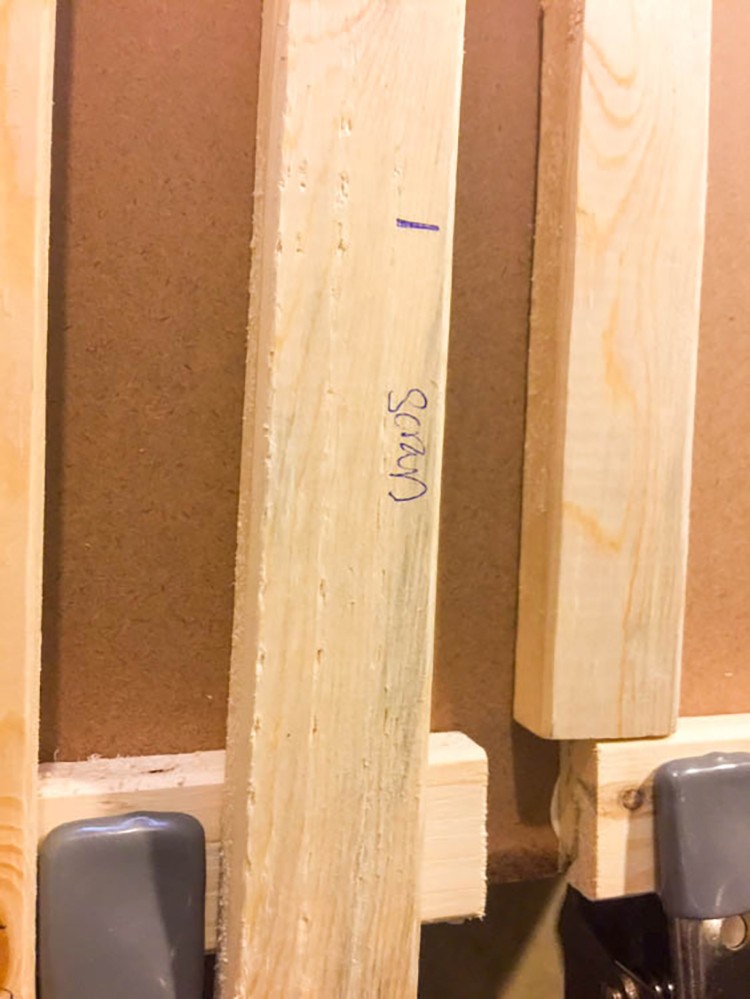
There can be a lot of similar pieces lying around, so I like to label excess wood as “scrap” before cutting to prevent my inevitable confusion on the next step.
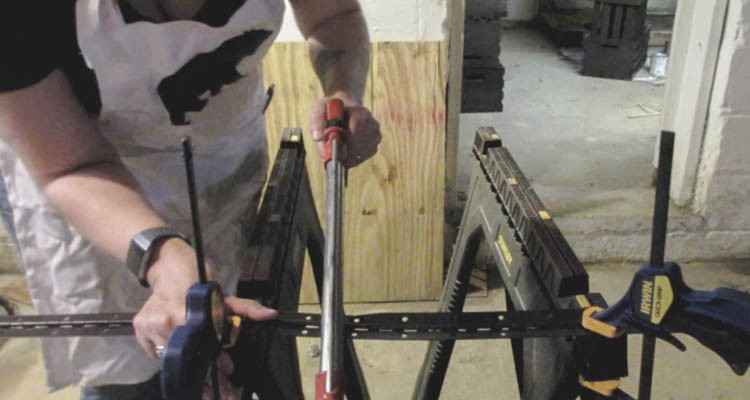
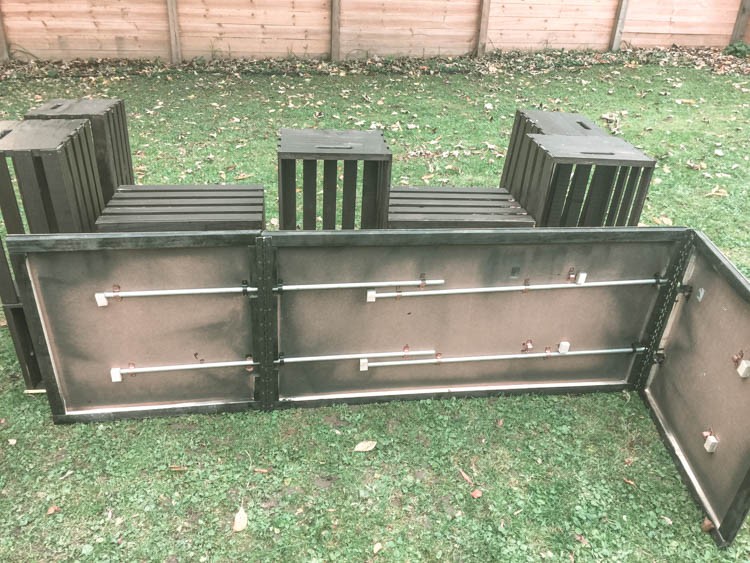
Unfortunately, 24-in. piano hinges don’t seem to be a standard. I opted for a 48-in. hinge to cut in half. If you’re a confident metal cutter, a Dremel with a metal saw wheel is a good pick to get the job done quickly. This was my first go-round with cutting metal with multiple parts and thicknesses, so I opted to go slowly with my hacksaw and file. If you plan to clamp these on a sawhorse set to cut, move the horses together as closely as possible to create a more substantial brace. The actual plates are very thin and can bend with too much force (which you can always bend back or hit with a rubber mallet to re-flatten).
Step 3: Glue Furring Strips to Chalkboard Panels
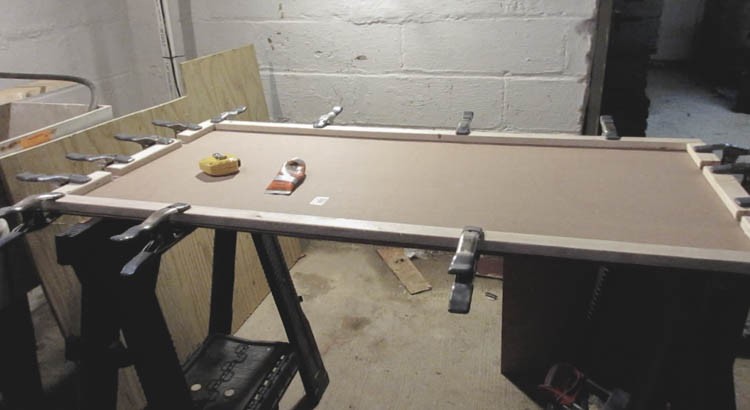
I wouldn’t recommend using wood glue here since the back of the chalkboard panels are composite materials. Instead, use something more versatile like Gorilla or super glue and clamp. Let dry for a few hours.
Step 4: Glue 1 in. Stops and Tube Straps
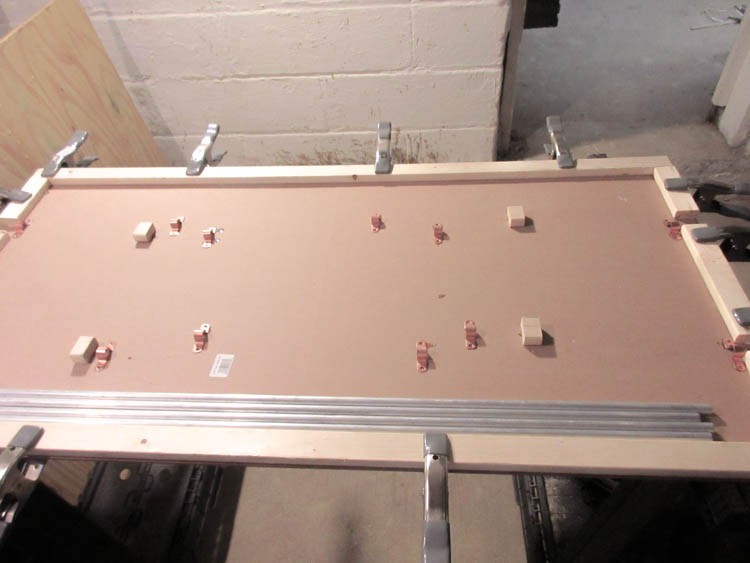
This is where the aluminum rods come into play. When assembled, the rods slide out to support the leaves and prevent strain on the hinges if the table is expanded to 6 or 8 ft. If you only use the 4-ft. table top, these rods can slide underneath, hidden from sight. You can go with your preference of materials here, (copper piping would’ve looked really cool and steampunky). I chose the aluminum solid rods because they could handle the job without being too heavy.
Next, measure out each rod and use glue to secure tube straps and 1-in. wood pieces, which are used as stops to make sure the rods don’t slide out. Stagger the rods on the 4-ft. panel. Then slide them over to the leaves and do the same on those panels. I measured about 16 in. for each drop leaf, allowing the rods to extend to support the tabletop extensions, but still hold the majority of the 4-ft. tabletop. Also, I would go generous with the glue here since the straps and stops can’t be clamped into place.
If this seems really complicated, you can skip the rod system altogether and just shimmy up a 4 x 4 piece of wood to stop the tabletop from bowing. However, that adds another thing to remember to bring and can be a problem if your flooring is uneven.
Step 5: Spray Paint Furring Strips
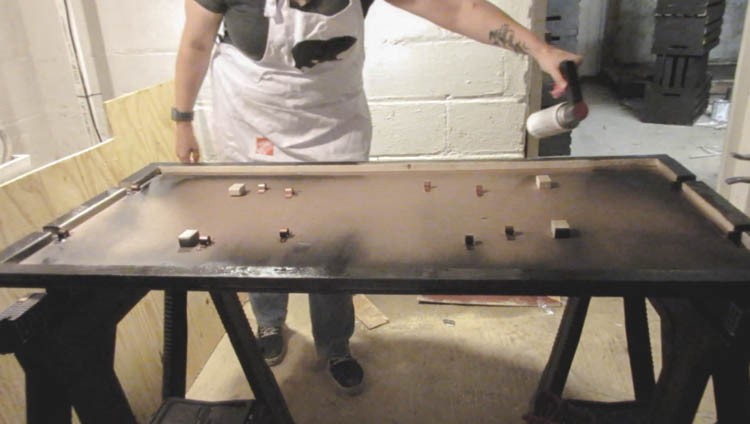
I wanted to give the look of a thicker tabletop so I painted the furring strips and sides of the tabletop with chalkboard spray paint. The good thing about chalkboard paint is that it dries fairly quickly so you can move onto the next step quickly. Home stretch!
Step 6: Slide rods into place on 4 ft. table
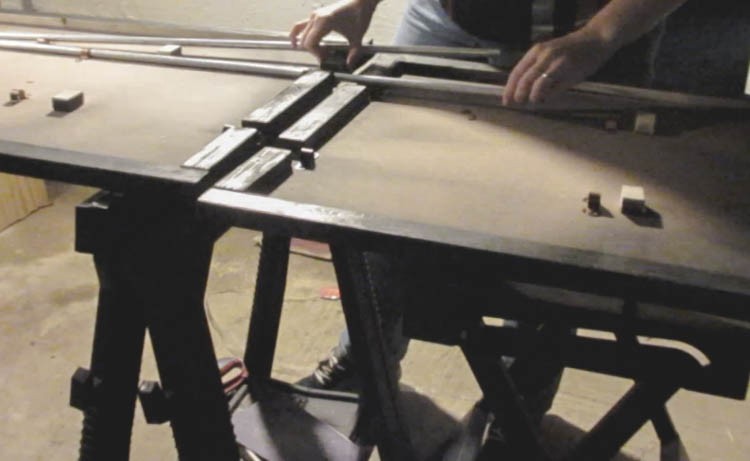
Step 7: Attach Chalkboard Halves to Chalkboard Panel
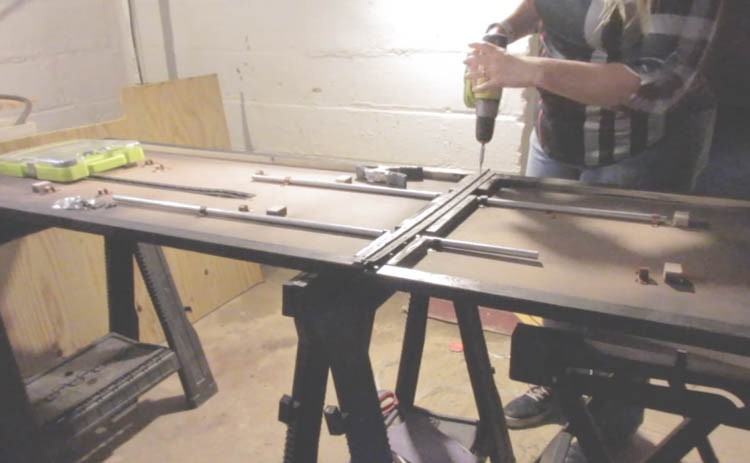
You can also slide the rods through to the panels to double check that all of the pieces line up correctly. Make sure to space out your screws across the 9 in. and 5 in. wood pieces.
Here’s how the rod system works when the table is expanded to 6 ft.
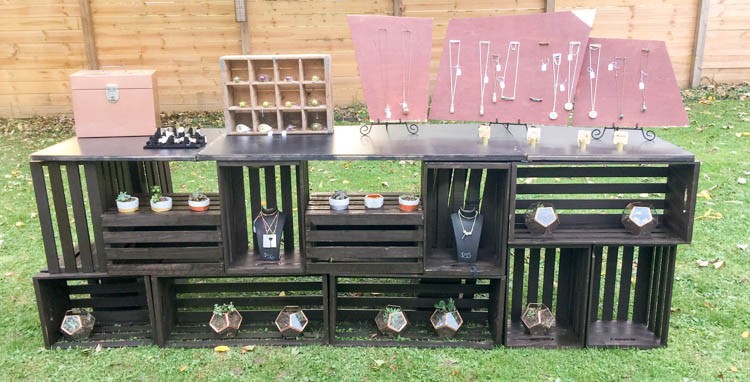
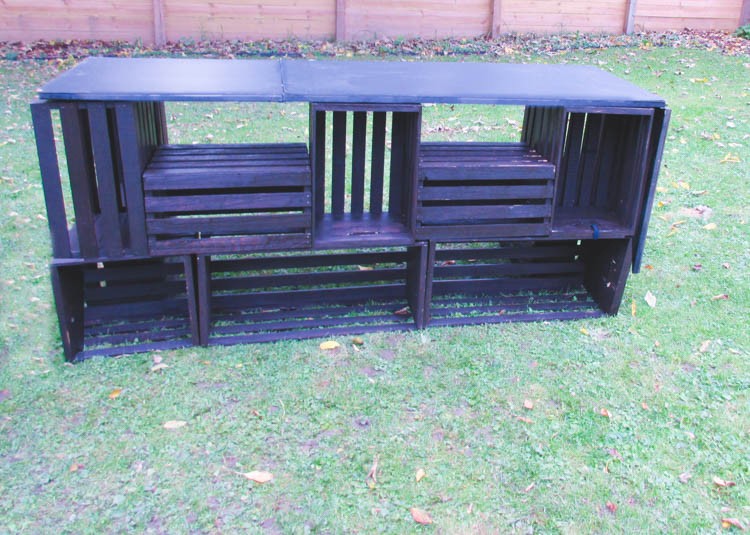
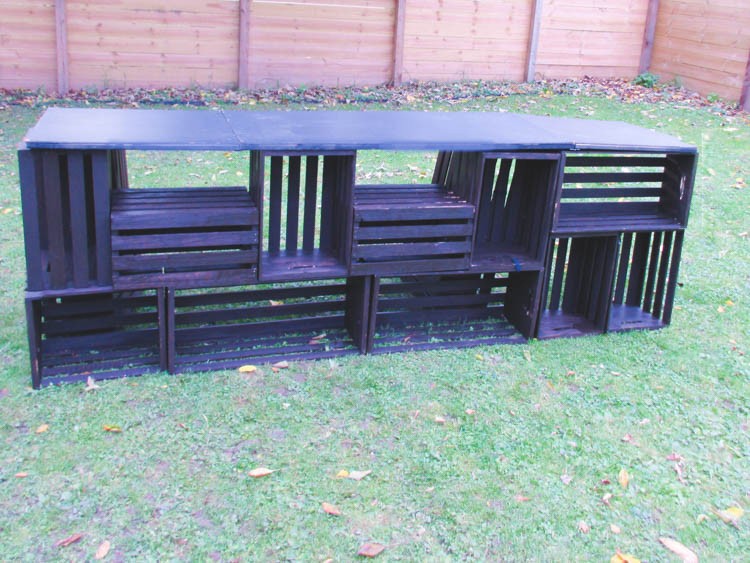
Step 8: Assemble Crates as Table Base and Add Table Top
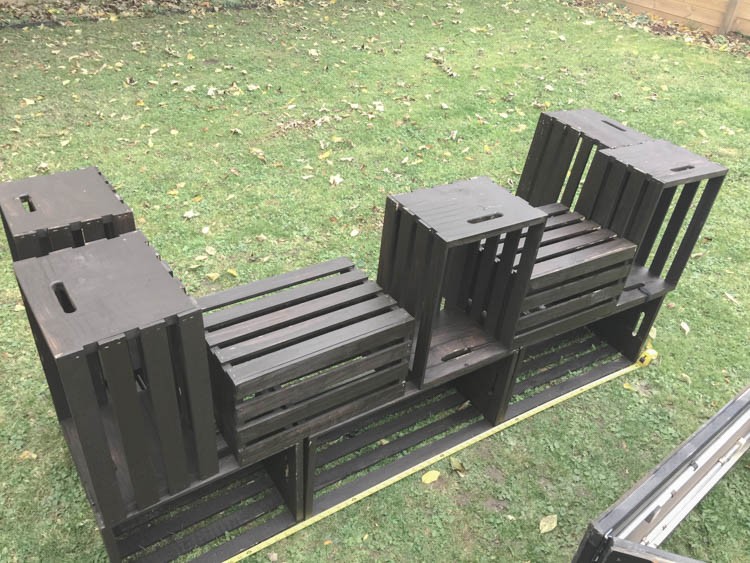
This is the fun part as the look is totally up to you. Remember that you’re trying to achieve a “U” shape that supports 3 sides of your table top.
Here are a few configurations I made with 15 crates.
4-ft. Counter

6-ft. Counter
8-ft. Counter
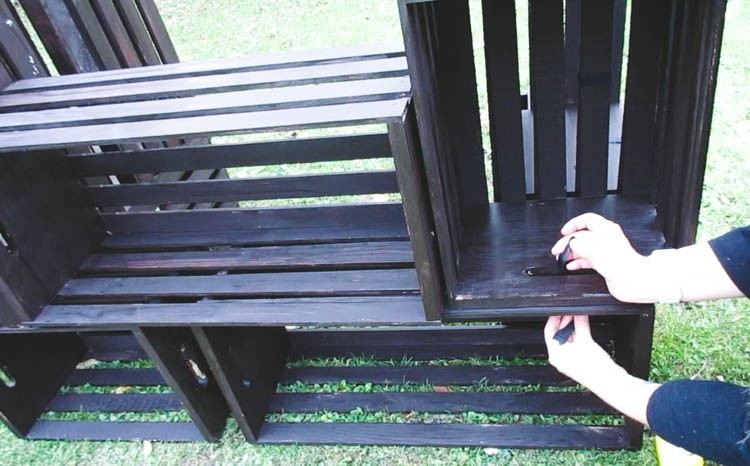
Use the velcro straps to secure the crates to one another and create a more stable base.
If you want to add stability to your wood crate shelves, secure the table top with velcro to the crate base. If you’re using a 4-ft. or 6-ft. display, drape the table leaves on the sides of the wood crate shelves or fold under the main tabletop. I would recommend only folding these up for transport and letting the leaves hang to help weigh down the wood crate shelves and improve stability.
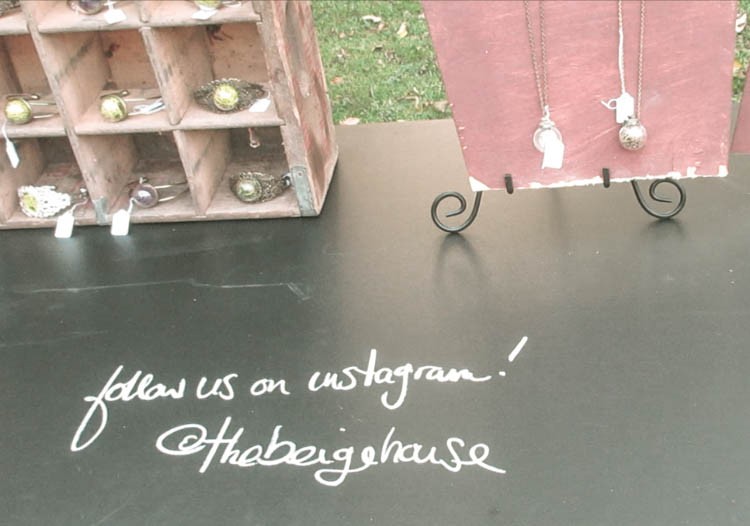
Step 9: Decorate and Merchandise!
One of the reasons I really love these wood crate shelves is the ability to use the chalkboard for signage, calls to action for social media, or to just have fun with. Stick the LED puck lights inside the crates to showcase particular pieces, limited editions, or important information (your credit card sign, postcards, policies, etc.). I ended up using two puck lights, but utilize as many as you need to create an attractive display.
Whew, can you believe it? You made a custom modular wood crate shelves that you can bring to any show. You can even use them as a counter or bar in your home when you’re not at shows. If you’re also interested in the modular necklace display featured, check out this easy tutorial using materials also found at The Home Depot. Be sure to hit me up on Twitter or Instagram to show me your new displays!
The post DIY Wood Crate Shelves with a Chalkboard Counter appeared first on The Home Depot Blog.
