
Conserving water at home can be an easy task according to Vineta Jackson of The Handyman’s Daughter. Read on to find out exactly how to conserve water at home with a rain barrel installation.
How to Install a Rain Barrel
Seattle gets a lot of rain in the winter and spring, but goes into a drought period during the summer. It seemed like such a waste to dump all that water down the drain, when it could be stored for the dry months instead! I’ll show you how to install a rain barrel on your existing downspout, so you can save your rainwater for a not-so-rainy day!
Materials Needed
- Rain barrel
- This is the one I chose, but there are lots of styles and options on the Home Depot website!
- 48” long level
- Drill
- Concrete pavers
- Tape measure
- Pencil
Step 1 – Choose a Location
When choosing a location for your rain barrel, keep in mind that it needs to be within a few feet of a downspout. Mine will be placed in a neglected corner of the front yard, where it will be out of the way yet easily accessible.
Step 2 – Level the Ground
A rain barrel can weigh hundreds of pounds when full, so the ground underneath it needs to be stable and level.
There were already some concrete pavers in this spot, but they weren’t level anymore. I pulled them out and filled in the low spots with more soil. After compacting the dirt, I replaced the pavers and checked that it was level.

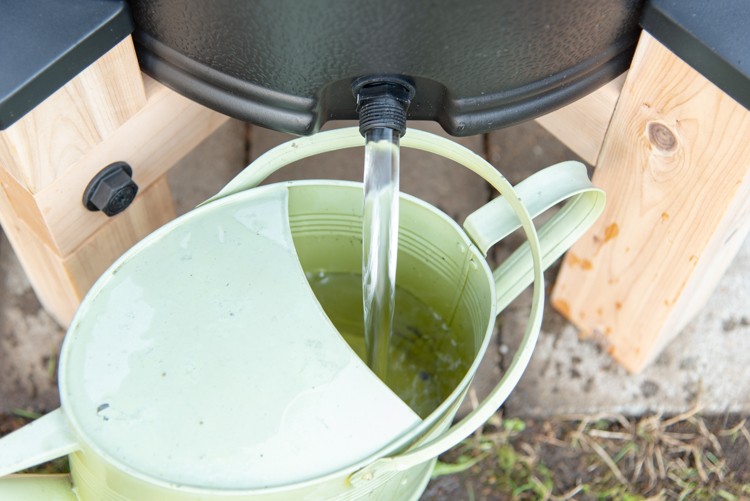
Elevate the Rain Barrel for Easy Access (Optional)
The spigots on a rain barrel are located at the bottom, which makes it difficult to fill a watering can! Consider elevating your rain barrel on a stand for easier access, and increased water pressure.
You can find plastic versions like this one, or make your own! You can find the tutorial and plans for my DIY rain barrel stand here.

Drill Holes for Drain Pipe
After determining the height of your rain barrel (with or without a stand), it’s time to connect it to your downspout.
Lay the level across the top of the rain barrel with one end pointed at the downspout. Make sure that bubble is in the middle!
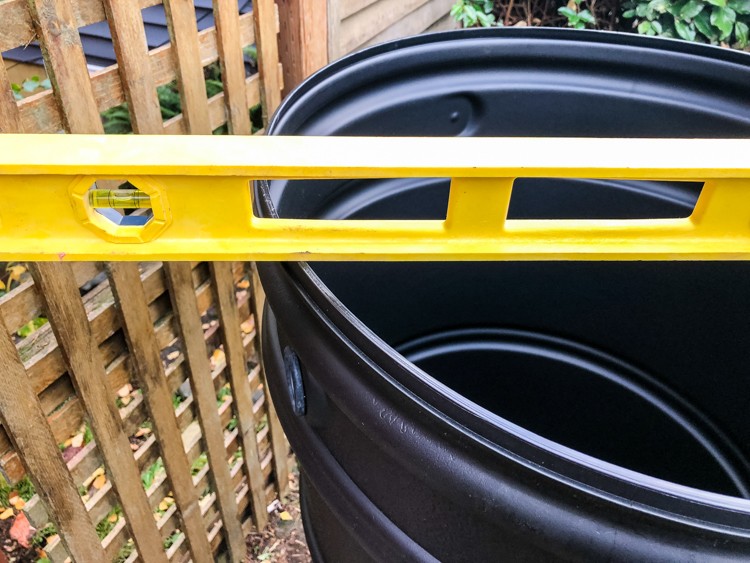
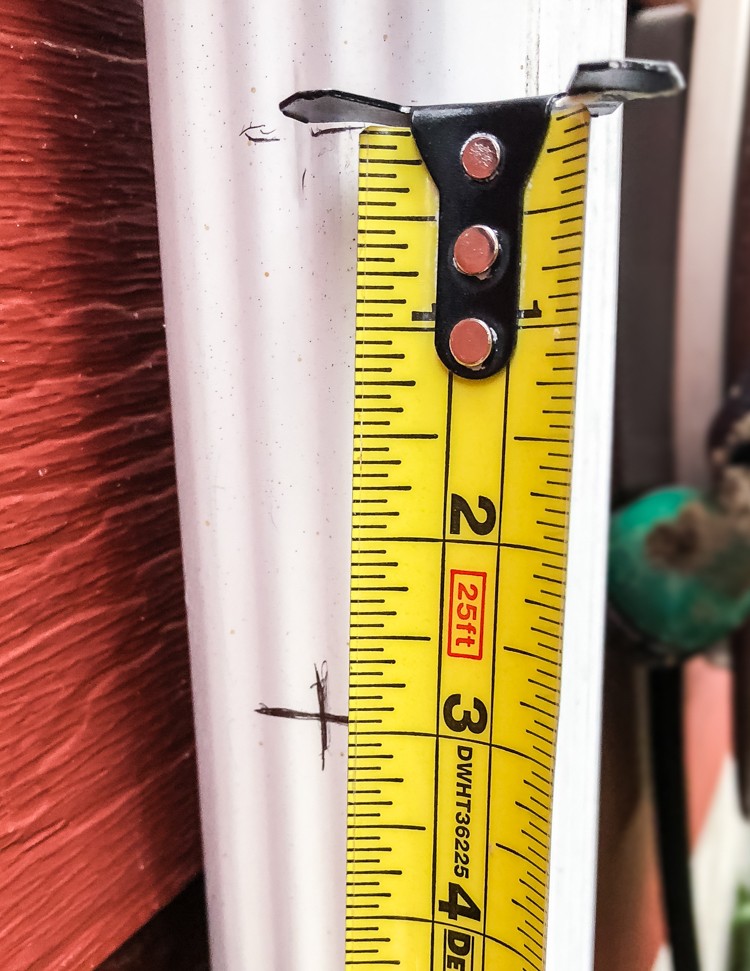
Mark where the end of the level meets the downspout with a pencil. Then measure down 3 inches and mark the center.
My rain barrel came with everything I needed to install it, including the hole saws! Drill a hole into the side of the downspout with the 2 ⅛” hole saw.
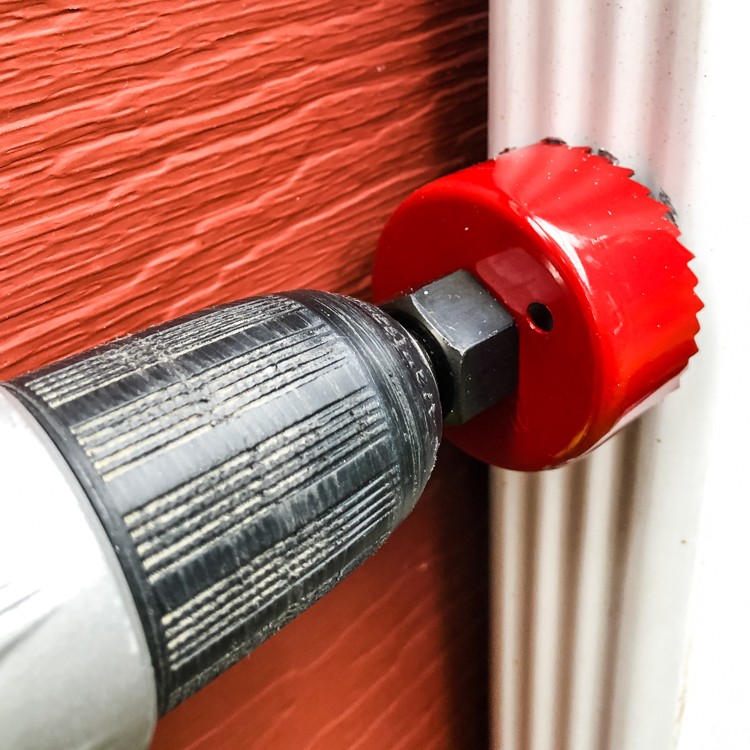
On the rain barrel, there are two different spots where you can drill a hole for the other end of the drain pipe. Pick the one closest to the downspout and drill a hole with the 1 ½” hole saw.

Insert Diverter and Connect to Rain Barrel
The diverter redirects some, but not all, of the rain off the roof into the barrel. When it’s full, water will bypass the collection cup inside the downspout and continue down the drain. Pretty slick!
The diverter fits snugly in the downspout, so it takes a little coaxing to get it into place. Once it’s in, secure it with the included screws.

A flexible hose connects the diverter to the rain barrel. Make sure it’s not sagging or rising above the diverter for proper water flow.

Pop on the Lid and Wait for Rain
This lid doubles as a planter, so in the spring I’ll be filling it with colorful annuals that spill over the sides of the barrel. For now, the lid is locked into place to prevent leaves and insects from finding their way inside.

I didn’t have to wait long before it started to rain. There was already a gallon or so in the bottom of the barrel the next morning!
I added a second rain barrel to the backyard to double the output. When the weather dries out, I’ll be able to keep my plants happy with free water!
Read the Home Depot Blog for more Outdoor Living ideas.
The post How to Install a Rain Barrel appeared first on The Home Depot Blog.

