How To Tile A Basement Shower
Hey, it’s Natalie, from The Creative Mom. I am so excited to show you how to build and tile a basement shower. I’ll walk you through every step of the process from sheetrock, to shower pan, to tile. Installing the shower is the first thing we did in our basement bathroom. To follow along with the whole bathroom process, you can check out my blog, The Creative Mom.
Supplies:
P-trap
Kerdi Shower Kit
Unmodified Thinset (to install the Kerdi system)
Pfister Venturi Shower Faucet
Penny Tiles
Tile Wet Saw
Tile Trowel
Thinset (to install tile)
Fusion Pro grout
1/8″ tile spacers
2 foot level
Angle Grinder
Corner Shelves
3×12 Daltile Subway Tiles
Grout Float
5 Gallon Homer Bucket
Tile sponges
Directions:
Step 1: Prepare Shower Stall
We considered using a shower insert for our basement bathroom, but since our shower stall wasn’t a standard size, we decided to tile it. We started with a sheetrocked shower stall and concrete floors. These instructions will also work with a wooden sub floor.

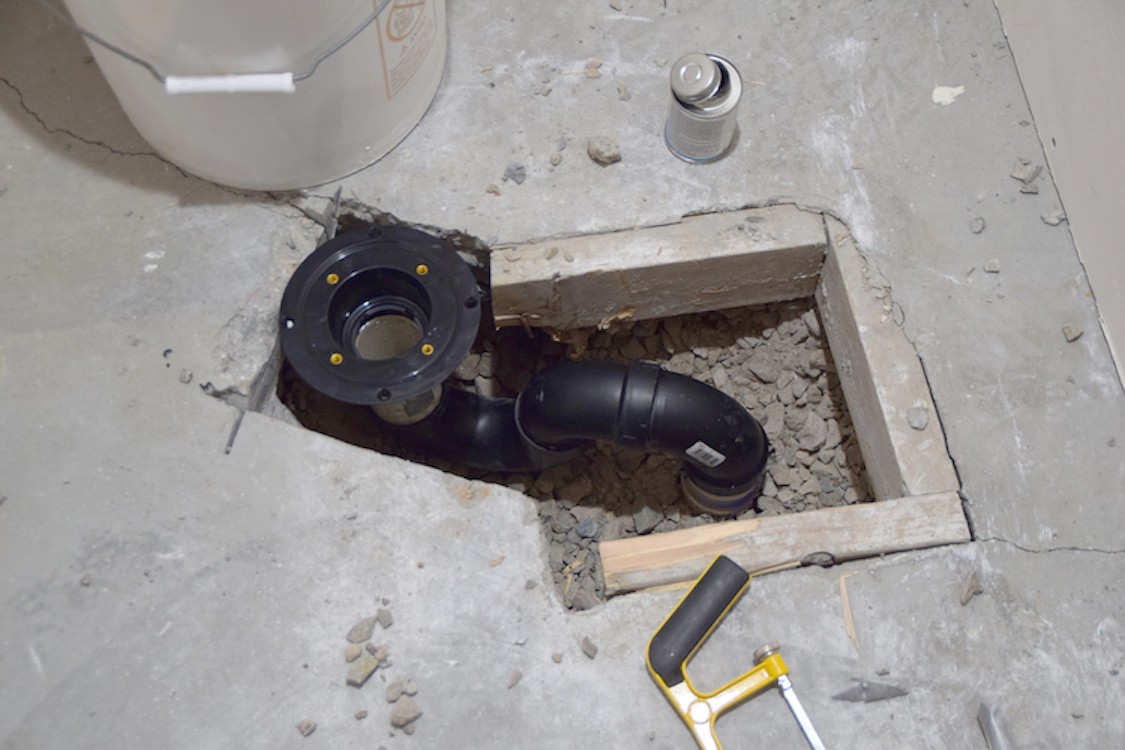
Step 2: Prepare Plumbing
You will want to make sure your plumbing is in order before you start working on the shower stall. When we built our home, we stubbed in a shower drain and faucet, but we didn’t have a P-trap, so before we could get the shower installed, we needed to get a P-trap installed. It did involve breaking out a little concrete, but it was easily patched with some fill gravel and concrete before we started installing the shower stall. You’ll also want to make sure the plumbing for your shower head is ready to go. The valve we needed came with our Pfister Venturi shower head.
Step 3: Prepare Shower Pan
We had two big concerns with putting in our basement shower. The first was the shower pan- we were worried putting in a shower pan by ourselves because we weren’t sure how to get the slope and drain just right. The other concern was waterproofing- we weren’t sure what product would be best for waterproofing.
We were excited when we found the Schluter Kerdi system on HomeDepot.com, because it solved both of our big problems at the same time! The Kerdi system has a pre-formed shower pan, so we didn’t have to worry about putting in cement and making sure our slope was perfect. It also came with a preformed curb, which was a huge plus!
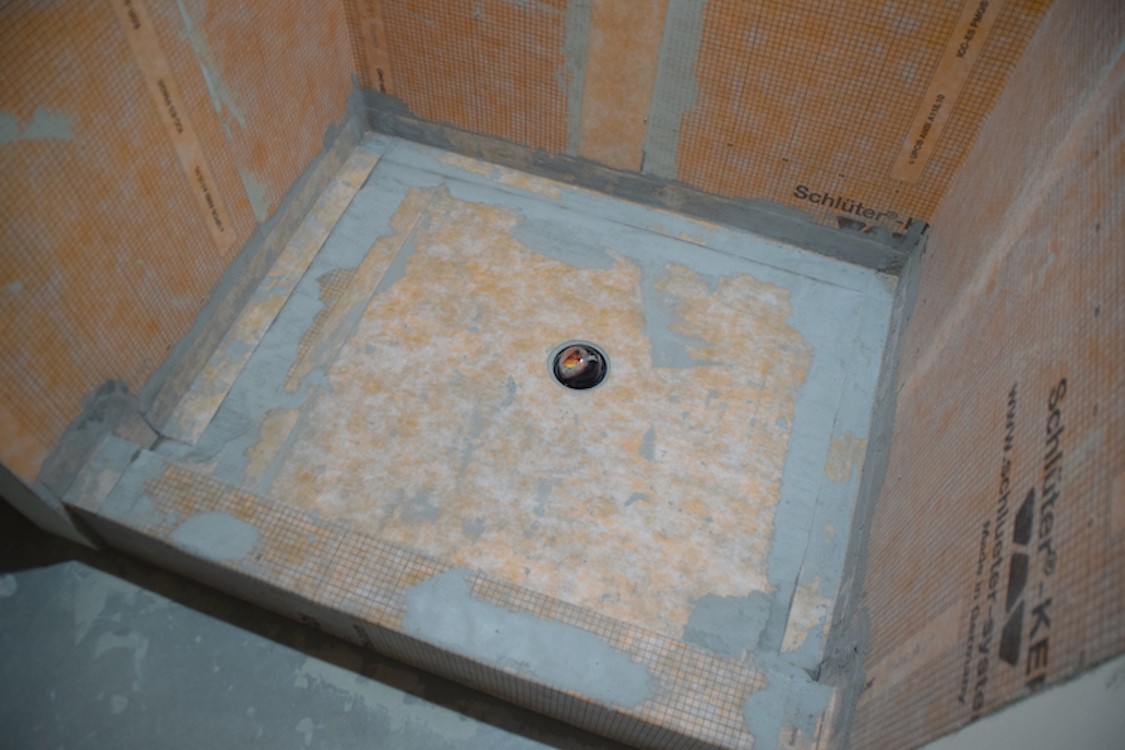
And if you are wondering what is in our drain, it’s a baseball- the perfect solution to keep fumes from coming up through the drain. Once we have water going in the shower, it will sit in the P trap and prevent fumes. Until then, we found that a baseball did the trick.
Step 4: Waterproof
Our other concern, waterproofing, was taken care of too. We were especially concerned with waterproofing around the shower head and handle, and how to make sure the drain met with the slope of the shower properly. The Kerdi system came with waterproofing fabric, seals for the shower head and handle, and even a drain that fit perfectly with the shower pan. All of it worked together like a charm!

We just felt like the Kerdi kit really solved all of our problems. The Home Depot also sells waterproofing options like Red Gard and PVC shower liners, if this Kerdi system doesn’t give you all the happy feels like it did us. I’m not going to walk you through the install process of the Kerdi shower kit, because Schluter has such a great step-by-step video, that I think it’s best to follow that video very closely for best results.

Step 5: Tile Shower Floor
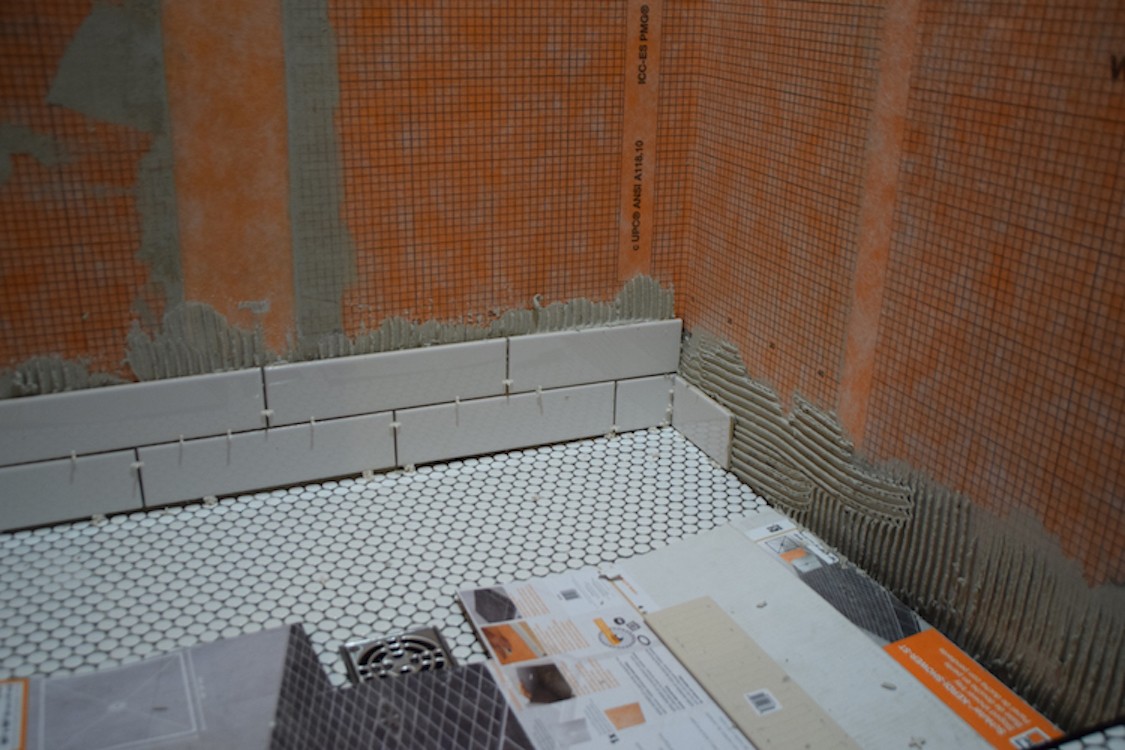
Once the shower pan and walls were installed and everything was waterproofed, we were able to start tiling. We started with the shower floor. Because I didn’t want to have to cut tiles to match the slope of the shower pan, I used these adorable little penny tiles. Installing them was really easy. I started by cutting one edge of the tiles with my wet saw, so the edge was square and even.

Then I started laying in the back corner, working my way across the back wall and then forward. You will spread a layer of thinset with the notched side of your trowel, then lay your tile. Take your time on these penny tiles. Because you don’t use spacers, you’ll need to be very deliberate and careful to make sure everything stays straight and level. You’ll also need to cut the tile to fit your drain. We used an angle grinder to cut the tiles so they fit perfectly around the drain.

Step 6: Tile Shower Curb
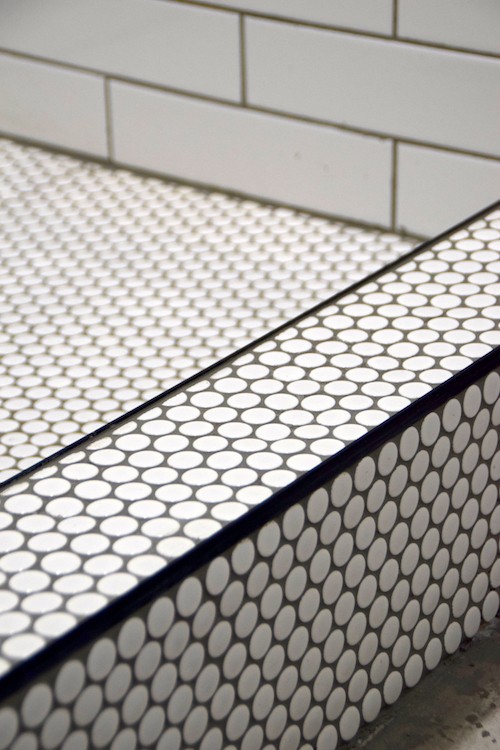
After our floor tile was laid, we cut some Schluter tile edging to match the length of our curb and up the edges of our walls.
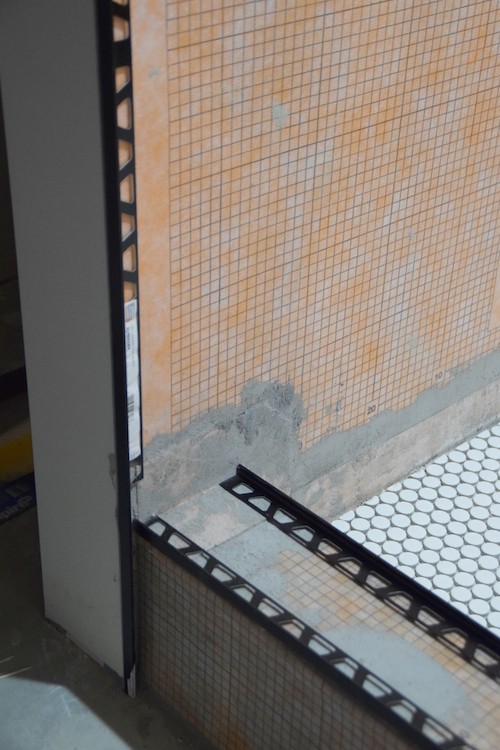
Make sure you get the right thickness of tile edging- our penny tiles were 1/2″ thick, while our wall tiles were 3/8″ thick, so we had to get different tile edging to match the tile we were using. We set the Schluter tile edging with our thinset, and then tiled right up to the edges with our penny tile. I think the Schluter tile edging makes all the difference in the way the tile looks when you’re done.

Step 7: Tile Walls
We let our floor and curb set overnight so we could stand on it to tile the walls. Once we were ready to tile the walls, we put down some cardboard so we didn’t drip thinset on our floor tiles. We used 3×12 Daltile Subway Tiles in bright white for our walls. The price on these tiles was so good! They give a lot of bang for their buck. We started by laying the back wall. We centered our first tile in the center of our back wall, then we tiled out and up from there.
You will spread a layer of thinset with the notched side of your trowel, then lay your tile. Make to keep the tiles level. Since the shower pan is sloped, you want to make sure you use a 2 foot level, and check every so often to make sure you are keeping your tiles level. We used 1/8″ tile spacers to keep our tiles spaced and even.
You’ll want to start on the wall you look at straight on, then move to your side walls, that way you won’t see your grout lines. So after we got our first row done on our back wall, we moved to our side walls. Since we didn’t really care if the tiles on those walls were centered, we started with half of a tile and worked our way outward. Then on the next row, we started with a whole tile. We continued that pattern upward.
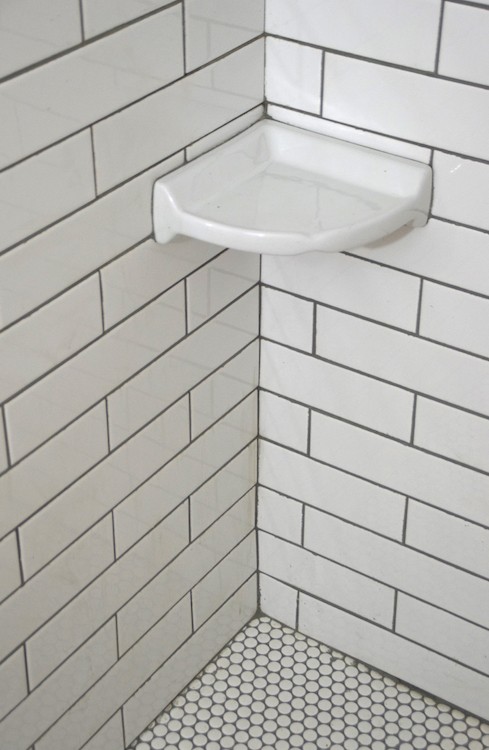
Step 8: Add Shelves
One of the advantages to building your own shower is that you can add as many shelves as you want! And you know what I always say, “a shower can never have too many shelves”- just kidding, I never say that. But really, I do like a lot of shelves in the shower so soap and shampoo bottles don’t end up on the floor.
We installed three of these cool corner shelves. I’m not going to lie, I was intimidated by these shelves when I first saw them. They are pretty heavy duty, and I thought there was no way they were going to stay on the wall with just thinset. But I was wrong! They are really amazing and super easy to install.

The shelf actually sits on the tile below it, and the tile above it slides behind the shelf, so it stays put! When we got to the row where we wanted the shelf, we installed the shelf first, with a layer of thinset, then tiled the row meeting up to it. That way we knew exactly what size to cut our tile. We did have to cut a couple of tiles in sort of an L-shape to have it fit up to the shelf, but the coolest part is that the tile slides in behind the shelf, so you can’t see the edge of the cut tile behind it.
Our bottom shelf was installed about 2 feet from the shower floor, and the top shelves just shy of 4 feet from the shower floor. We were big fans of these shelves.
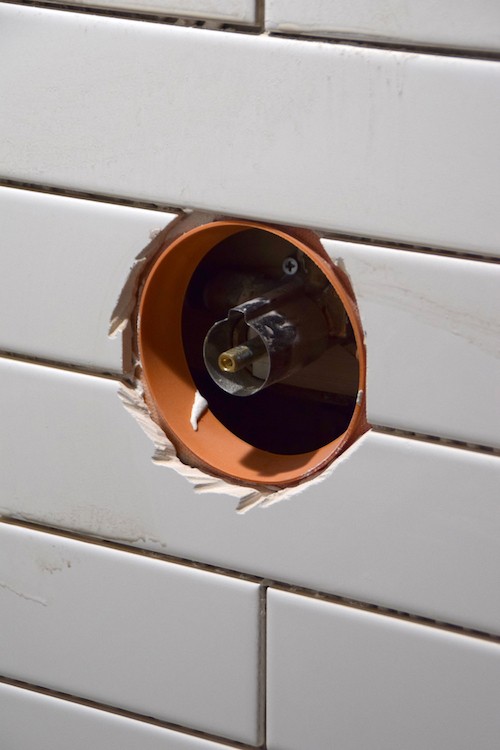
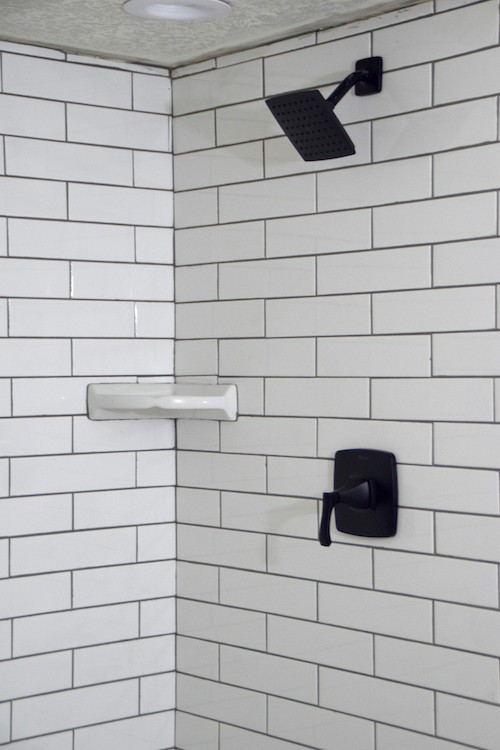
Step 9: Cut openings for Faucet and Shower Head
Eventually you will need to cut out the hole for your faucet and shower handle. We used an angle grinder to cut the tile to the shape we wanted BEFORE we put the tile on the wall. The Home Depot also sells diamond hole saws, but we weren’t worried about making it pretty, since our faucet handle has a big plate to cover any mistakes we made. You’ll need to do the same thing for your shower head.
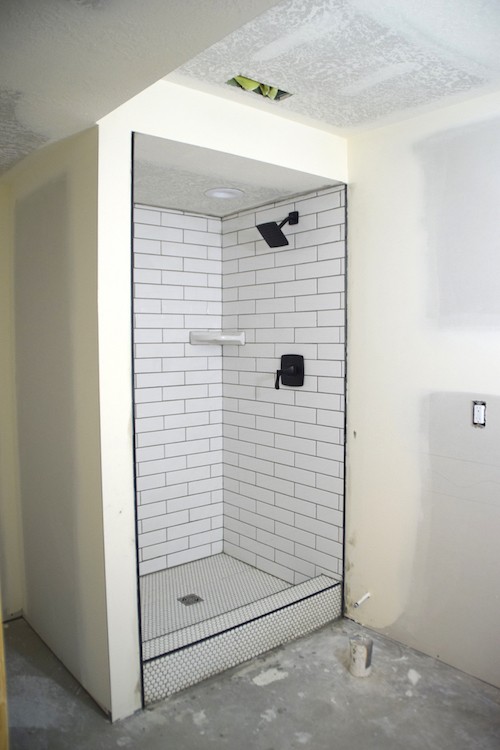
Continue tiling until you get to the height you want your shower. Since our basement ceilings aren’t very high, we knew we wanted our shower to go to the ceiling. We had to cut the last tile to fit up to the ceiling. If you aren’t tiling up to the ceiling, I suggest finishing off your edge with Schluter tile edging.
After I paint the ceiling, I will apply a layer of caulk where my ceiling meets my tile. That way, we know the seam is watertight and we don’t have to worry about water or vapor getting behind the tile at the top. You can get caulk that matches your grout, so that will help it look really nice at the top. But like I said, that will wait until after I paint the ceiling, which I didn’t do yet, because I knew I would probably get grout and thinset on it.
Step 10: Grout
Let your tile sit overnight to dry completely before you start grouting. You’ll need grout (of course), a grout float, a 5 gallon homer bucket of clean water, and a sponge. I swear by these sponges with the scrubber thing on one side. It really helps if you let the grout sit for a little too long before wiping it off. I also used premixed Fusion Pro grout in Natural Gray (#09). I decided to go with this grout because it never needs sealing, which is so nice! And I went with the premixed, because I wanted to be sure I had the right consistency.
Please note that I am an incredibly messy grouter- my whole grouting process could have gone a lot faster if I’d have stayed cleaner with my grout.

When you are grouting, you want to start with your walls first, then go to your floor. Basically you smear the grout on with your float and make sure it smooshes into your spaces between the tiles. Then you go behind and wipe the excess grout with a clean, wet sponge. You’ll want to make sure you keep your water and your sponge clean. Once you have your tile pretty clean, you can let the grout sit for a few hours and cure. Then go back with a clean, wet sponge and give it a really good wipe down. If you didn’t get the Fusion Pro grout, you will have to seal it after the grout cures completely.
Make sure you grout right up to your Schluter tile edging. You’ll want to make sure there aren’t any gaps at all. Also, the grout will stick to the Schluter tile edging, so make sure to wipe it down really well while it’s wet, or you’ll spend a lot of time scraping dried grout off later. Don’t ask me how I know that! haha!

And make sure you clean your corners out really well. Your grout will tend to pool in the corners, so use a putty knife or the corner of your float to get the excess grout out of the corners and out from under the shelves.
Step 11: Install Shower Head
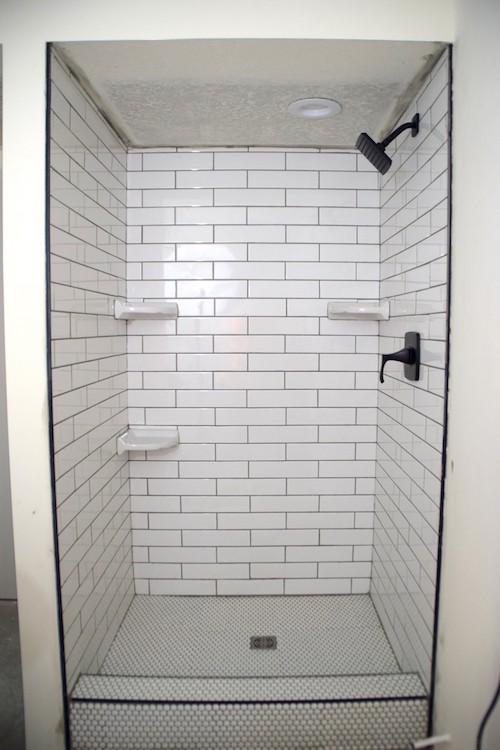
Once your tile is done, you can install your shower head and handle. I used the Pfister Venturi in Black, and it is SOOO perfect!
After you’ve installed your shower head, check for leaks in the fittings, let your grout cure for at least a day or two, and enjoy your new basement shower!
This was the first step in our basement bathroom install. Now we are ready for paint, flooring, vanity and a toilet!
Thanks for following along on this project. You can find more DIY’s like this, as well as see all of the finishing touches for this bathroom on my blog, The Creative Mom. You can also follow me on Pinterest, Instagram, Facebook, or Twitter.
The post How To Tile A Basement Shower appeared first on The Home Depot Blog.


