Follow along as Savannah of DIY and design blog Classy Clutter takes you through her backyard paver patio transformation step by step. Read more about the fun, family-friendly backyard makeover below.
How to Transform Your Backyard With Pavers
When we bought our house we knew that the backyard was going to need some major work. Installing patio pavers was at the top of our list of things to do to improve our backyard. We felt we needed our pool area to function better than it was. We needed more lounging space in the pool area. Next, our covered back patio had green outdoor carpet that needed to go. On either side of the patio there were two dirt walkways/planters and in front of the patio was a section of old pavers that were in bad shape. This update made a major difference and I wanted to share how to install patio pavers and how easy installing patio pavers can be.
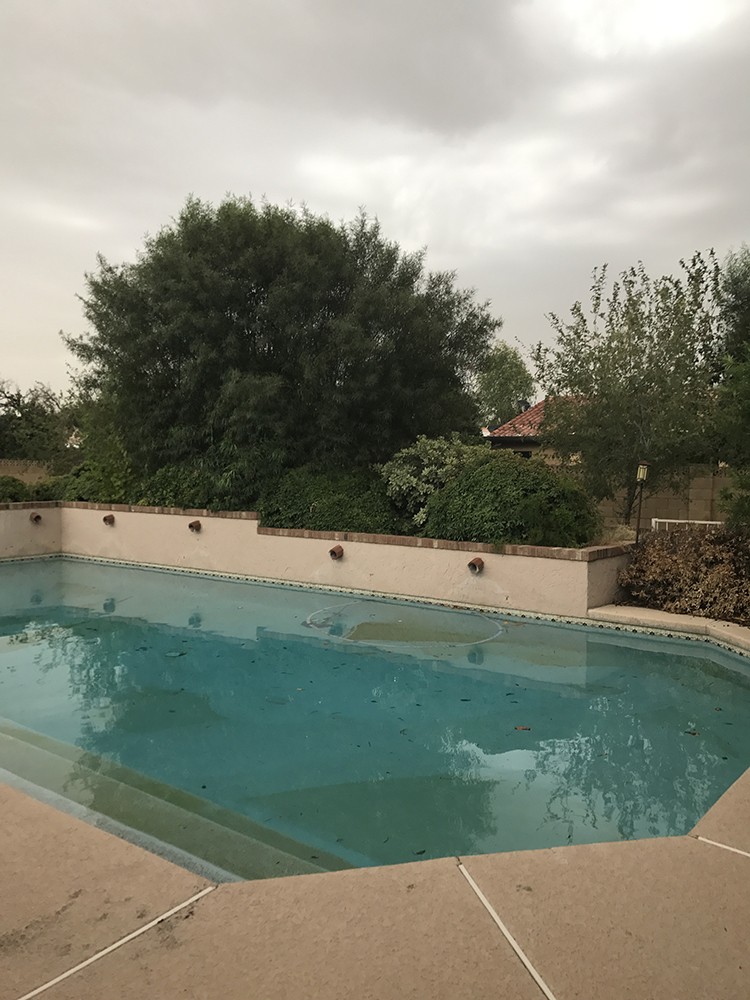
Before
Before I show you how to install patio pavers this is what our pool area looked like. It was just a big planter box with much more lounge space needed.
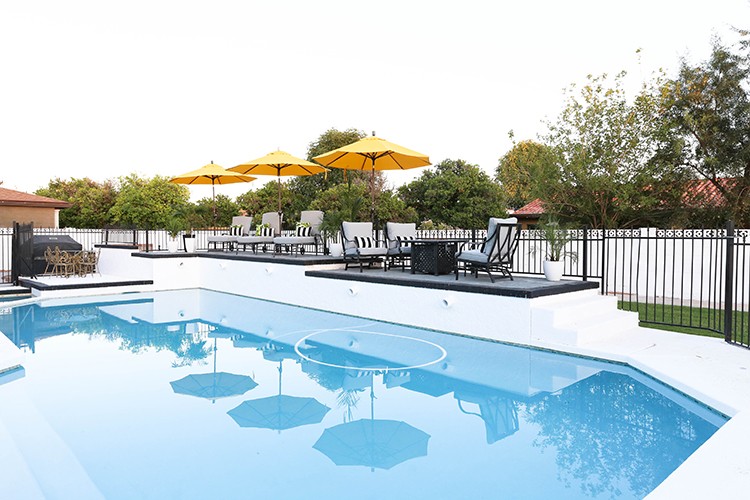
After
After we laid the patio pavers and added a few steps this is what our pool area looked like. It functions way better for our family and I love how it all came together.
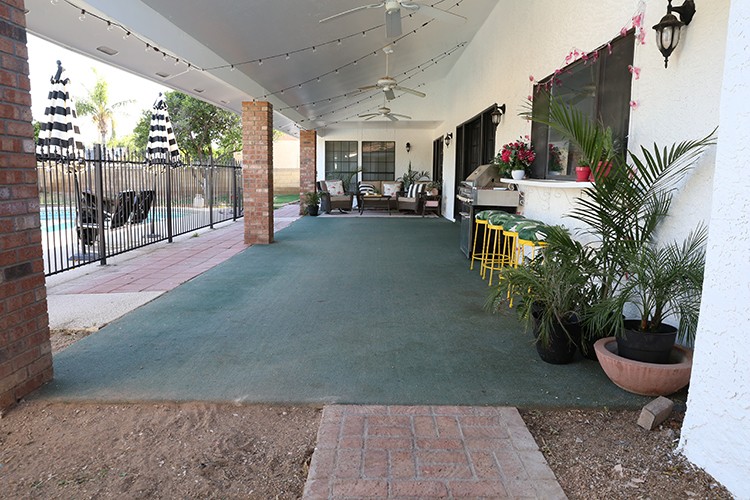
Patio Before
This is what our covered patio looked like. It was fine, but the carpet was old and coming up in so many different areas.

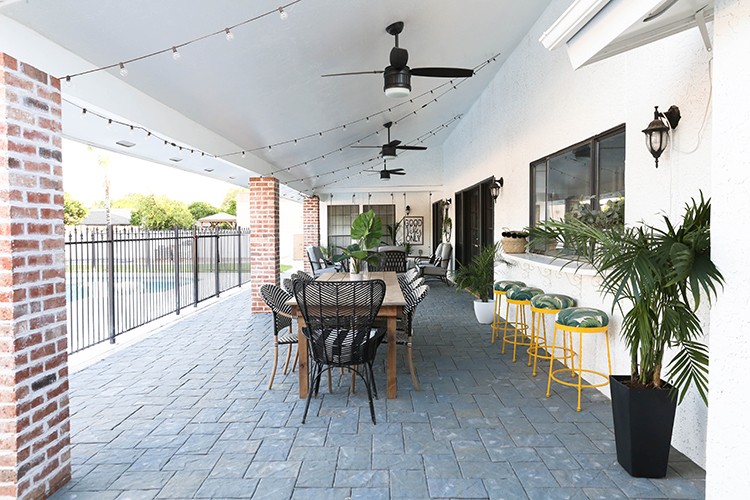
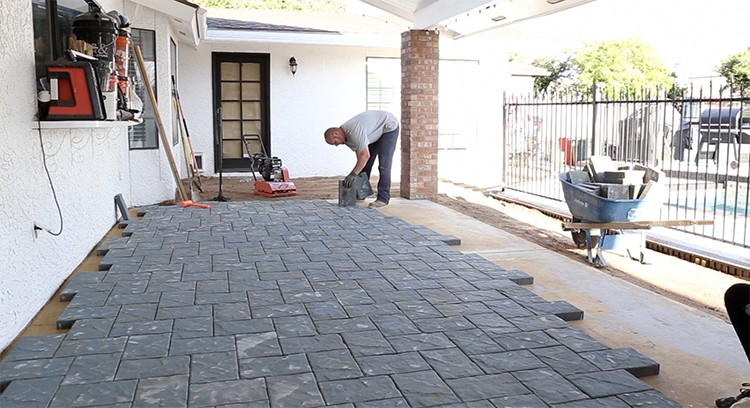
Patio After
Now our covered patio looks bigger and we’re utilizing the entire space.
How to install Patio Pavers
Now that I have shown you these amazing transformations, I want to show you exactly how you can do your own patio pavers.
Tools and Material:
- Shovel
- Wheelbarrow
- Level
- Marker or pencil
- Tape measure
- 4 pound dead blow hammer
- Rafter Square
- Landscape rake
- 2×4
- Plate compactor ( you can Buy or Rent )
- Paver saw ( you can Buy or Rent )
- Pavestone Paver Base
- Paver sand
- Paverstone Taverna 12×8 Pavers
- Broom
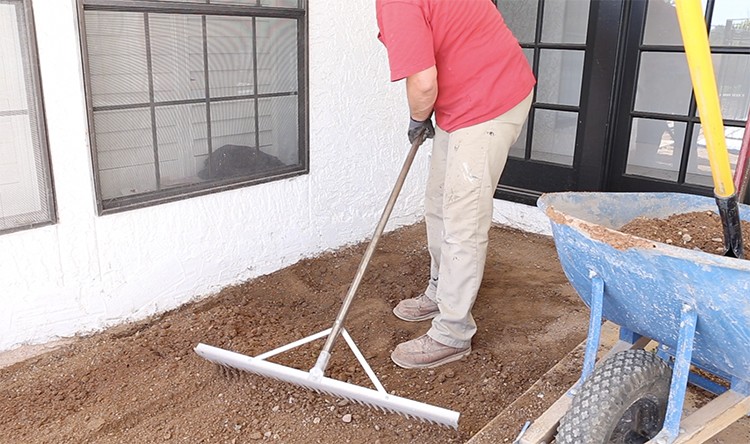
Step 1: Clear area
We used shovels and rakes to clear the areas where the pavers would be. We also had a few areas that were low and needed fill dirt to bring the grade up to the level that we wanted. On our covered patio, we laid the pavers directly on top of the concrete slab that was already in place after removing the outdoor carpet.
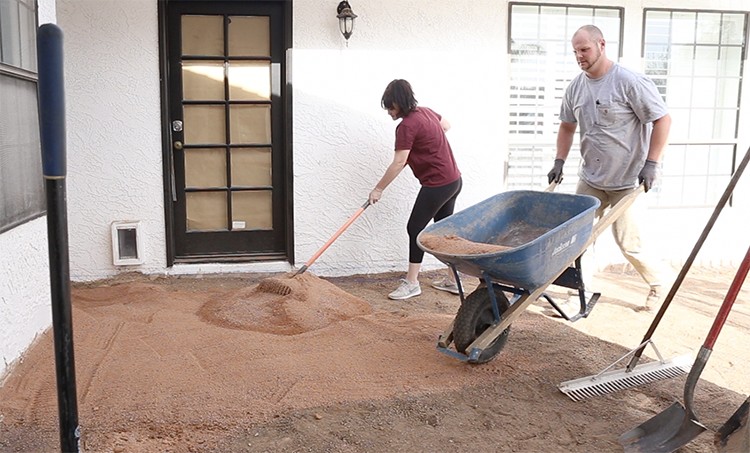
Step 2: Spread Paver base
We used a wheel barrow to move around the paver base to meet the height where we wanted to install the pavers. We then used flat shovels and rakes to spread the paver base at roughly the height and grade we wanted.
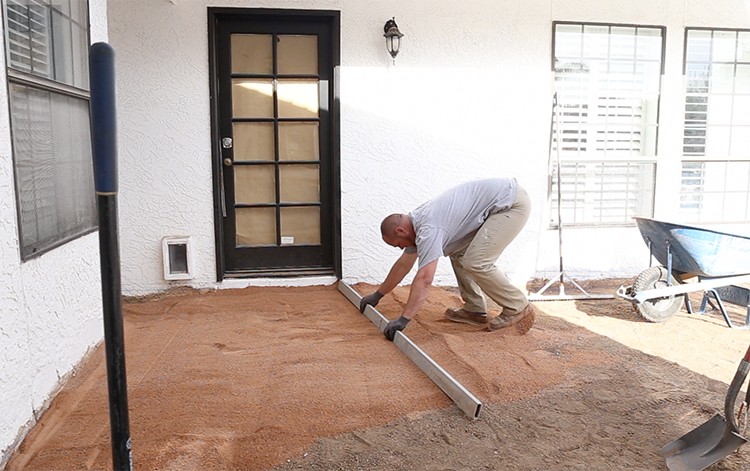
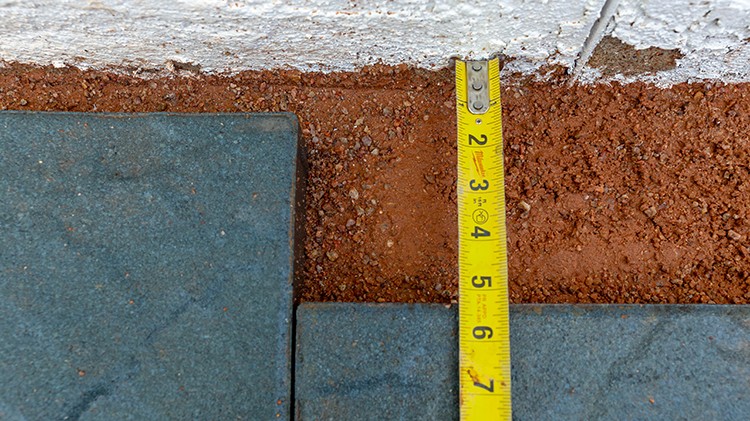
Step 3: Screed sand and level
To screed and level the paver base, use a 2×4 or screed rail (like the one shown in the picture above) to spread the paver base, making sure the paver base is sloping away from the house.
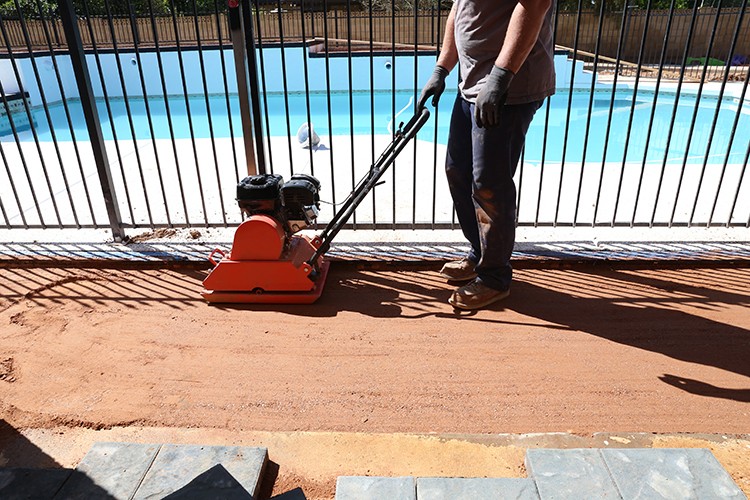
Step 4: Compact the base
Once the paver base is in place at roughly the desired grade and height, use a vibratory plate compactor to compact the base so that it becomes firm. You can either buy or rent a plate compactor. We would very lightly spray the paver base with water before running it over with the plate compactor to aid in the compaction. After several passes with the plate compactor, we would add more paver base as needed, screed the paver base again, spray lightly with water, run the plate compactor, and repeat as needed. The goal is to make sure the paver base is solid, slopes away from the house, and is at the desired height.
Step 5: Lay pavers
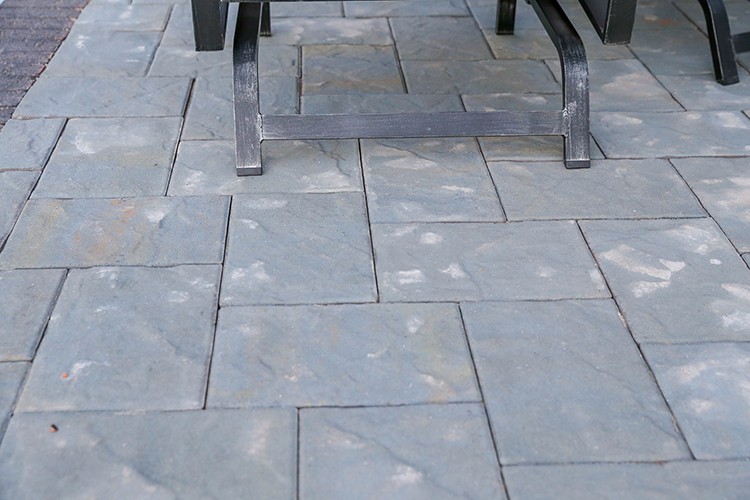
On our backyard patio we choose to do a Herringbone type pattern. We found different paver patterns on the Pavestone website. We first laid the whole pavers pieces. Our starting point was near the patio door. We laid the pavers slowly at first, making sure all the joints were tight and running square to the area we were covering. Using the straight edge of a level can assist in making sure that repeating paver lines are running straight and true. After all of the whole pavers were laid, we measured and cut the rest of the pavers.
First, we measured the space.

Then we marked the paver.
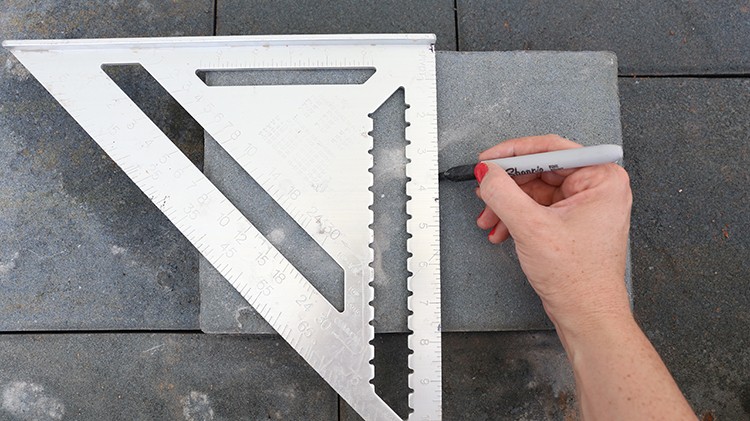
Then, using a rafter square we drew a nice straight line.
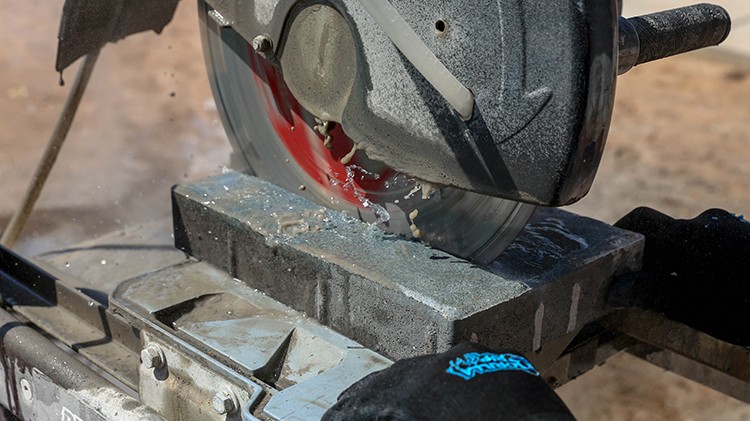
Once the paver is measured and marked, the cuts were easy and effortless using a paver saw we rented from The Home Depot.

Using a dead blow hammer, we tapped the paver into place. Repeat for each cut that needs to be made, paying attention to the orientation of each cut as it relates to the chosen pattern.
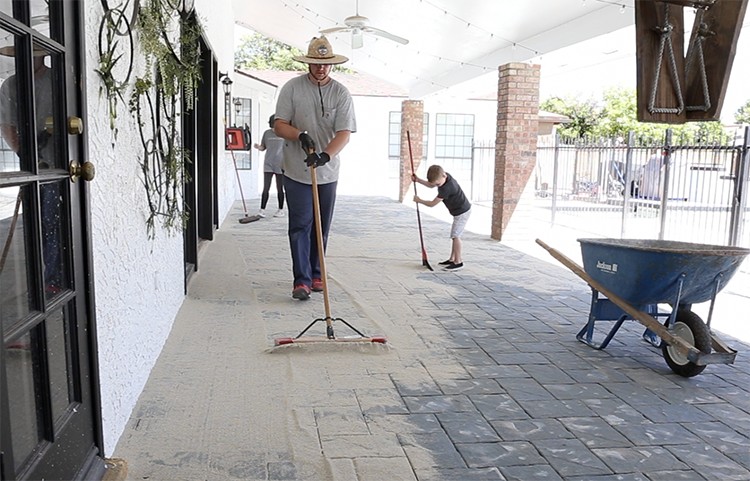
Step 6: Fill Joints with Paver Sand
We used paver sand to lock the pavers into place. This step fills the joints of the pavers with sand and gives them a solid and secure feel. We placed the sand on top of the pavers and used a broom to brush sand into the joints.
Step 7: Enjoy!
After completing the pavers, we updated each space with new furniture and decor purchased at The Home Depot.
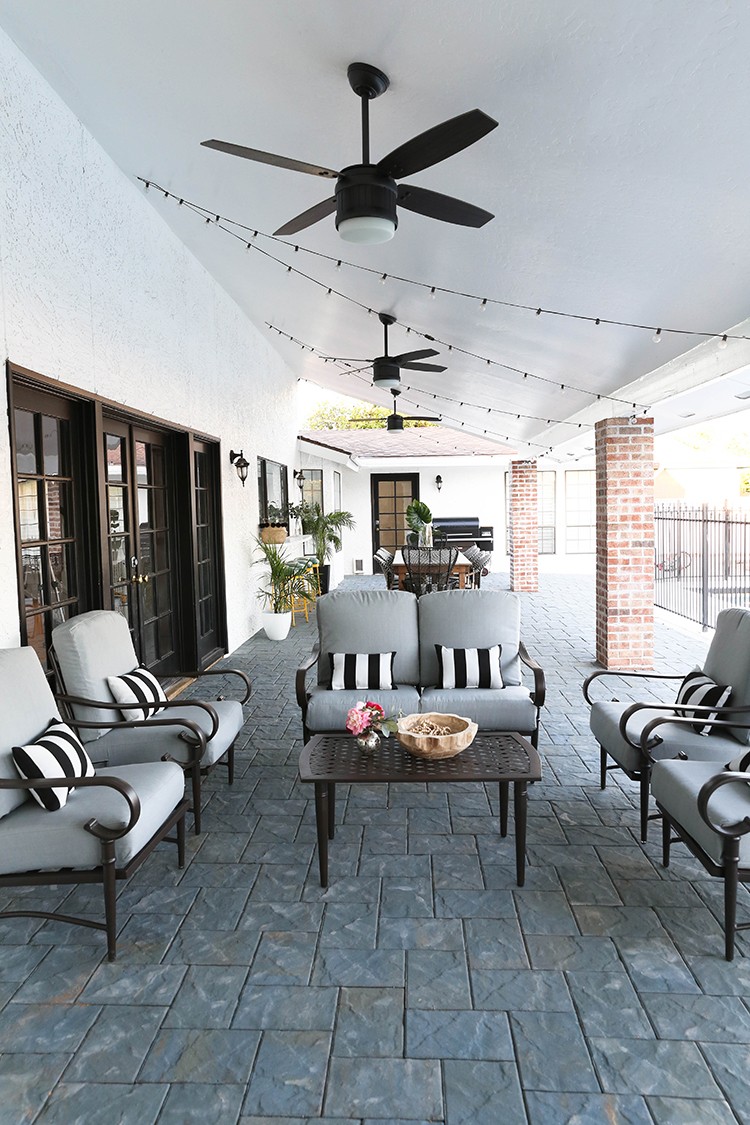

For the covered patio furniture I went with this beautiful Oak Cliff 4-Piece Metal Outdoor Deep Seating Set that comes with a table, a loveseat, and a set of chairs. We added an extra set of chairs to really maximize the seating area. I chose the gray cushion covers because I feel like they complemented the pavers and this space nicely.
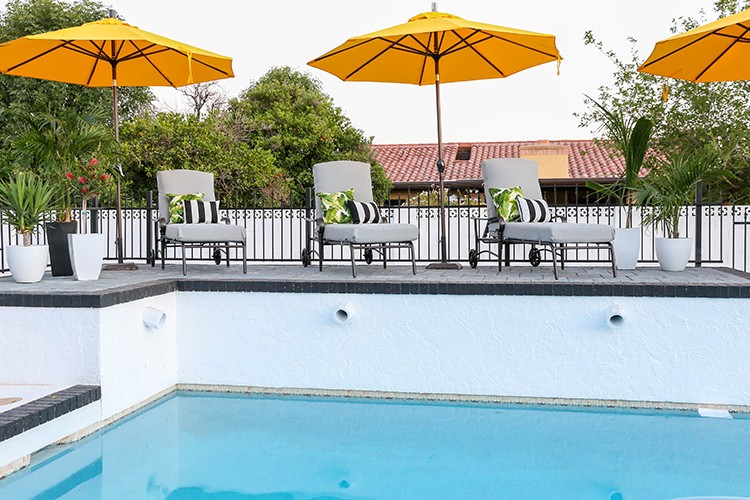
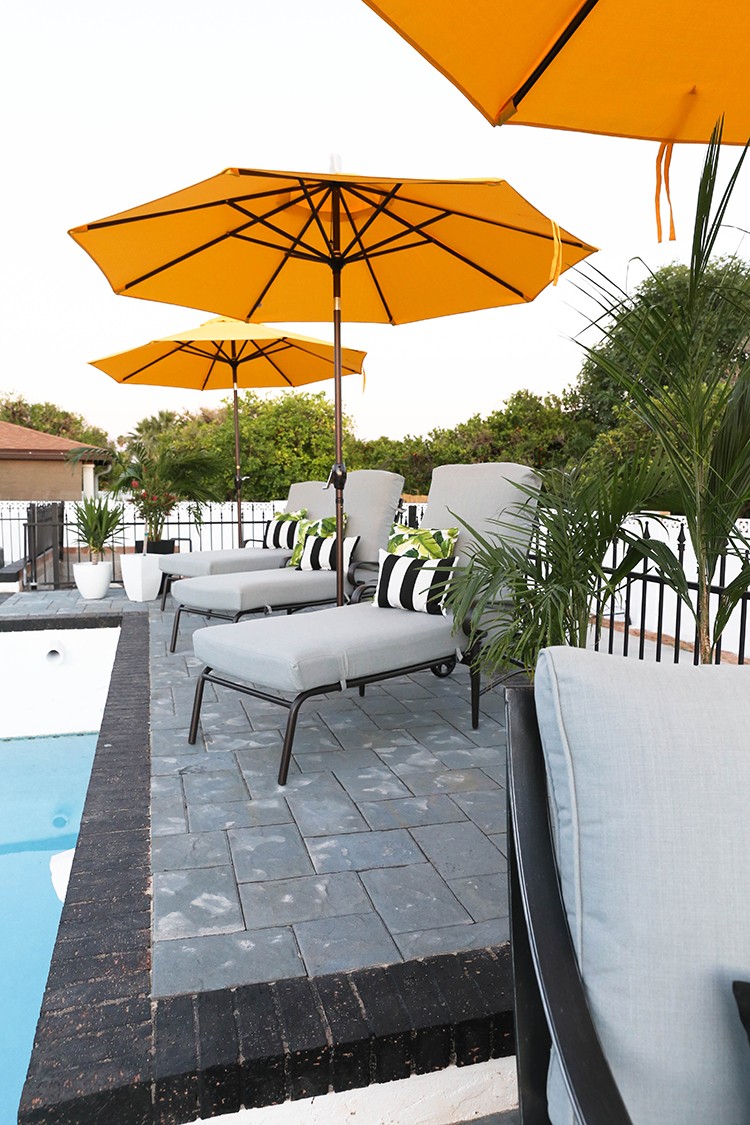
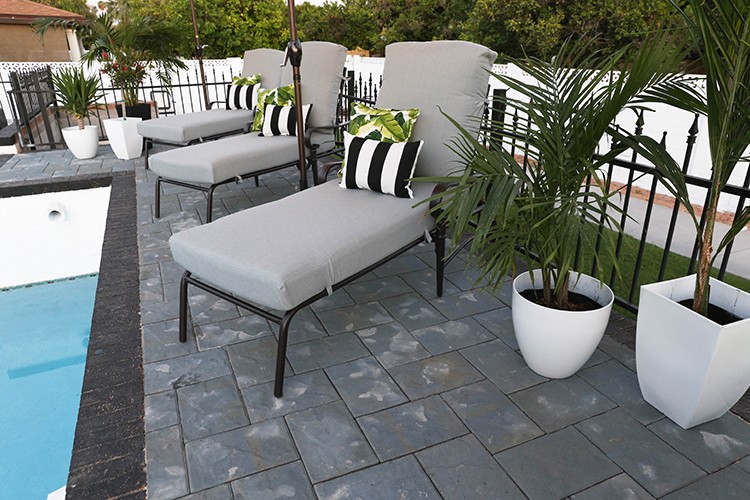
I got these amazing Oak Cliff Metal Outdoor Chaise Lounge chairs with gray cushion covers, and these bright yellow Push Tilt Patio Umbrellas to dress up the space on the upper deck.
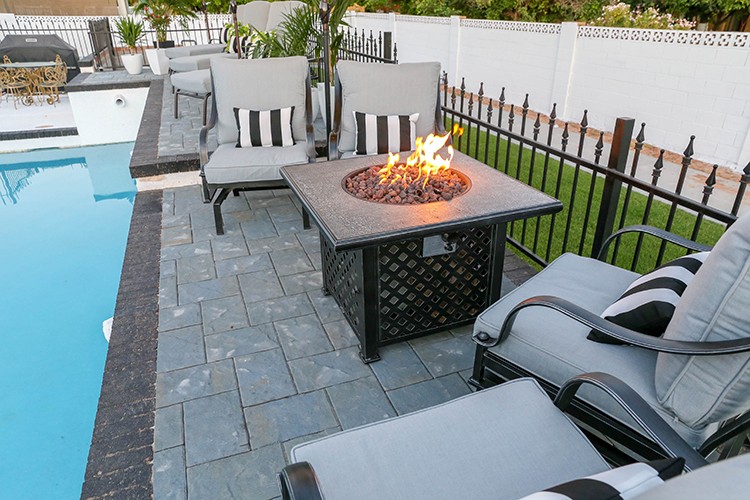
On the bottom deck, I chose the Highland Point Fire Pit Conversation Set with Gray Cushions both for chilly nights and for some much needed extra seating when we’re hanging out by the pool.
I have loved how the new patio pavers look and I could not be more happy with how backyard turned out. It was a lot of work, but totally worth it.

Transform your own backyard by installing pavers with the help of The Home Depot. Find all the materials you need to create a paver patio at The Home Depot.
The post How to Transform Your Backyard with Pavers appeared first on The Home Depot Blog.
