Replacing your shower head is a quick and easy bathroom update that can make a big impact. Follow along as Ashley Basnight of Handmade Haven walks you through the installation, and her favorite features from the new Moen Magnetix line.
Upgrading a Shower Head with MOEN Magnetix
One of the quickest ways to update your bathroom is to change out your shower head. I know that this can seem like an intimidating project, but I am going to walk you through how I changed mine out in three easy steps.

I’ve always wanted a detachable shower head in my master bath, therefore I was really excited to install this MOEN Magnetix. Check out how easy it is to install – I think you’ll be pleasantly surprised!

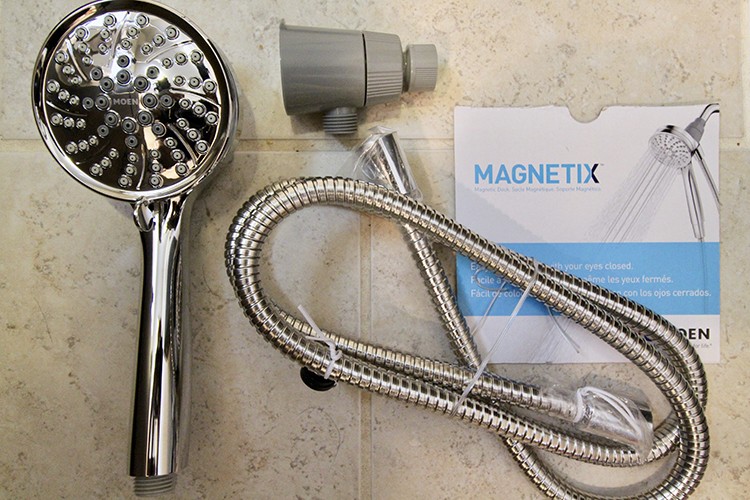
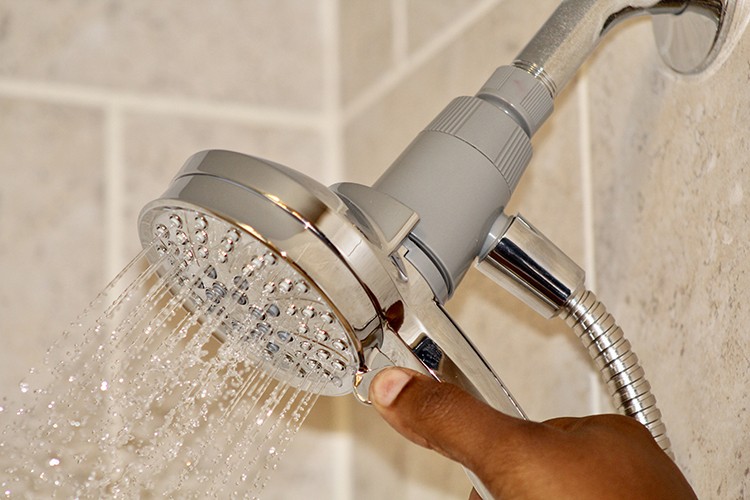
The box came packed with the MOEN Magnetix shower head, magnetic bracket and 60’’ hose.
Installing the Shower Head
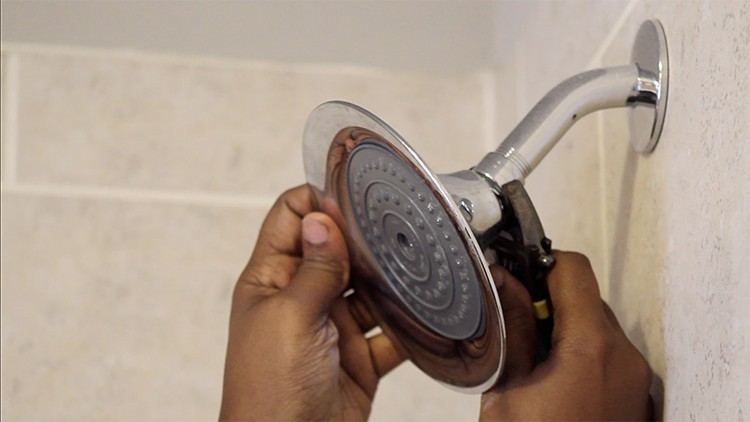
For starters, I removed my old shower head. Although I already had a pretty nice one, the MOEN Magnetix was definitely a step up. I used some channel locks to loosen up the old one a bit and then twisted it right off.
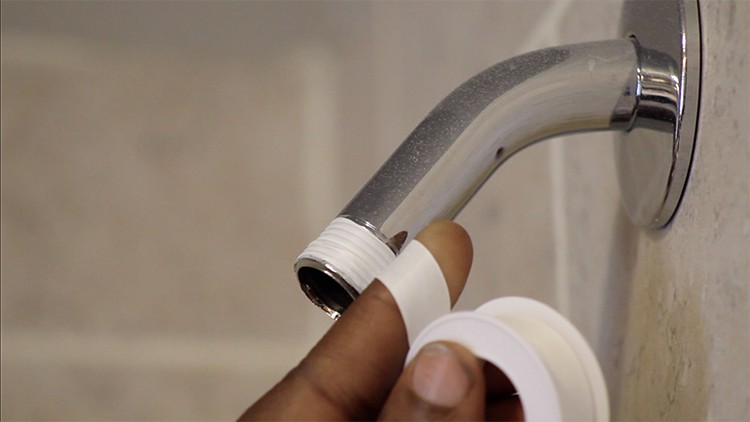
Once the old shower head was removed, I added some more seal tape around the piping to ensure the pipe would be completely sealed when I added on the new one. One word of advice here is to make sure you only place the seal tape on the part of the pipe that will be covered by the shower head, otherwise you will have seal tape showing through.
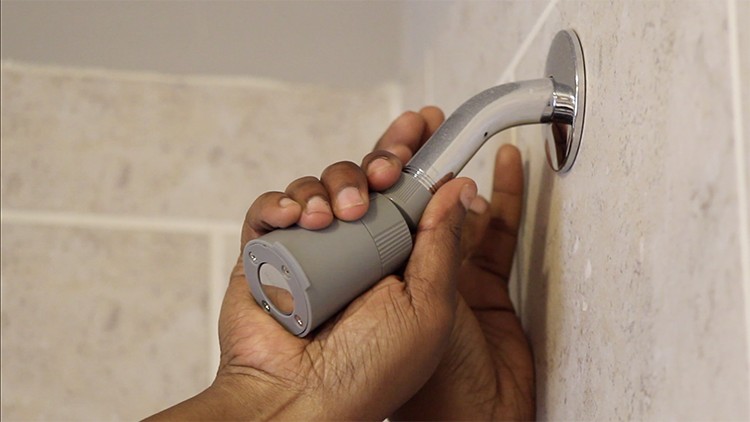
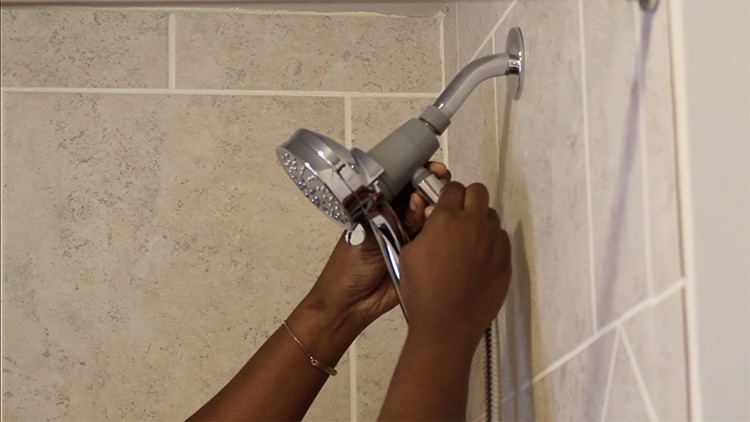
Once the seal tape was in place, I added the MOEN Magnetix bracket on to the pipe. This bracket comes with a small black spacer that I put on the pipe as well. Next, I easily hand-twisted it on and made sure it was tight.
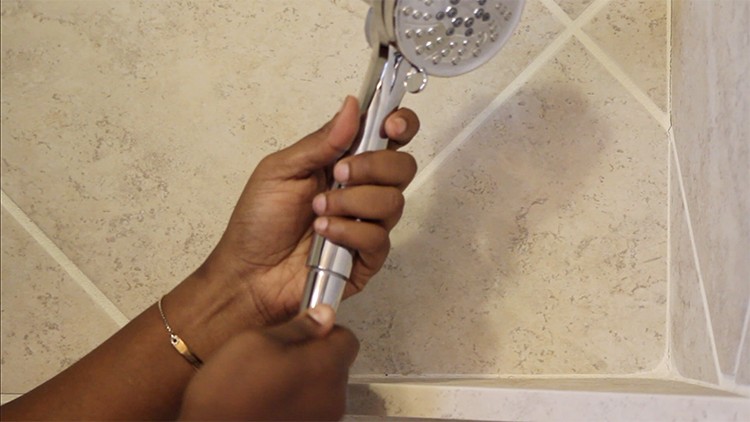
With the MOEN Magnetix bracket in place, I assembled the 60’’ metal hose. First I attached one end of the hose to the shower head, then attached the other end of the hose to the magnetic bracket and voila! I was done! Easy as 1, 2, 3.

Favorite Features
There are several reasons why I really love this Moen six-spray shower head; however, here are my favorite features:
1. Installs on Existing Shower Arm
This was the reason for such an easy installation as the Moen Magnetix fits all standard shower arms, making it possible for anyone to be able to change theirs out.
2. The Magnetic Dock
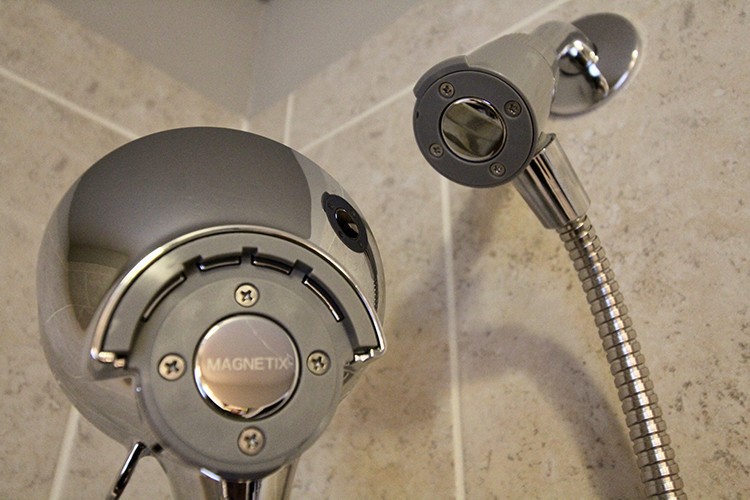
The magnetic dock allows for easy release and snaps the shower head securely in place. I really love the ease of being able to take the shower head off and putting it back on easily.
3. Includes a 60” Hose
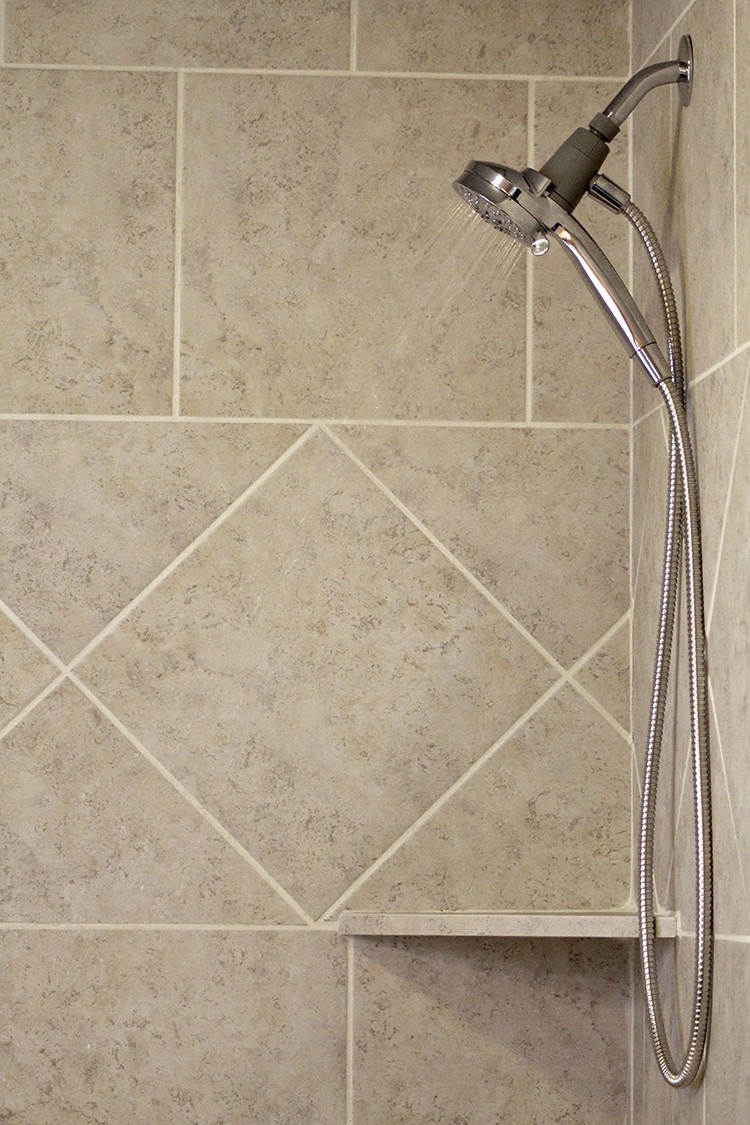
Another great feature is that the hose is long and kink-free. It extends my reach and flexibility and will really be helpful when doing activities like washing my hair.
4. Contains Six Settings
Now, this feature definitely sold me. The Moen Magnetix features a dial that switches between six settings. The six settings are:
- Massage
- Wide coverage
- Relaxing massage
- Rinse
- Downpour
- Soothing massage
Downpour is hands-down my favorite setting as it provides a concentrated water coverage.
With the easy three-step installation, I was able to get my shower head switched out in less than 30 minutes, and now I have a shower I can really enjoy.
For the full tutorial on how I installed this Moen six-spray shower head, check out my full installation video here!
Update pain points around your home with the help of Home Depot. Find more products from the Moen Magnetix line here.
The post MOEN Magnetix Shower Head Upgrade appeared first on The Home Depot Blog.

