Brad Rodriguez of Fix This Build That enlists the help of Delta and their UPstile Wall System to transform his small bathroom space. Read below to get his step by step guide on how to revamp your bathroom like a Pro.
Renovating a Small Bathroom with the Delta UPstile Wall System
Our house was built 13 years ago and the original owners definitely went with the contractor basic package for this small bathroom. It’s 6’ x 5’ excluding the bathtub and has two doors init to boot, so not a lot of usable space. And it had Bland flooring, a sheet mirror with basic lights, and a shower that was just kind of…a basic shower. We wanted a complete overhaul of this space and using the Delta UPstile Wall System for a custom tiled shower without all the tiling was the perfect cornerstone. Let me show you how we did it!
Products Used:
- Delta UPstile Wall System
- Delta Classic 400 Bathtub
- Delta Everly Shower Set
- Delta Everly Sink Faucet
- Delta Everly Bath Accessories
- Delta 36” x 28” Mirror
- Delta Foundations Toilet
- Home Decorators Collection Sonoma Vanity
- Greecian White Hexagon Mosaic Tiles
- Carrara 12” x 24” Porcelain Floor Tiles
- Hartley Brushed Nickel Vanity Light


Step 1. Demo and Tub Removal
Here’s what we started with in this bathroom. Like I said, it was really contractor basic. So the first thing we did was tear everything out!

The old fixtures come out pretty fast since most of it is just unbolted or screwed then removed, but the bathtub was a different story. I had to use a reciprocating saw to cut through the fiberglass to get the tub out. It was quite a bit of work, but it finally came out in pieces. And the floor came up pretty easily with a big pry bar.

Step 2. New Tub Install
With a clean slate it was time to start installing the new system. The Delta Classic 400 tub is the base for the UPstile system. I did have to move the plumbing connections to fit the new tub and I’d highly recommend using a licensed plumber for that. The tub has direct to stud installation so I predrilled holes in the flanges and secured the tub into the alcove. Then I hooked up the connections for the drain and the overflow


Step 3. Dry Fit & Put Hole in Shower Walls
Next up I did my first dry fit of the UPstile wall system. I put the back and left wall in place to check for fitment. The right wall needs cut outs for the plumbing so I took measurements and made cut outs for the spout and the mixer valve.

Step 4. Put Up Bracing
The UPstile Wall System is supported by furring strips on the wall. I had to add framing supports in the corners to support the strips properly. The furring strips are installed at designated heights along the wall. I used a 2×4 scrap to get consistent spacing and hold up the strips as I installed them.

Step 5. Install Shower Walls
After test fitting the walls and making sure everything fit well I moved on install. The wall kit comes with double stick tape to help hold the wall to the furring strips while the adhesive sealant sets. I used a generous amount of adhesive on each furring strip then brought the walls in one by one and secured them to the studs with panhead screws.

The walls were all pushed firmly into the double stick tape and the caulking. Then to help the wall setup properly I wedged some 2x4s against the tub to hold the bottom tight and left it all to set up for 24 hours.

Step 6. Install Accent Tile
The cool thing about the UPstile Wall System is the channel it has in the surround where you can install your own custom accent tiles. It lets you get a custom tiles shower look without all the work and expense of a full tile job. We went with a hexagon mosaic tile for our accent and I got them to size on my wet saw.
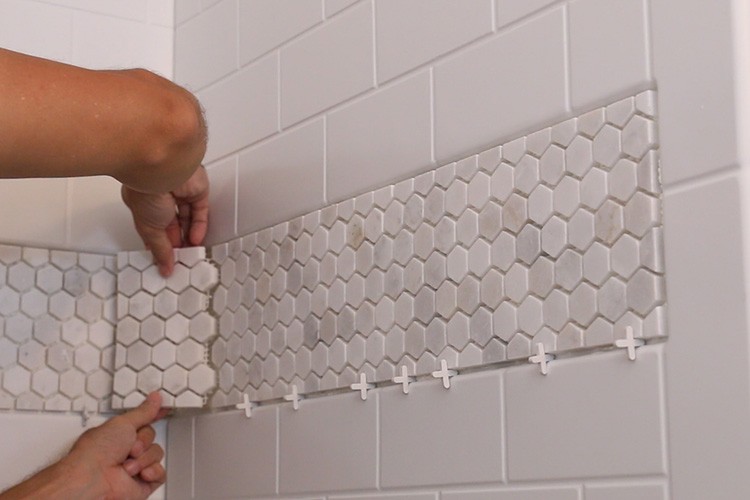
Installing the tile is a little different as you use adhesive sealant that will work on the acrylic vs. a traditional mortar. I used a v-notch trowel to spread the adhesive along the accent strip, filling in the channel for the screws from install. Then I pressed in the tiles and spaced them off the bottom with small spacers. There was definitely a little finagling to due to get the gaps right between the strips, but I smoothed it out the best I could and let the it sit for 24 hours to cure.

Step 7. Grout Tile Accent
The tiles can be grouted with a regular grout just like any other tile after the adhesive is set. Before I started I masked off the wall surround using painter’s tape and clear plastic to keep the grout from scratching the acrylic tiles. I pushed the grout into all the open gaps then rinsed off the excess with a sponge.
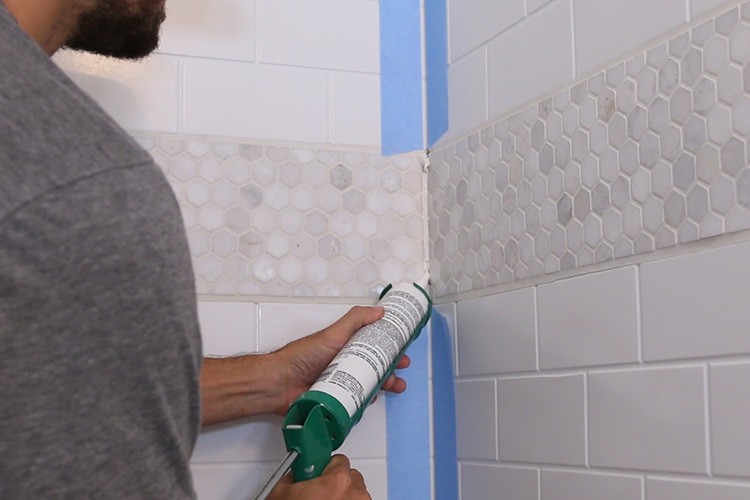
After 4 hours I came back and wiped off any grout haze that was left over. I let the grout cure for 24 hours then caulked all the seams on the shower to keep it water tight.


Step 8. Shower Fixture Install
To finish up the shower surround install I put in some nice Delta Everly fixtures. We love the look of this design with the subtle curves and that fun little twist on the tub spout. And the shower head is a really nice one with lots of spraying options and a great look.

Step 9. Rest of Bathroom Changes
With the shower buttoned up I repaired the drywall around the surround and we gave the whole room a nice coat of gray paint. We continued on by installing some nice Carrara 12” x 24” Porcelain Floor Tiles then putting in a Delta Foundations Toilet.

Then we finished up with a Home Decorators Collection Sonoma Vanity with a Delta Everly Sink Faucet, a Delta 36” x 28” Mirror, and a Hartley Brushed Nickel Vanity Light.


Step 10. The Reveal
We took this bathroom from contractor basic to sophisticated modern with a little determination and a lot of sweat. And everyone thinks the shower is all tile until I let them in on the secret.
The post Renovating a Small Bathroom with the Delta UPstile Wall System appeared first on The Home Depot Blog.
