Jaime Costiglio, of Jaime Costiglio, got creative with her latest DIY project. Instead of using floral centerpieces, Jaime created beautiful wooden lanterns for her friend’s wedding reception. This simple project added a lot of character.
Read on to see the step-by-step instructions!
Simple DIY Wooden Lanterns
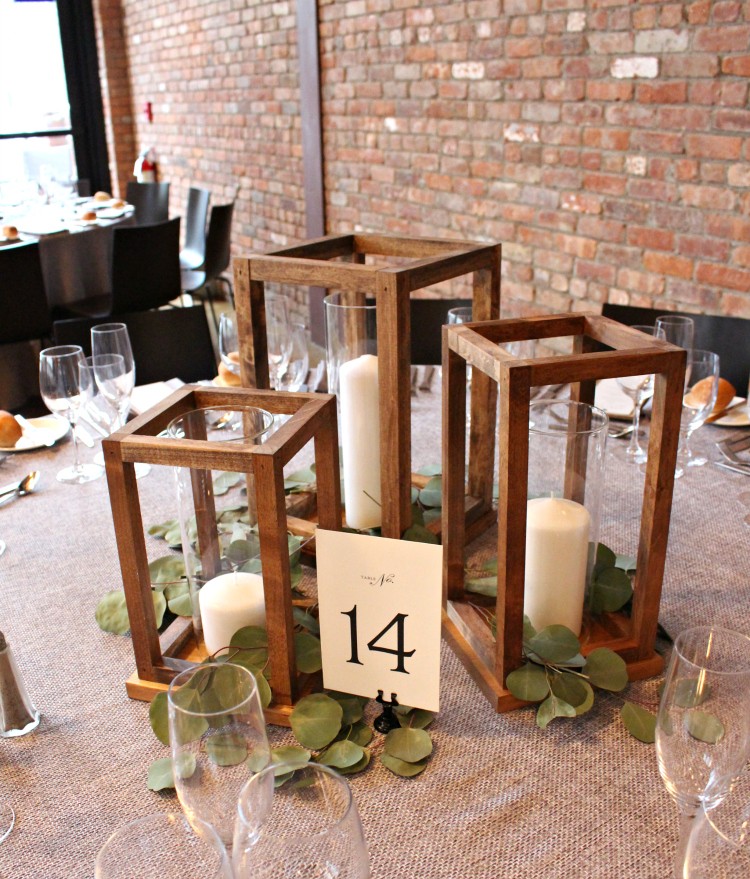
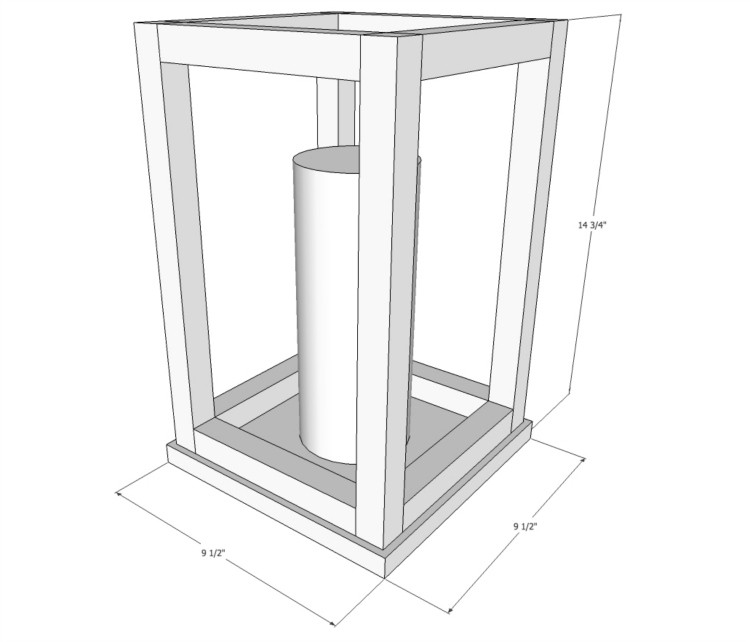
A beautiful alternative to floral centerpieces these large wood lanterns make a big statement without being overly fussy. Finish the wood as you like to match your décor – stained, painted or natural – they add an understated architectural element to the overall aesthetic. This is a very simple DIY project that requires minimal experience and tools so if you’re wanting to make your own centerpieces or add décor for your next event this is one project to consider.
I created these lanterns for a friend’s wedding reception. She never wanted florals and was hoping for an alternative that would demand the same focus a giant flower centerpiece and serve as a reflection of her and the groom.
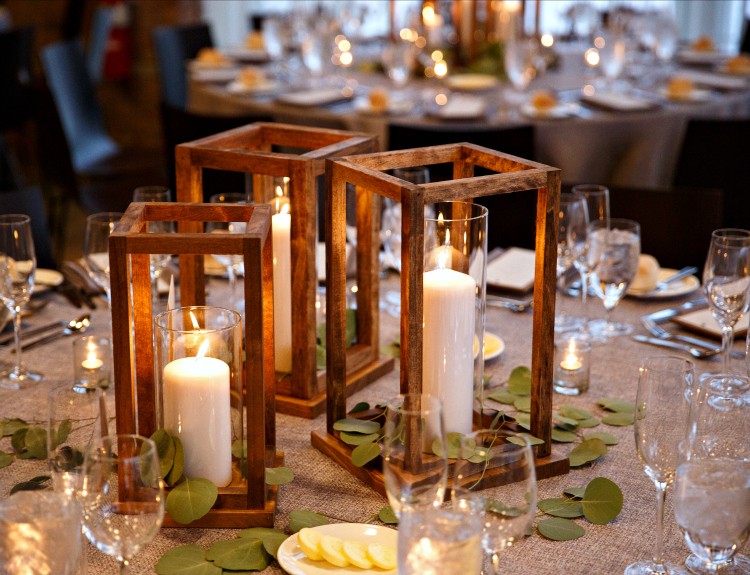
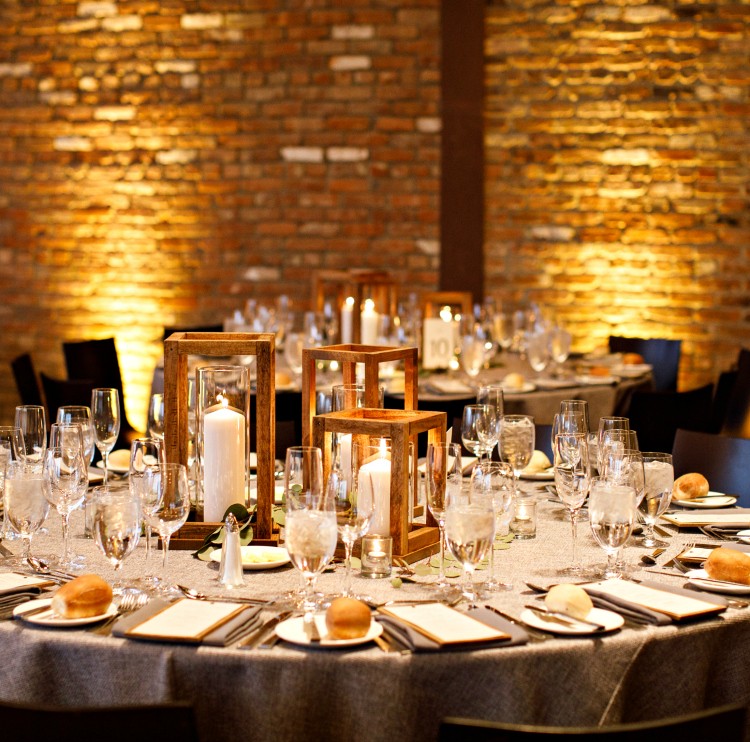
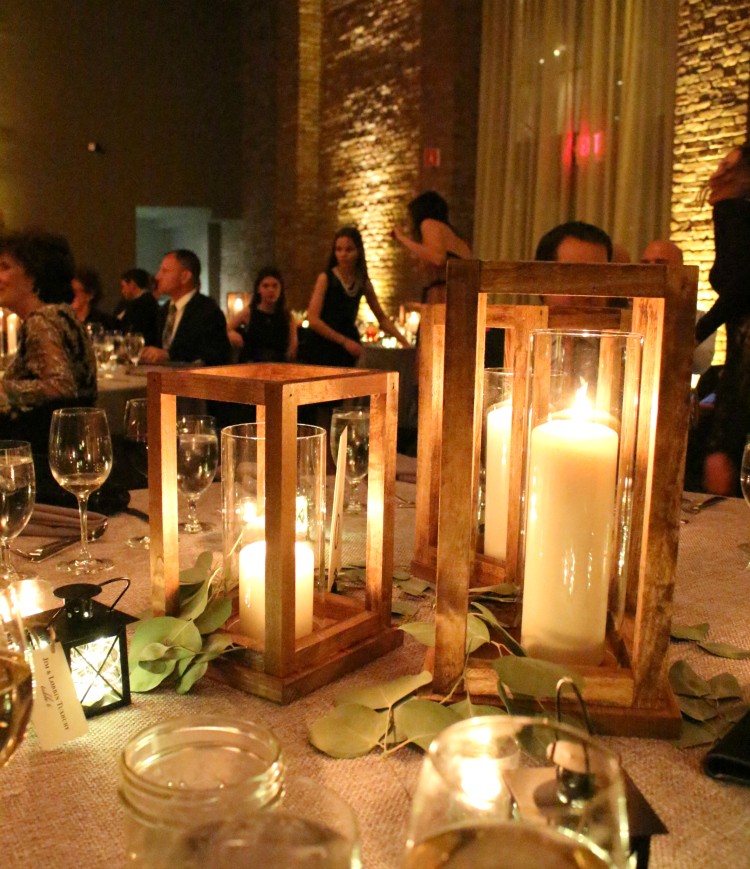
Success! The warm wood tones against the brick walls, glassware and candlelight glow makes this lantern centerpiece idea a winner. I asked the florist to insert a bit of greenery at the base of the lanterns and she added the eucalyptus leaves. The organic leaves soften the sharp lantern shape and provide a grounded space.
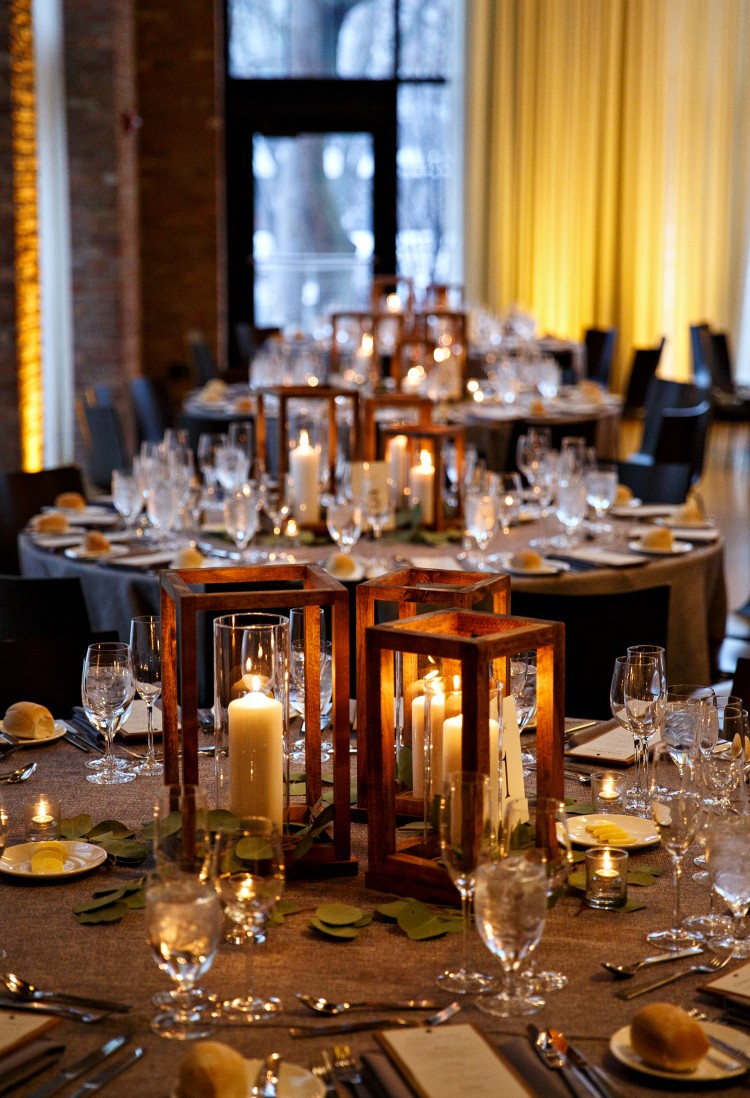
I’m loving the reflection of light from the candles and lanterns mixed with humanity. As a guest at the wedding myself I can tell you the lantern centerpieces were very well received. So much so that multiple guests were spotted taking the lanterns with them to reuse in their homes!

I also think once you add an element in multitude (I made 48 lanterns for this wedding) something magical happens. It creates a feeling and guests see the repetitive nature of the lanterns on each table marking your event as special.
Below you will find the step by step instructions to create these lantern centerpieces. Please read through the steps entirely before beginning and always follow all safety precautions when using power tools.
Materials:
Tools:
- Miter saw
- Measuring tape
- Pencil
- Drill & drill bits
- Nail gun
- 2 in. finish nails
- Wood glue
- 1 ¼ in. wood screws
- Sander
Cut list for one planter:
Square Dowels
- (4) 1 in. square dowels @ 14 in. (sides)
- (8) 1 in. square dowels @ 7 in. (cross supports)
1 x 10 boards
- (1) 1 x 10 @ 9 ½ in. (base)
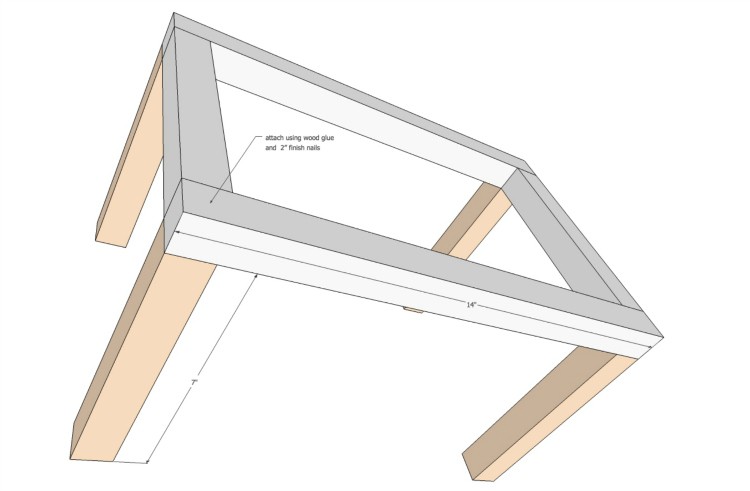
Step 1: Make Side Panels

Attach 2 cross supports to 2 sides. Use wood glue and 2 in. finish nails. Make 2 panels.
Step 2: Attach Cross Supports
Attach 4 cross supports to one side panel using wood glue and 2 in. finish nails.
Step 3: Attach Final Side Panel
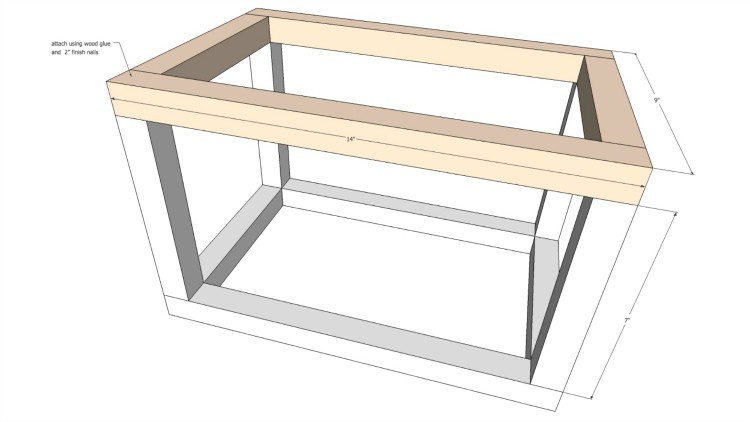
Attach the other side panel to complete the box shape. Use wood glue and 2 in. finish nails.
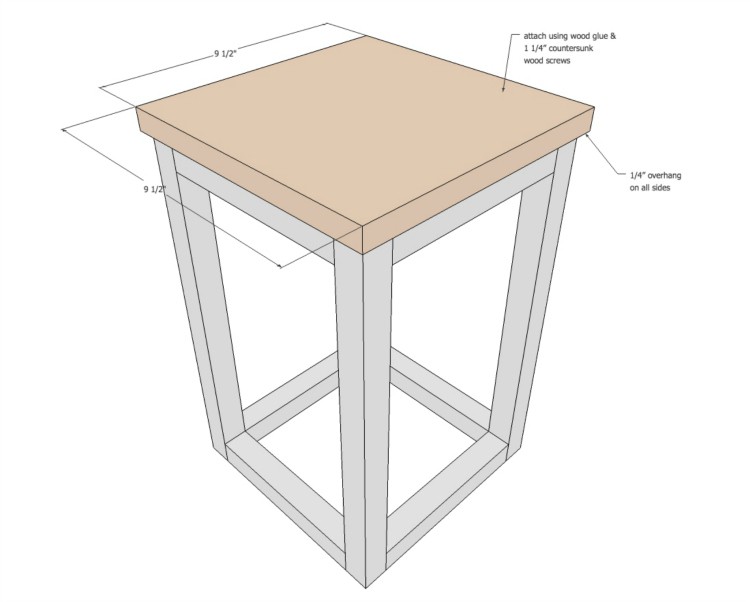
Step 4: Attache The Base
Final Reveal
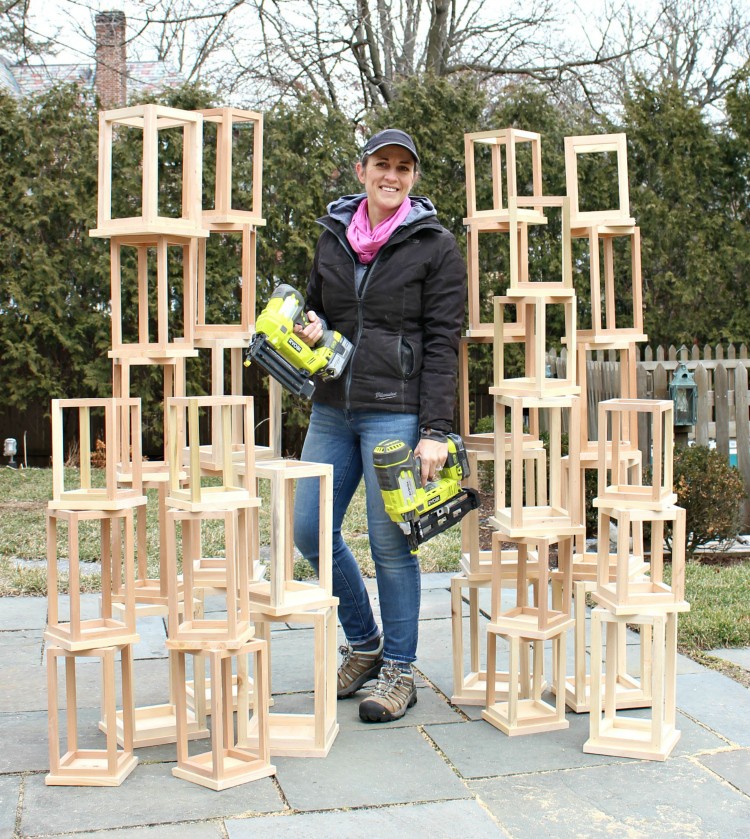
Here I am after constructing a batch. You can see I used both 1 in. square dowels and ¾ in. dowels. Varying the thickness and heights of the lanterns creates slight visual interest and disrupts the expected ‘all the same’ size.
Check with your reception site regarding candle requirements. We used clear glass hurricanes and 3 in. pillar candles, again varying the heights. Truly a very doable DIY project if you plan ahead and prepare you can definitely pull this off for your next event.
*Photo credit: Matt Gillis
The post Simple DIY Wooden Lanterns appeared first on The Home Depot Blog.

