Adding another entertaining area to your backyard can be an easy DIY project. Follow along as Morgan McBride of Charleston Crafted walks through a few simple steps to create this paver bench and fire pit set up!
Creating a Backyard Entertaining Area with Paver Kits
Our backyard is coming together. The second phase after completing our patio makeover was to add a hardscaped fire pit area off of the end. We decided that we wanted a round fire pit with L-shaped benches for seating. We were able to put together this entire beautiful setup very quickly thanks to the Pavestone Rumblestone kits available at The Home Depot.
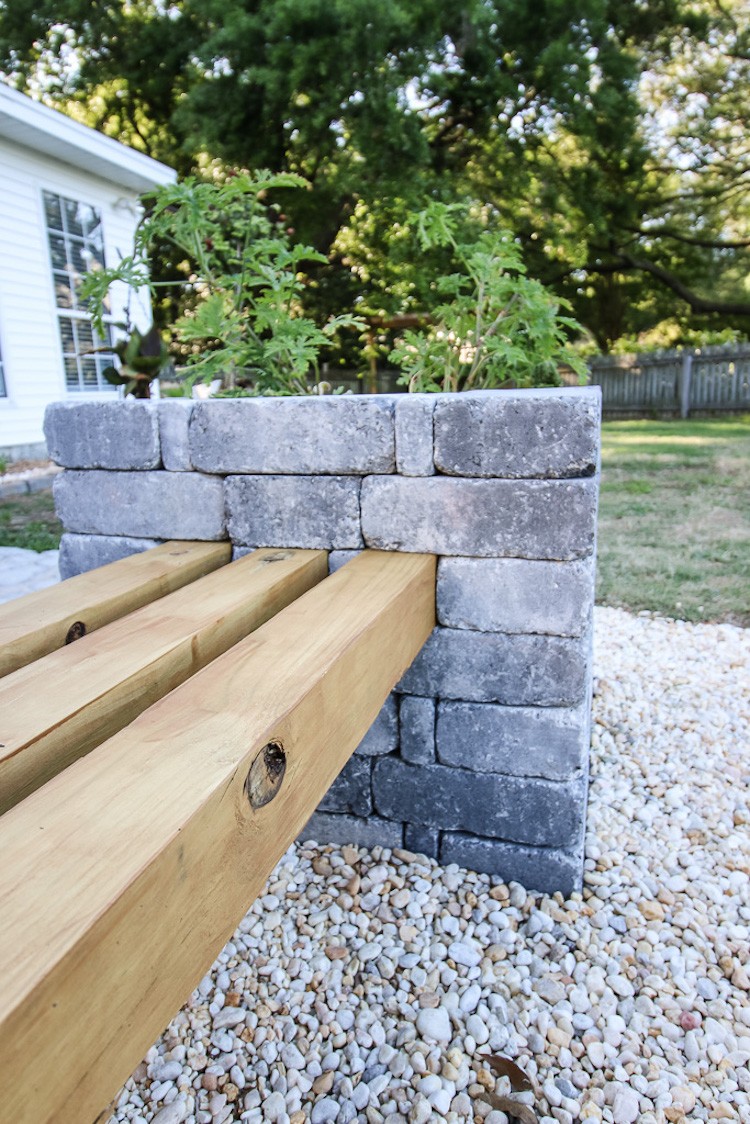
The Benches
I wanted low profile L-shaped benches so we could sit around our fire pit but not block our view of the lake, and found the perfect fit with the RumbleStone 114 in. x 24.5 in. x 17.5 in. Concrete Garden Bench/Planter Kit in Greystone. This kit may look complicated, but it was really simple to build. There are three different sizes of pavers, all of which come in the kit. In fact, everything that you need comes in the kit except for construction adhesive (we used six tubes for this project) and the boards for the seats. You will need six 4’x4′ boards, cut to the desired length of your benches.
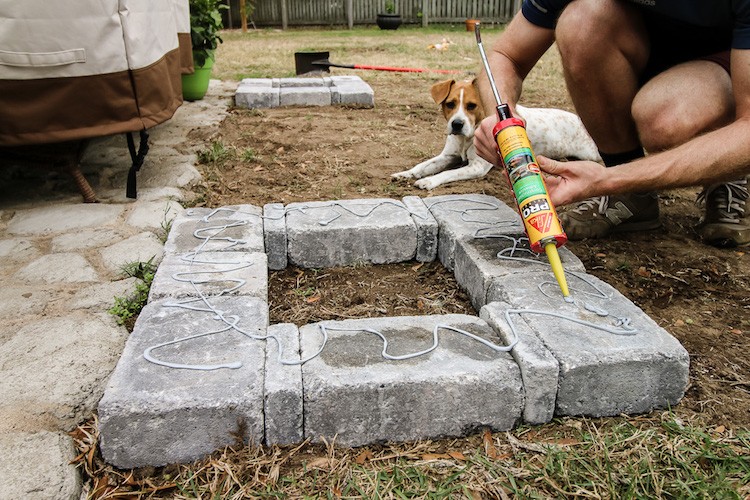
Start by laying your base layer. We suggest that you lay out all three of the pillars of the benches at once. We did the first layer of each pillar before moving on to the next layer. This made it easy to make sure everything was level, spaced out appropriately and lining up nicely. Follow the pattern in the image above. Be really picky with this layer – use your longest level and straight edges to be sure that everything is lined up nicely. If the bottom layer is crooked, everything will be off!
Once you are satisfied with the bottom layers, add construction adhesive and then the second layer of pavers. Be sure to rotate the pattern 1/4 turn so that none of the seams line up.
Repeat this until you have four layers of pavers on each of the three pillars.
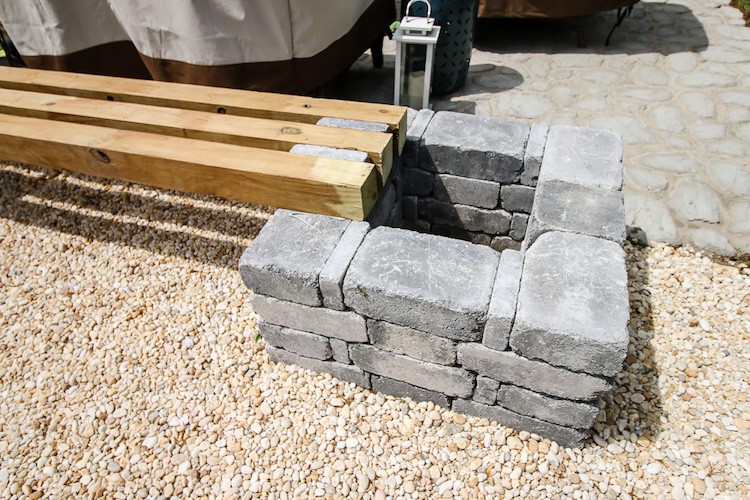
Layer five includes your bench boards. Add the boards to your pillars. A small brick goes in between each board. Complete the pattern around the boards, being sure than none of the paver seams line up with the layer below and that you are still staggering the pattern.

Add two more layers (for a total of seven) with construction adhesive in between to complete the project.
If you chose the planter kit like we did, fill each planter with dirt and plants. We chose citronella and rosemary to naturally deter insects!
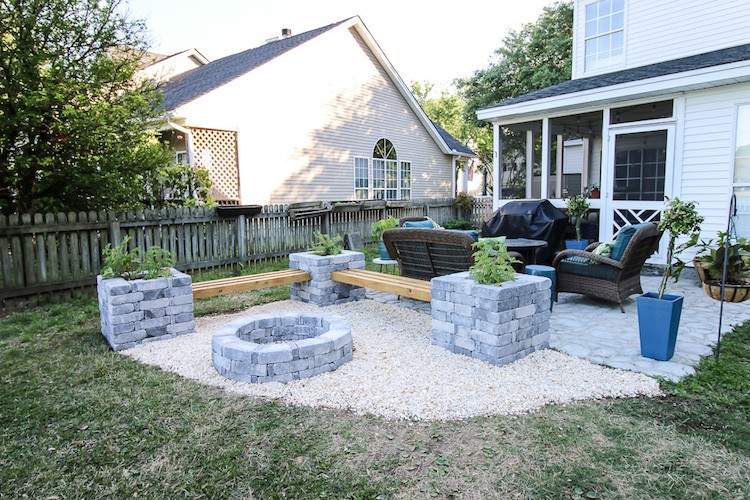
The Fire Pit
We assembled the fire pit from the RumbleStone 46 in. x 10.5 in. Round Concrete Fire Pit Kit No. 1 in Greystone. This kit was so very easy to put together! You have your choice of the pit that is three rows high or four rows high. We chose the shorter pit because we prefer having the heat of the fire a bit lower. Each row includes 12 trapezoid-shaped pavestones as well as 12 small brick shaped pavestones. It is easy to use them to form a circle for each layer. We applied construction adhesive in between the layers. This whole fire pit seriously came together in fifteen minutes! Just make sure your first layer is level and you are good to go.
Once the fire pit and benches were done, we covered the entire area with river rocks to make the area look like its own space. We put a layer inside the planters and inside the fire pit too for drainage.
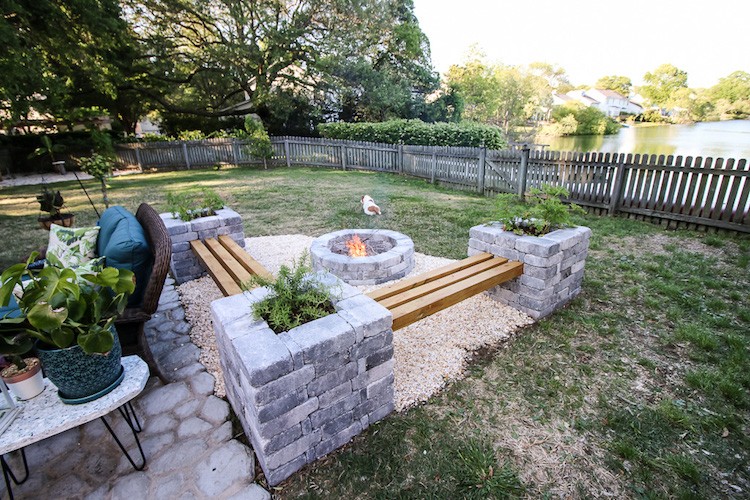
Y’all, this project was super easy. By far the hardest part was carrying so many loads of bricks from the front yard to the back yard in the wheelbarrow. The assembly was simple and the paver bench and fire pit looks so great next to our patio. Our outdoor entertaining space is finally ready to host guests!
Creating a paver fire pit and seating area can be a breeze with the help of Home Depot. Find more paver kits at the Home Depot.
The post Creating a Backyard Entertaining Area with Paver Kits appeared first on The Home Depot Blog.


