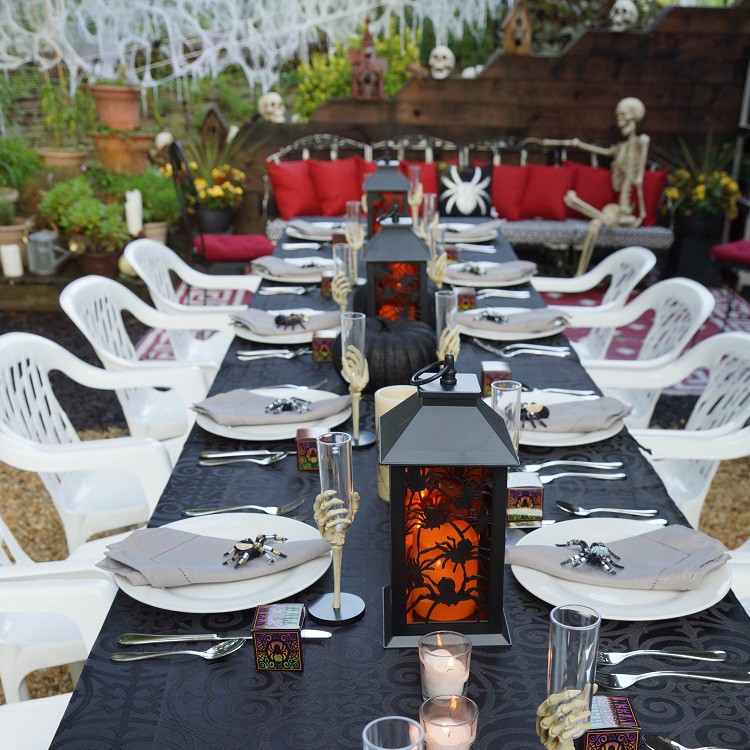
As a part of this year’s Halloween Style Challenge series, we sent Lynn Ferris of Holiday Decor & More a gargantuan spider and let her do the rest. From a life-sized spider web to a Peruvian-inspired temple wall, Lynn got creative and created the perfect place to host a spooky Halloween dinner party.
Check out how you can also impress your family and friends with a Halloween dinner party at spider temple.
Halloween Dinner Party at Spider Temple
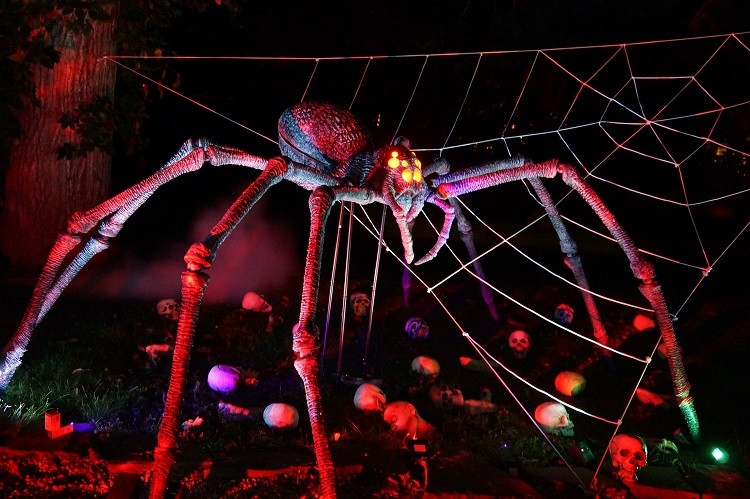
Imagine my delight when I received my feature item from The Home Depot—their awesome Gargantuan Spider! Spanning 9 ft., I knew I had to design a space for my spider outdoors. After kicking around a few ideas, I did some online research and came upon a temple in Peru. It is referred to as the “Spider God Temple” and features numerous wall panels depicting the Ancient Peruvian’s Spider God. I decided to use this as my inspiration. I would create my own “Spider Temple” and use the space to host a dinner party.
Building the Spider Web
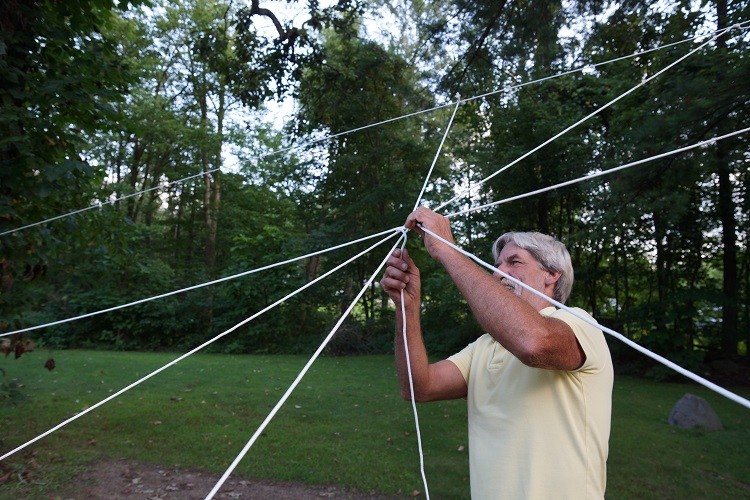
With my 9-ft. spider, I decided I needed a large spider web. I chose two trees in my backyard that were approximately 24 ft. apart. I decided to build my web between the two trees and sketched out my design.
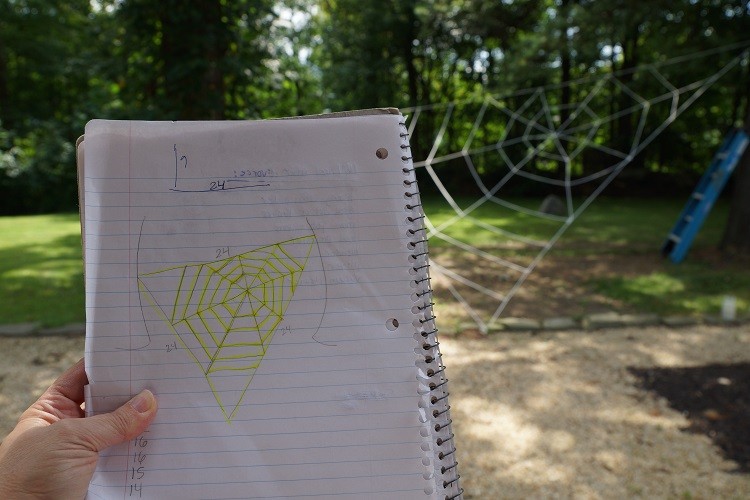
From my sketch, I estimated how much rope I would need to build my spider web. My estimate came to about 200 ft. Deciding to get extra for other projects (and just to be on the safe side), I purchased four 100-ft. packages of Everbilt All-Purpose Clothesline.
Everbilt ¾ x 3 in. screw eyes were screwed into the two trees to hold each side of the spider web. Everbilt 9-in. Tent Stakes were used to anchor the bottom of the web to the ground. With the triangular web outline set, we started on the interior web design. I was fortunate to have a friend helping, as this step of the project is much easier with two people.
One person tied the rope sections while the other watched from a few steps back, giving direction on where to tie the knots. Following my sketch, we moved the clothesline around, tying off and cutting each section as we worked. My estimate was close. We ended up using about 194 ft. of clothesline for the web.
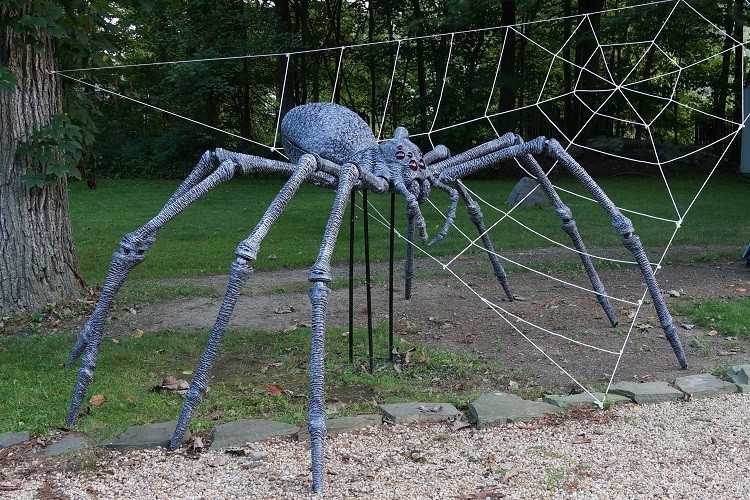
I think it came out pretty cool! A very large spider web for my very large spider.
Creating the Spider Tunnel
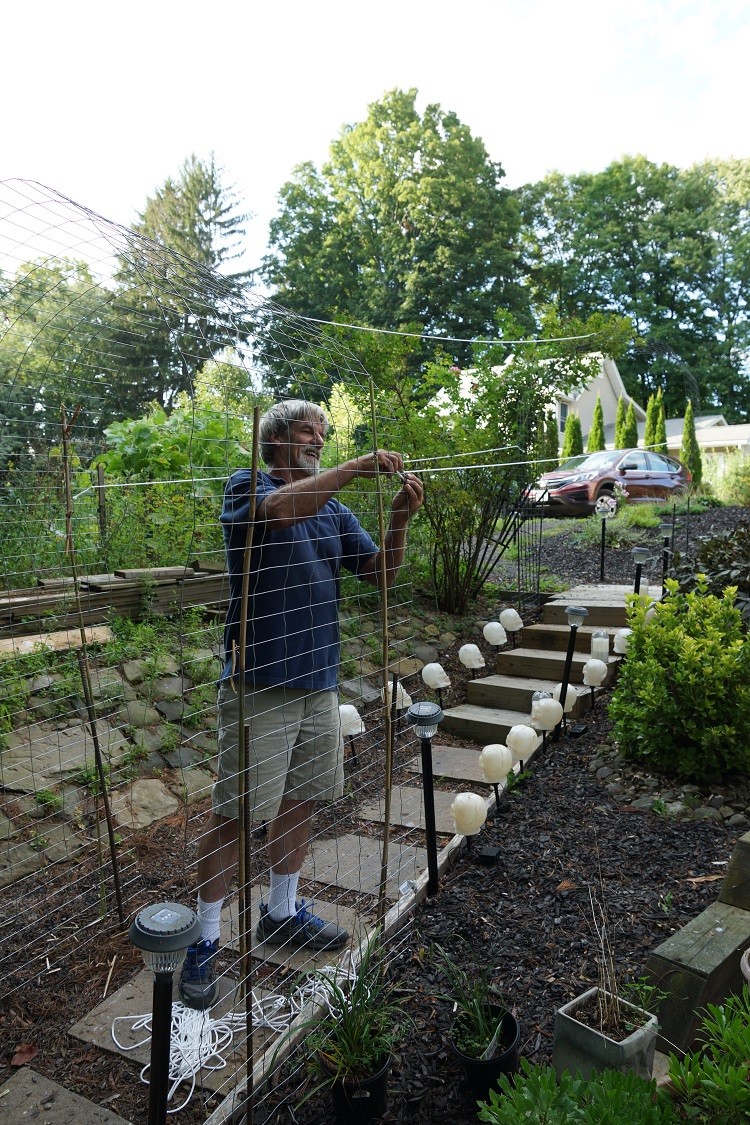
Next, we started working on our spider web tunnel. Using some wire fencing we had left over from our garden, we made two arches approximately 6-ft. high. We placed one at the top of the steps leading down to the yard and the second one at the base of the steps.
We staked these in place, using 4-ft. rebar stakes. Using more of the Everbilt All-Purpose Clothesline, we connected the two arches together with sections of rope tied to the tops and sides of each arch.
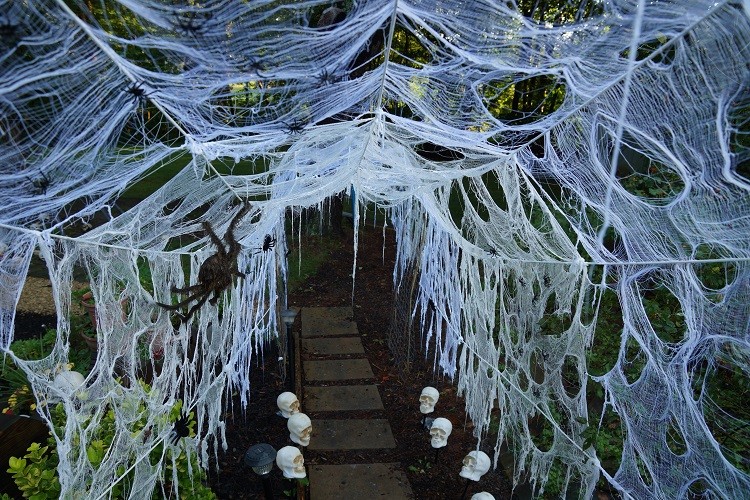
Having built the loose framework for our tunnel, it was now time to start covering it with spider webs. I purchased nine packages of HDX Cheesecloth, and we stretched and ripped this, making it look like creepy cobwebs.
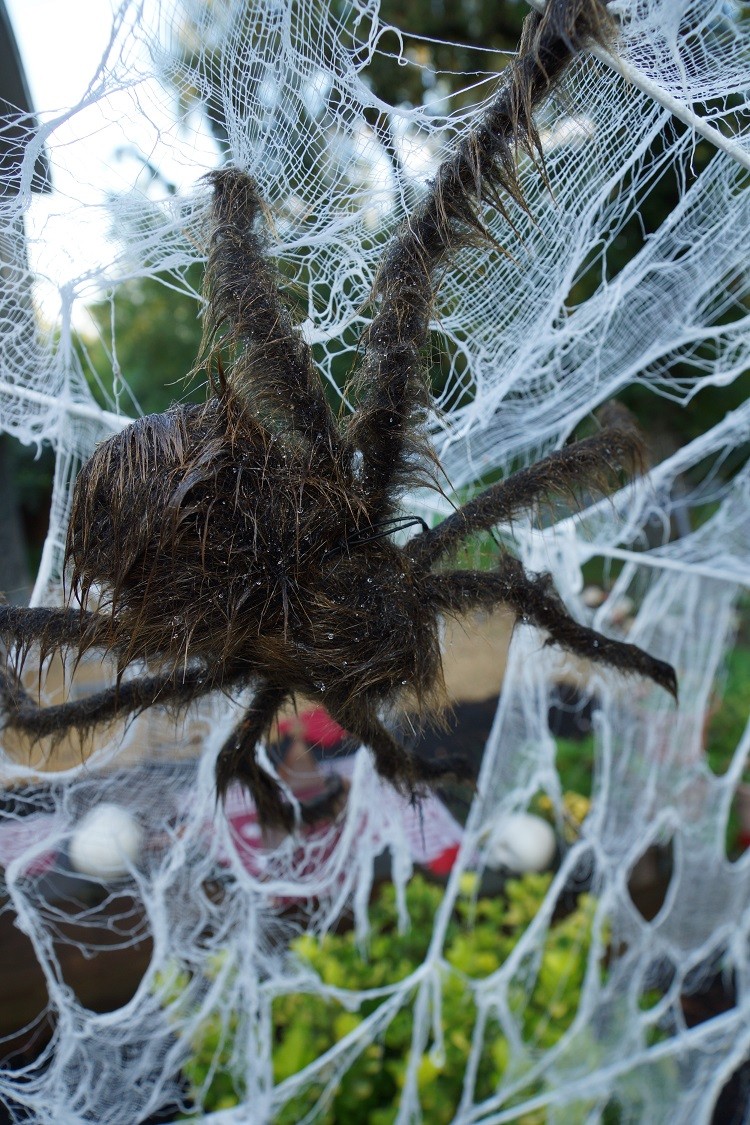
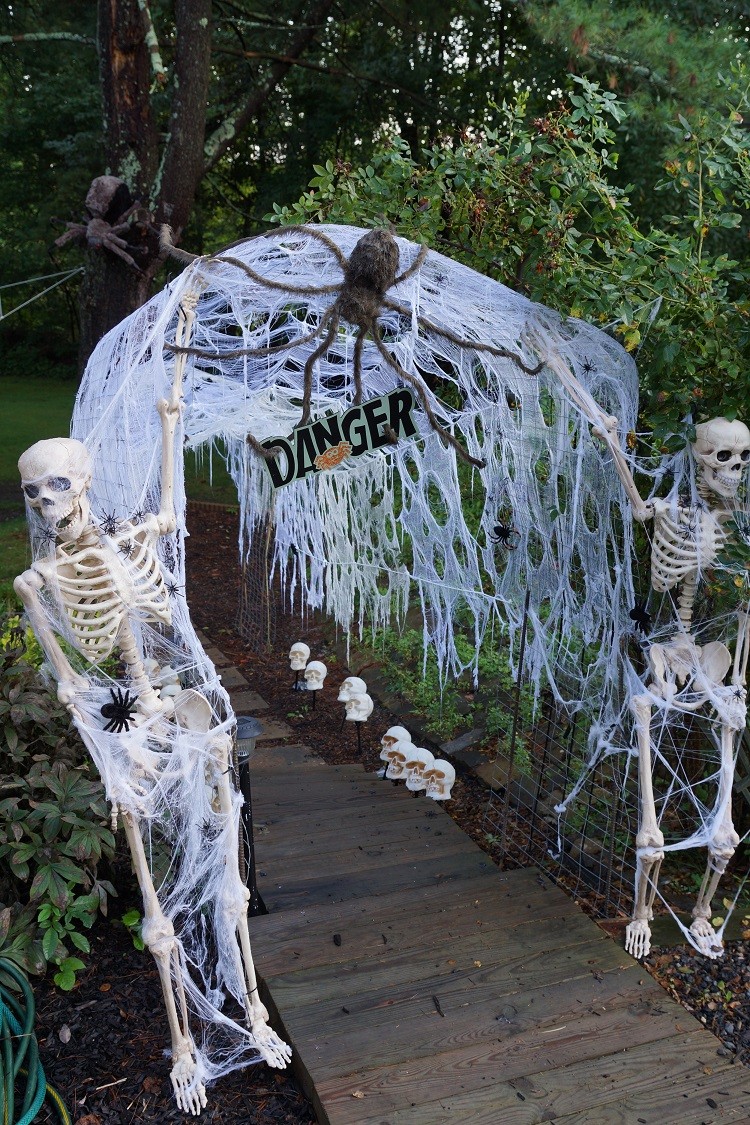
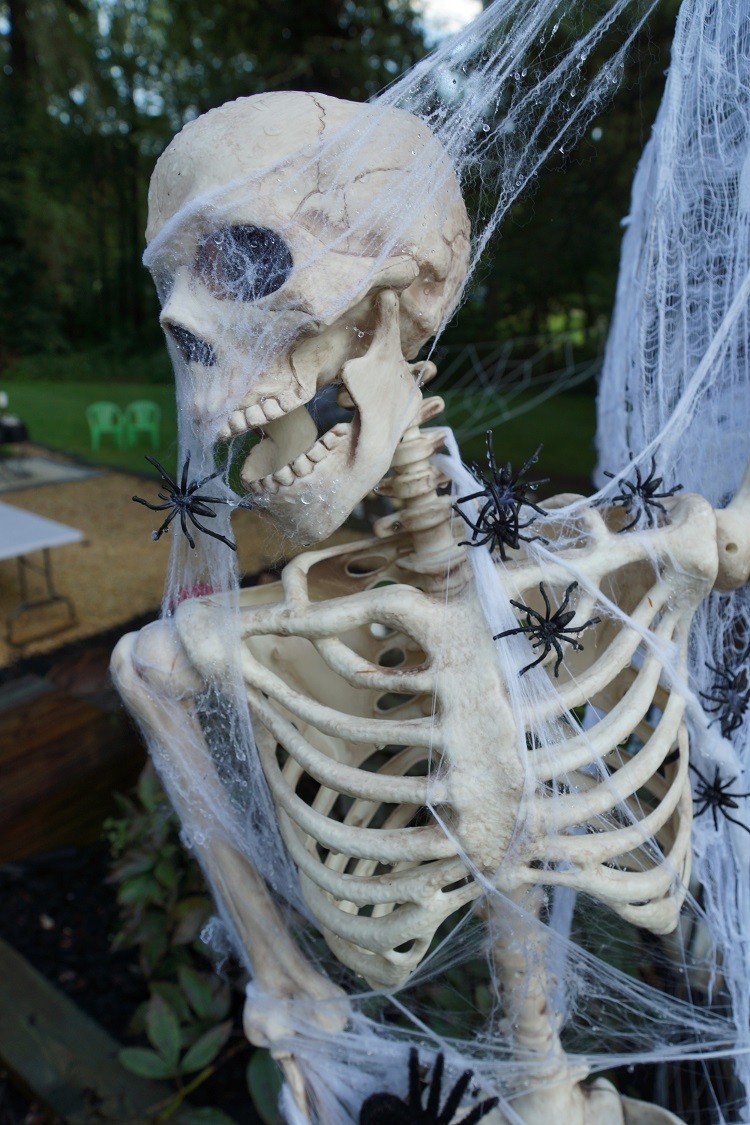
We then draped each piece over our rope framework, tying it in place to the ropes. We also let some strands hang loose. Lastly, we added our prop spiders throughout the tunnel as well as two web-wrapped skeletons at the entrance.
A big, hairy spider with a Danger sign dangles from the tunnel entry. A great way to greet our guests!
Peruvian Temple Wall
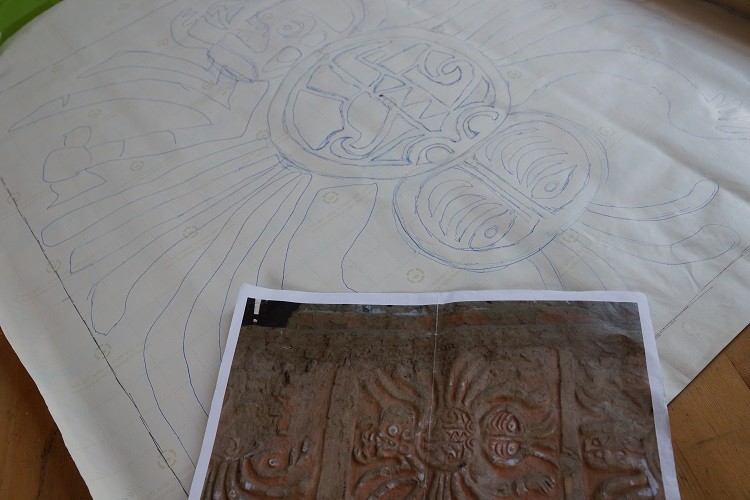
On to our temple wall panels! This was a bit daunting at first. I had seen the process online but had never done them myself. It was time to give it a try and make my first carved foam walls! First, I needed to draw out my design. I knew I wanted each spider panel to be 2 x 2 ft.
Materials
- (3) Owens Corning Pink Foam Insulation
- Soldering Iron
- Dewalt 2.75 in. Heat Gun
- Glidden Essentials Flat Interior Paint
- Glidden Essentials Cool Metalwork
- Black Rust-Oleum Painters Touch Ultra Cover Premium Latex Paint
- 8 oz. White Rust-Oleum Painters Touch Ultra Cover Premium Latex Paint
- Economy Basic 1.5 in. Flat Utility Brushes.
Step 1: Sketching the Spider
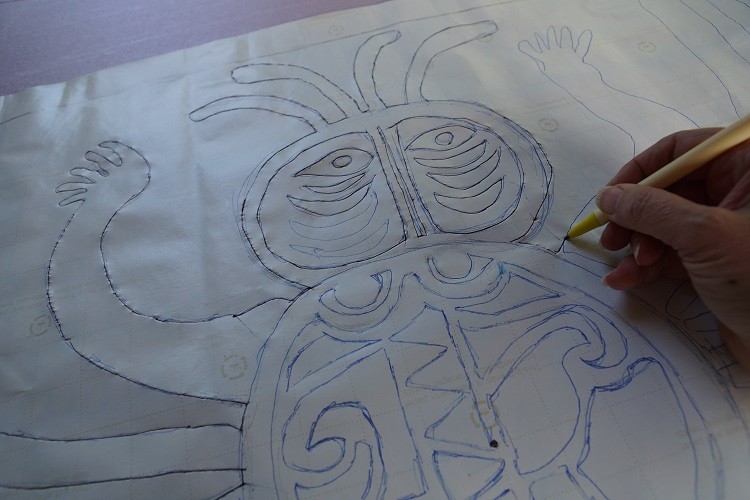
Not having any paper that large, I decided to use the back of some wrapping paper I had. This actually worked out perfectly as the back of the paper had a 1-in. grid printed on it. This helped me get my design where I wanted it to be. Additionally, the paper was thin enough that I could trace the design on the foam panel and see the indentations of the lines.
To make the panels, I purchased three sheets of Owens Corning pink foam insulation, 1-in. thick by 4 x 8 ft. We cut about 4 in. off each sheet to make it fit the space. I then traced my “Spider God” image on to the foam panel.
Step 2: Engraving the Foam
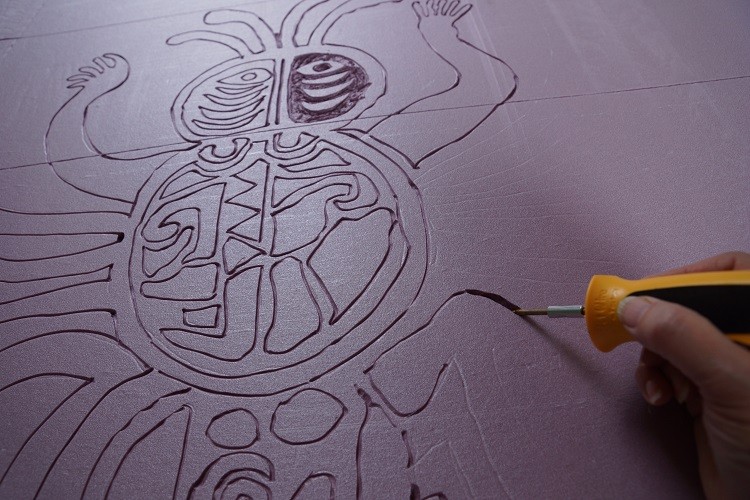
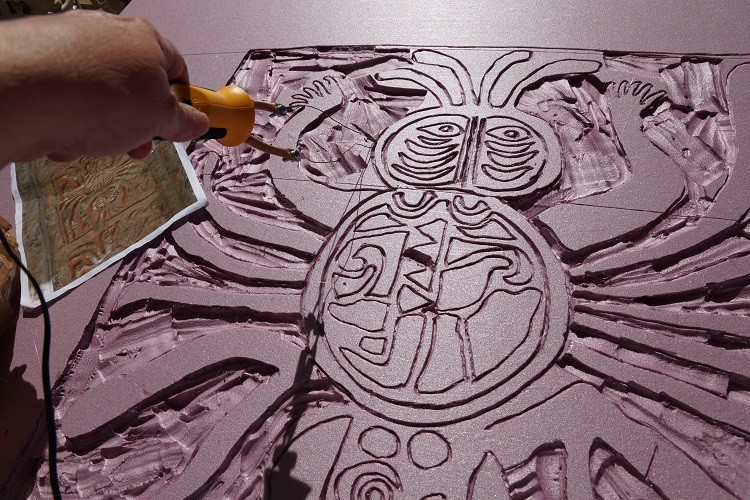
Now the fun begins! I was given a foam carving kit a few years ago for Christmas, but had yet to use it. I say carving, but these tools actually melt the foam allowing you to do fine engraving work, carving and sculpting.
This step should be done outdoors or in a well-ventilated area as there may be some fumes. Using the trace lines on my foam panel, I drew out the design with the engraving tool. An inexpensive soldering iron from The Home Depot would work, too.
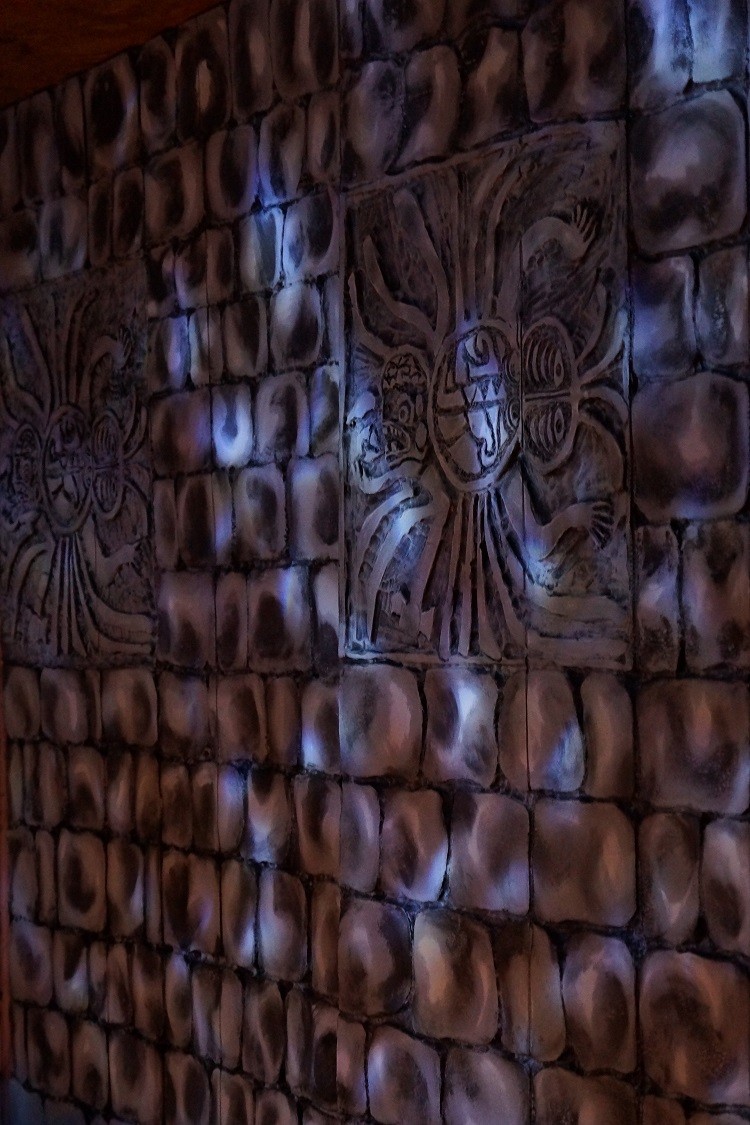
After engraving the outline, I removed chunks of foam with the heat carving tool to give my design a 3D appearance. I kept the removed areas quite rough to resemble chiseled rock. This was time-consuming, but quite fun, and the finished carving looked pretty cool.
Step 3: Creating a Stone Look
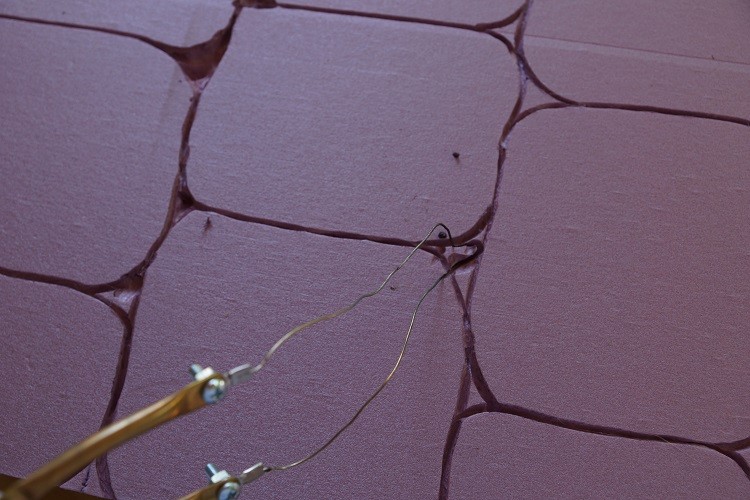
I then drew out the stone portion of the temple wall panels freehand, using the heated engraving tool. For more dimension, I carved out the crevices between the rocks.
Step 4: Adding Depth
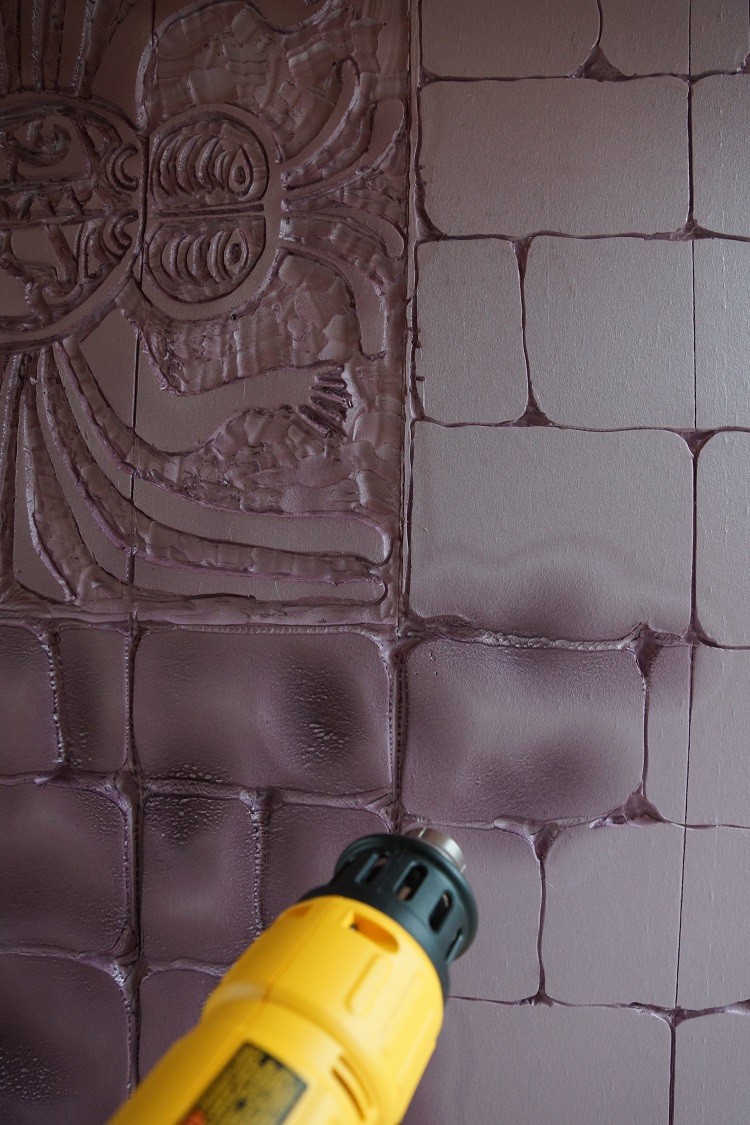
The walls at this point did resemble rocks, but I knew I could make them even better. With my Dewalt 2.75 in. Heat Gun, I carefully moved it across over the surface of my foam panel. Try a test piece first to see how hot you need the gun to be and how close you need to get to the foam.
The heat gun creates great crevices for your “grout” lines and gives dimension and texture to the faux rocks. I was admittedly a little intimidated at first by using a heat gun, but this was really so simple, and the result is so cool.
Step 5: Painting the Rocks
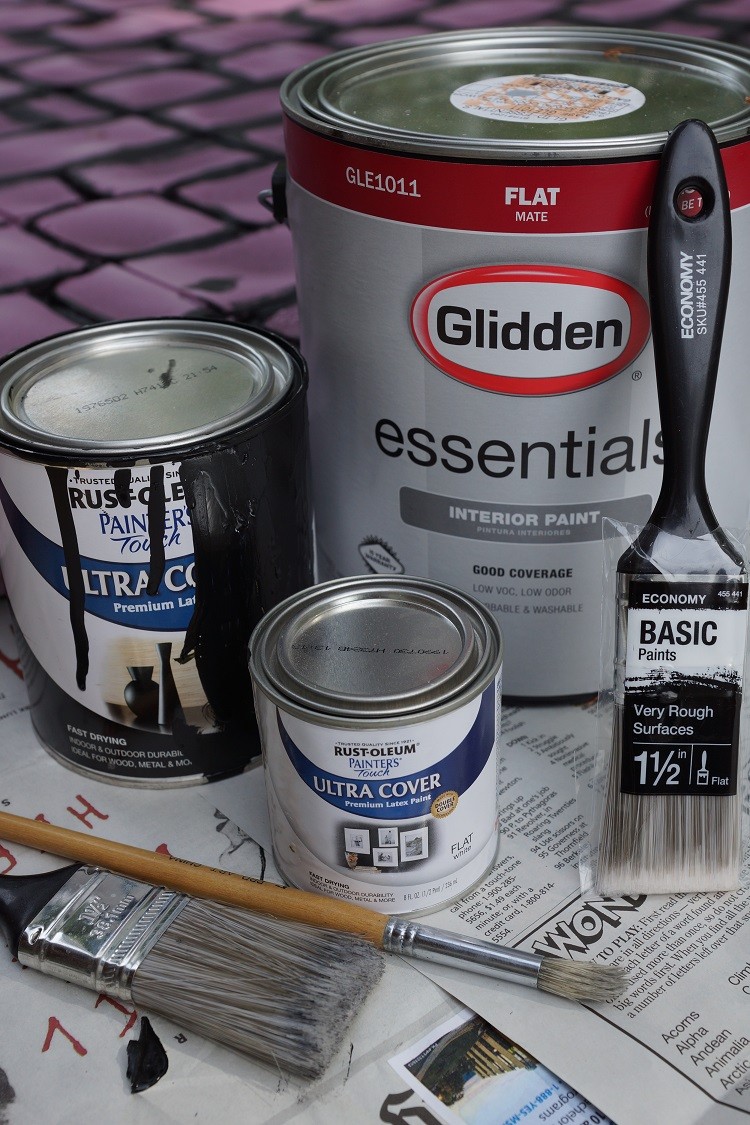
After carving the foam panels, they were ready for painting. I went to our local Home Depot and purchased one gallon of Glidden Essentials Flat Interior Paint. Although the Peruvian temple walls I used for inspiration are shades of orange, I decided to go with grey to look dark and gloomy. I chose a shade of grey called Cool Metalwork. I purchased a gallon, but could’ve gotten much less. I now have lots of leftover grey paint for another future project! I would always rather have too much than too little!
I decided to also purchase black and white paint to add shadows and highlights to my stone wall. A quart of black Rust-Oleum Painters Touch Ultra Cover Premium Latex Paint was just the right amount for the project, and a small 8 oz. can of white Rust-Oleum Painters Touch Ultra Cover Premium Latex Paint was purchased for the highlights. I already had some round crafters paint brushes, but purchased two Economy Basic 1.5 in. Flat Utility Brushes.
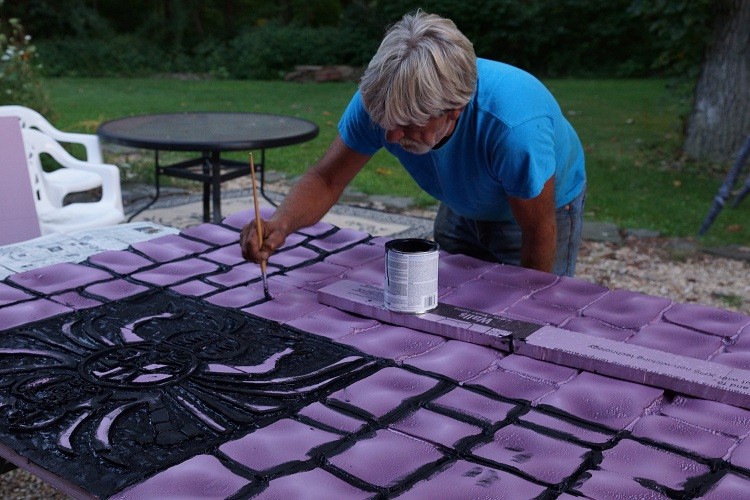
Again, I was fortunate to have a friend helping, and he started by painting all the grout lines black. He also painted the spider panels black.

Next, we painted the stones with the grey. Using quick, dry-brush brushstrokes across the groutlines, the grey settled only on the high areas, leaving the deep recesses black. We painted each stone, trying to keep the paint thin. Drying time was very quick.
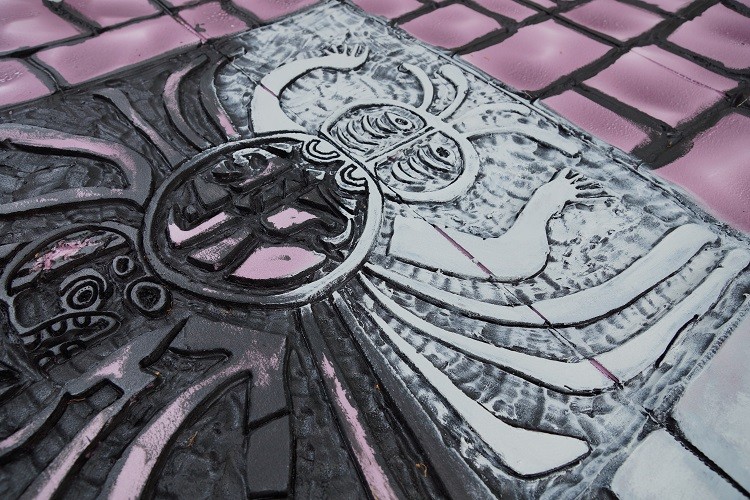
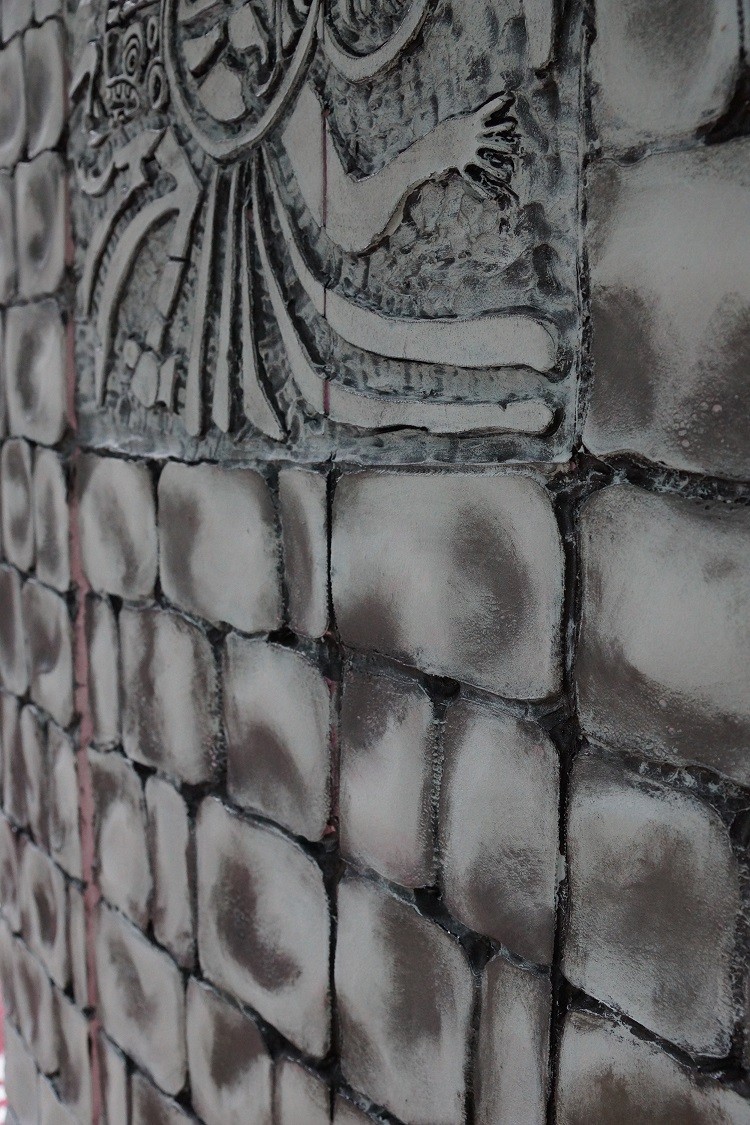
Using the highs and lows created from the heat gun as my guide, I added black to the low areas of each stone. I tried to keep my brush dry with very little paint on it creating shadows on each stone. This admittedly took quite longer than anticipated, so leave yourself enough time. I found myself getting sloppy at the end in order to finish. I actually think I added too much black, but for my first time doing this, I think it still came out ok. I may go back and lighten it up at another point in time.
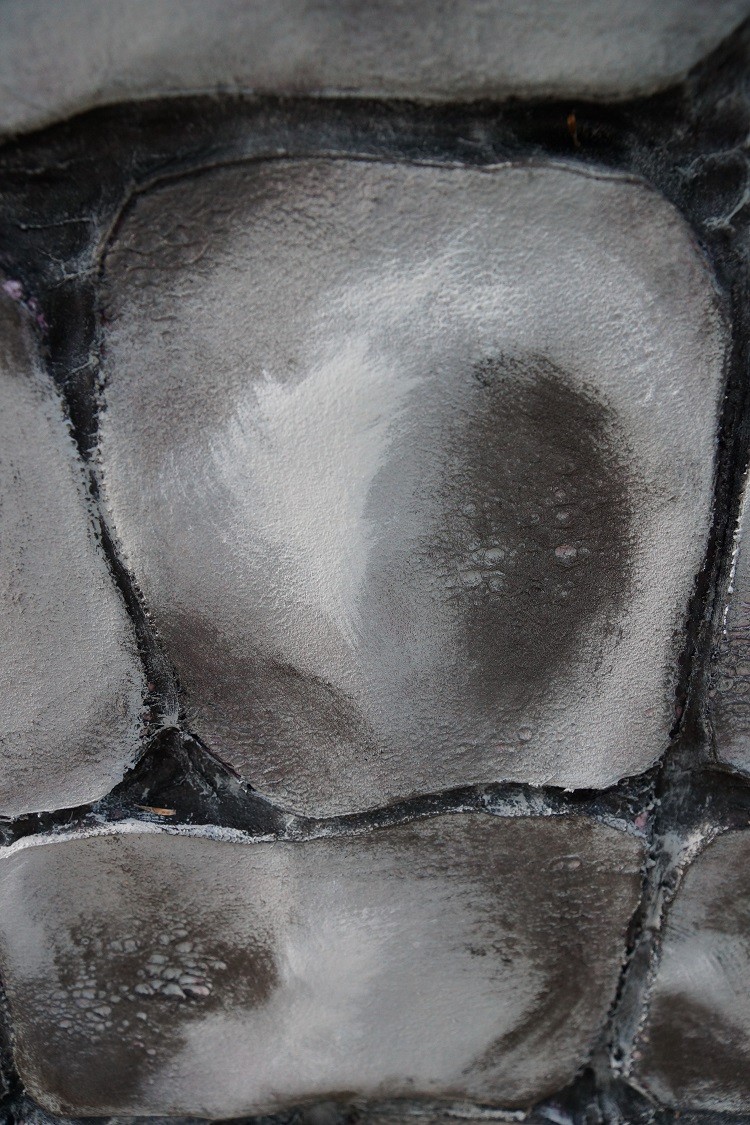
After the black dried, I mixed some white and grey together to add as highlights. Again, I used the contours of the foam, adding the light grey to the highest areas of each stone.
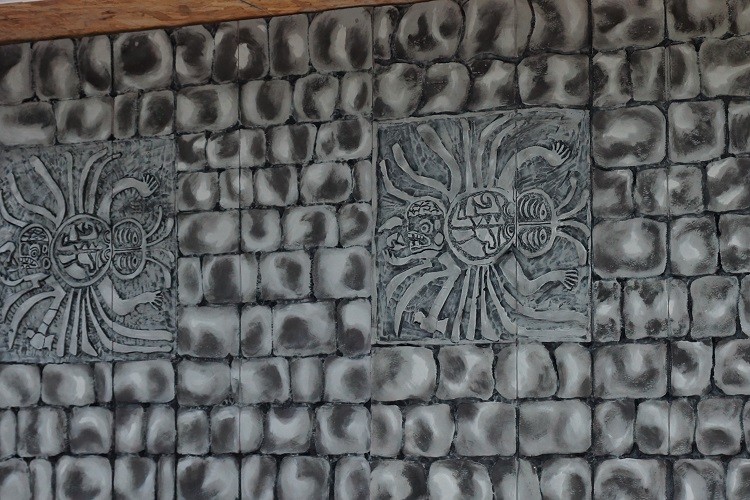
And my spider walls were now complete!
Spooky Halloween Dinner Party
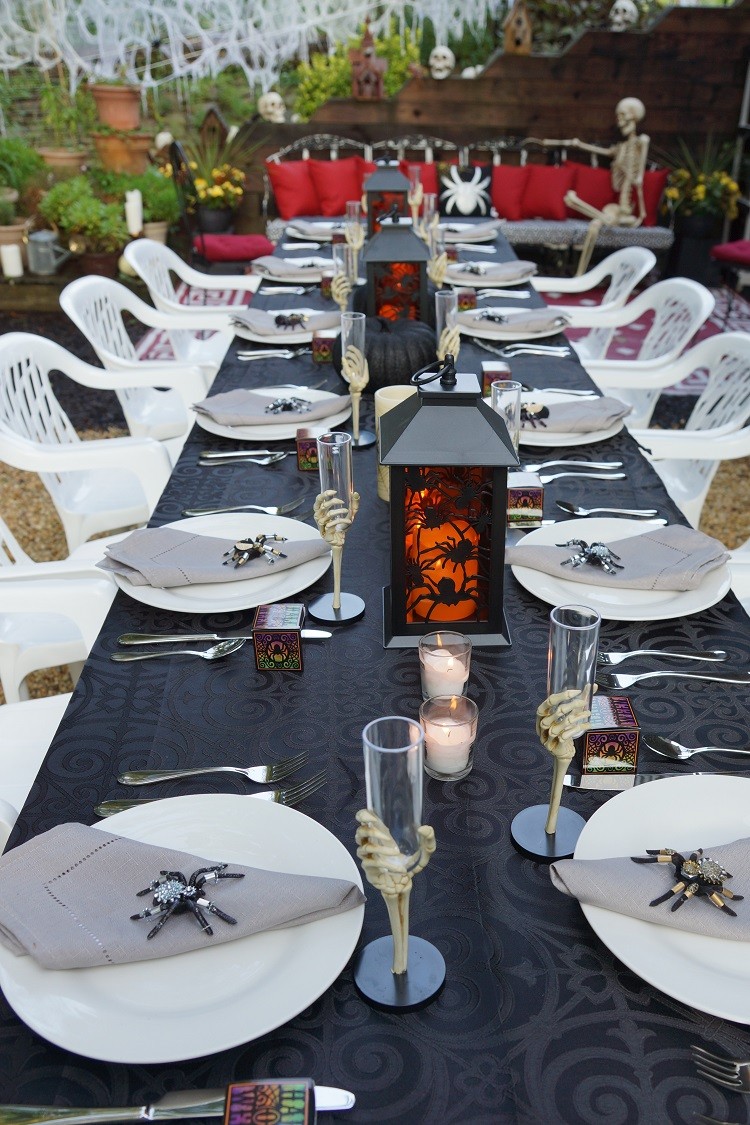
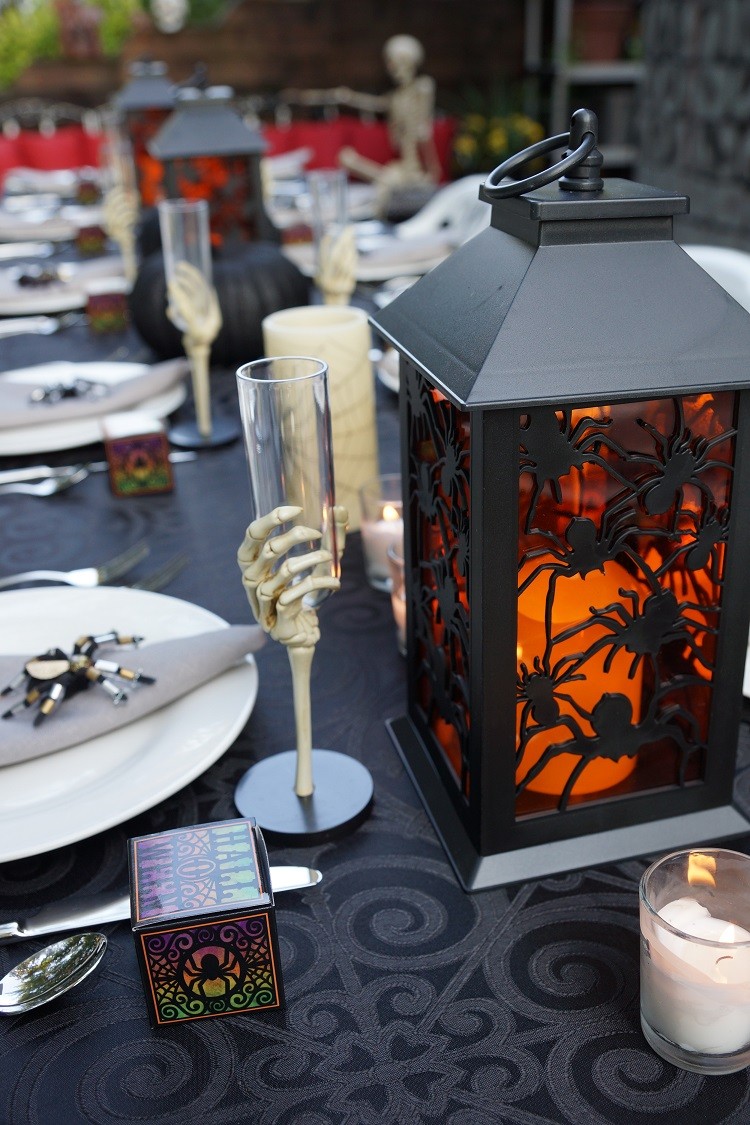
With my temple wall backdrop complete, it was now time to add props and accessories, set the table, get my lighting set and prepare the fog machine. Almost time for my Dinner Party at Spider Temple!
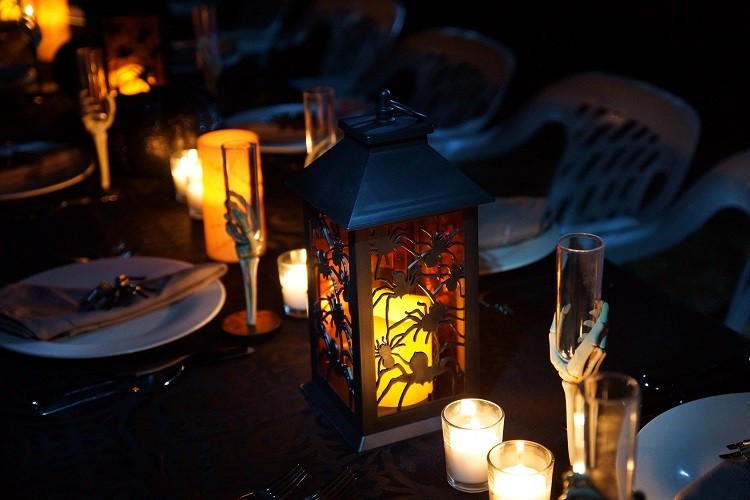
I set my table for twelve, with simple place settings in black, white and grey to coordinate with my stone walls. Three LED Spider Lanterns from The Home Depot adorned the table. I think they look great!
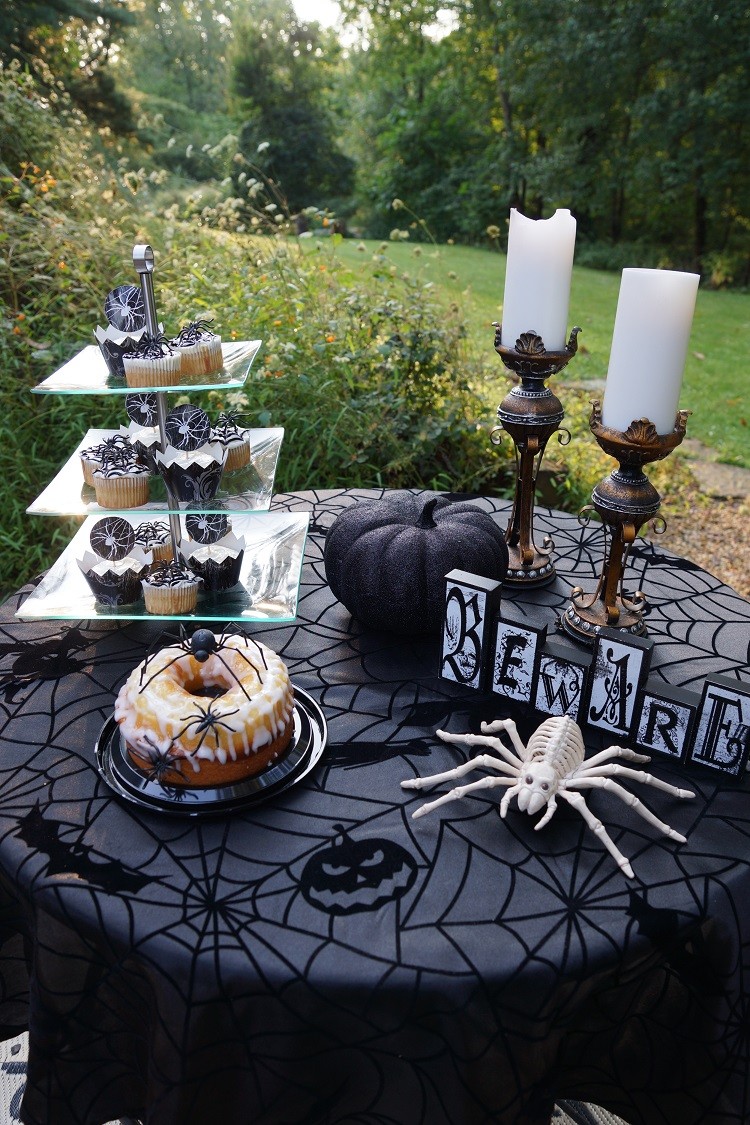
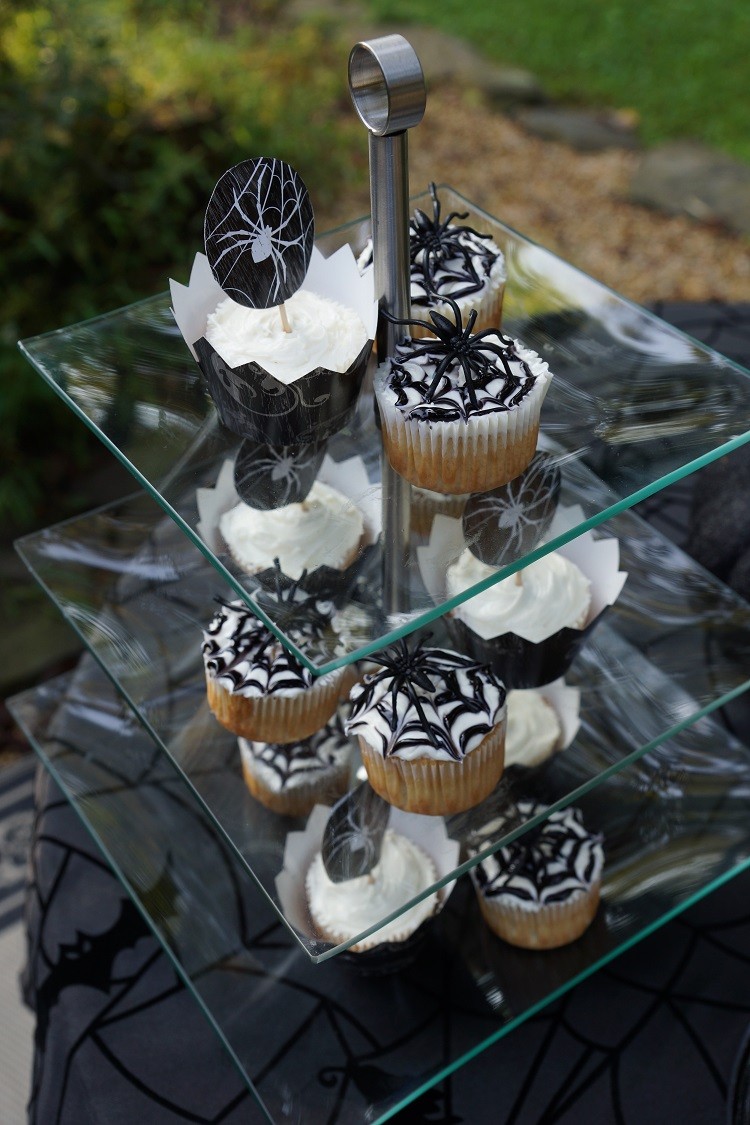
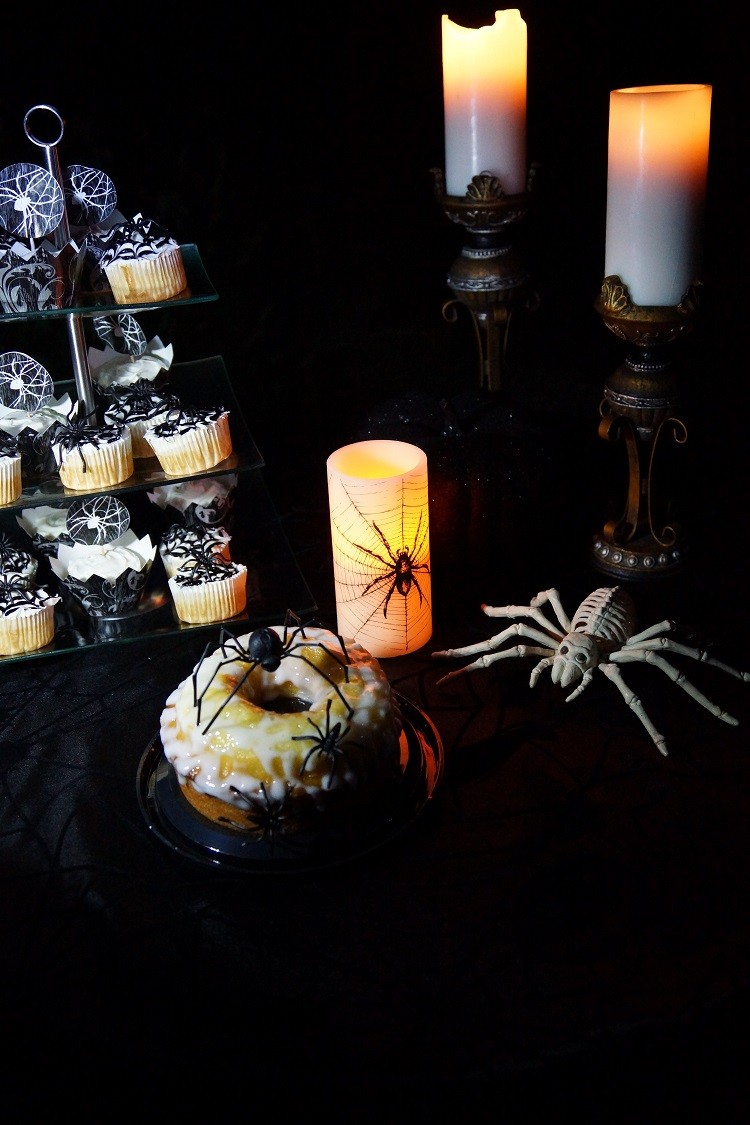
Then, I set up my dessert table nearby. I found this great 3-Tier Square Glass Dessert Stand at The Home Depot as part of their Home Decorators Collection. Who knew The Home Depot had such great accessories? It’s just what I needed to display my homemade spider cupcakes!
Finishing Touches
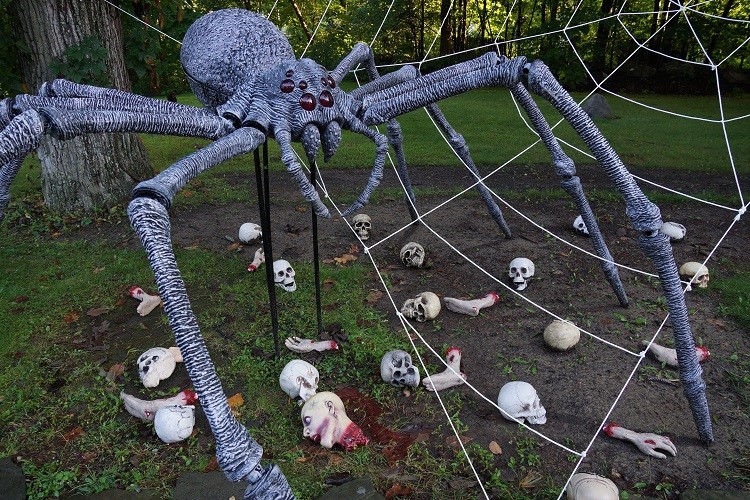
And now some props. I add skulls, hands and feet on the ground below my Gargantuan Spider. Looks like quite a few people have fallen victim to this arresting arachnid! Hopefully my guests survive the evening!
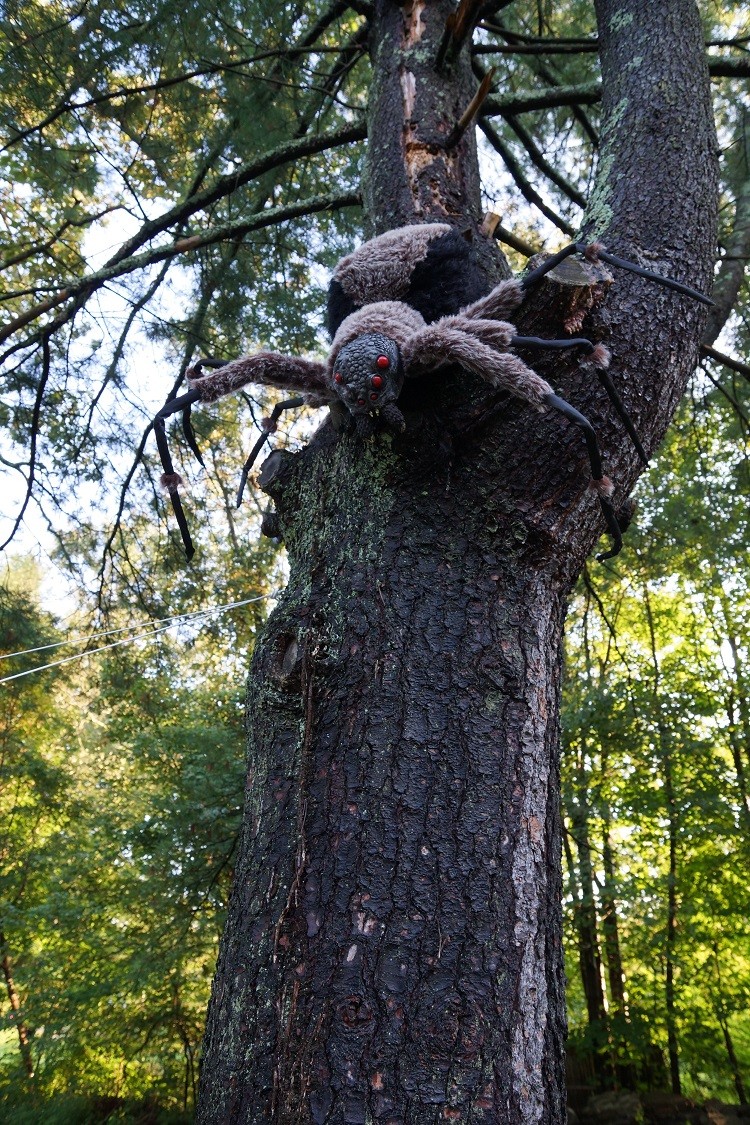
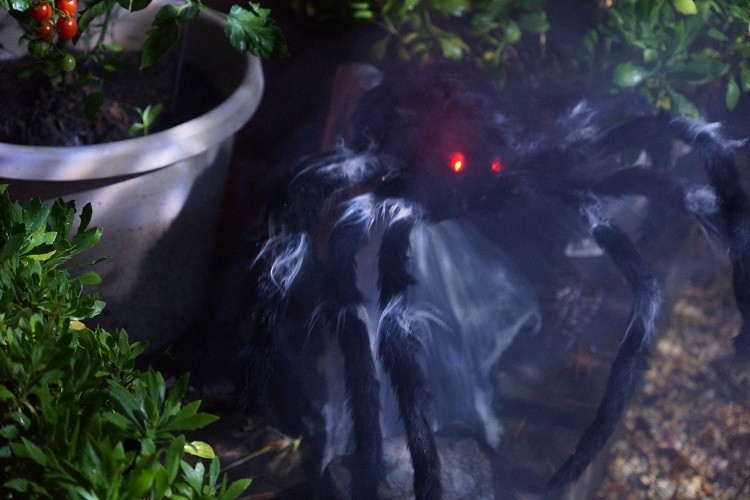
A 3-ft. hairy spider was positioned in a tree, looking as if he’s ready to drop down and startle my guests.
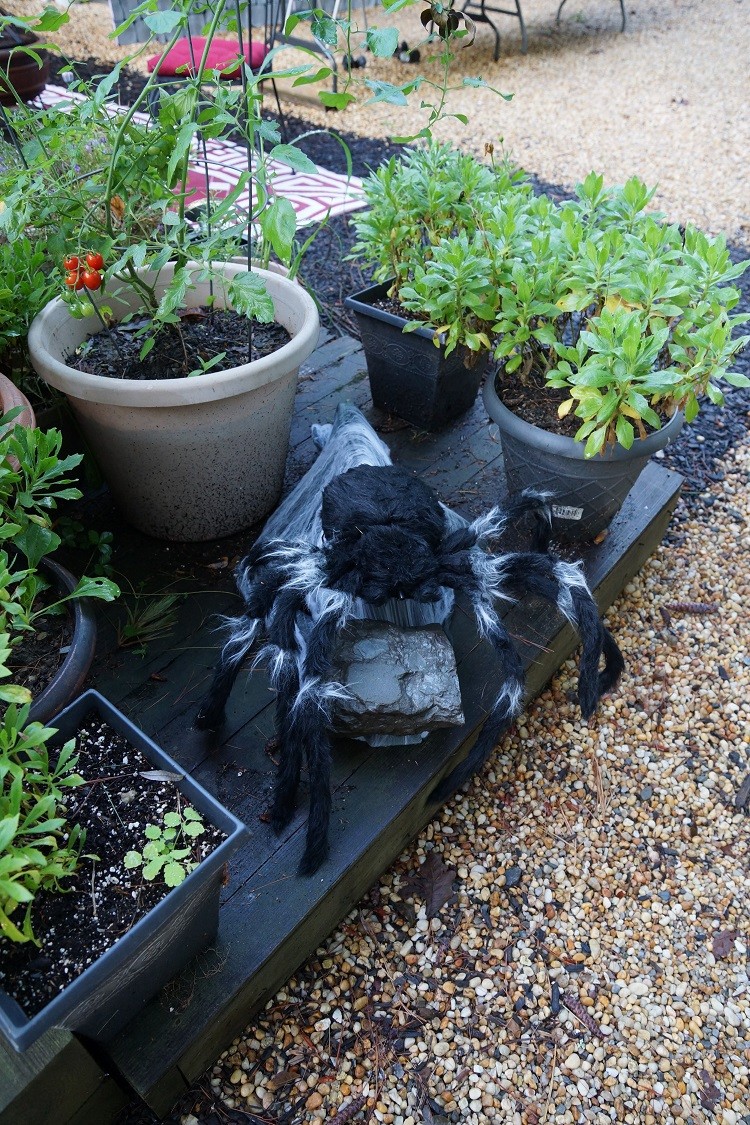
The Home Depot’s Animated Jumping Spider with Red LED Eyes is guaranteed to startle my guests! I positioned him amongst some potted plants, at the foot of the stairs. As guests descend from the cobweb tunnel, they will look up at the spider in the tree. Their motion will activate the jumping spider beside them, and screams and laughter will surely follow!
Final Reveal
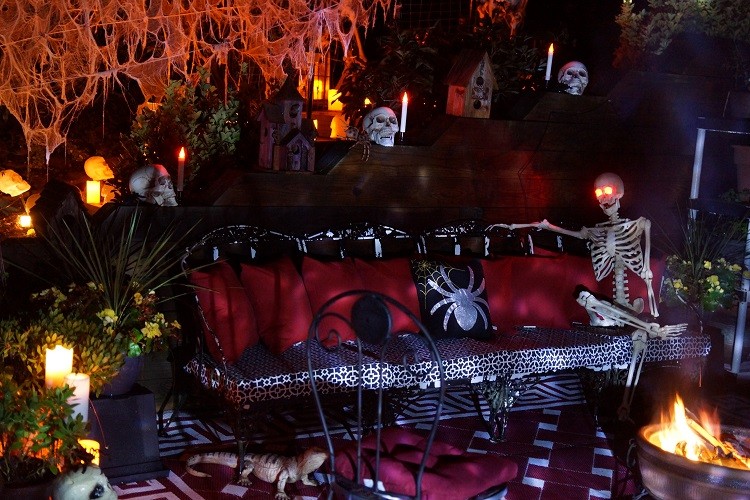
At night, I light candles, turn on the LED candles and position my lights. We light a fire, creating a warm glow over our seating area. The Home Depot’s 5 ft. Poseable Skeleton with LED Eyes takes a seat on the couch, making for a great photo op for my guests. Here, have a seat with Mr. Bones. Now smile for the camera. Snap. Got it! Everyone will love him.
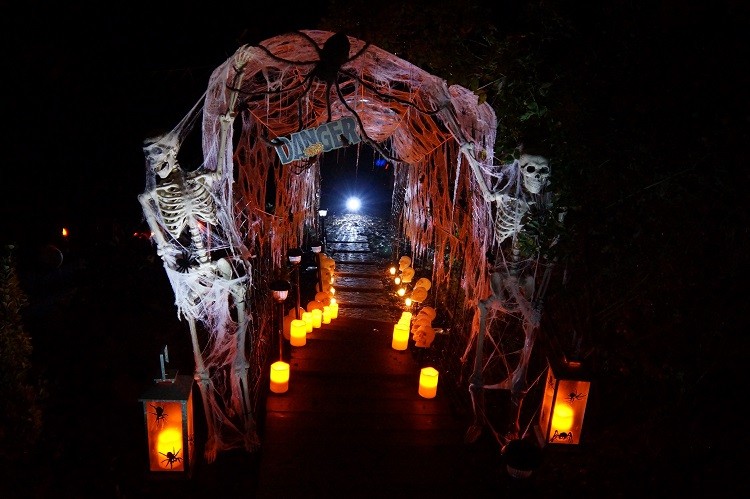
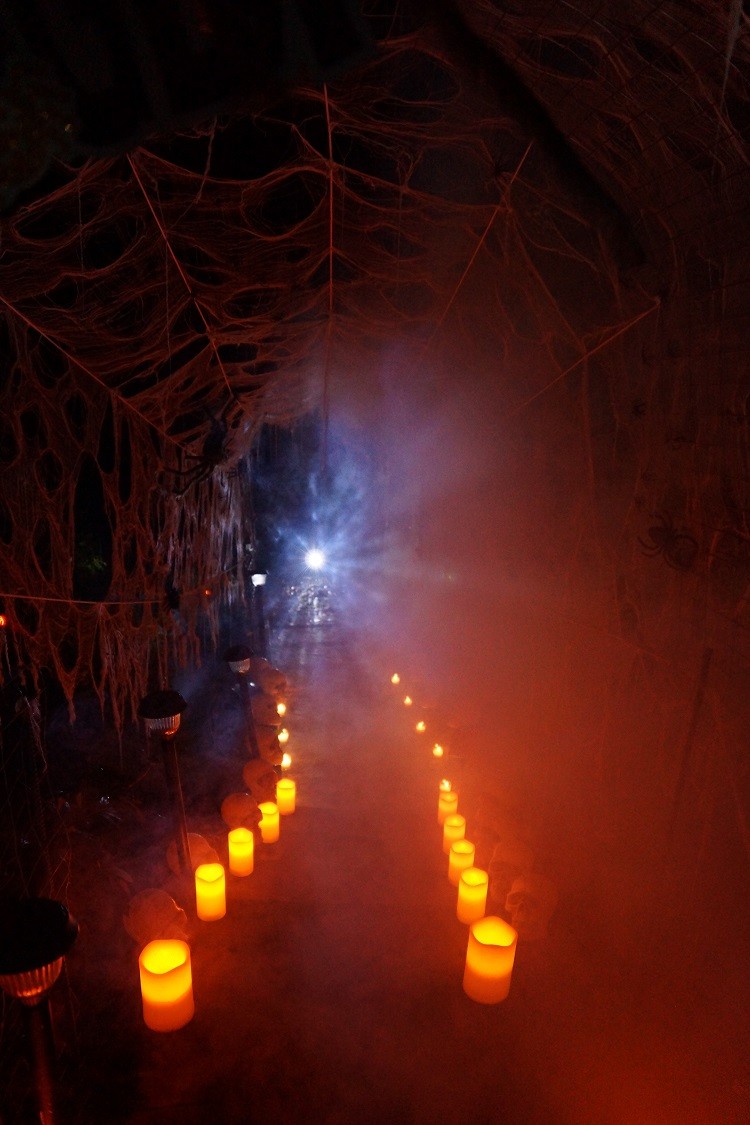
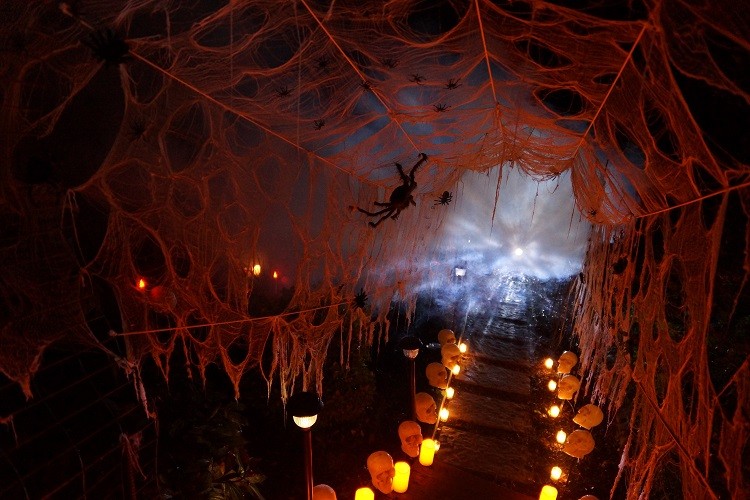

The evening darkness has now taken over. The fog machine does its magic, adding a touch of spookiness. The fog, combined with strobe and spotlights, creates a truly awesome atmosphere. I do one last walk-through to ensure everything is in place, envisioning how my guests will see everything.


I think it looks amazing! My Halloween dinner party at Spider Temple is ready to start, and my guests should be here any minute now. With a little creativity and some great spooky decorations from The Home Depot, I have designed a memorable evening, sure to impress. I can’t wait to share it with my friends!
For more DIY Halloween and harvest ideas, see other articles in our Halloween Style Challenge series, and follow our Halloween Style Challenge board on Pinterest.
Visit The Home Depot’s online Halloween Décor Department for everything you need to decorate your home for Halloween and fall.
The post Dinner Party at Spider Temple appeared first on The Home Depot Blog.

