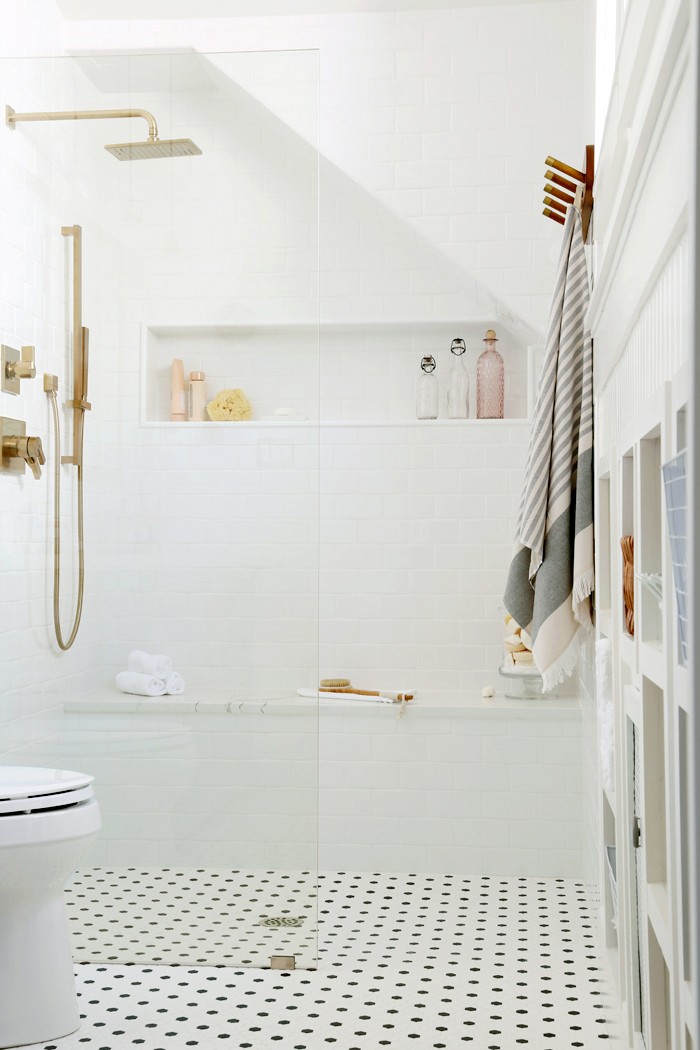
Cristina Garay of Remodelando La Casa has been remodeling her home for the past several years and left the master bathroom for last. Read on to learn about the steps she took to transform her unused bathtub into a beautiful walk-in shower.
Six-Step Walk-in Shower Install

I spent the past several years remodeling our plain, cookie cutter home by adding character to most of the rooms with paint, moldings and a few builds. Very slowly, but surely, I’ve updated every single room except for one: our master bathroom. It is the only room in our house I left untouched since the moment we moved in almost 20 years ago!
However, waiting so long to renovate this room gave me the opportunity to define the most important features I wanted to include in the new and improved bathroom. For instance, I wanted to add more storage, install more lights, ditch the annoying shower curtain and above all, get rid of the bathtub and complete a walk-in shower install.
We have lived with a bathtub all this time and never once used it! Although, there is a bathtub in our kids bathroom and it will be staying as my daughter loves to take baths. Besides, it’s recommended that your home has at least one bathtub for home resale purposes
Check out the following seven steps we took to transform this bathtub/shower combo into the walk-in shower our older-selves are going to enjoy!
MATERIALS
- Delta Vero 1-Handle shower only faucet
- Delta Vero 1-Spray Hand Shower
- Delta Vero 1-Handle 6-Setting Diverter Valve Trim Kit
- Delta 1/2″IPS Handshower wall supply elbow
- Delta MultiChoice Universal shower valve body rough-in kit
- Daltile 3 x 6 Subway Tile
- Jeffrey Court Allegro White Pencil Molding Tile
- Metro Hex Matte White with Black Dot Tile
- Glass Warehouse Frameless Fixed Shower Door
- Shower Pan Liner Roll
- DeWalt Drill
- RYOBI Brushless Drywall Screw Gun
- VersaBond ThinSet Mortar
- Durock Cement Board
- Arauco Radiata Pine Ship Lap Board
THE BEFORE
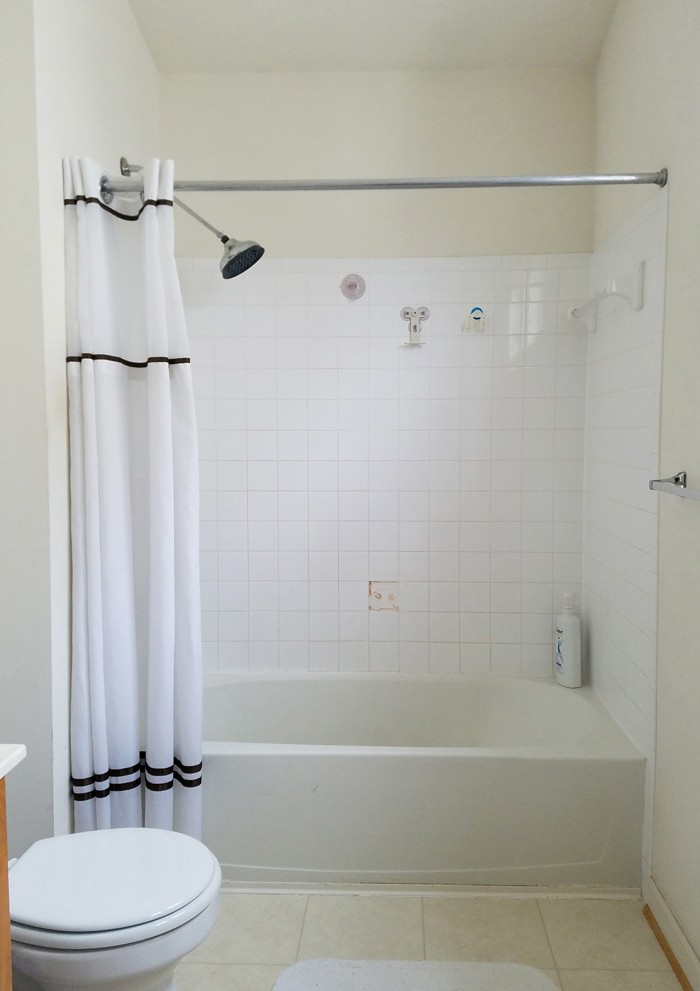
Here is our old bathroom: a bathtub that had seen better days, square tiles that only reached six feet up the wall, a shower head that kept fighting gravity and a missing soap holder that got damaged when the suction cup mirror gave up and collapsed on it.
Step 1: DEMOLITION
A great way to stretch your budget is by tackling the demolition yourself – if you do it the right way. I demo’d the entire bathroom myself and let the pros work on the projects that were challenging.
After turning off the water supply and disconnecting the water fixtures, you will need a simple drywall jab saw, a pry bar and a good amount of strength in your arms to get rid of the tile/drywall. The plastic bathtub was easily removed by disengaging the clips that secured it to the wall studs.
Step 2: ADD EXTRA SPACE
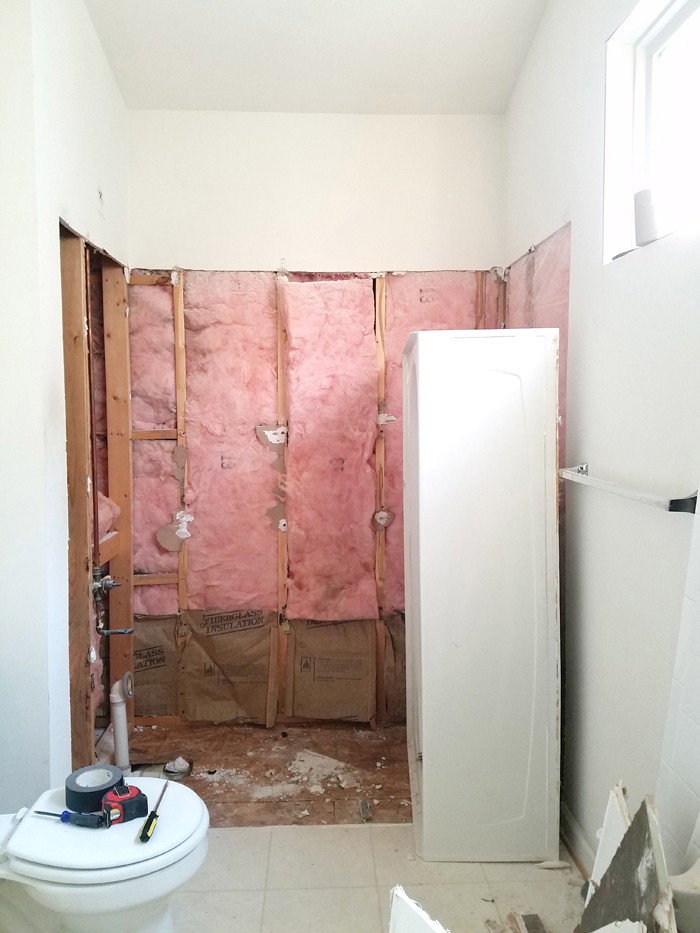
If you haven’t thought about adding extra space just yet, this might be a good moment to consider how to add it now that you can see what’s behind the sheetrock. One extra foot of space taken from the attic or a contiguous room/closet would make a big difference in your shower. Alternatively, you can add a sitting bench or a storage niche on the wall.

We were lucky to grab 16 inches from the attic space to accommodate for a sitting bench, plus six extra inches at the top of that same back wall to create a shower niche.

Step 3: RETROFIT PLUMBING
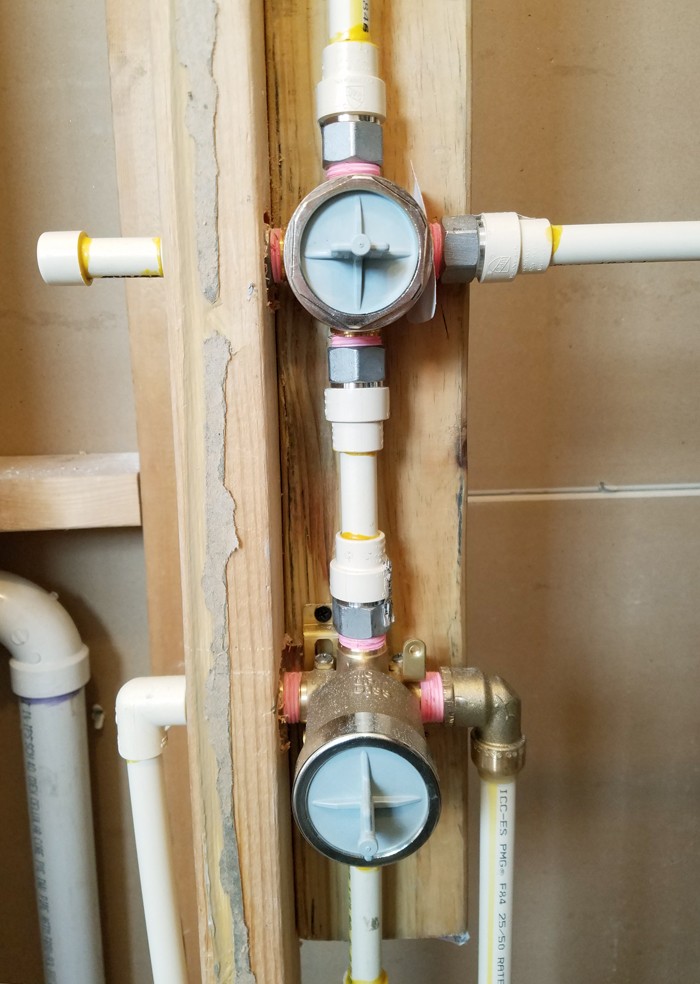
You can install a simple shower using the same pipes and drain you already have in place; however, the possibilities are endless if you want to upgrade or add some extra fixtures. There is a great variety of shower systems in the market for you to choose from ranging from style, finish, special features and price.

For our modern + a-bit-of-vintage-look bathroom, I chose the Delta Vero series single function pressure balanced shower system with shower head and hand shower.
When ordering all the materials for this bathroom renovation, I had no idea what valves and extra parts I needed to buy to install the shower head and handheld shower. A simple e-mail to the Delta Faucet customer service a was all I had to do to get answers. In less than 24 hours I got a list with all the parts the plumber needed on installation day!
Step 4: CURB OR CURB-LESS SHOWER
An important decision you have to make when planning your walk-in shower is choosing the type of floor you want to install – and I’m not talking about materials, which is something else you need to decide later on.
For the floor of your shower or “shower pan,” there are two basic options:
- A curb design, which is the one you must step over as you enter the shower or,
- A curb-less design where the shower and the surrounding bathroom floor are at the same level.
Curbed designs are easier and cheaper to install than curb-less, and they work better than its counterpart at keeping the water inside the shower.
Curb-less designs are trickier to install but give the entire bathroom a sense of openness. A great option for small bathrooms because there are no transitions on the way to the shower.
A curb-less design can be achieved by raising the entire bathroom floor, or by lowering the shower pan.
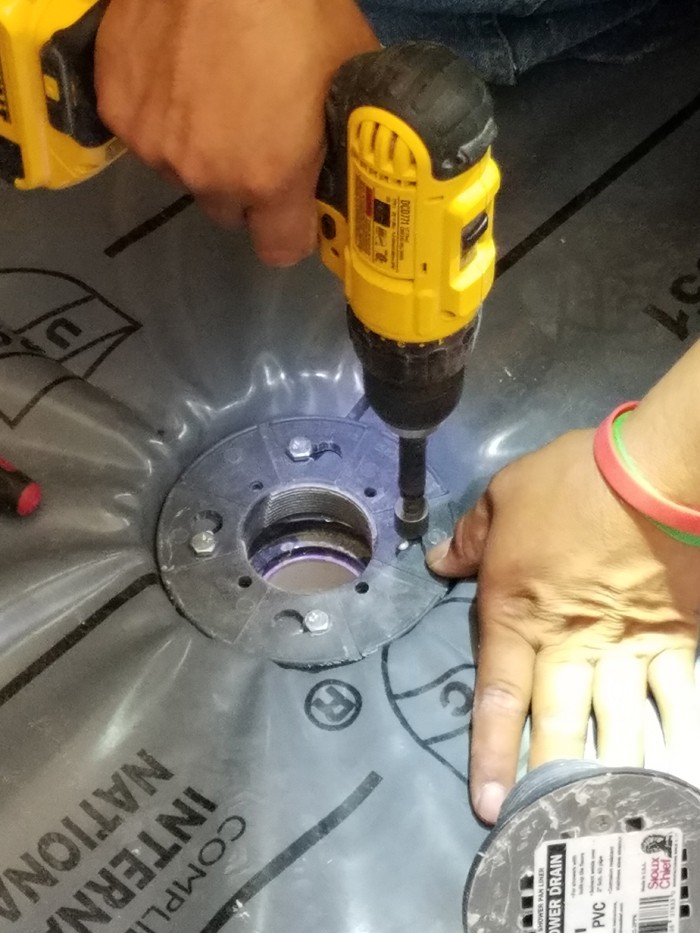
We chose a curb-less design, raising the entire bathroom floor and building the drainage slope below the level of the surrounding bathroom floor.

Step 5: INSTALL THE TILE
With thousands of options to choose from, picking the right tile for your bathroom is not an easy feat.
This is one of the aspects of the remodel that will give your bathroom the style of your dreams, or you can go with a neutral palette if you’re thinking about resale value.

For our master bathroom we took a timeless approach by using the Metro Hex Matte White with Black Dot Porcelain Tile on the floor and the simple Daltile 3 x 6 Subway Ceramic Tile that we brought all the way to the ceiling.

Finally, the sitting bench was topped off with a beautiful quartz slab.
I also gave the ceiling a planked treatment using Arauco Radiata Pine Ship Lap Boards. See complete instructions on how you can install ship lap on the ceiling on my website.

We finally installed the shower fixtures after completing the tile work. All I have to say is they are the jewelry this room needed. The champagne bronze color is so striking!

The Delta Vero 1-Handle shower is equipped with Touch Clean soft, rubber nubbins (spray holes) that allow you to easily wipe away calcium and lime build-up with the touch of a finger.

I love the Delta Vero’s fixtures easy-to-clean design and the fact that it maintains a balanced pressure of hot and cold water, even when operating either one of the fixtures.
Step 6: INSTALL A SHOWER GLASS ENCLOSURE
This Premium 3/8 (10 mm) tempered safety Glass Warehouse Frameless Fixed Shower Door was installed to keep the water where it’s supposed to stay and to make the bathroom look bigger and brighter. It’s the final addition to the walk-in shower that gives the entire bathroom a fresh and modern feel.

The shower niche is one element that I highly recommend in a shower. That mean, no more suction cups holding stuff! Its streamlined design allows the accessories and products to take center stage; however, in order to give the niche more definition, we installed Jeffrey Court Allegro White Pencil Molding Tile all around the outside border.
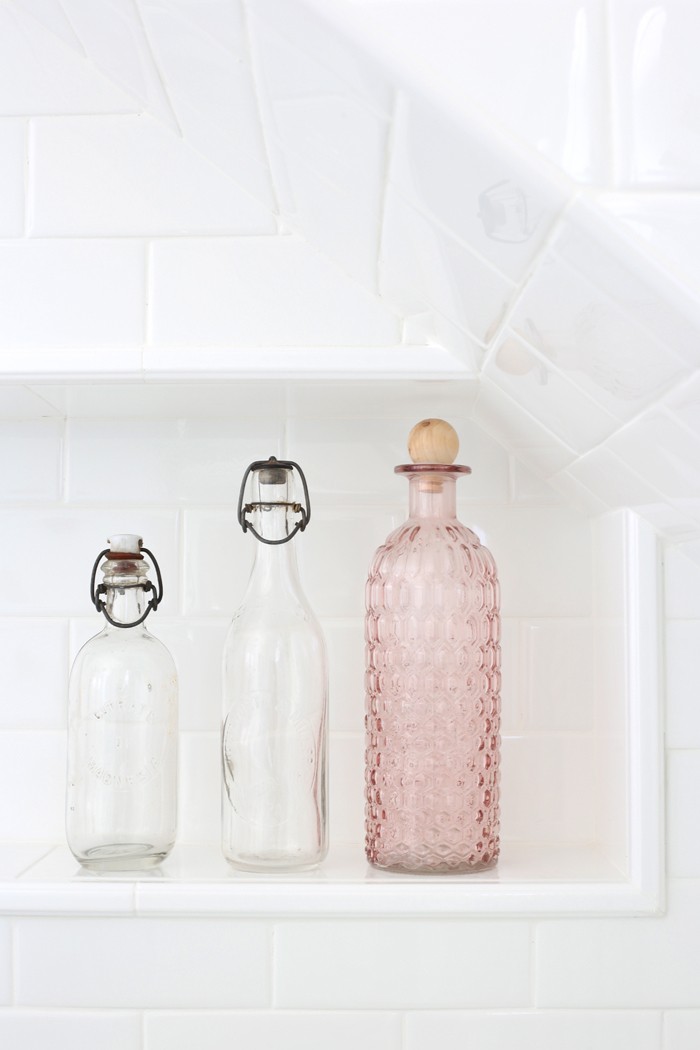
We’re so glad we installed the shower bench! It was extra work, but those 16 inches of space make a huge difference when we use the shower.

Sticking to a neutral palette gives me the option to play with decor in whatever color I want. Because yeah, I also like color!
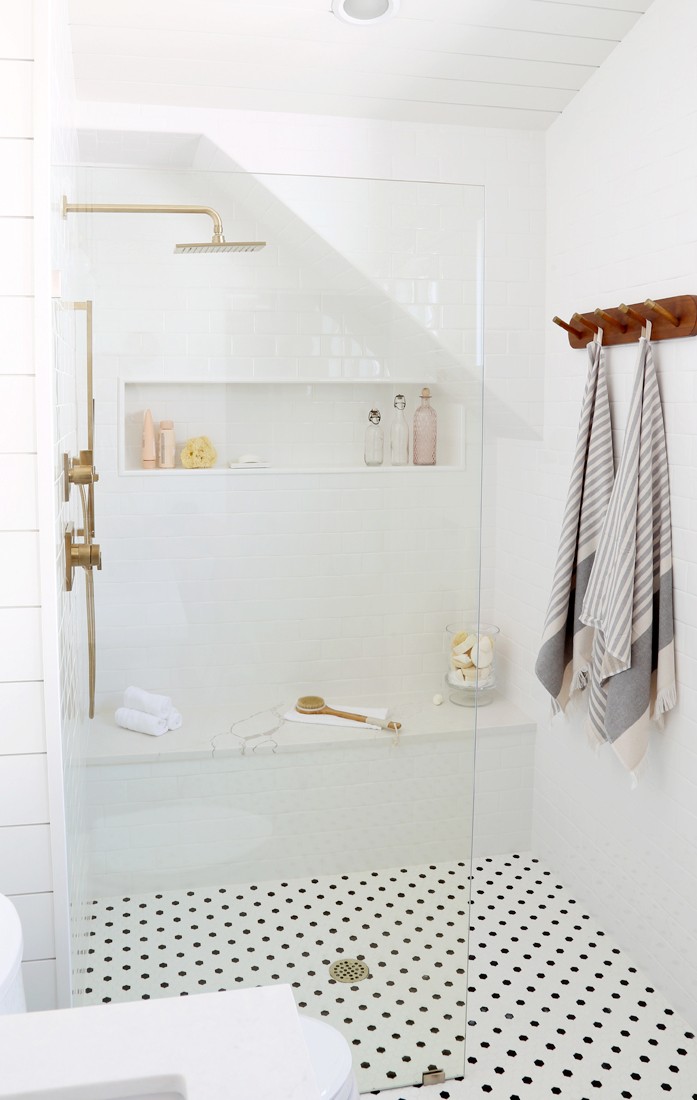
We love how spacious our walk-in shower feels! Now we have plenty of space for all our bathing products and there are no road blocks for us getting into the shower. The best decision we made in this entire bathroom renovation was without a doubt, getting rid of the bathtub.
And now I can say I put my mark on every single room of my home! 😀
Browse our Bathroom Ideas on The Home Depot Blog for more ways to transform your space.
The post Six-Step Walk-In Shower Install appeared first on The Home Depot Blog.

