
Ashley Basnight, of Handmade Haven, loves to entertain, but didn’t have a great backyard space to host people. Being the avid DIYer she is, Ashley built her own floating deck!
Read on to see how Ashley created a backyard oasis perfect for entertaining her guests and find out how to build a floating deck and DIY chevron privacy wall.
5 Steps to the Perfect Backyard: Build a Floating Deck with a DIY Chevron Privacy Wall
Everyone dreams of their own backyard oasis, so I was super excited to build a floating deck with a DIY chevron privacy wall! My backyard was pretty sad, and for a girl who loves to entertain, I knew this DIY floating deck would be the perfect project for me!
Let’s take a look at how my backyard looked before the deck. I think we can all agree that this project was a much-needed addition to my home.
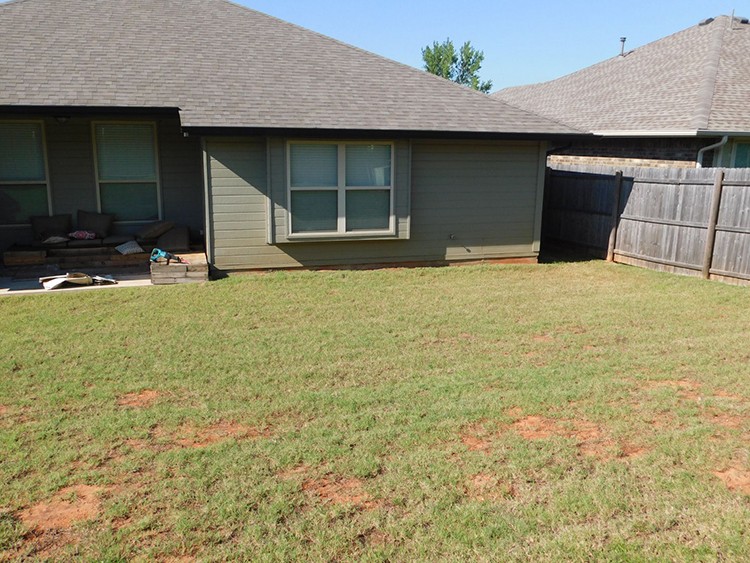
If you’re wondering if you can build a floating deck yourself, you can! With no experience at all, I built this floating deck on my own and I’m loving the results.
Materials
- Paver Base/Stone Dust
- Deck Blocks
- 4 x 4 Pressure Treated Lumber
- 2 x 8 Pressure Treated Lumber
- Joist Hangers
- Landscape Fabric
- Lanscape Fabric Staples
- Galvenized Nails
- 3 in. Screws
- 1 x 6 Pressure Treated Lumber
- 2 x 4 Pressure Treated Lumber
- 1 board of 1 x 3 lumber
- 3 in. Galvenized Nails
- 1 1/2 in. Galvenized Nails
- 2 x 4 Connectors
- Bolts
- Solid Color Behr Waterproofing Stain and Sealer – Slate
- Graco Magnum X5
- Paint Brush
- Painters Tape
- Paint Strainer
- 2 Buckets
- UltraShield Naturale Voyager Series Roman Antique Hollow Compositie Decking
- NewTechWood UltraShield Plastic T Clip Hidden Fastener
Tools
- Ryobi Hammer Drill
- 12 in. Sliding Dewalt Miter Saw
- Dewalt Tape Measure
- Ridigd Palm Nailer
- Milwaukee Framing Hammer
- Ryobi Pancake Air Compressor
- Level
- Husky Gloves
- Safety Glasses
- Hearing Protection
- Dewalt Circular Saw
- Respirator Mask
- Shovel
- Bessey Clamps
Step 1: Laying the Foundation

This first step was the most labor intensive step, laying the foundation. With the use of deck blocks and pavor base I laid five 2 x 8 pressure-treated lumber beams down and then connected them together with 4 x 4 posts and 2 x 8 joists using Simpson Strongtie connector brackets and galavenized nails. I used my ridgid palm nailer to secure the brackets and I must say, that palm nailer was a life saver; I couldn’t imagine hammering all those nails in with a hammer.

It is very important to be meticulous as possible on this step; any imperfections in the foundation will show through on your final product. Using a level, I made sure that every part of the foundation was level. My deck was a little more complicating due to it being on a slightly sloped backyard, but with time and patience I got everything level.
Click here for the in-depth blog post and video tutorial on how I laid the foundation.
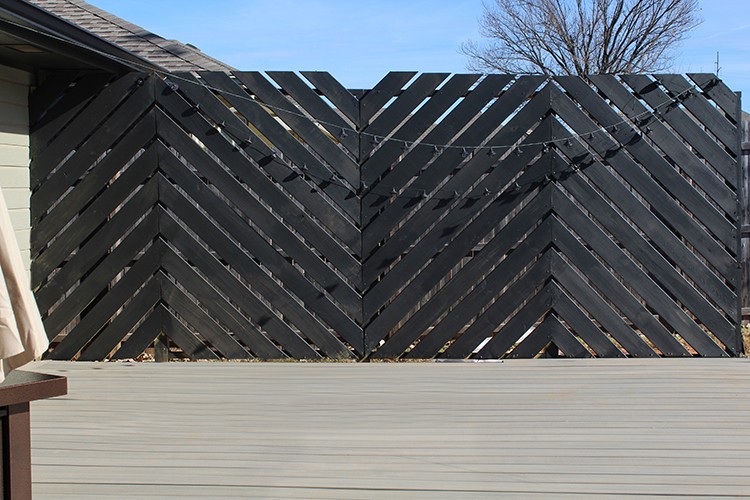
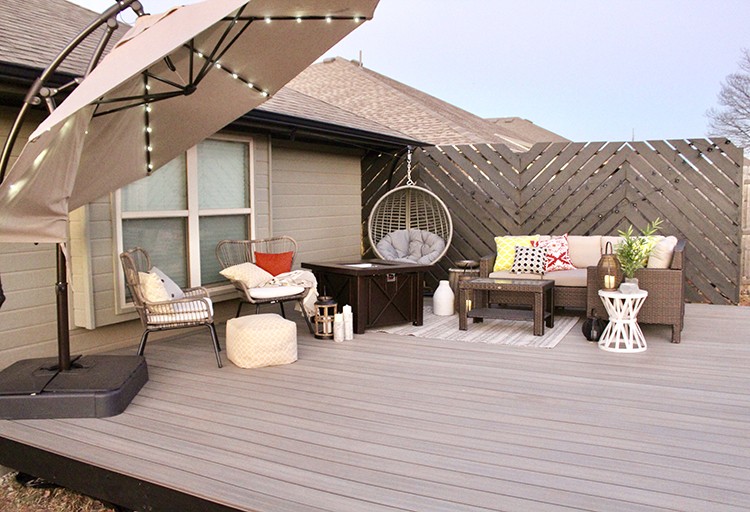
Step 2: DIY Chevron Privacy Wall
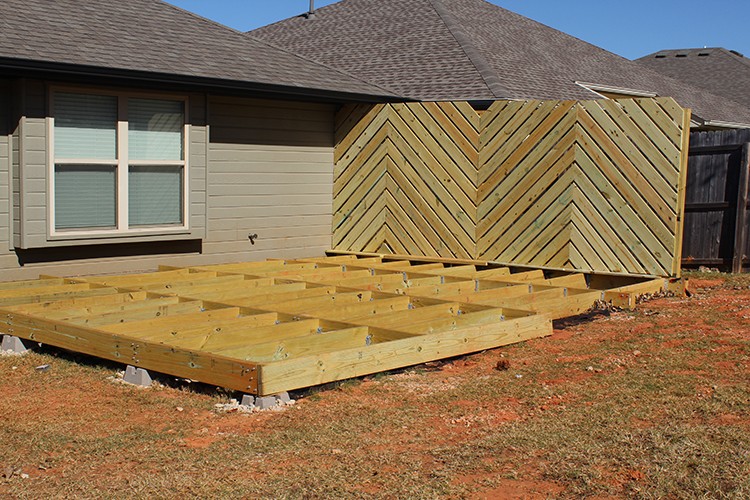
I knew I wanted some kind of privacy wall for my floating deck because the fence just didn’t give me enough privacy. I am pancaked between two houses so this wall just gives a feel of a more intimate deck area.
First, I started by securing four 4 x 4 pressure treated post to the foundation of the deck using crown bolts. Once the posts were secure I used 1 x 6 pressure treated lumber to create the chevron privacy wall. I built it section be section and secured the 1 x 6 pressure treated lumber with 3 in. galvanized nails using my palm nailer.
Click here for the in-depth tutorial on how I built this chevron privacy wall.
Step 3: Laying the Deck Boards
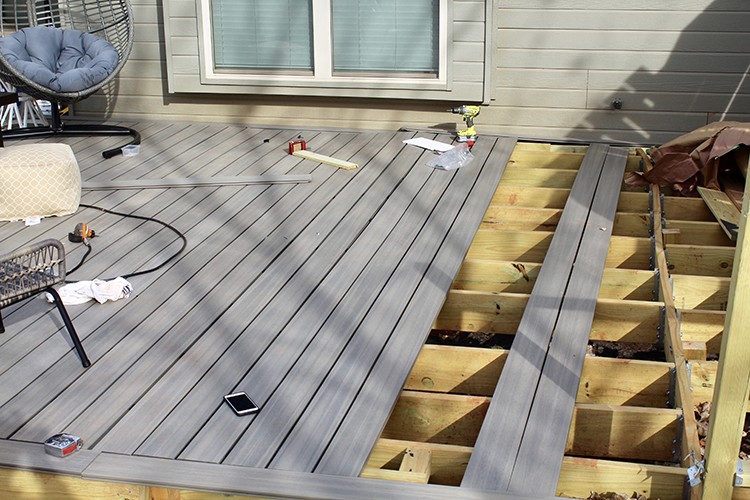
I ended up going with New Tech Wood Composite Decking for the top because I really wanted my patio to feel like a getaway area and I’m glad I went with it. These composite decking boards really make the deck look like it was done by a professional (humble brag).
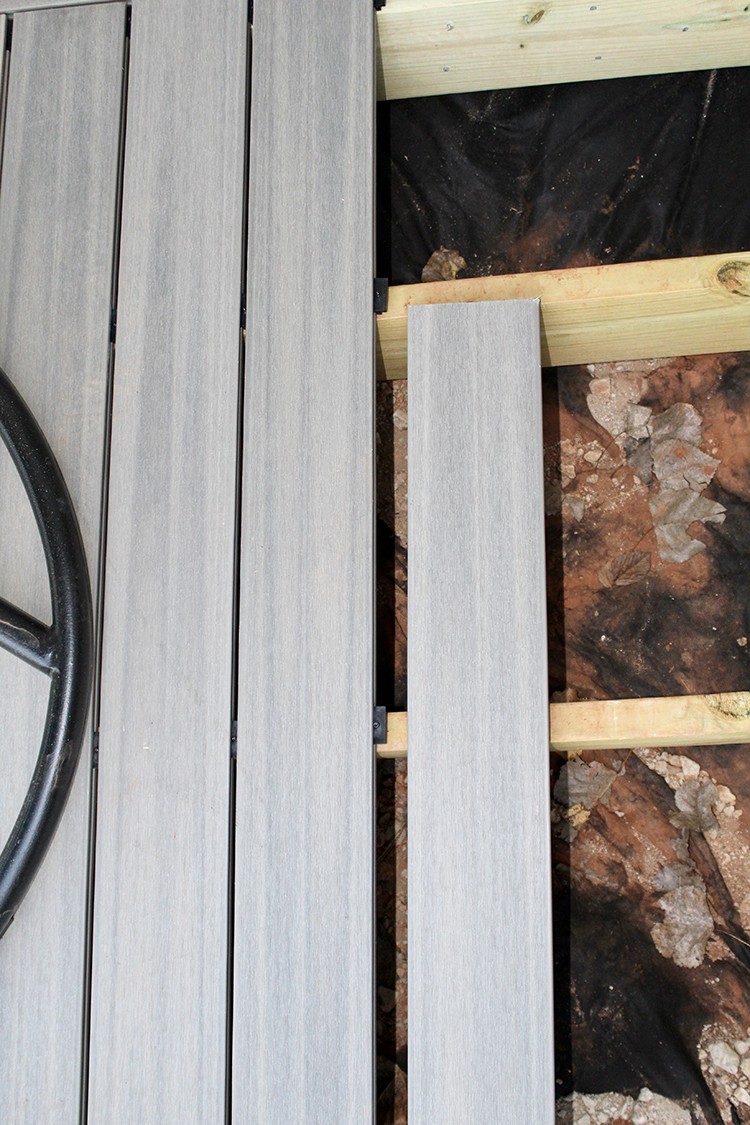
To secure the decking down I used UltraShield Plastic T Clip Hidden Fasteners. This made the process really simple and I really love that the t clips are hidden. No ugly screw heads on the top of the boards. I just screwed the fasteners into each joist and the boards slide right on the clips.
Step 4: Painting the Floating Deck
I was excited to get to this phase of the deck done because I knew it meant I was that much closer to finishing. I went back and forth on whether to stain or paint my deck and I finally decided to just take a risk and go for black. So glad I did! I used Behr Waterproofing Stain and Sealer Solid Color in the color slate. It’s called stain but the solid color is more of a paint. If you want more of a stain, you can get your color as a semi-transparent.
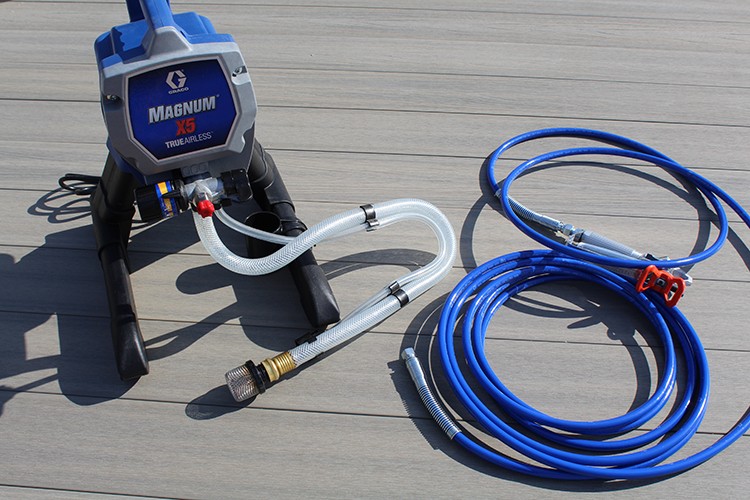
I applied the paint using the Graco Magnum X5 machine and man, oh man, did this baby perform. I sprayed in small sections and then went back over the paint with a brush. This sprayer definitely cut my spray time down in half and the cleanup didn’t take too long.
The final result was breath-taking.
Finishing the painting was such a fulfilling moment because I knew I had actually pulled it off.
Click here to see the in-depth blog post and video tutorial on how I painted my deck and laid the decking boards.
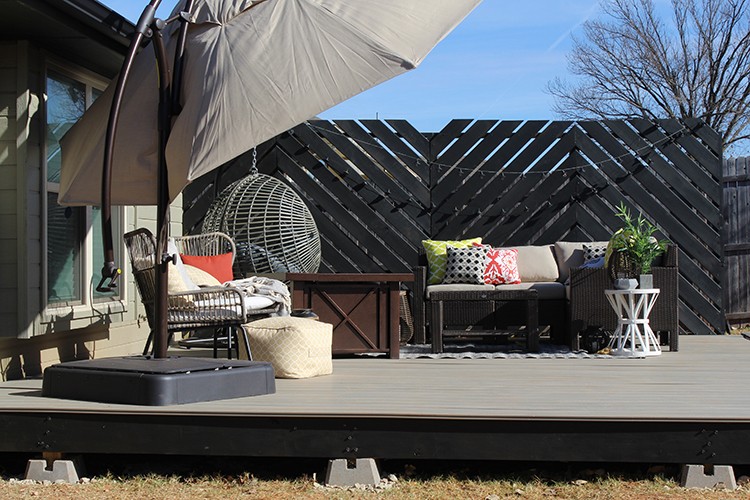
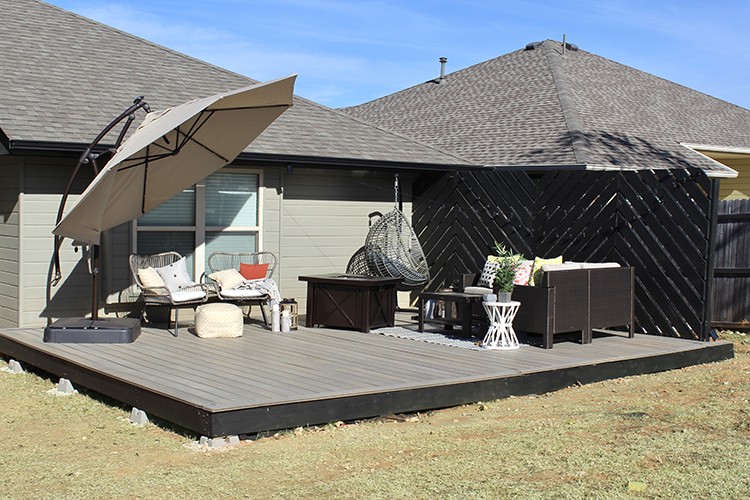
Step 5: Styling the Deck
The best and final part was styling the deck and enjoying all of the hard work.
Seating
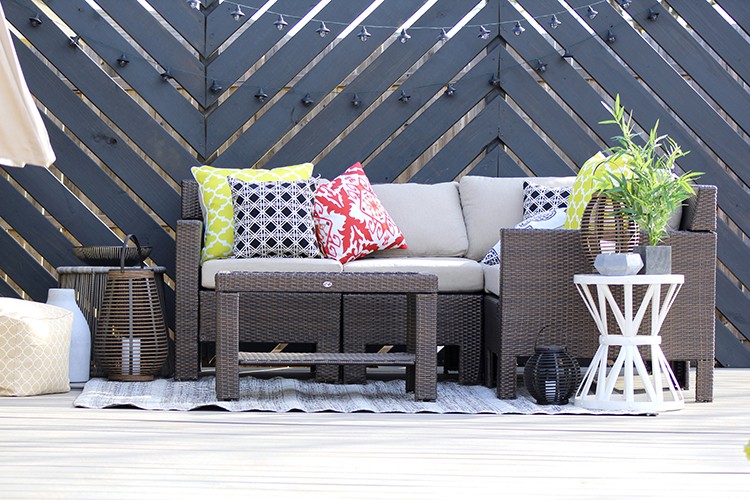
With any backyard oasis, you need plenty of seating, so I knew I wanted a patio sectional that was both stylish and comfortable, so I went with this Beverly 5 –Piece Patio Sectional Seating Set. What sold me on this one was the fact that you can buy additional seats to make it as big as you want. I will definitely be buying some add ons in the near future.
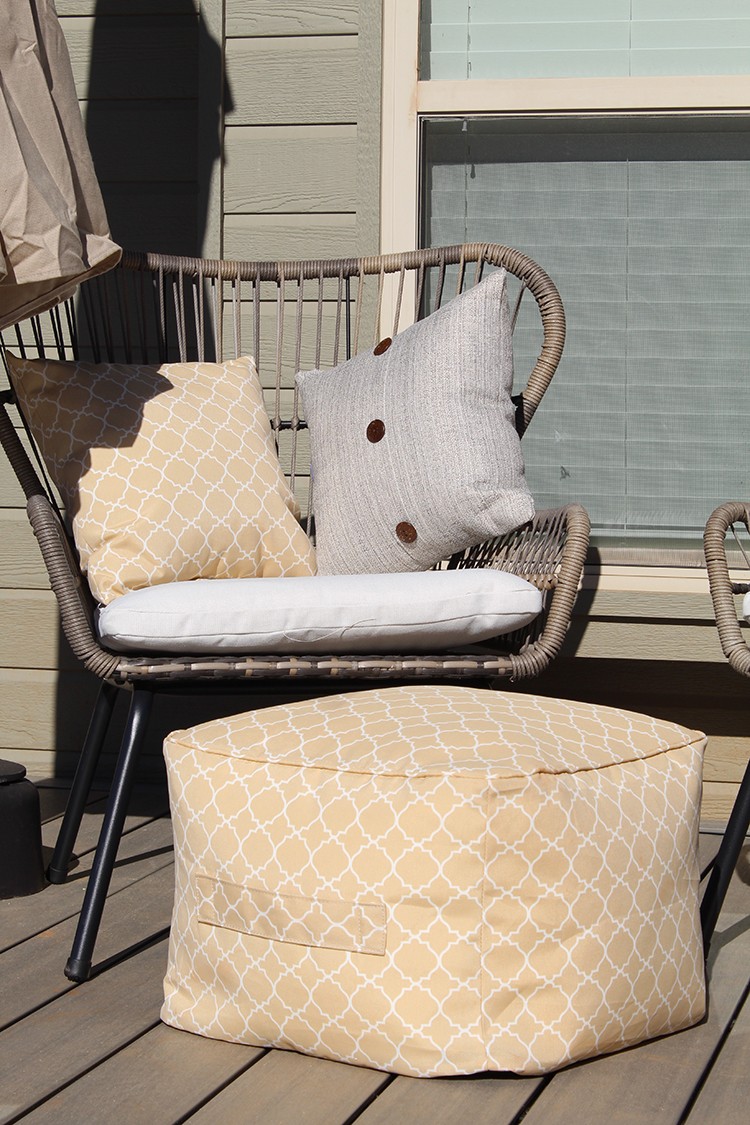
To make the sectional pop I used some colorful pillows and added some contrast with these Wicker Lattice Outdoor Throw Pillows.
You can never have enough places to sit, especially on a 16 ft. x 21 ft. deck, so I got this ottoman pouf for extra seating. I love that you can just move it around anywhere. Makes the perfect deck addition and even better Home Depot has the matching Sand-Geo Throw pillows to tie it all together.
Floating Deck Extras
I absolutely love the wicker on Beverly Patio sectional and to really tie in the sectional I placed this Round Metal Garden Stool in Chalk beside it to serve as an outdoor end table.

Before I even started to build a floating deck I knew I wanted this Hampton Bay 11 ft. LED Offset Patio Umbrella. I am in love. It gives off so much shade for my new deck and gives the deck that cozy feel.
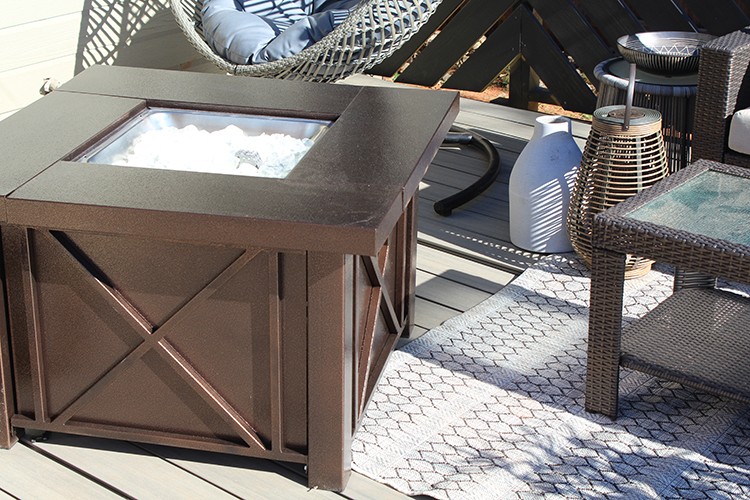
And speaking of cozy, I was happy to move my AZ Patio 38 in. Decorative Steel Fire Pit onto my deck for the upcoming winter months. This fire pit was surprisingly bigger than I had anticipated when I purchased it a while back but the perfect addition for my new deck.
Lighting
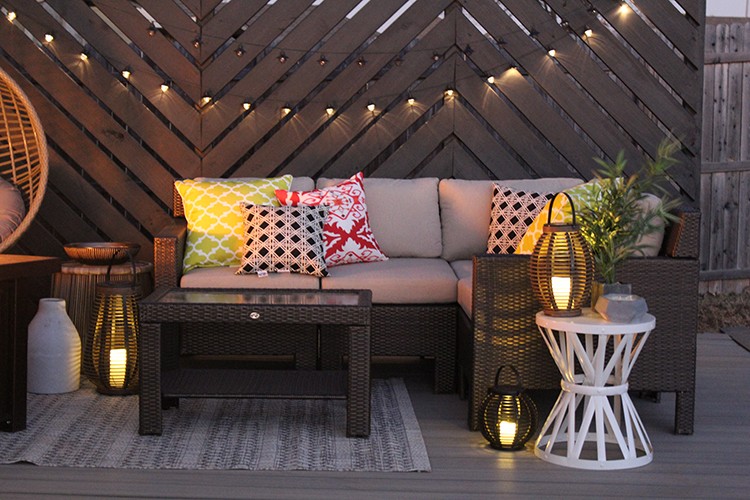
In order to enjoy my deck after dark I hung up some Solar Powered Black Nautical String Lights for some deck lighting. I love that these lights are solar so I don’t have to worry about plugging them in.
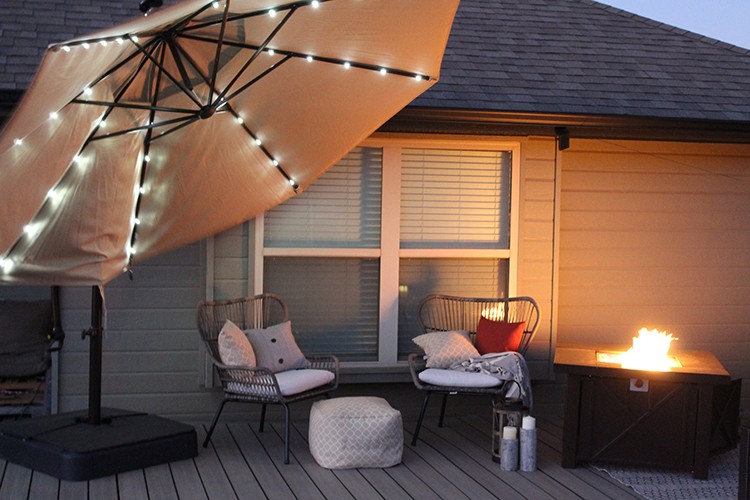
I was also excited to learn that the Hampton Bay 11-ft. LED Offset Patio Umbrella has solar LED lights. This umbrella lights up the night sky like no other and I love it. The first day I took it out of the box, with some direct sunlight, she was lit up that same night.
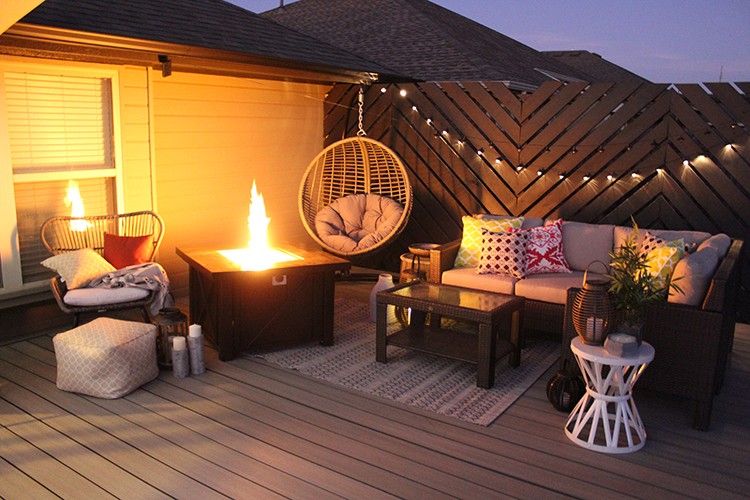
Even though the fire pit isn’t necessarily a light, cranking it up definitely brings some illumination to the deck and the warm feeling just ties it all in.
Overall this project was lots of fun, and after some sore muscles and some crazy events, I am happy to be able to say I successfully completed this floating deck! Now it’s time to go enjoy it!
The post 5 Steps to the Perfect Backyard appeared first on The Home Depot Blog.

