There’s no beating around the bush on this one: Bathroom renovations are tough—both mentally and financially. But there are ways to make the process as painless as possible! Lifestyle blogger Carrie Waller, of Dream Green DIY, spent several months working with her local Home Depot kitchen and bath center to refresh the dated bathroom in her mid-century home, and today she’s sharing eight of the main things she learned throughout the process.
8 Things to Consider During Your Bathroom Renovation

Since moving into our retro brick ranch three years ago, my husband and I have repainted walls, replaced light fixtures, rearranged rooms countless times, and just generally poured as much DIY love into the home as we knew how. When it came to our downstairs bathroom, though, we hit a wall—literally. Breaking into drywall and ripping out tile is something neither one of us has experience with, but that’s exactly the type of treatment our dated bathroom needed.
The Bathroom Before Updating

First, a refresher. If you’re just tuning in to our renovation story, here’s a quick tour of the space as it looked when we moved in, and (embarrassingly enough) two years later. Judging by the dated fixtures and finishes, we assume that this bathroom was added on to our 1960s home sometime in the ’80s or ’90s, and hadn’t seen an update since then.


As you may remember, we spent one weekend swapping out a few key accents—things like the towel bars, drawer hardware, and sink faucet—but we left the shower as is because a full renovation hadn’t been in the budget. Fast forward six months, though, and we were ready to get serious about making over our bathroom to last for the next few decades. Scroll on for a list of the eight things we kept in mind (and learned!) throughout the process of our retro reno project.
1: Build on the Original Footprint
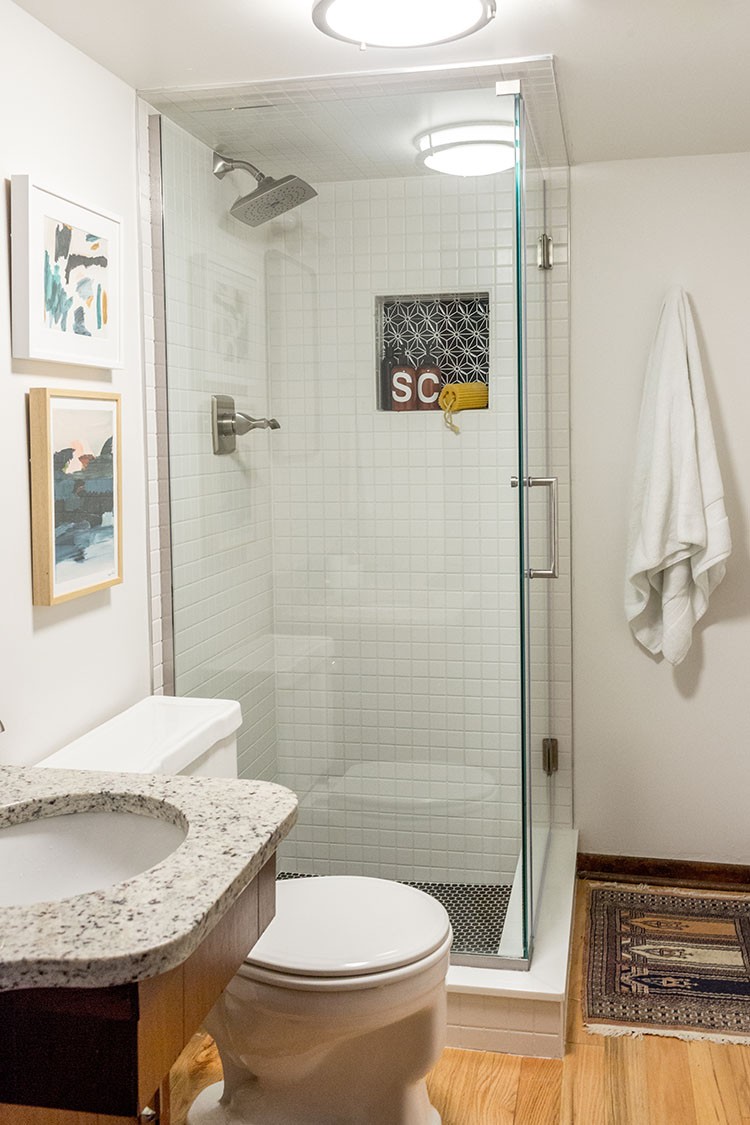
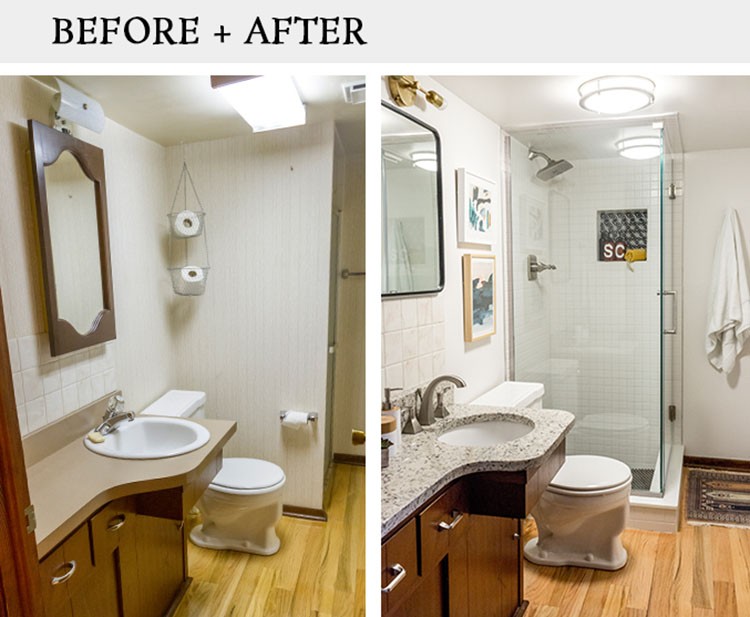
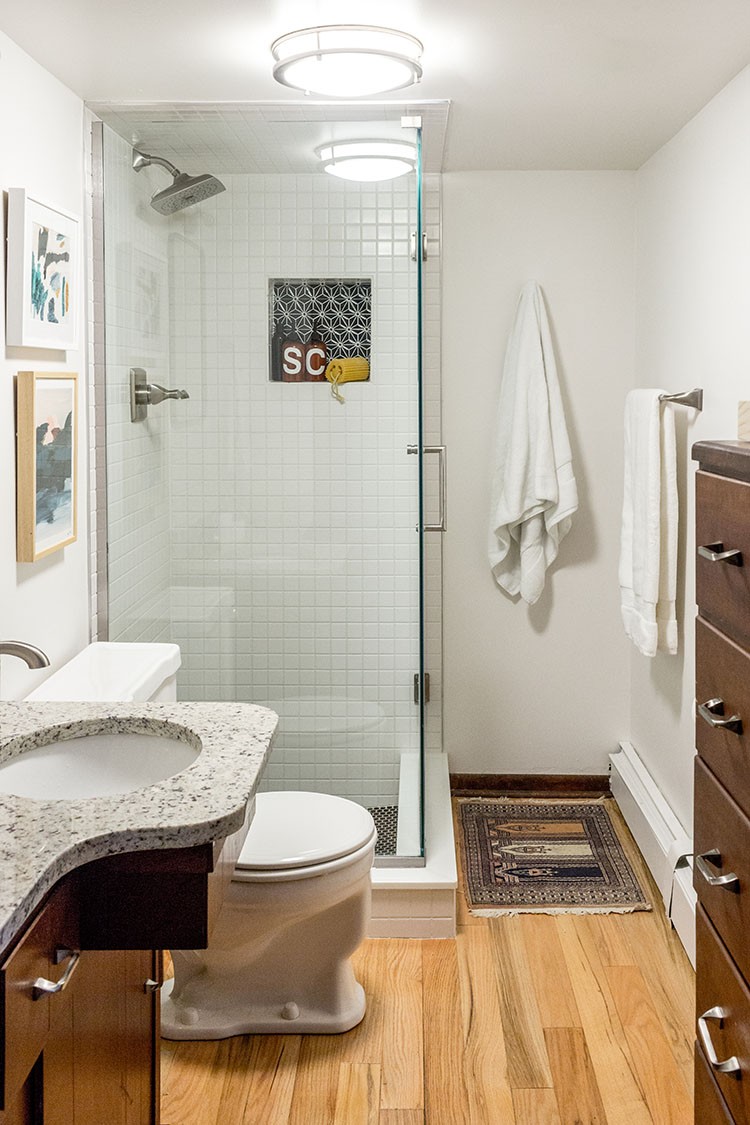
If, like us, you just don’t have the time or budget to completely gut your dated bathroom and start from scratch, the best thing to do is build on the original footprint. Instead of making our shower bigger, for example, we limited the renovation to the existing measurements of the old stall. This meant that we could avoid disturbing the wood flooring around the shower, and we saved on demo costs, too.
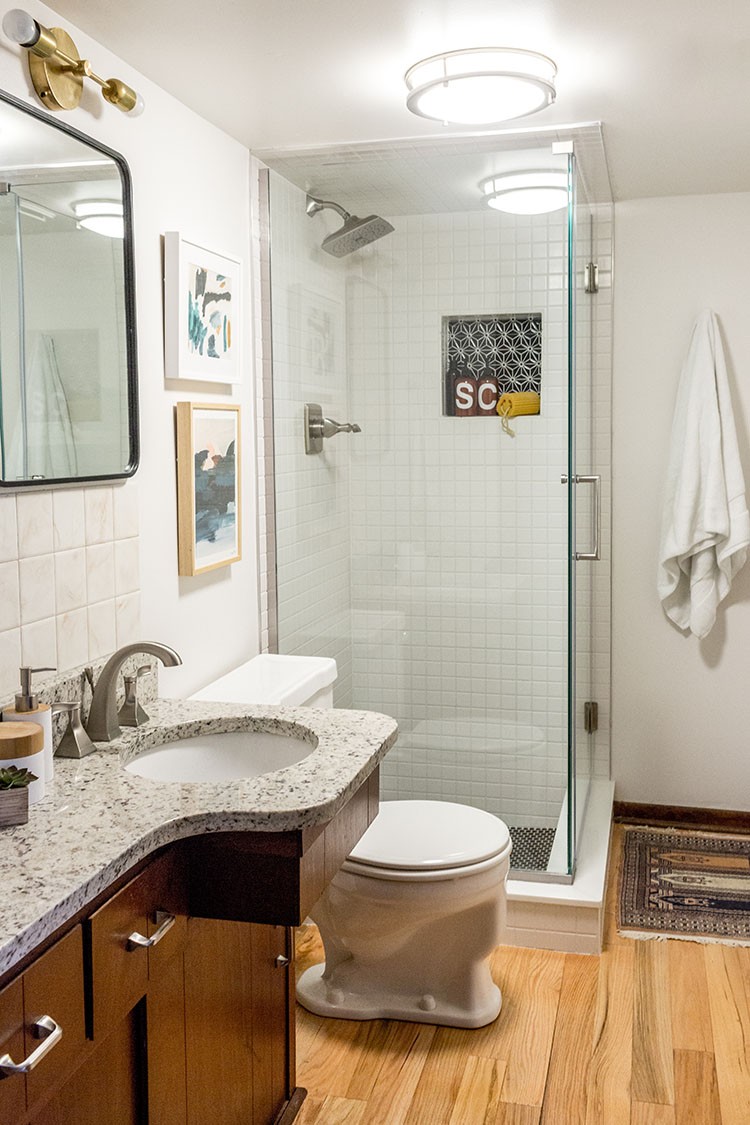
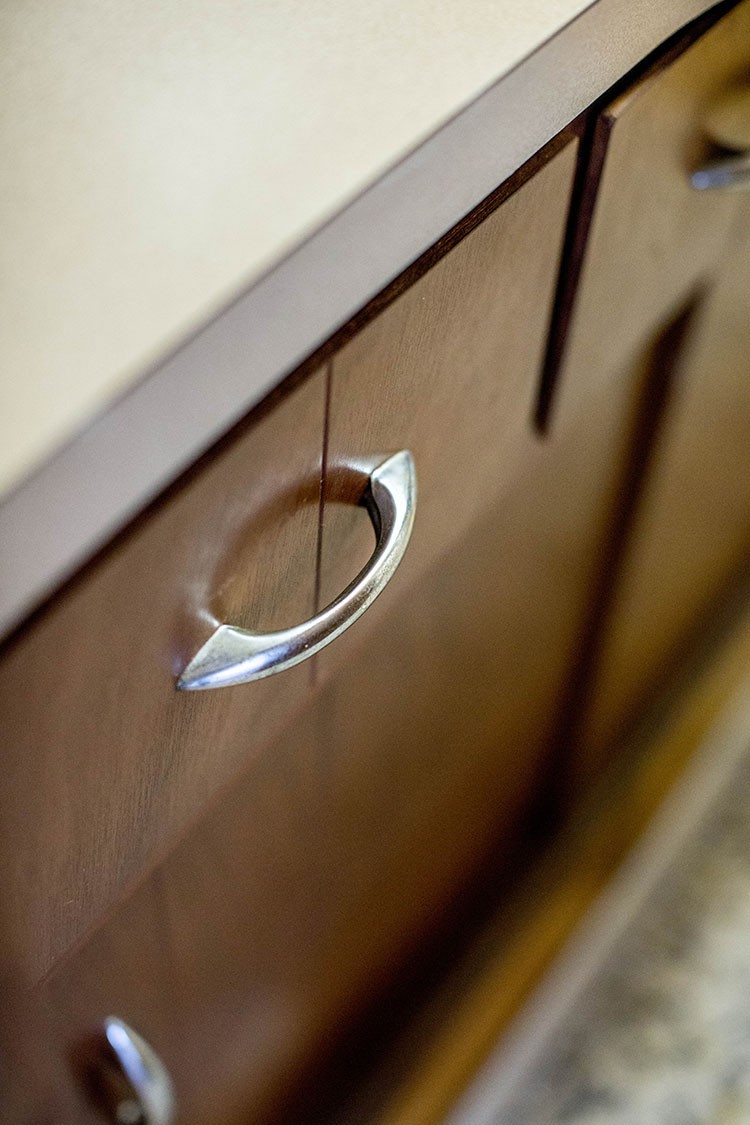
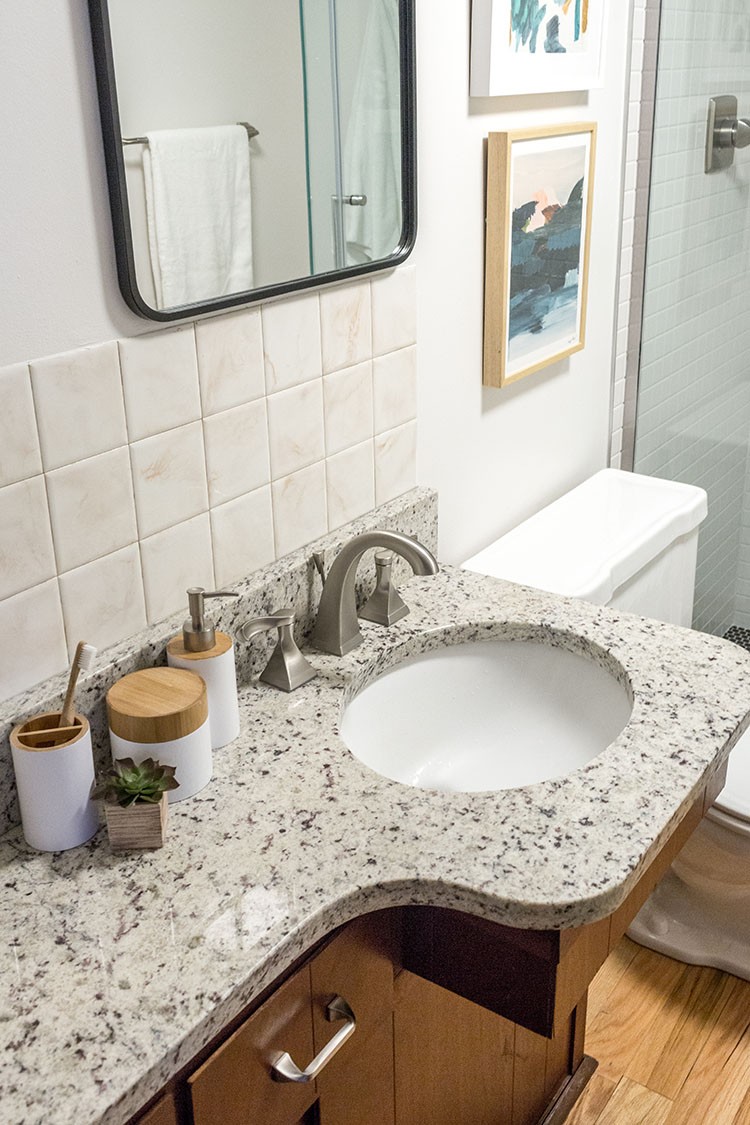
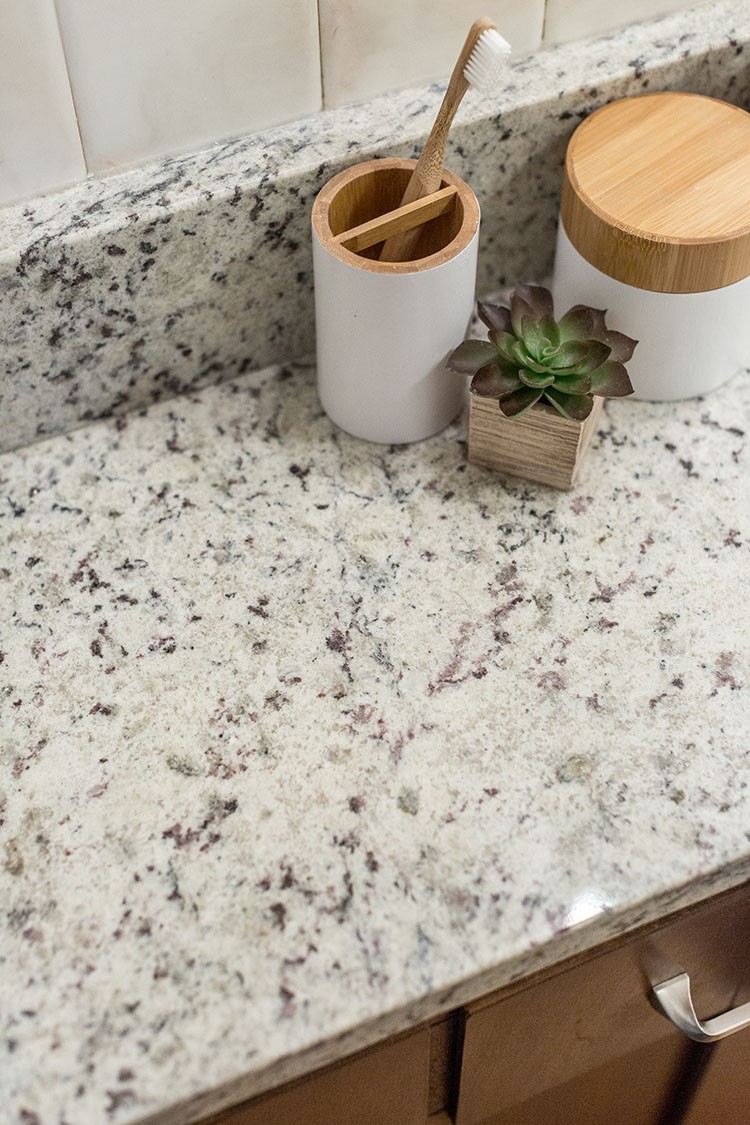
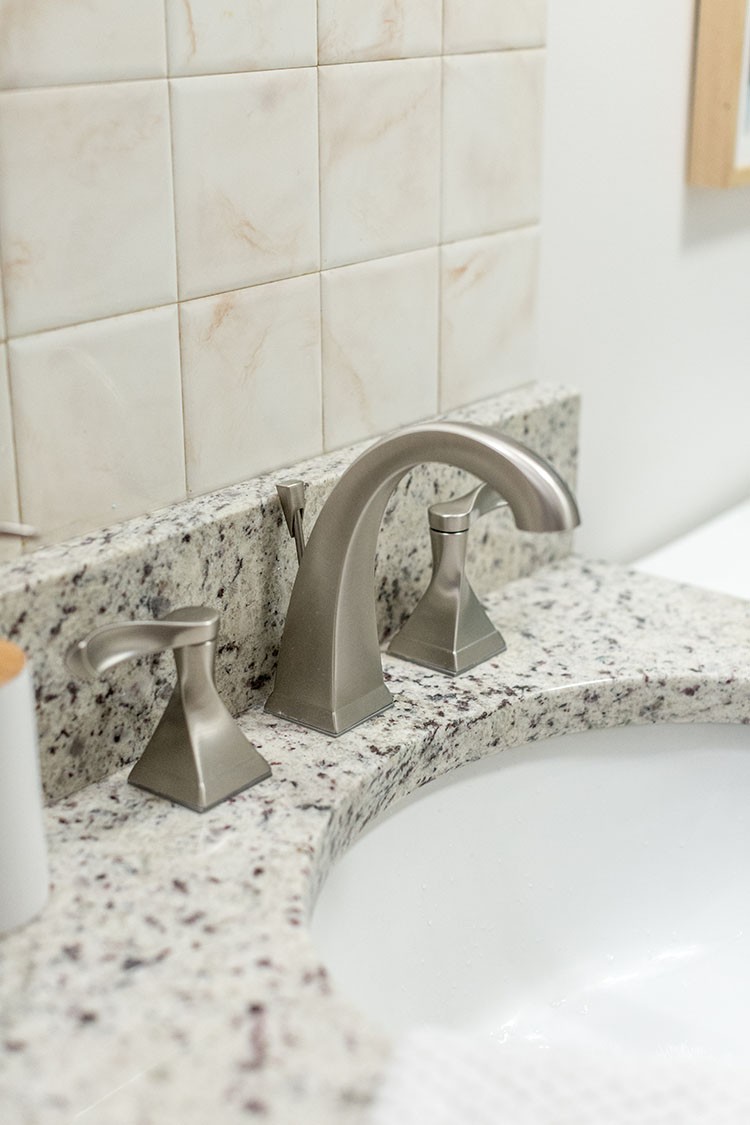
We also decided to keep the sink vanity as is since the wood surround and drawers were still in great shape. A brand new granite countertop with an updated curved shape helped give the vanity a new look without having to tear into the walls and floor.
2: Start with a Neutral Base

Let’s face it: home design trends change and evolve constantly, so do your best to think beyond the here and now when working on a bathroom renovation. In order to achieve a look that would stand the test of time, we chose neutral colors and finishes for all of the built-in surfaces so that they would feel fresh for decades to come.
I removed the dated wallpaper in the bathroom, and then repainted the walls and ceiling a matching soft white. The stone countertop around the sink was also chosen specifically for its neutral white and gray pattern.
3: Add Pops of Color

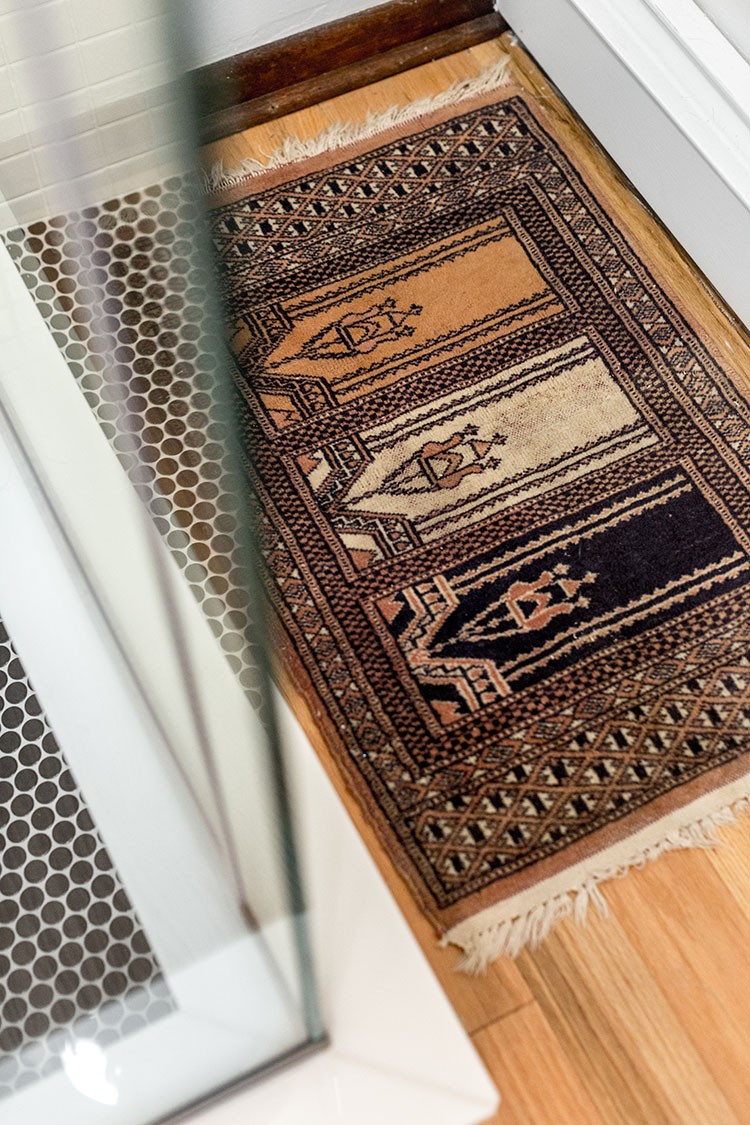
With that neutral light and bright foundation set, I made sure to add in a few fun pops of color with the accents. Things like bold abstract framed art and a vintage Turkish rug help give the mostly-white room a bit of extra texture and personality. For your own space, consider small, removable ways to bring in those hits of pattern and color so that you can easily swap them out as your taste evolves—no power tools required!
4: Replace Drywall with Glass
The original shower stall in our bathroom was largely surrounded by drywall, with a frosted plastic door on one side. This made the shower experience nearly pitch-black since the drywall blocked the only overhead light in the room. It just wasn’t working. So, when it came time to renovate, we opted for a glass surround to let as much light in as possible. The new glassed-in shower now feels twice as big even though it’s the same size as the original stall.
5: Choose High Contrast Tile
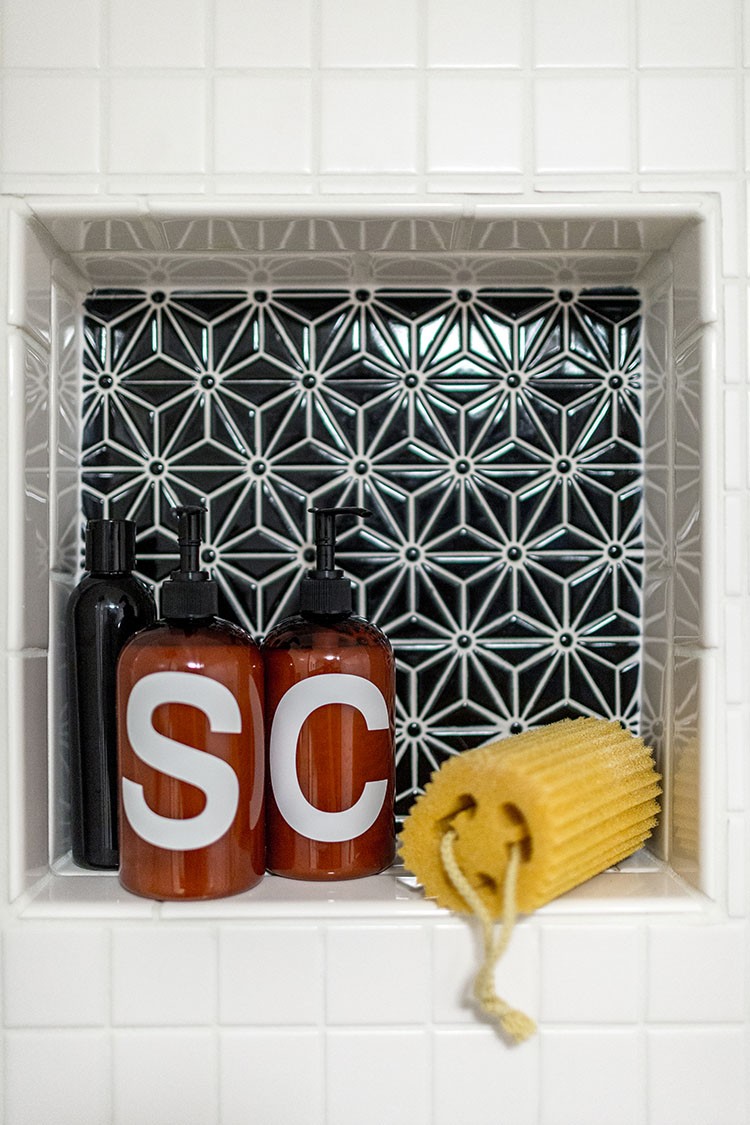

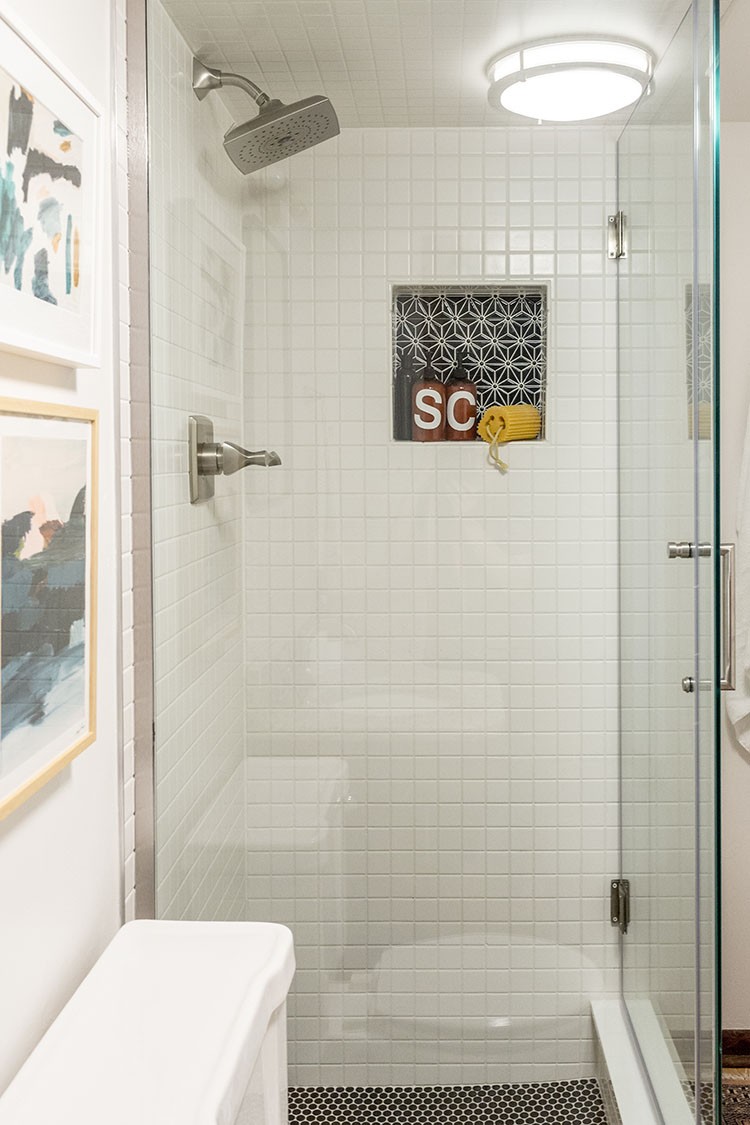

With so much of our renovation centered on neutral colors, I needed to make sure that I got a little playful with my tile combinations to avoid a flat look in the end. So, I chose two super high contrast options for our shower in order to give the room a bit of drama. Black penny tile on the floor grounds the look, while white satin finish square tiles on the walls and ceiling give the illusion of height. A funky black accent tile in the shower niche (that I already had from an old project) is a fun focal point for the room, and really pops against the light wall tile.
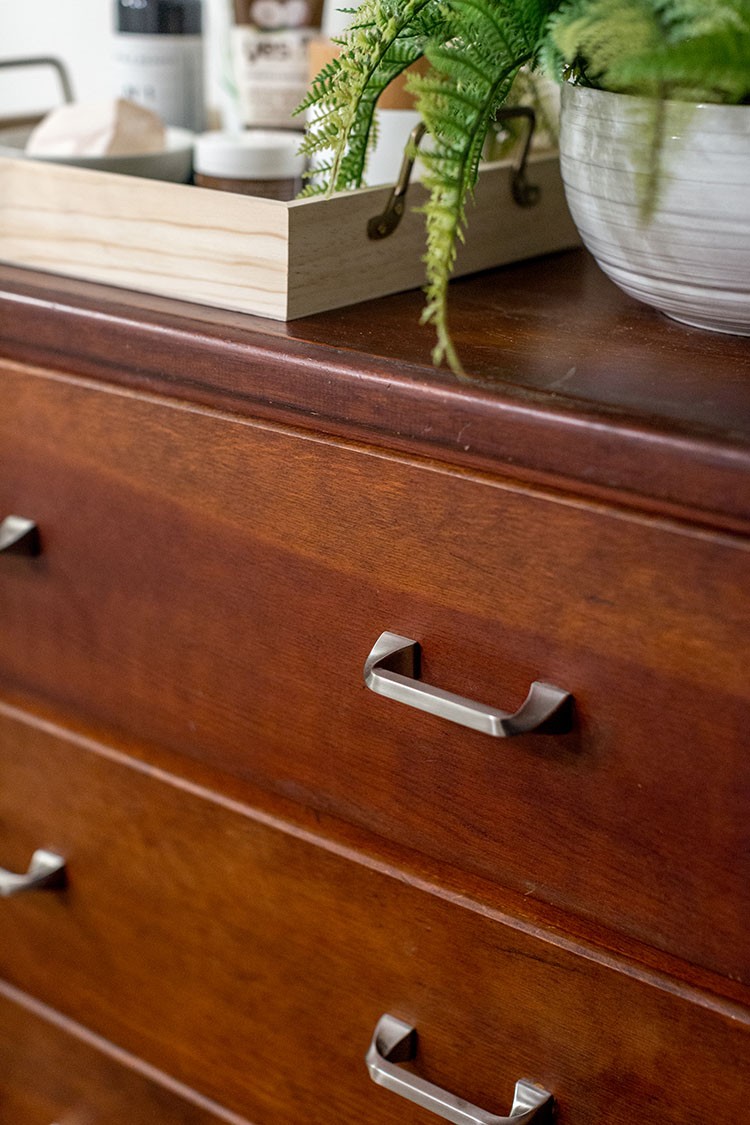
6: Mix Metals for Fun
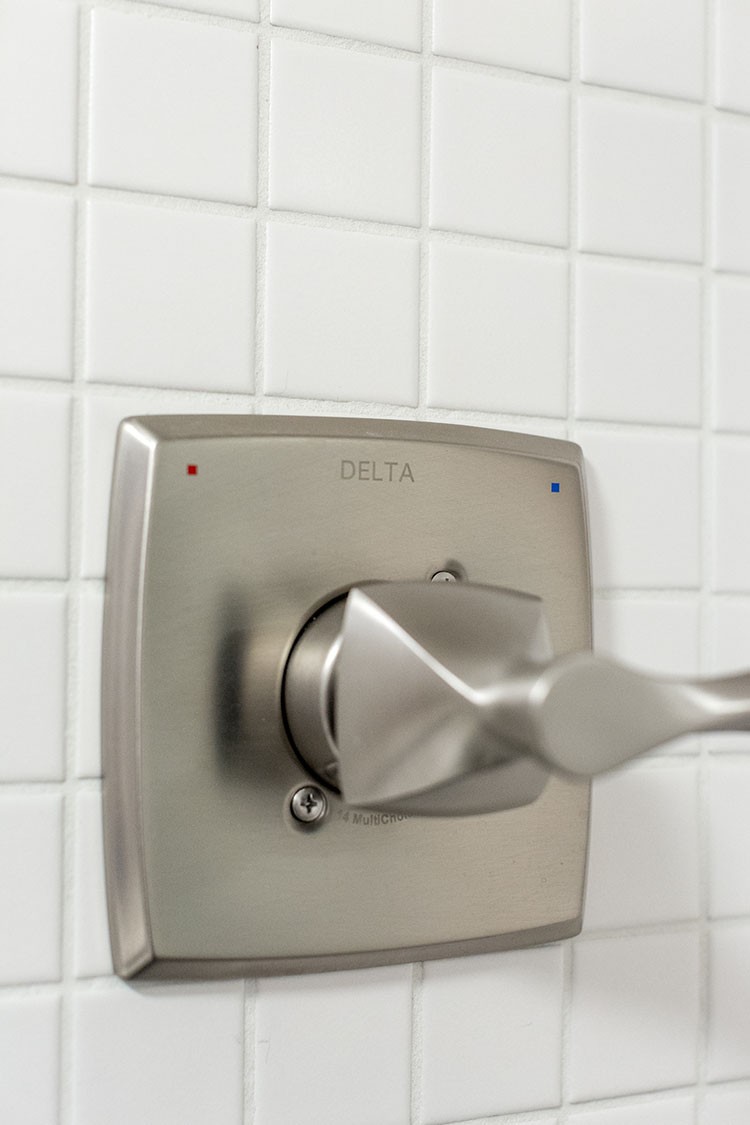
Resist the urge to think that all of your metals have to match in a bathroom renovation. For the most part, we used a classic brushed nickel finish throughout, but a funky black metal mirror helps draw the eye and also makes the black tile in the shower make sense with the rest of the room. The gold vanity light fixture is another cool metallic focal point that might have been lost had we simply matched it to the brushed nickel fixtures everywhere else.
7: Stick with ‘Sleek’ in a Small Space
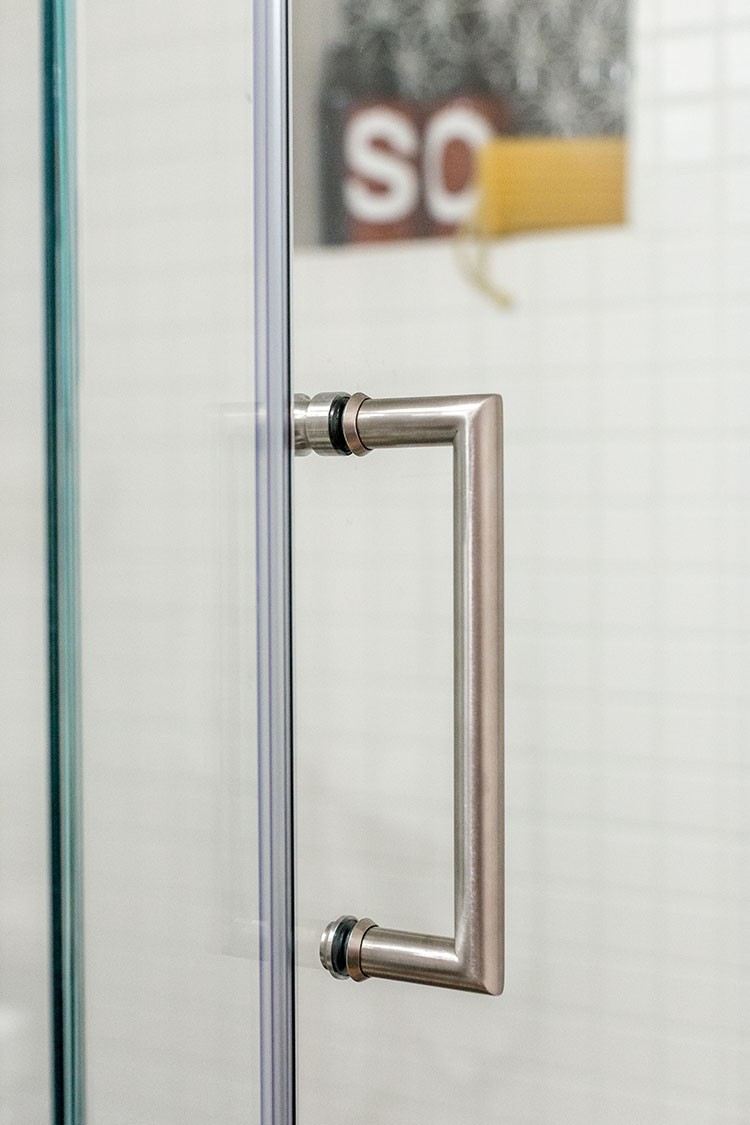
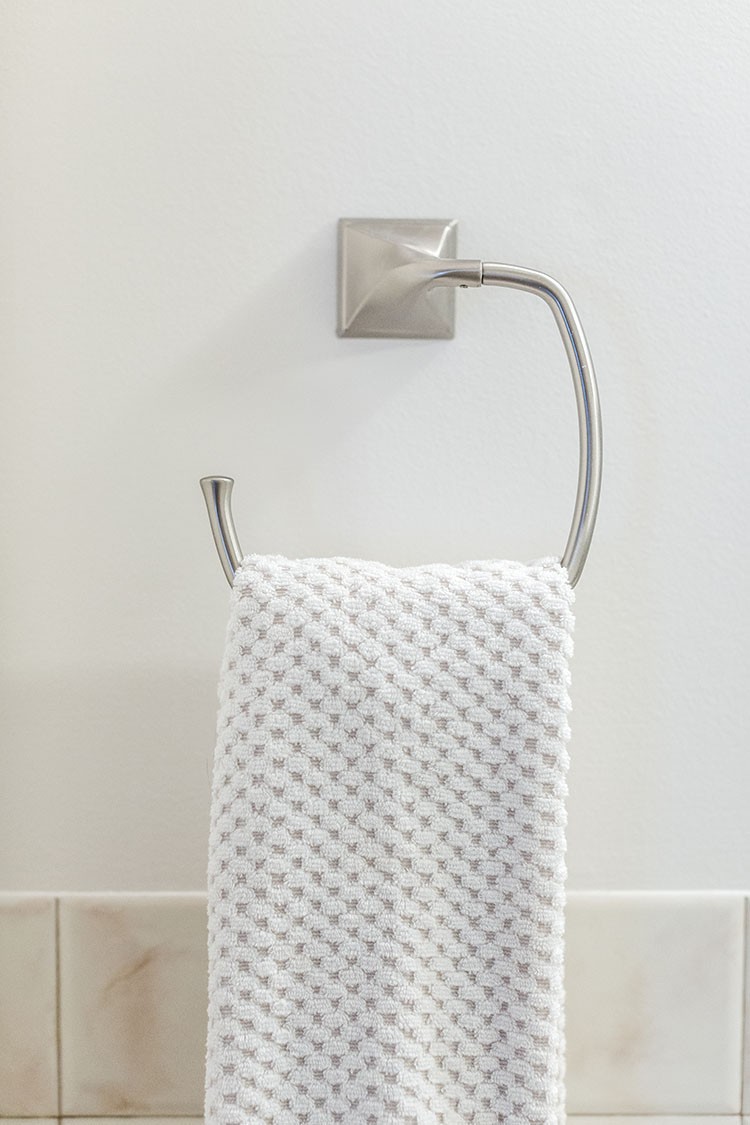
You might think that you need to play homage to your love for traditional or ornate design on every surface when you renovate, but elaborate isn’t always best—especially in a small space.
Instead, consider sleek, streamlined fixtures and finishes (think: faucet, towel bars, drawer hardware, the shower door handle, tub fixtures, etc.) so that they don’t end up looking busy all together in a tight space. Later on you can indulge your love for traditional design in things like the art you hang and the vanity accessories you put out.
8: Reduce and Reuse
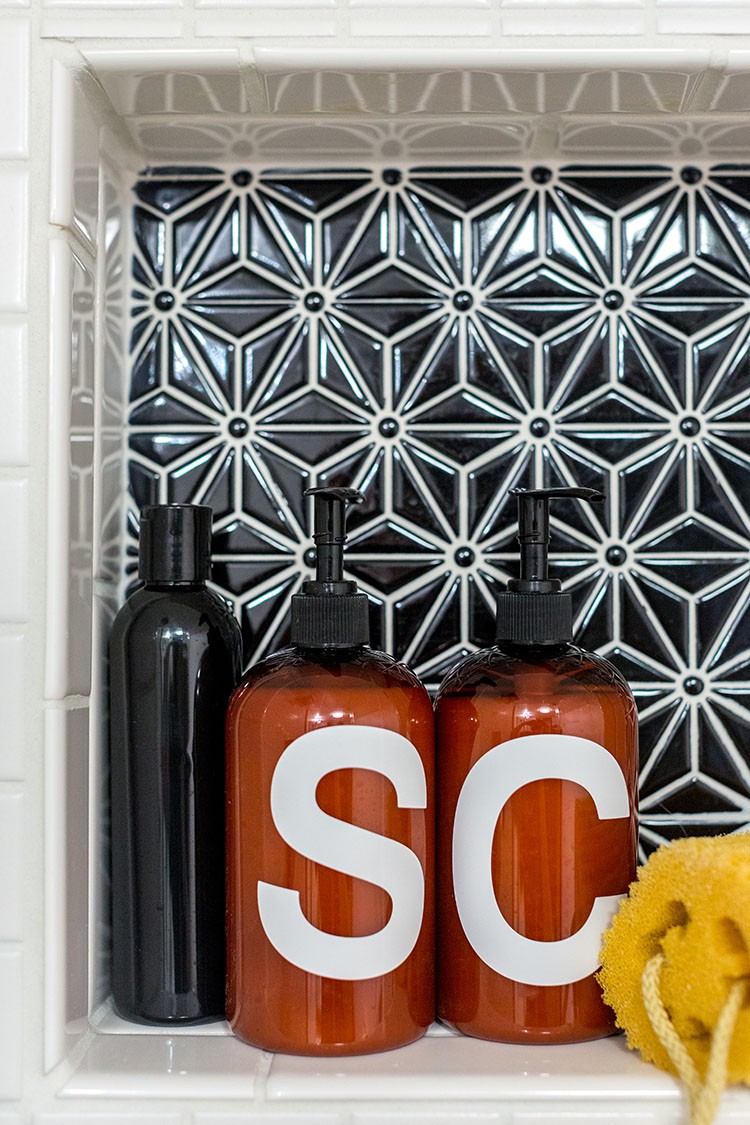
Finally, don’t forget to put a little thought into things like your soap pumps and shampoo and conditioner bottles. It might seem a little fussy to search around for the perfect reusable bottles, but these items can easily steal the show in a small, open bathroom like this one.
Using a fun DIY tutorial as my inspiration, I purchased plastic amber bottles from a local supply store, and added white vinyl letters to the bottles so that we could differentiate between shampoo and conditioner. I also used a neutral white and wood-tone soap dispenser on the vanity, which can be refilled as needed. Since you can see all three bottles right when you walk into the room, I feel like it was well worth the extra time to make sure they fit within the design of the room itself.
The post 8 Things to Consider During Your Bathroom Renovation appeared first on The Home Depot Blog.

