Sometimes you need to tear what you have down and start over. That’s the case for this backyard deck rebuild by Andrew Bacon of Field Treasure Designs. His deck had seen its best years, it wasn’t really suitable for his needs, and it turns out it wasn’t even well-constructed in the first place.
He totally rebuild his backyard deck, with proper drainage, more space and better construction. As you’ll see, it looks fabulous, too. Follow along as Andrew explains the steps to his backyard deck rebuild.
DIY Backyard Deck Rebuild
After remodeling nearly my entire house over the last year, I finally tackled the challenge of renovating our backyard deck. Full confession: I thought it would take me about two weeks to complete, but rather it took me two months! I had never built a deck before and was committed to doing it right from beginning to end. Hopefully my project helps you plan your deck project if you should ever decide to remodel one or build one brand-new.
First, why did I decide to do this? Well I think from the photos you can see that we inherited a very outdated deck. We wanted to update the aesthetics and looks of our backyard and make sure it was safe because we have three little children. We also wanted to expand the deck and make it more functional for gatherings or family hang time.
Before the Deck Rebuild
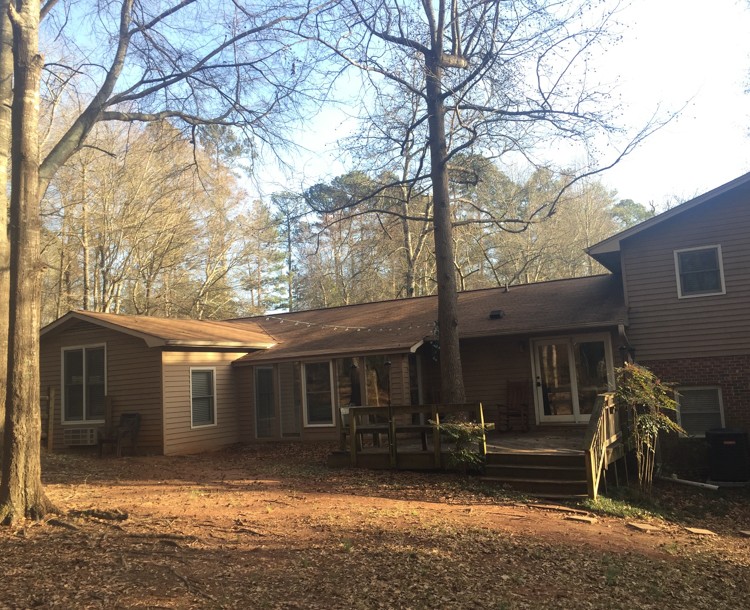
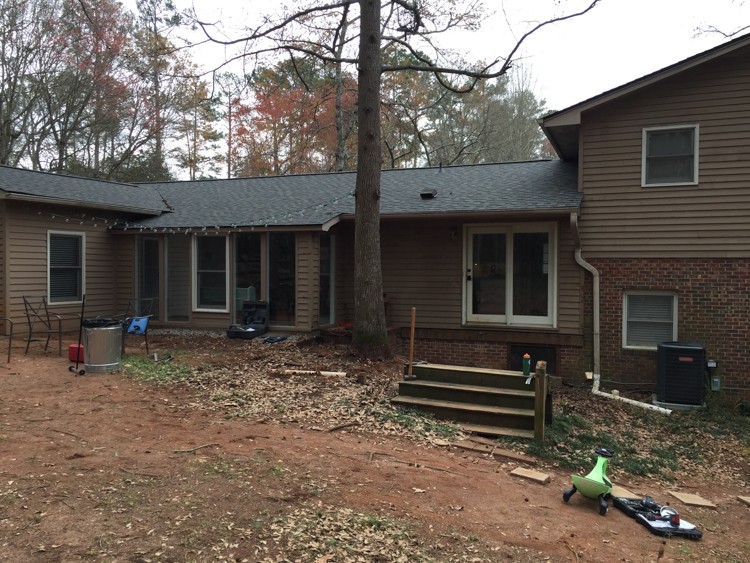
As you can see from the before photos, it was old, unsafe and small.
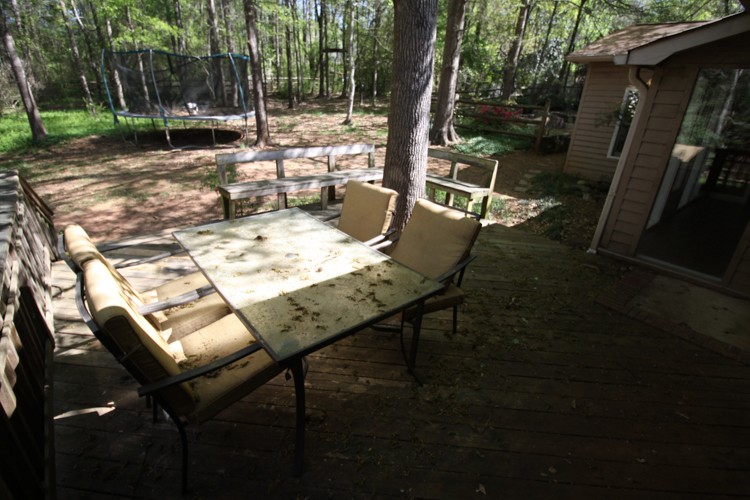
Here is the full view of the old deck from the backyard.
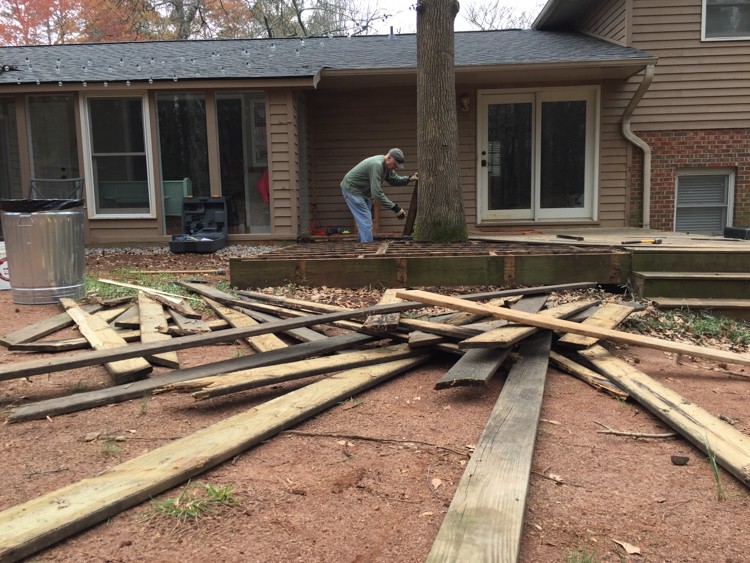
Let’s Tear This Thing Out!
My good friend Tim came and helped me take down the deck. We discovered that this deck had not been properly made, and we confirmed even more that it was a good decision to update it. It took an entire day just to tear the whole thing out, and another day to load it all in a dumpster and haul it away.
Prepping for the New Deck
Now with the old deck completely cleared away, it was a lot easier to lay out the plan and start the prep. A lot of people think decks are just that – decks. But there is more to it if you want to do it right.
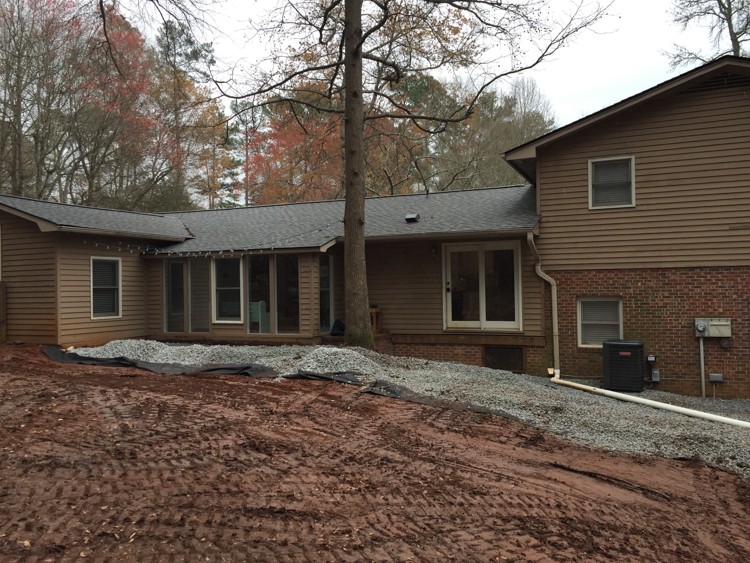
First, I made sure to grade (or adjust the dirt) to the right level. I brought in a mini loader, and we scraped some dirt away to make room for drainage stone and enough room for the joists (boards running under your deck) to fit.
After a day’s work, we had fabric laid down and ¾-in. crushed stone (drainage rock) laid down where the deck was going to go. The reasons for this step are very important. It prevents animals from moving in under your deck, it prevents plant growth, and it promotes good drainage without erosion problems, which if unchecked, can affect the stability of your deck over a long period of time.
Planning a deck should take a good amount of time as you want to calculate all your materials and work accordingly. I used simple graph paper to sketch out the design and worked with my local Home Depot to schedule delivery of my materials.
Materials
*All wood is pressure treated
- 2 x 12 x 16’s (for beams, joists, and ledger)
- 2 x 8 x 8’s (for beams joists on shallow side)
- 6 x 6 posts (for all posts)
- 2 x 4’s (for ledger on shallow side under the windows)
- Premium deck boards in 16-, 12-, 10- and 8-feet lengths
- Joist hangers (saves so much time!)
- Galvanized joist hanger nails
- Galvanized 16 gauge nails
- Quickcrete Concrete (for post footings)
- ¾-in. Crushed stone, aka #57 wash stone (for underlayment)
- Fabric (over red dirt and under the crushed stone)
- Drainage piping (for redirecting gutter downspouts under the deck to other side of the yard)
- Kreg Deck screws
Tools
- Circular Saw
- 21 degree framing nail gun
- Table saw
- Hammer
- Level
- Masonry string
- Impact drill
- Tape Measure
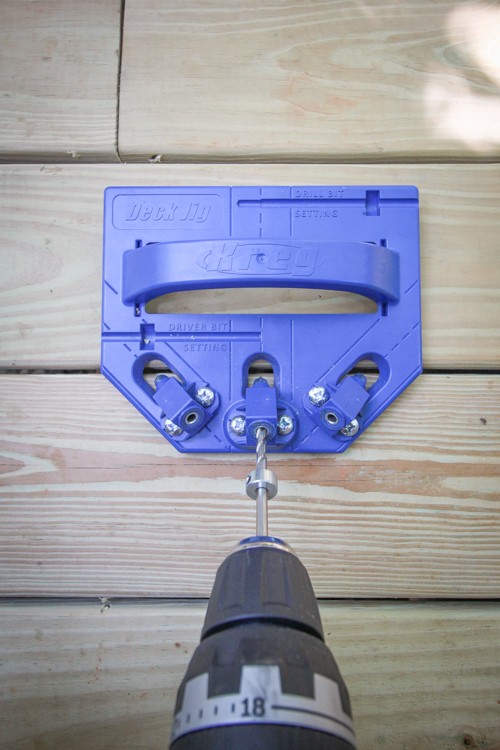
- Kreg Deck Jig
Framing the New Deck
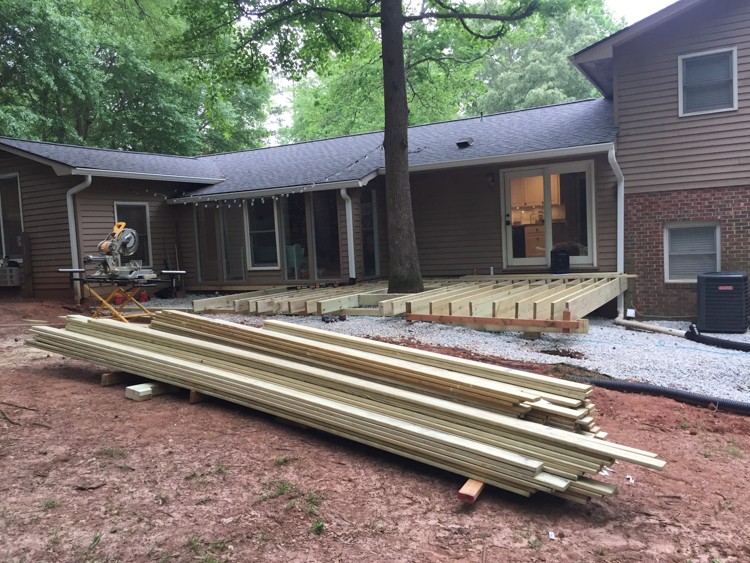
After laying out all the footings and letting them set for a few days, I was able to start framing out the deck. I used a ledger on the hose side drilled in and used joist hangers to come out and lay on top of a beam. My Ryobi Impact Driver and a Paslode nailer were both perfect tools.


As you can see, the plan was to extend the deck over the windows where it used to be an old flowerbed and dirt as well as a huge water trap. You can also see in this picture that we had the gutters re-done to catch more water. I redirected all the water into piping under the ground to allow it to run out on the other side of the yard. The last thing I wanted to do was have the deck dump water into the house.
Tips for a Backyard Deck Rebuild
- Plan. Plan. Plan! (There is nothing worse than not thinking through something and stopping all of your progress mid work.)
- Always be thinking of where water will want to go with your deck.
- Have the next stage of materials delivered so that you are always ready to go to the next stage without having to wait.
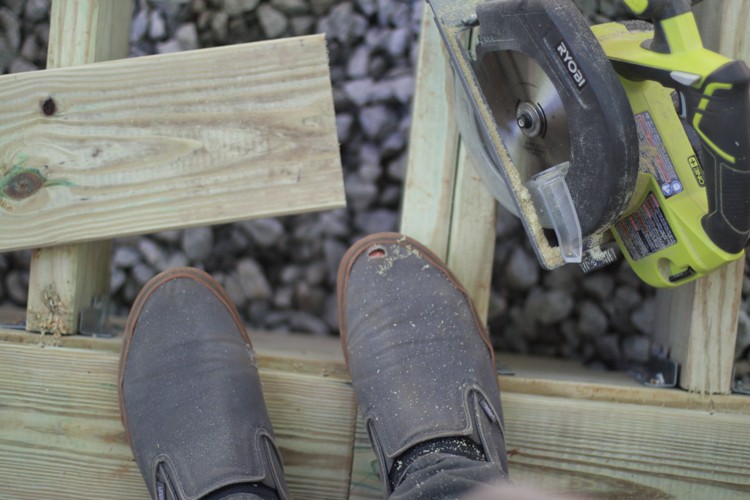
- A good portable circular saw is an invaluable tool in deck building. I ended up using my Ryobi Cordless Circular Saw for almost every cut on the project.
- With a big outdoor project such as this, always be prepared for rain with the ability to protect your tools and materials.
- Nail guns are a lot more efficient than your elbows. Either rent a nail gun, or invest in one.
Laying the Deck Boards
Next, I started laying out my decking boards. I bought them in 16-, 12-, 10- and 8-foot lengths so the pattern would be randomized, like a wood floor in a home. And like I mentioned earlier, the circular saw was my best friend through this process.
Thanks to Kreg Tool I used the Kreg Deck Jig, which allowed me to hide all the deck screws and ensure a clean look. You can see how the jig helps you drill a pilot hole and then using their special deck screws, pop them in and you are good to go. Although this takes a lot longer than traditional deck screws that are put through the top of the wood, I liked this method because I never split a board, and I never had to worry about my deck screw pattern being off or not in a straight line.
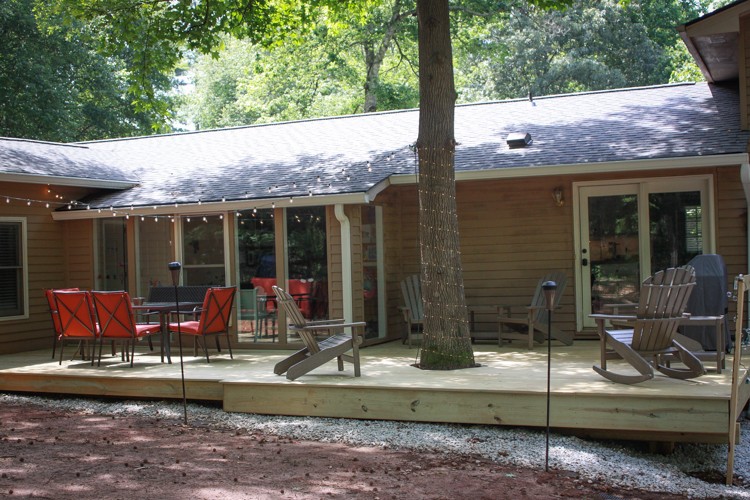
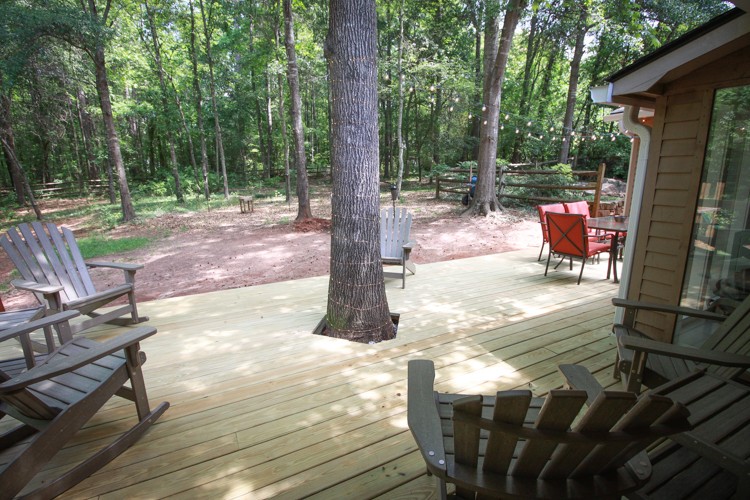
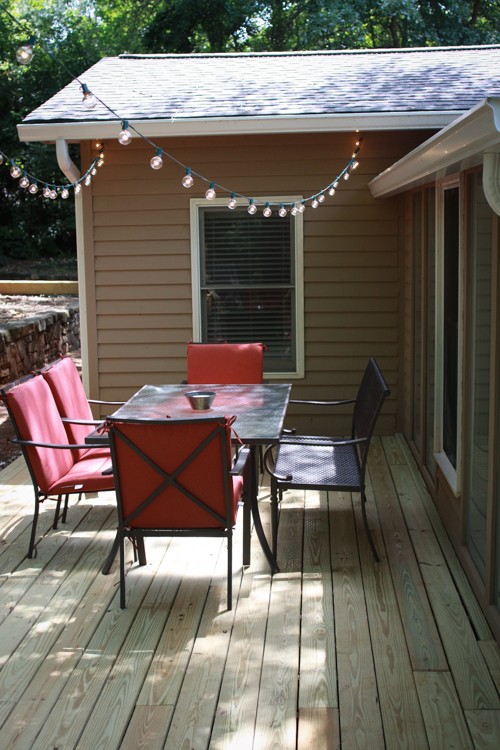
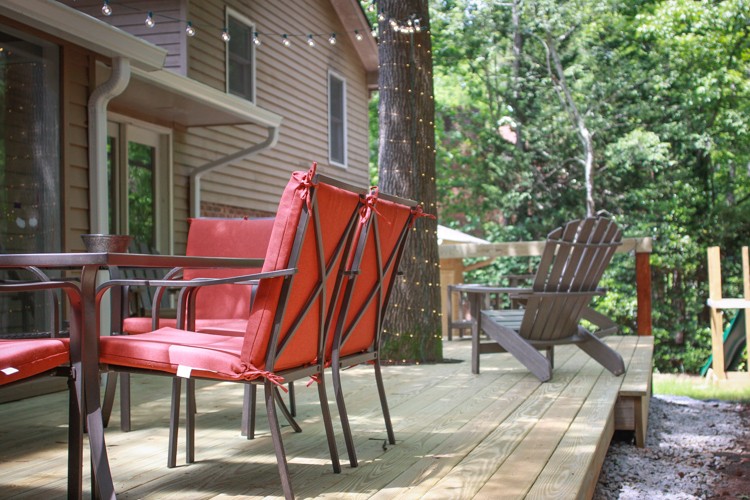
The Finished Deck
Finally! After two months, the deck is finished! It’s so fun to look back and see the before and after shots.
Before
After
Before
After
Before
After
Looking Toward the Second Phase
While there are still a few things I want to do to it such as add grass around it and begin the second phase of the deck. There will be another 100 square feet added to the other side. But for now, it is ready for some hangs. It has made such a difference in our backyard and our ability to spend more time outside enjoying the South Carolina spring.

The post DIY Backyard Deck Rebuild appeared first on The Home Depot Blog.

