Sarah Wissinger, of The Surznick Common Room, loves her 1950s ranch, but she felt like some of the doors in her home were lacking her style. These budget-friendly options made a huge impact in her home and gave her doors a much needed makeover.
Read on to see how Sarah gave her door a mid-century makeover in five simple steps!
DIY Mid-Century Door Makeover
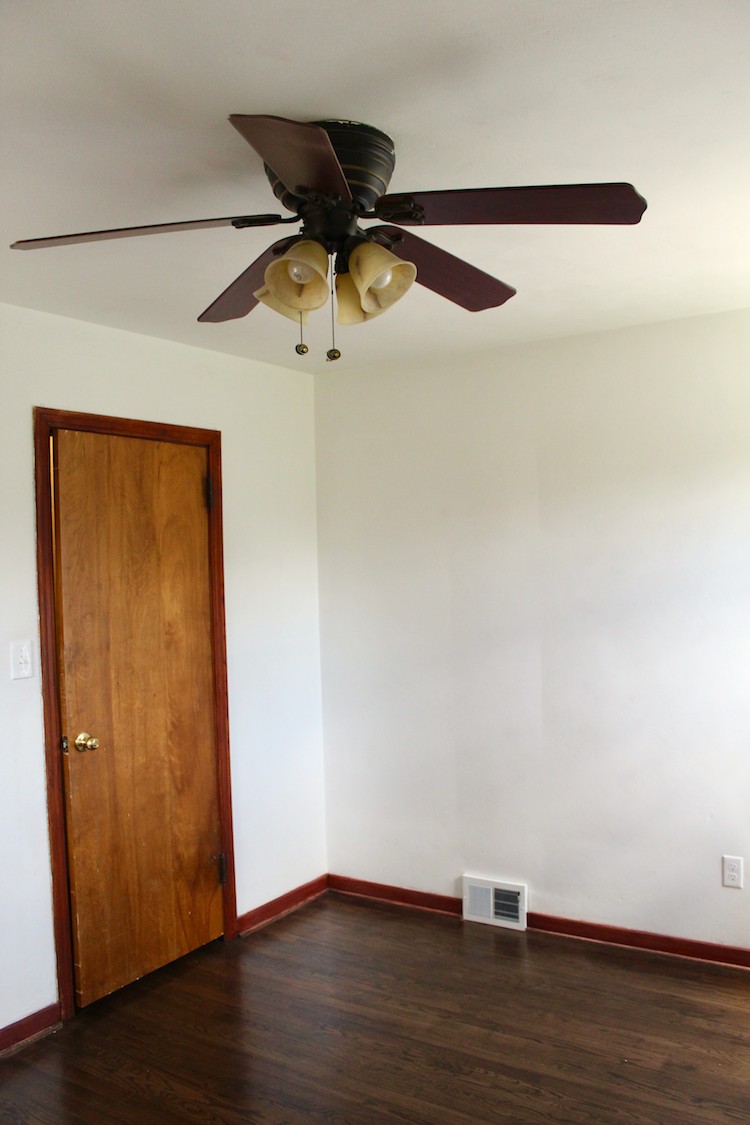
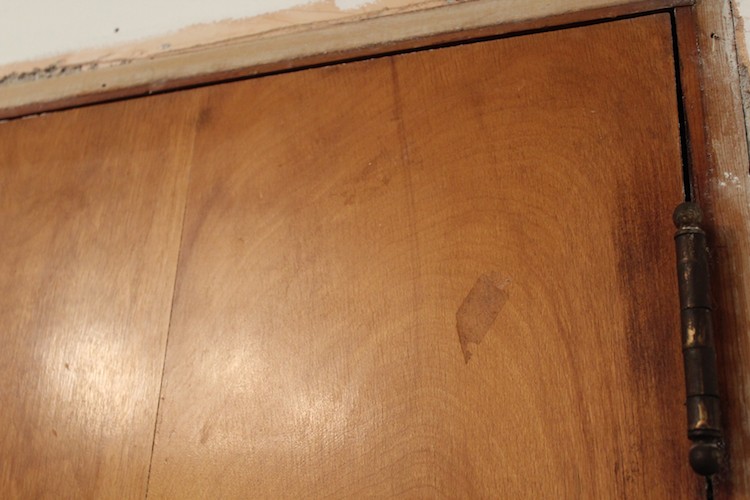
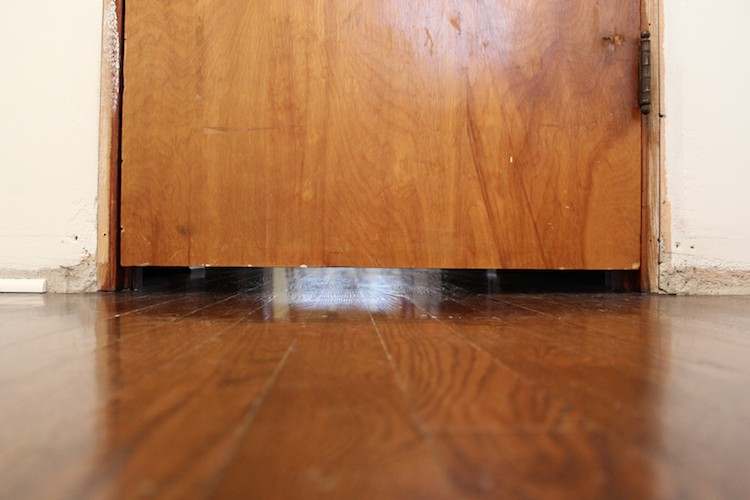
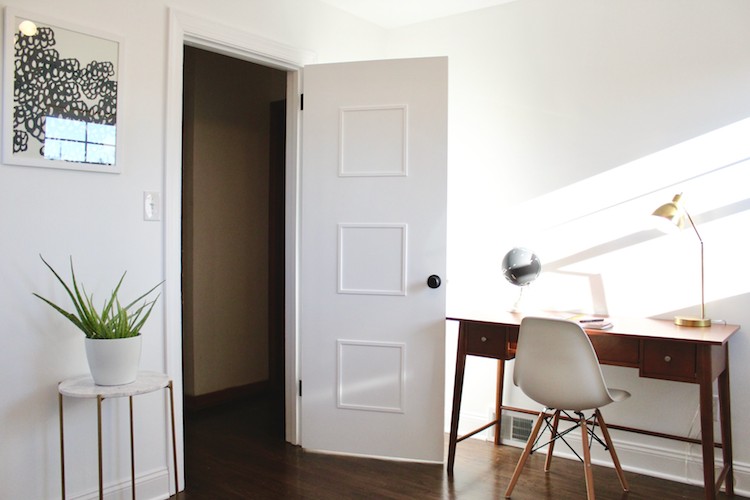
Last year my fiancé and I purchased our first home—a cute, little 1950s ranch in Pittsburgh! We love the house’s original three-square window front door, but the interior doors were certainly lacking our cool mid-century style. Instead, we had your basic wooden slab doors that happened to be in pretty rough shape after 65+ years of wear and tear.
During our recent makeover of the master bedroom, we decided that the door needed a major update in order to look as great as the rest of the room. We wanted the cool three-square design of our front door to carry throughout the rest of the house, so we DIYed our own mid-century inspired interior door makeover! Here’s how we did it!
Materials
Tools
Step 1: Measure the Doorway
We measured our doorway to determine the size of the door we would need. We purchased a new wooden slab door from The Home Depot, but if you already have a slab door that’s in good shape, you could use that too! Luckily a new door is an inexpensive upgrade, so we were happy to swap out our old one for a fresh start.
To create the squares on the door, we needed low-profile moulding that we could attach to the door. We found this ¼ in. x ¾ in. pine screen moulding and purchased enough to make six 14-in. squares.
Step 2: Cut the Moulding
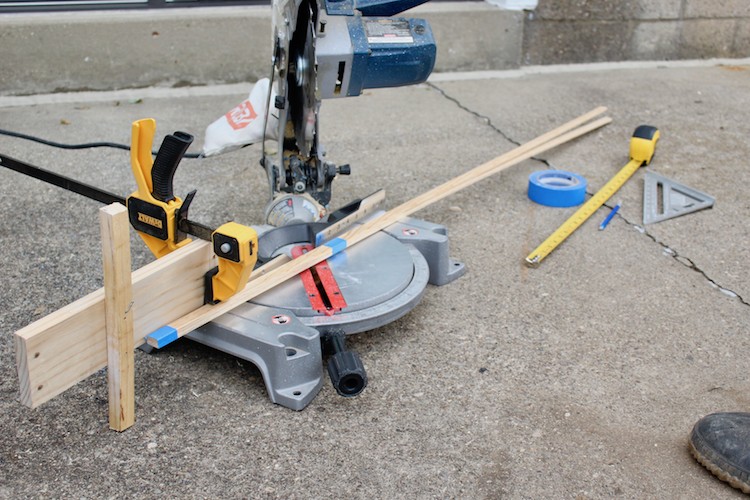
With the moulding purchased, it was time to start making cuts. When doing any type of woodworking, it’s not necessarily accuracy that matters—it’s repeatability. We set up a simple and temporary stop-block on a miter saw to ensure that all pieces cut would be 14 in. long. If we were to measure each piece individually, it would have been next to impossible to get a perfect square as a result. This way, even if the stop block wasn’t exactly 14 in. from the blade, every piece would be identical, so they would all fit!
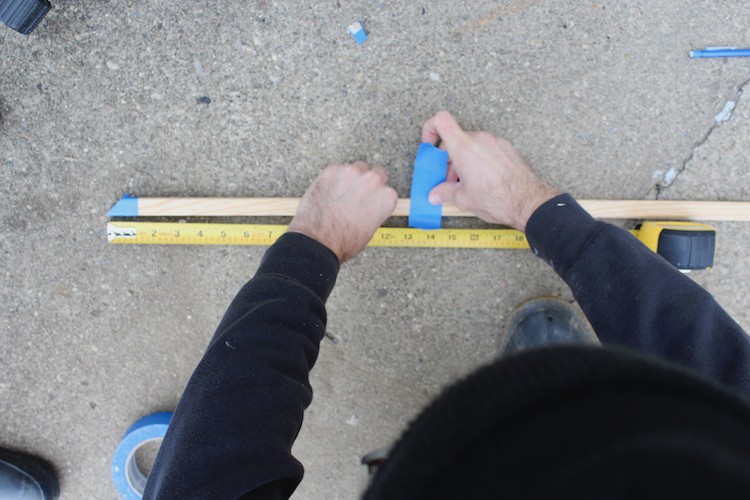
To help prevent splintering the wood with the saw, we tightly taped each piece where the saw would make its cut. This ensures a nice clean edge, which is essential for trim work.

We used the miter saw with the stop-block to cut the pieces at a 45° angle. Always be sure to check your angle with a speed square.
Step 3: Glue the Moulding
After all the pieces were cut, it was time to glue. We first found the center of the door, and marked 7 in. out in all directions so that our middle square was exactly centered. From there, we found midpoints to the top and bottom of the door, marking where the remaining two squares would need to go.
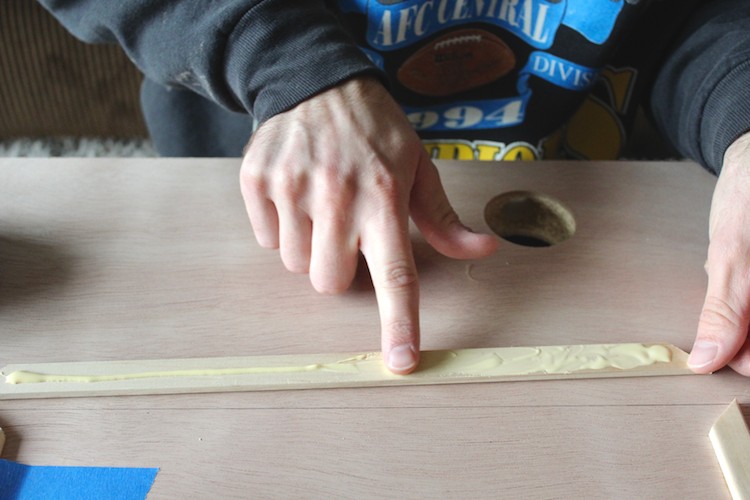

Carefully using an adjustable T-square, we drew our lines, and glued the moulding directly to the door face. To do so, we applied wood glue directly to the back of the moulding pieces and spread the glue evenly with a finger. We carefully applied the pieces to the lines we drew, pressing down gently and cleaning up glue squeeze-out with a rag.

Since this trim is light and won’t need to bear any weight, simply taping the trim down tightly for a couple of hours is all the clamping that needs to be done. Finally, we lightly sanded down the connecting corners of all of the moulding pieces to ensure that all of the seams had a smooth transition and were ready for painting.
Step 4: Paint the Door
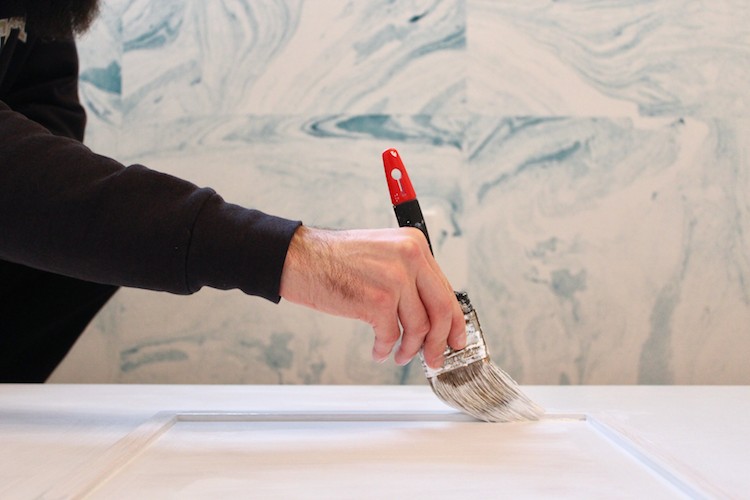
After all of the moulding was glued to each side of the door and lightly sanded, we added two coats of Kilz 2 Latex Primer, allowing ample drying time between each coat. We then added two coats of Behr Premium Plus Paint & Primer in Ultra Pure White, Semi-Gloss, again allowing enough drying time between each coat. We brushed on the first coat of primer, but to ensure a smooth finish, we rolled on the paint with a mini fabric roller.
Step 5: Install Hardware
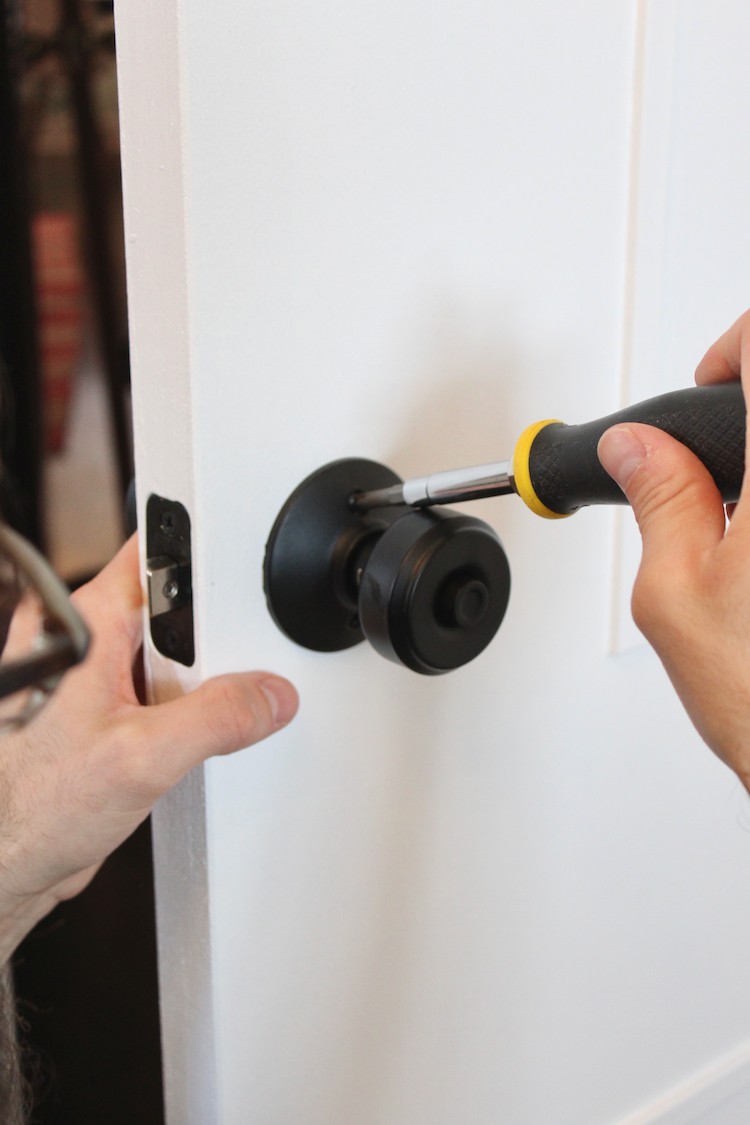
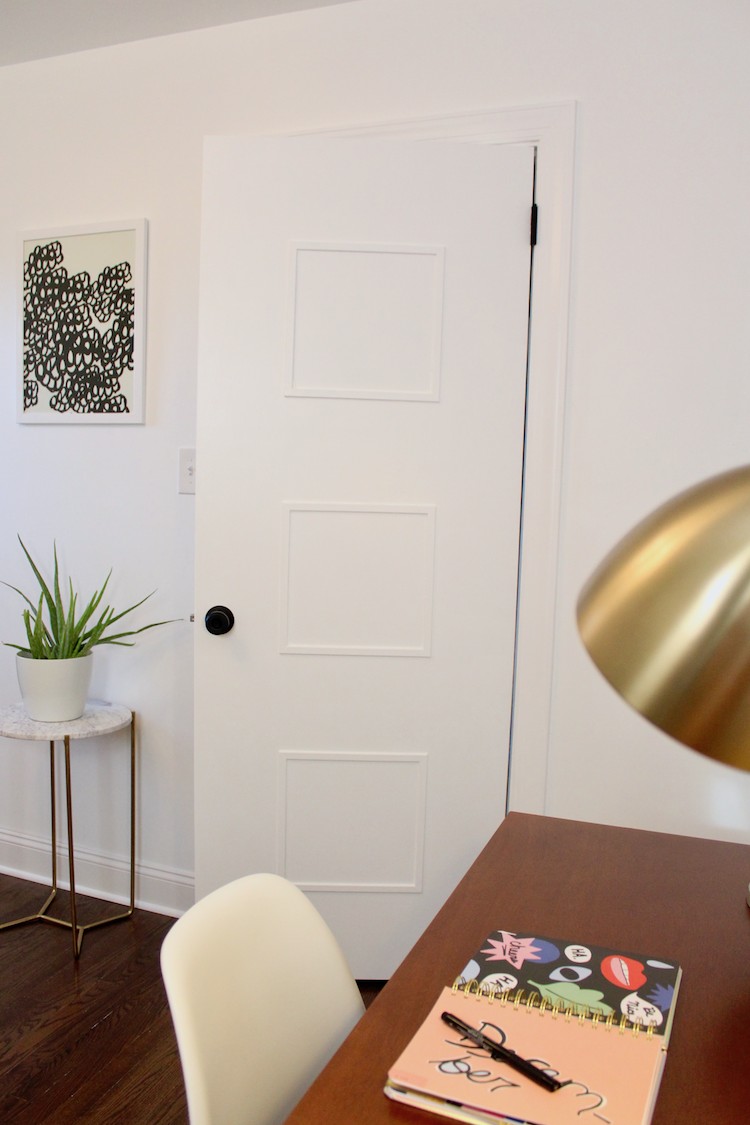
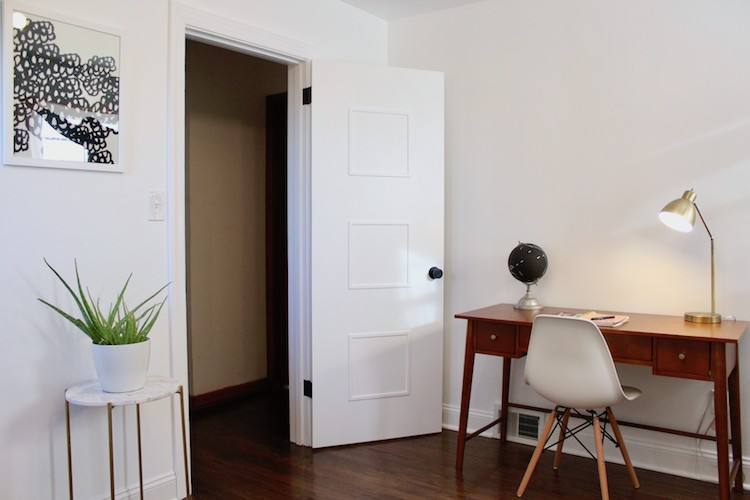
Now that the new door has a fresh coat of white paint, it’s time to add some sleek new hardware to match. We decided to outfit the door with a new matte black doorknob and hinges to tie in to our brass and matte black light fixtures in the room.

We added the Schlage Bowery Privacy Lock Knob in matte black. It was super easy to install and looks great against the white door. We hung the door using new National Hardware matte black hinges, which coordinated great with the new door knob.
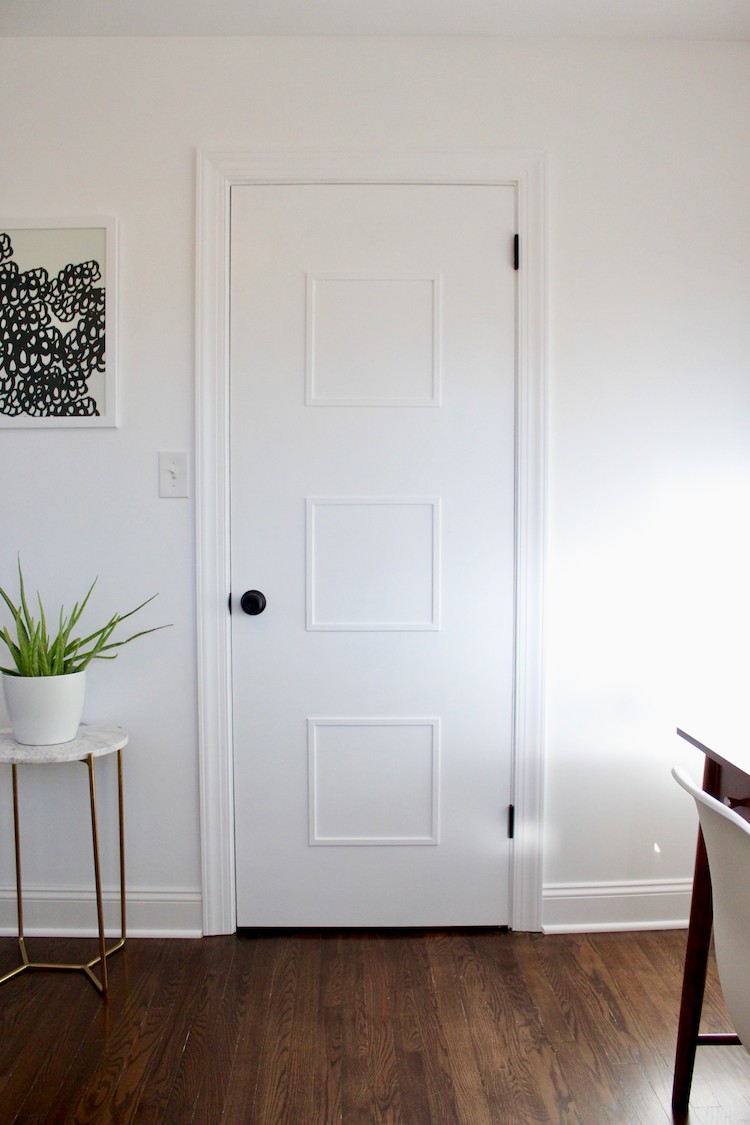
We love how this DIY Mid-Century inspired door makeover turned out and we can’t wait to repeat the process on all of the doors throughout our house. It’s a great budget-friendly door makeover that makes a huge impact in our home–we couldn’t be happier!

The post DIY Mid-Century Door Makeover appeared first on The Home Depot Blog.
