
How to Build a Playhouse
Giving the right Christmas gift to your child can be hard, especially when you feel like they have more toys than they need already. Building a present is a great option, especially when it can create fun and encourage creativity for years to come.
Follow these steps to learn how you can build a playhouse for your own backyard and give the perfect gift to your kids this holiday season.
Materials
- (22) 1 x 6 x 8 ft. Tongue & Groove Boards
- (17) 2 x 4 x 8 ft. Boards
- (13) 1 x 6 x 8 ft. Boards
- (1) 1 x 3 x 8 ft. Boards
- (8) 1 x 2 x 8 ft. Boards
- (1) Sheet of ¾-in. Exterior Plywood Sheathing
- Roofing Material Of Your Choice (shingles, corrugated metal, roof panels, etc.)
- 2½ in. Exterior Wood Screws
- 1¼ in. Exterior Wood Screws
- 2½ in. Exterior Pocket Screws
- 1¼ in. Brad Nails
- Exterior Wood Glue
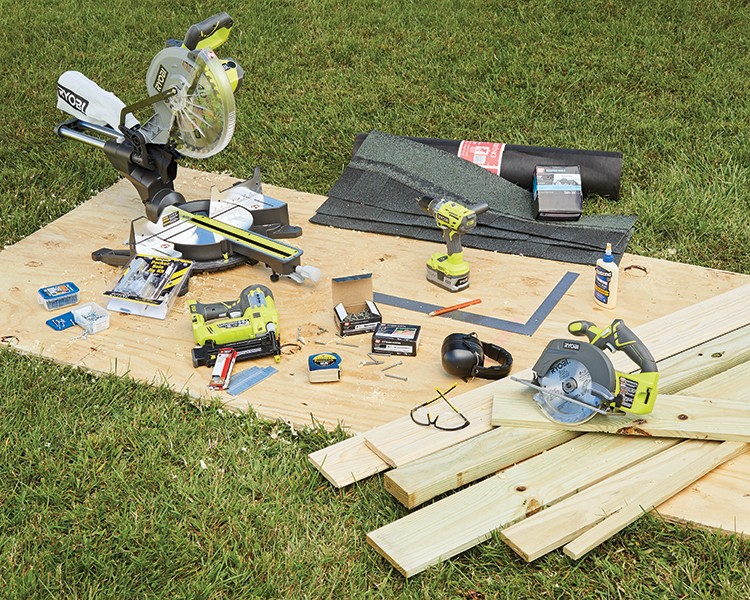
Tools
- Tape Measure
- Pencil
- Carpenter’s Square
- Drill
- Pocket Hole Jig
- Brad Nailer or Hammer
- Miter Saw
- Circular Saw or Jigsaw
- Safety Glasses
- Hearing Protection
Cut List
Deck
- (2) 2 x 4 @ 96 in. ( frame)
- (5) 2 x 4 @ 68½ in. (frame)
- (13) 1 x 6 @ 96 in.(decking)
Front Panel
- (1) 2 x 4 @ 46 in.
- (1) 2 x 4 @ 70½ in.
- (2) 2 x 4 @ 57 in.
- (1) 2 x 4 @ 63½ in.
- (1) 2 x 4 @ 40 in.
- (2) 1 x 6 @ 72 in. (tongue & groove planks)
- (4) 1 x 6 @ 47¾ in. (tongue & groove planks)
- (8) 1 x 6 @ 15 in. (tongue & groove planks)
- (1) 1 x 6 @ 6 in. (tongue & groove planks)
- (2) 1 x 2 @ 63 in. (transom window trim)
- (5) 1 x 2 @ 5½ in. (transom window trim)
- (2) 1 x 2 @ 22 in. (window trim)
- (2) 1 x 2 @ 20¾ in. (window trim)
- (1) 1 x 3 @ 22¾ in. (window ledge)
- (2) 1 x 2 @ 44 in. (door trim)
- (1) 1 x 2 @ 21¼ in. (door trim)
Back Panel
- (2) 2 x 4 @ 70½ in.
- (4) 2 x 4 @ ≈ 49½ in.
- (10) 1 x 6 @ 72 in. (tongue & groove planks)
- (1) 1 x 2 @ 72 in. (top plank)
Side Panels
- (2) 2 x 4 @ 60½ in., top ends cut at 5º off square
- (2) 2 x 4 @ ≈ 5611/64 in., top ends cut at 5º off square
- (2) 2 x 4 @ 33 in.
- (2) 2 x 4 @ ≈ 333/16 in., ends cut at 5º off square
- (14) 1 x 6 @ 43 in. (tongue & groove planks)
- (16) 1 x 6 @ 10 in. (tongue & groove planks)
- (4) 1 x 2 @ 26 in. (trim)
- (4) 1 x 2 @ 22 in. ( trim)
- (2) 1 x 3 @ 28 in. (ledge)
Roof
- (3) 2 x 4 @ 4015/64 in. (supports)
- (1) ¾-in. sheathing @ 76 in. x 48 in. (roof)
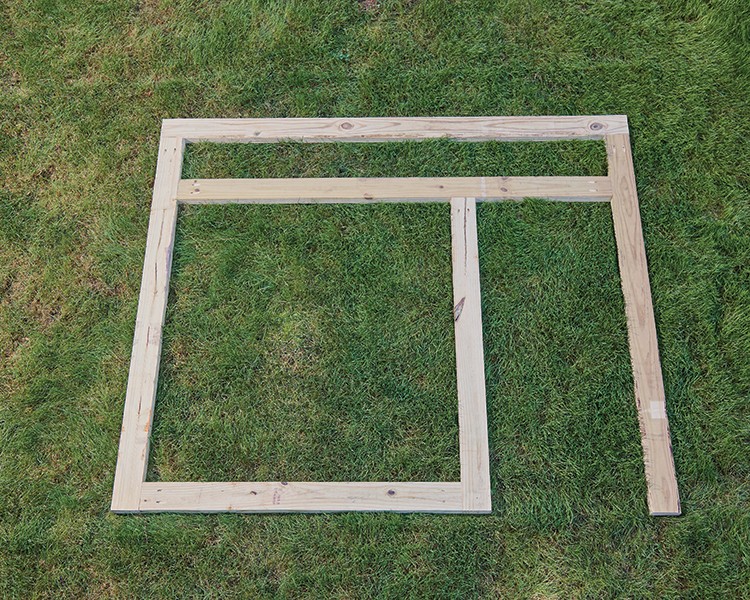
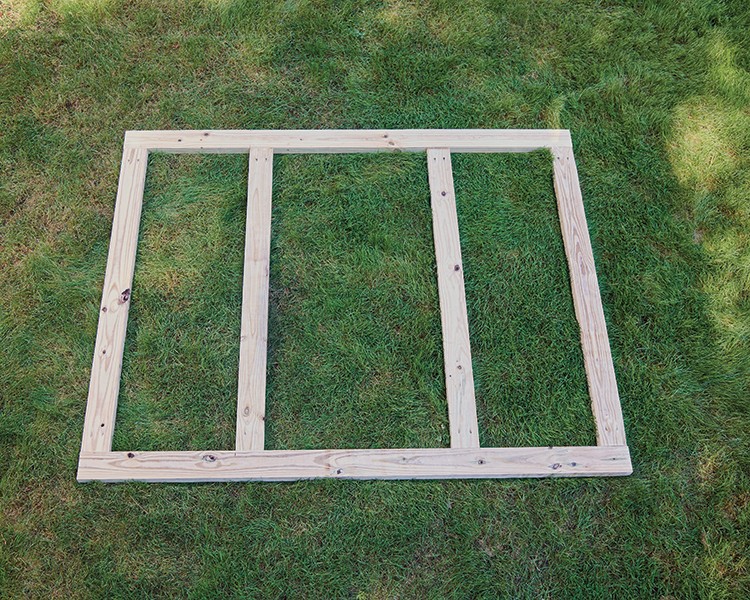
Step 1: Build the Deck Frame

Measure, mark and cut the 2 x 4s to length. Pre-drill pilot holes and construct deck frame as shown with 2½-in. exterior wood screws.
Step 2: Attach the Deck Boards
Measure, mark and cut 1 x 6 deck boards to length. Pre-drill pilot holes and attach to deck frame with 1¼-in. exterior wood screws or deck screws.
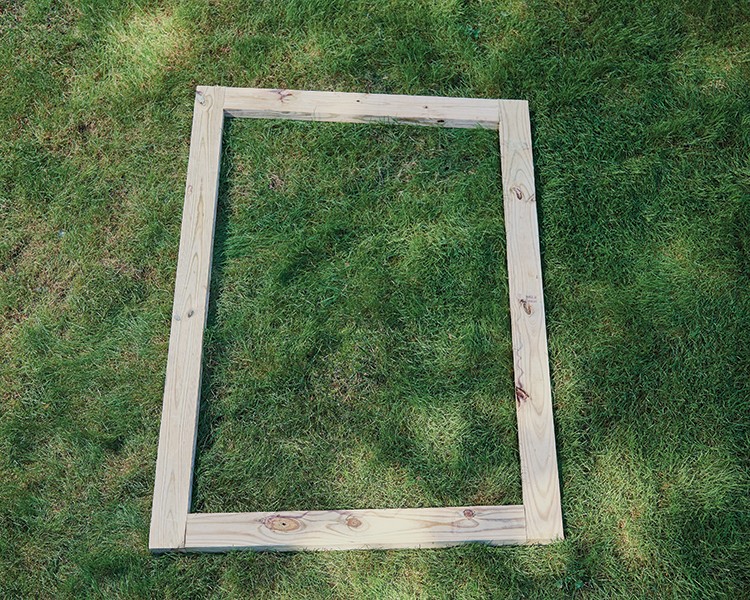
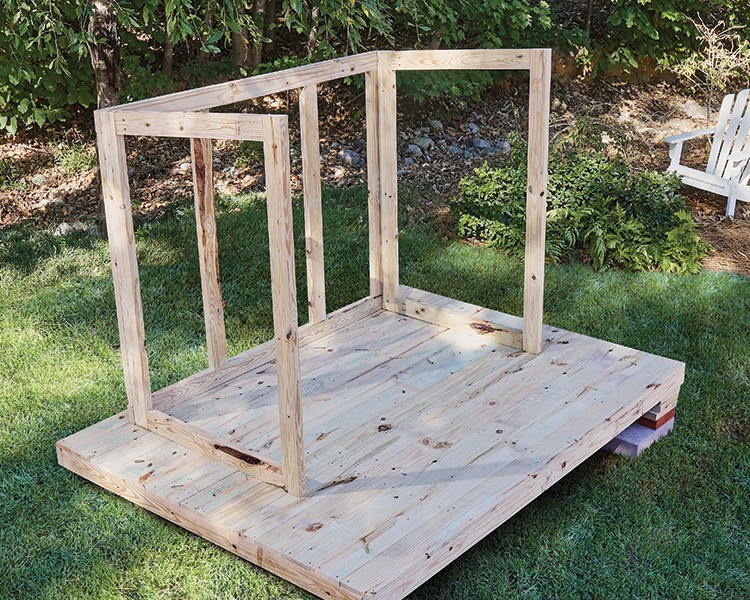
Step 3: Build the Front Panel
Measure, mark, and cut 2 x 4 boards to length. Drill 1½-in. pocket holes into the ends of the 2x4s and construct the front panel as shown with 2½-in. exterior pocket screws. You can place the pocket holes on the outside of the playhouse because the 1 x 6 tongue and groove planks will cover them up in a later step.
Step 4: Build the Back Panels
Measure, mark, and cut 2 x 4 boards to length. Drill 1½-in. pocket holes into the ends of the 2 x 4 stiles and construct the back panel as shown with 2½-in. exterior pocket screws. Once again, place the pocket holes on the outside so they’ll be hidden by the tongue and groove planks later.
Step 5: Build Two Side Panels

Measure, mark and cut 2 x 4 boards to length. The top angles are all cut at a 5º angle off square. It is recommended to hold the angled boards in place, marking, then cutting to length for the most precise fit. Cut long and shave off ⅛-in. at a time until the fit is snug. Drill 1½-in. pocket holes into the ends of the rails and construct the side panels as shown with 2½-in. pocket screws. Build two of these side panels. Place pocket holes on the outside of the playhouse. These side panels should be mirror images of each other.
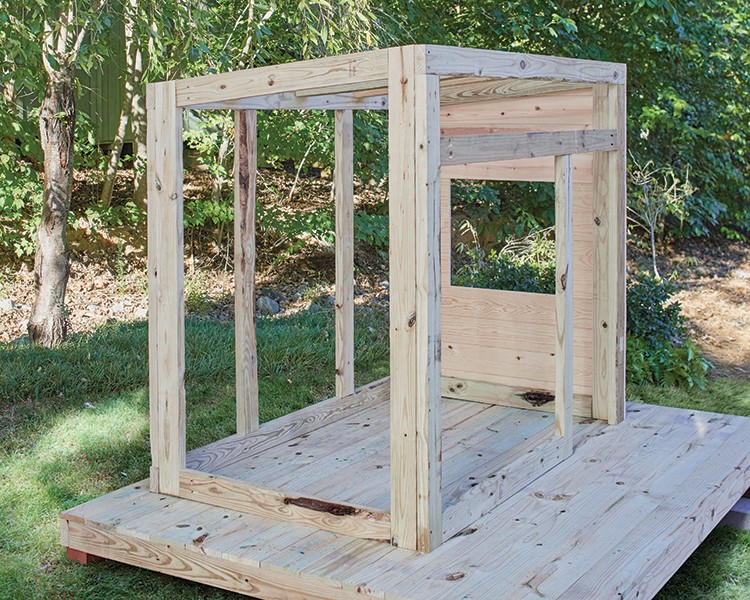
Step 6: Construct the Playhouse
Pre-drill pilot holes and attach the side panels and front and back panels as shown by driving 2½-in. wood screws from the front and back panel stiles into the side panel stiles. Space screws approximately 6-8 in. apart. Secure the playhouse frame to the deck.
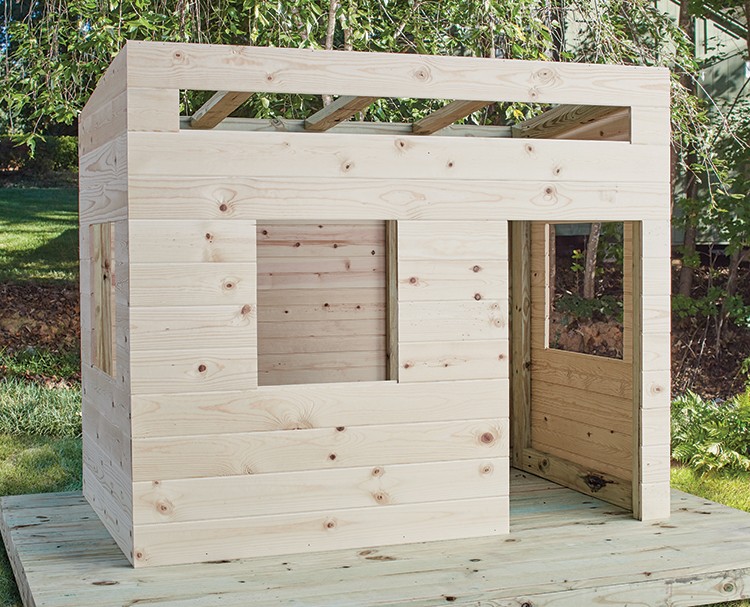
Step 7: Attach the Roof Supports
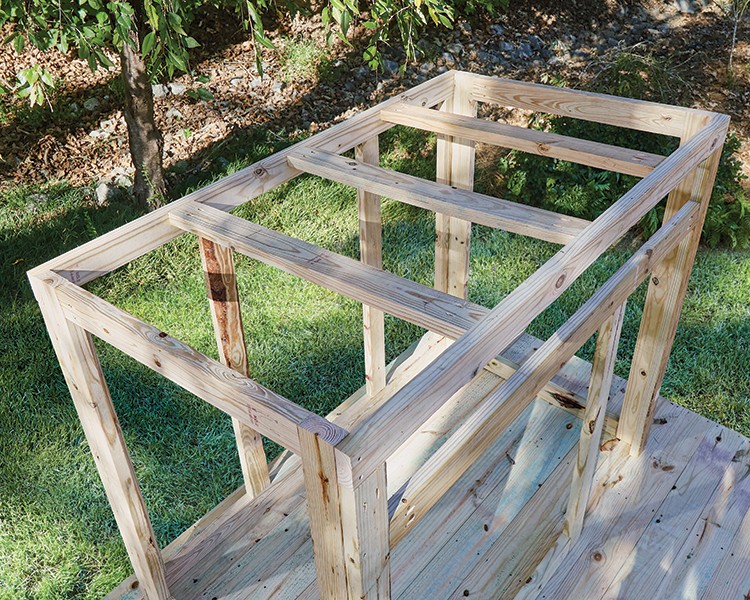
Measure, mark and cut the 2 x 4 roof supports to length. Pre-drill pilot holes and attach the roof supports to the playhouse with 2½-in. exterior wood screws driven from the front and back panel top rails into the roof supports. Alternately, you can drill 1½-in. pocket holes into the roof support ends as shown and attach them to the playhouse with 2½-in. pocket screws.
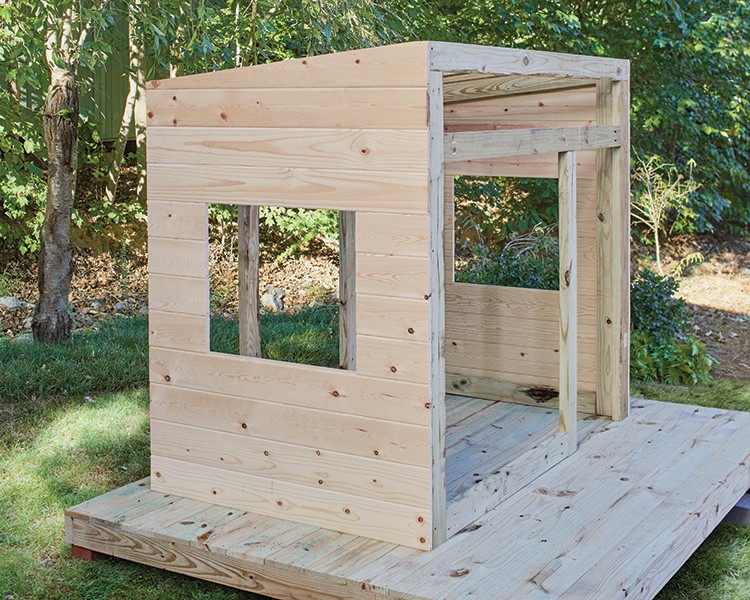
Step 8: Attach the Tongue and Groove Planks to the Side Panels
Starting at the bottom with the tongue facing up, attach the first plank with 1¼-in. brad nails and glue. Hide the nail heads by driving them in at an angle at the tongue. This way, when you place the next board, the groove will hide the nail holes. Work your way up until you reach the top plank. For the top plank, hold it in place, mark a line following the pitch of the roof, then use a circular saw or jigsaw to rip the board to fit. Repeat for the other side.
Step 9: Attach the Tongue and Groove Planks to the Back Panel

Measure, mark and cut tongue and groove planks to length. Starting at the bottom with the tongue facing up, attach the bottom plank with 1¼-in. brad nails and glue. Work your way up, driving the nails in at an angle at the tongue to hide the nail holes. Once again, the top plank will have to be ripped to width. You may choose to substitute a 1 x 2 for this top board.
Step 10: Attach the Tongue and Groove Planks to the Front Panel
Measure, mark and cut the tongue and groove planks to length. Starting at the bottom with the tongue facing up, attach the bottom planks with 1¼-in. brad nails and glue. Work your way up to the top.
Step 11: Attach Window Trim
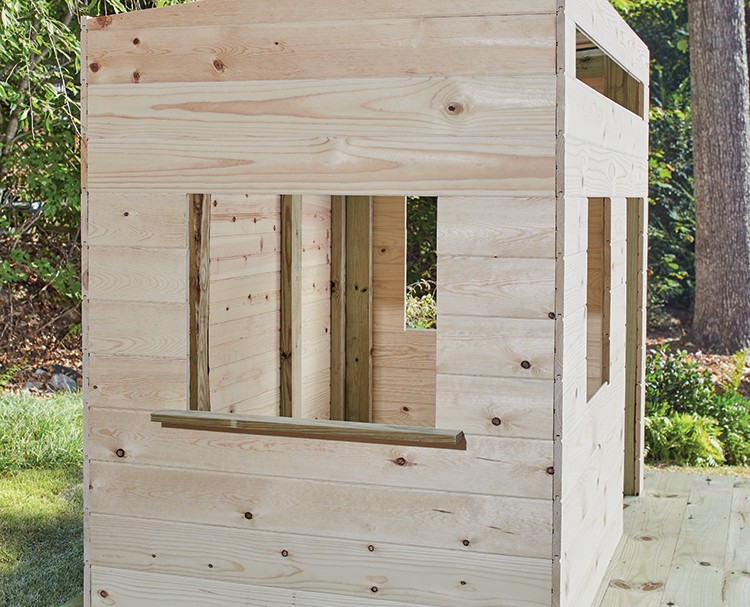
Measure, mark and cut the trim to length. Note that the window “ledge” is a 1 x 3 while the rest of the trim are 1 x 2s. Attach trim to window with 1¼-in. brad nails and glue. Repeat for other side window.
Step 12: Attach Window and Door Trim

Measure, mark, and cut 1×2 trim to length. Once again, the window “ledge” is a 1 x 3 while the rest are 1 x 2s. Attach trim to the playhouse with 1¼ inch brad nails and glue. For the transom window trim, it is recommended to build the window trim complete and then bring the completed trim up to the window. Drill ¾-in. pocket holes into the 1 x 2 dividers in the transom window and attach to the rest of the trim with 1¼-in. pocket screws.
Step 13: Attach Sheathing
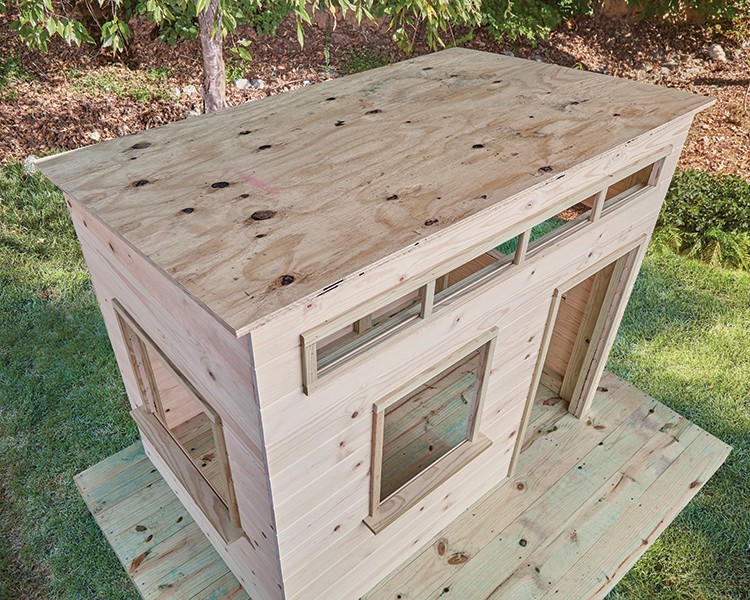
Measure, mark and cut sheathing to size. Pre-drill pilot holes and attach the roof to the playhouse with 1¼-in. exterior wood screws. Install roofing of your choice (i.e. shingles, corrugated metal, roof panels, etc.) according to manufacturer’s directions.

Step 16: Paint and Add the Finishing Touches
Paint the playhouse the color of your choosing! Cut lattice to size to cover any openings below the platform. Then, cut lumber to the size of your choosing to create a step.
Final Playhouse

The post How to Build a Playhouse for the Perfect Christmas Gift appeared first on The Home Depot Blog.
