
Ashley Johnston, of Make It Love It, shows how you can use peel and stick modern kitchen tile to update your space in a few simple steps.
Modern Kitchen Tile Update
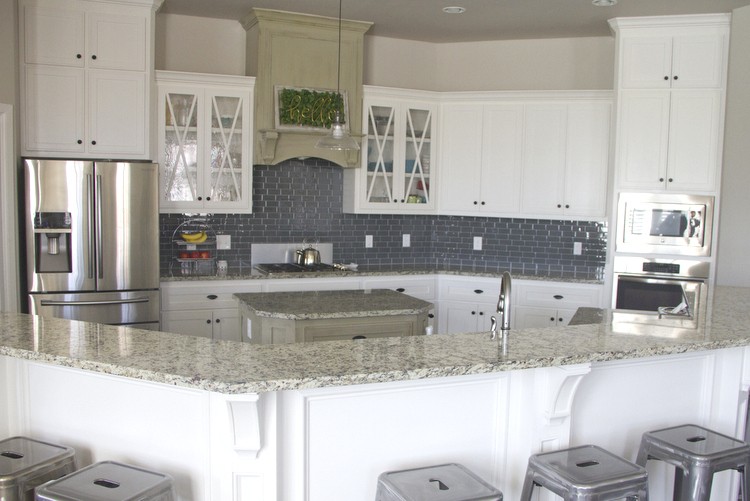
I am so excited to be here today on the Home Depot Blog to share something that has kinda blown my mind! We were able to transform our kitchen in just a few short hours, with a modern kitchen tile by Smart Tiles. I’ll admit, I was a little doubtful at how they would look and was originally going to test them out in a low-traffic area. However, once I received my box of Smart Tiles in the mail, I placed one on top of our kitchen backsplash, just for fun, which I have disliked since moving into our house 2 years ago. I stood back and fell in love! Turns out, the amount I needed for the original wall project, was the same amount I needed to overhaul my modern kitchen tile backsplash. Done!
These Smart Tiles are magical. If you’ve ever tiled any space in your home you know it can be a very long and messy process, but these tiles are quick and simple to install. My husband and I keep walking into our kitchen saying, “wow, it’s like we have a whole new kitchen!”
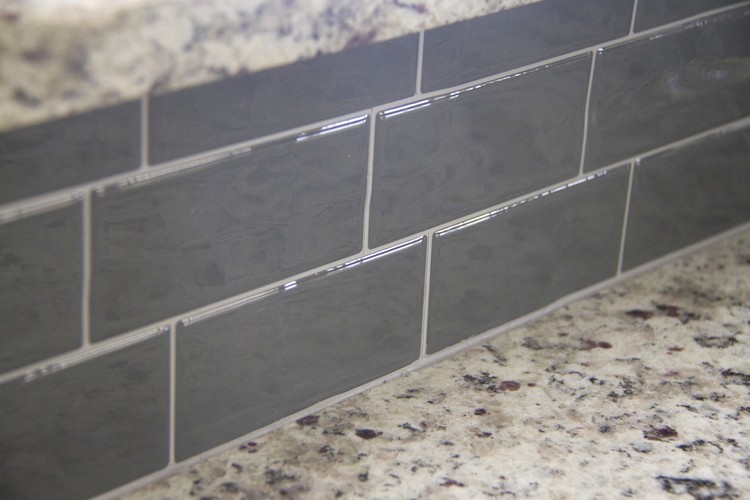
Smart Tiles come in square adhesive sheets and have a raised texture like traditional tiles do and even have a shine to them, like a glossy finished tile.

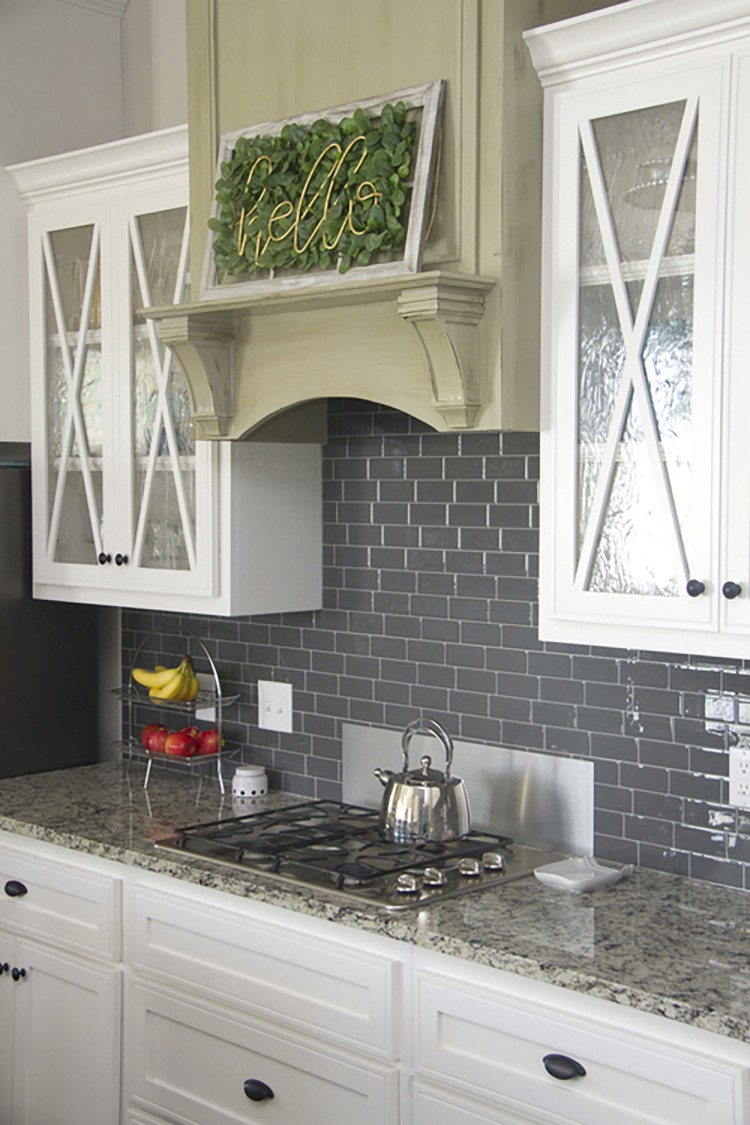
Smart Tiles are very flexible and are simple to cut to fit around fixtures and corners. They will also adhere to a variety of surfaces, including right on top of your old tile, which we did! We have always hated how the color of our backsplash blended right into the countertop, so the gray modern Metro Grigio tiles provided the perfect pop! They are also easy to take off if you absolutely need to, but will last forever if you leave them in place!
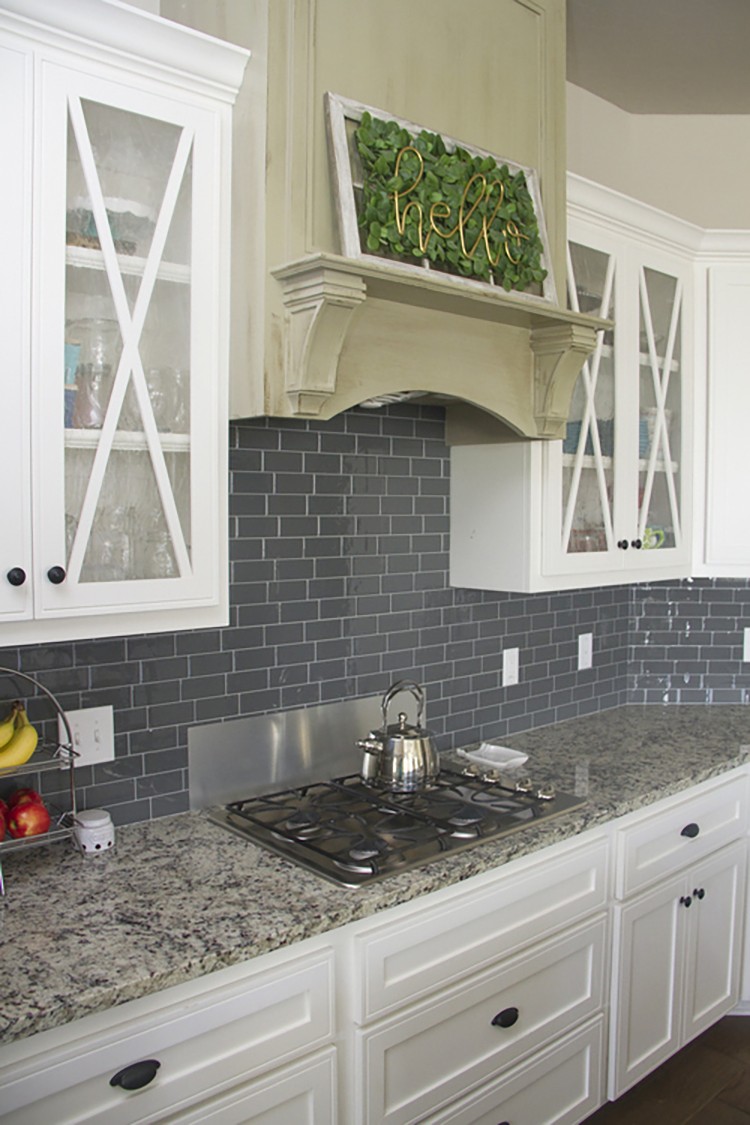
This modern kitchen tile is also very easy to maintain and wipe clean like traditional tiles. You can’t even tell there’s a seam from piecing the sheets together. Pretty cool!
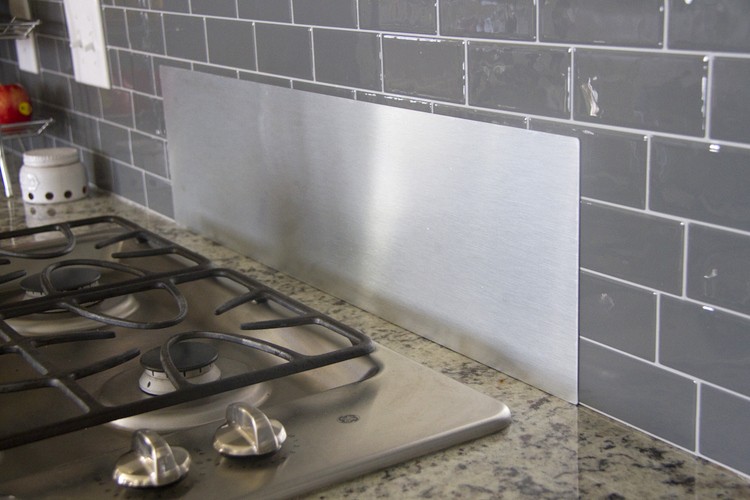
If you’re curious about attaching these tiles close to a stove top, yes, Smart Tiles are heat resistant. However, if you have a range like mine without a back control panel, you must respect the safety zone of 8 inches and install a smart panel, which takes about 5 seconds to install.
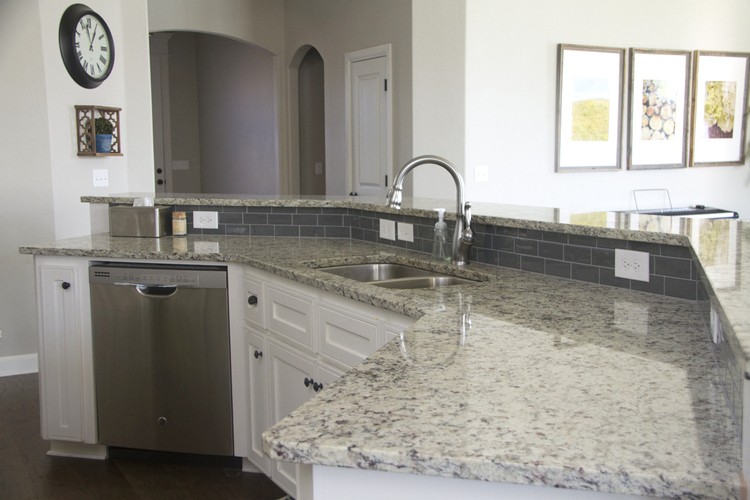
I also love that I was able to use these modern kitchen tiles on our island in the small space between the counter and the bar! I hated the old tile color here, because it all meshed together so horribly between the two levels of granite. Smart Tiles was such a perfect fix!
If you’re concerned about water leakage along a countertop near a water source, you can absolutely caulk along the bottom edge of these Smart Tiles. This will keep the water from seeping under. I color matched some sand-free tinted caulk and it turned out beautifully!
Let me show you just how easy it was to install modern kitchen tile with Smart Tiles!
Materials
- Smart Tiles
- Utility Knife
- Cutting Board/Mat
- Straight Edge
- Marker
- Optional: Tinted Caulk (the color you need may vary)
Step 1
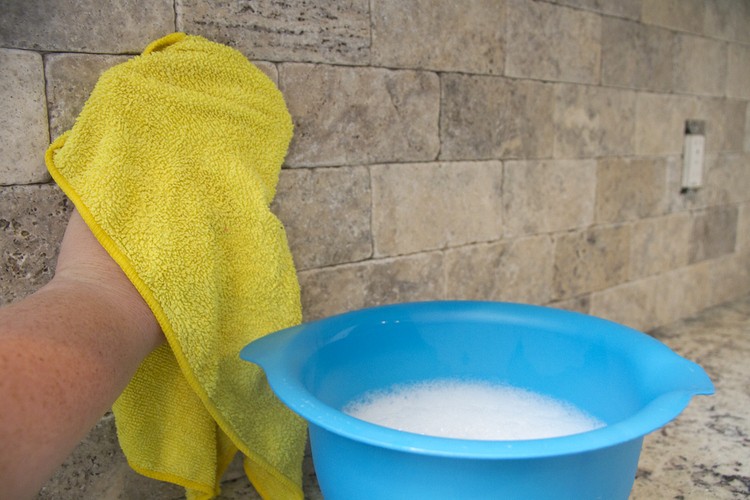
First, wipe down your surface from any dust or grease and then let dry completely.
Step 2
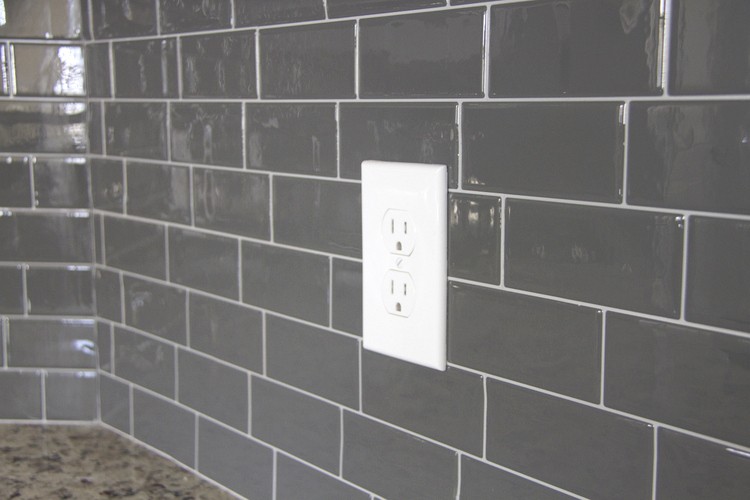
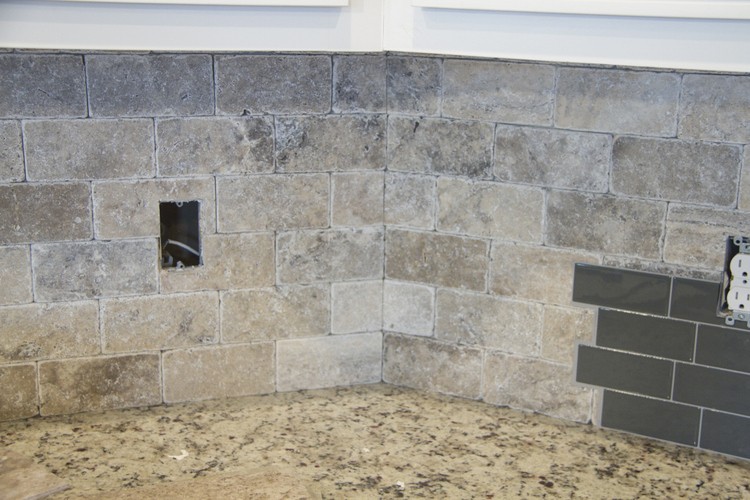
Then, decide if you’re going to start from the right side of your work area and work to the left, or vice versa. Just be sure that you take note of how each tile overlaps and position them accordingly. Then cut off one side of your first tile with your utility knife and straight edge to give yourself a straight edge to start with. Then start peeling and sticking your tiles along the bottom edge of your area, overlapping each tile along the grout line. When you reach an outlet (or other obstacle), make a line with a marker where you need to cut.
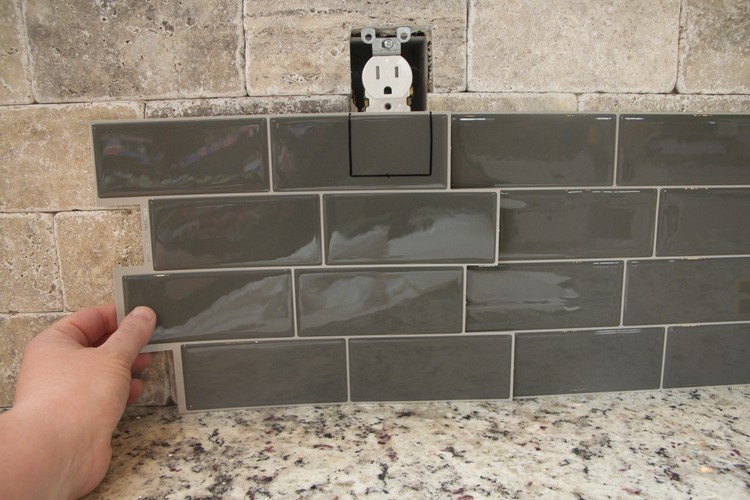
Just be sure to check your markings to see if they match up, before peeling off the backing of your tile.
Step 3
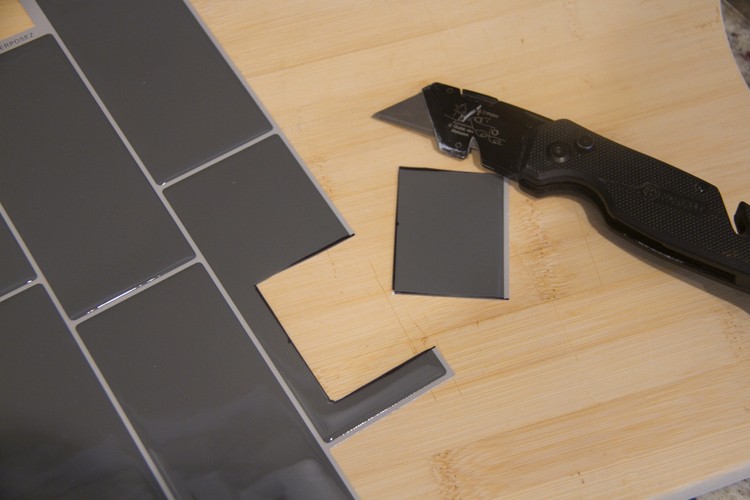
Use your utility knife to create your cut-out.
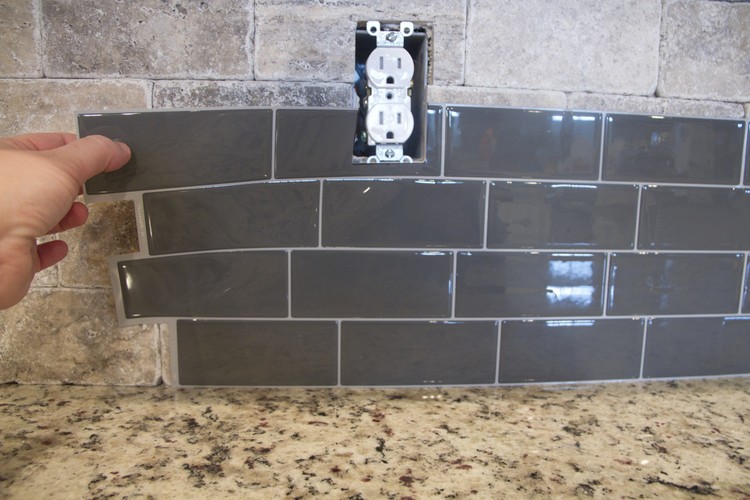
Then line the tile up along your bottom edge, overlap the previous tile, and press in place firmly and along all seams.
The Smart Tiles are thin enough to fit beneath any of your outlet prongs, so maneuver them as needed.
If you have an angled wall, don’t just press the tile across the top and cover it up, even though they would probably stick and stay in place.
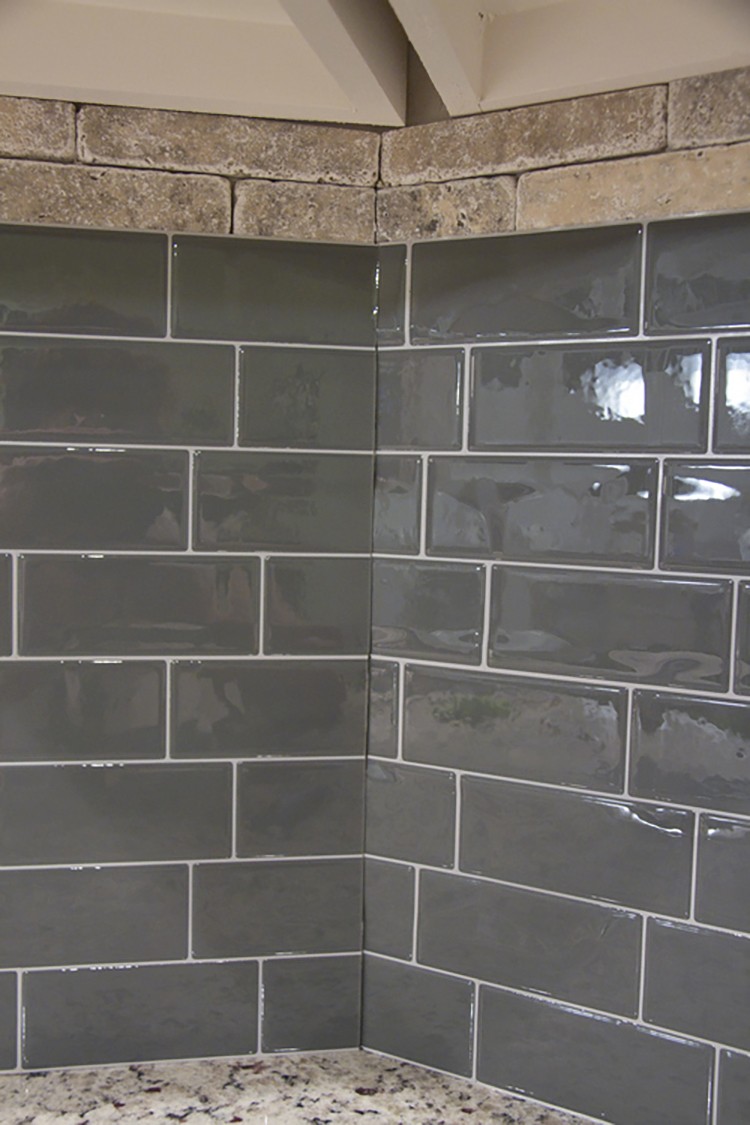
You’ll want to mimic traditional tile by cutting the Smart Tiles so that they end right at the angle in your wall and then continue installing along the other side of the angle.
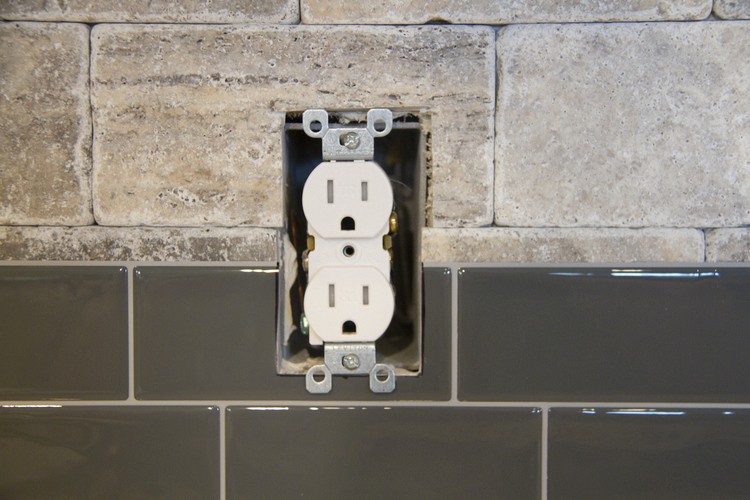
Then continue adding your tiles until your space is completely covered.
Step 4
Also, like mentioned above, you can use caulk to fill in any cracks or seams, to give the tile a finished look! Here’s where I added caulk along the very bottom edge, because these tiles are on the island over by my sink, and I don’t want water to seep underneath.

But here is an area over along the other counters away from the sink where I didn’t add any caulk. The tiles meet up so nicely with the counter top, I didn’t think it was necessary.
Once the area is complete, it is recommended to wait 48 hours for the Smart Tiles to completely adhere to your surface. Then, you can wipe them down with a non-abrasive cleanser, just like traditional tiles.
Now, it’s time to love your new look! And I bet no one will ever notice the difference!
The post Modern Kitchen Tile Update appeared first on The Home Depot Blog.


