Jen Woodhouse of House of Wood surprises her parents with a beautiful laundry room makeover just in time for Spring! See what products went into re-creating his parent’s space below.
Spring Cleaning: A Laundry Room Makeover
Spring is officially here which means it’s Spring cleaning time! What better room to get started in, than in the laundry room? It’s literally the only space in the house dedicated solely to cleaning. Here, in this magical cleaning room, can you believe we have shiny machines that faithfully clean all the things at the push of a button?! Oh, yes.

We are serial renters (Army life!), so when The Home Depot asked me to makeover a laundry room, I knew the perfect place. My parents have wanted to update their laundry room for years now, so we were thrilled to partner with them on this laundry room makeover. I flew from Texas to my parents’ house in Nashville to complete this laundry room makeover over Spring Break and we finished it in under a week! It was so much fun – The Home Depot made the entire process so easy – they are our one-stop shop for all things Spring cleaning.
Let’s start with a few good ‘before’ photos, just so you can see where we started. Are you ready for this?
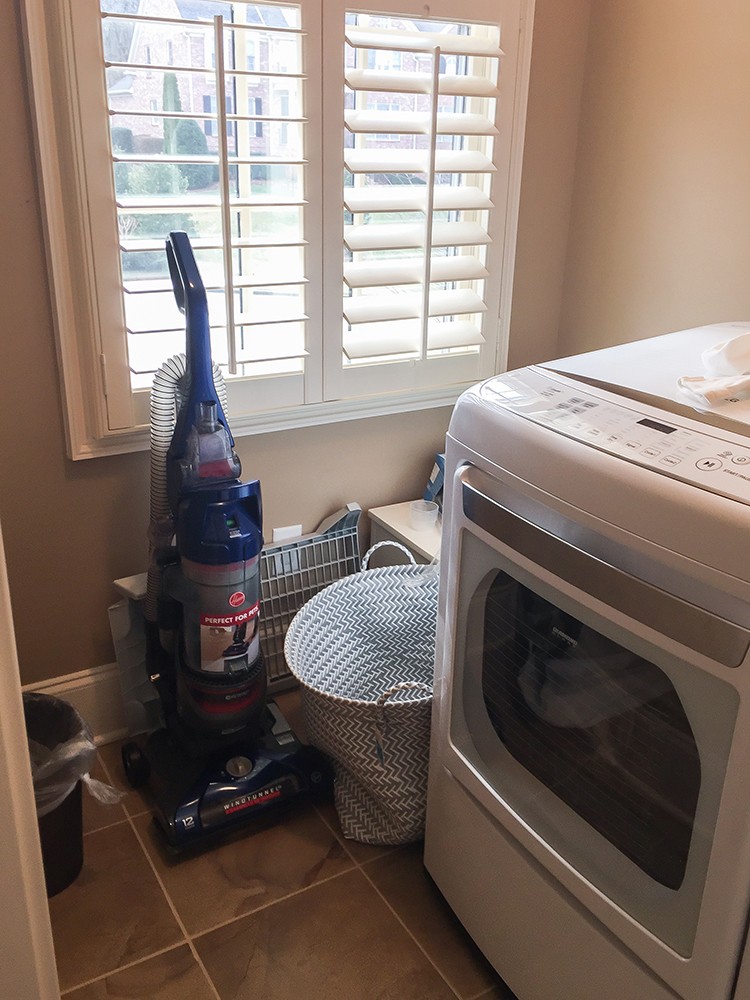
Womp, womp. Nothing to see here, folks. Move along, move along.
Does this space inspire you to clean? It sure doesn’t do it for me – and I need all the motivation I can get when it comes to cleaning.
I’m not sure why the home builder decided to place the dryer exhaust on the left and the water lines on the right. I think it makes more sense to work from left to right. Washer on the left, dryer on the right – am I right?! Perhaps, it was a design choice.
Another interesting design choice was how the water lines and the power outlet are placed on the wall: how poetic! I mean, look at them – they’re not even at the same level. (Am I the only one who gets annoyed by these things?)
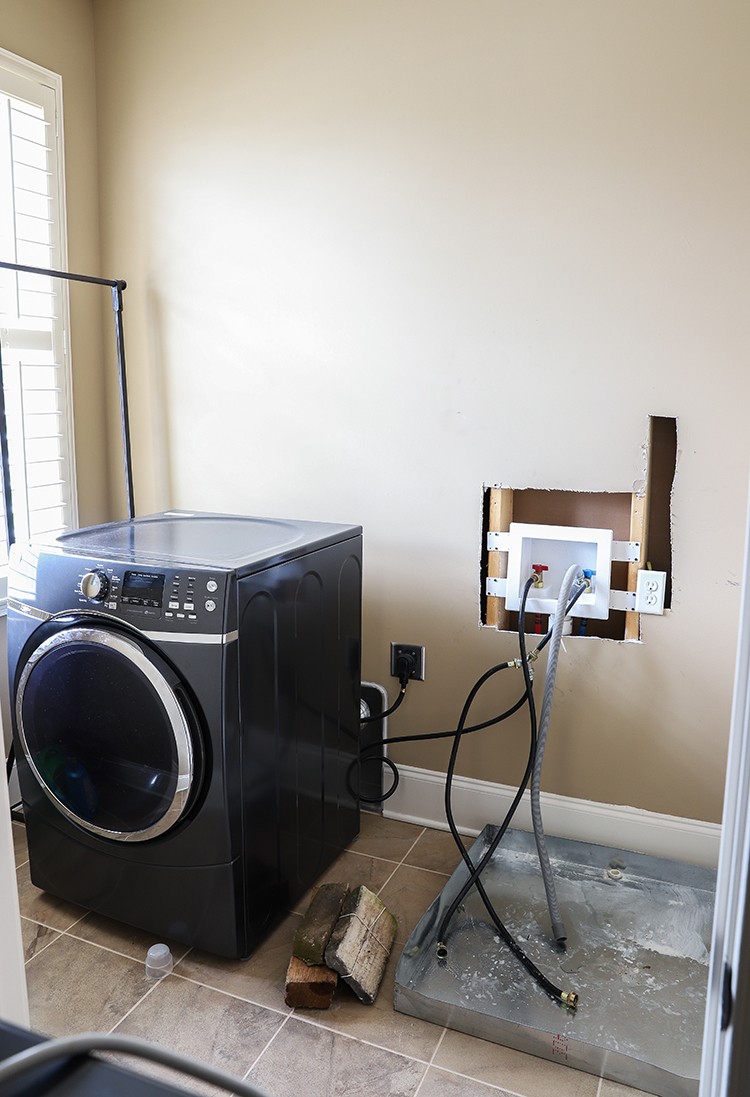
Because I planned on adding a countertop over the washer and dryer, we had a plumber and an electrician move the water lines and power outlet down so that they wouldn’t interrupt the countertop lines. Then, we patched up the drywall.
Okay, so now that the nit-picky stuff is taken care of, let’s get started on this laundry room makeover. You’ll see how a few small upgrades, like cabinets and countertops, can make a world of difference.
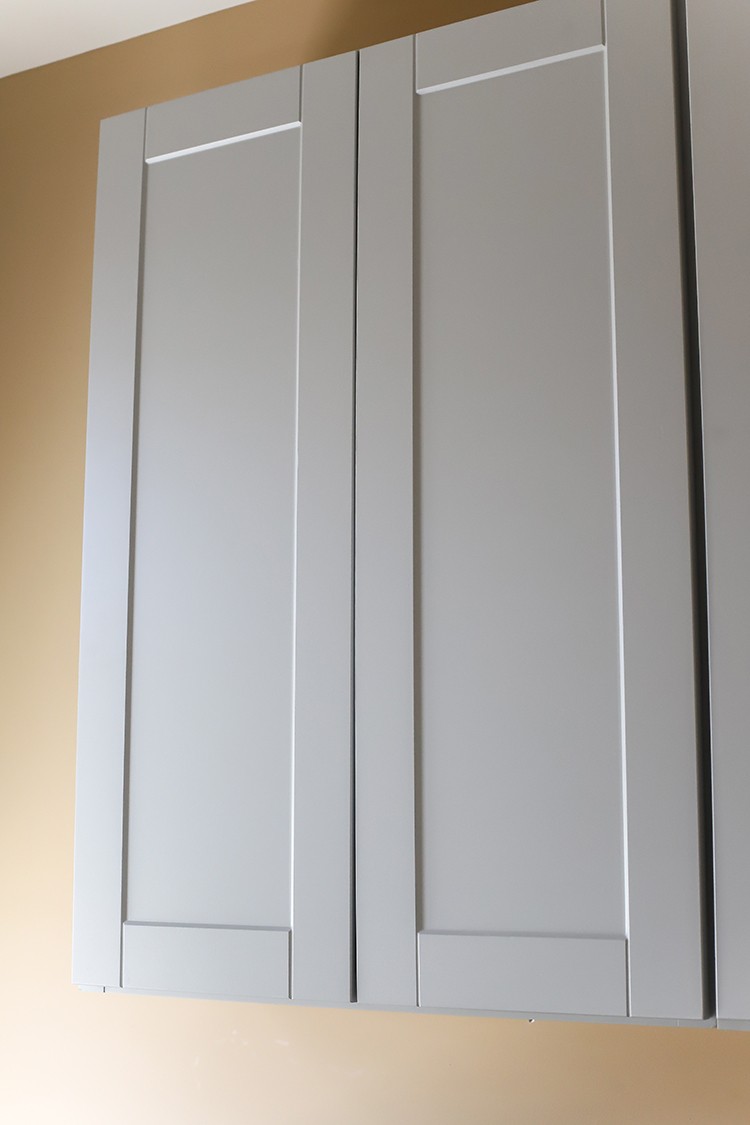
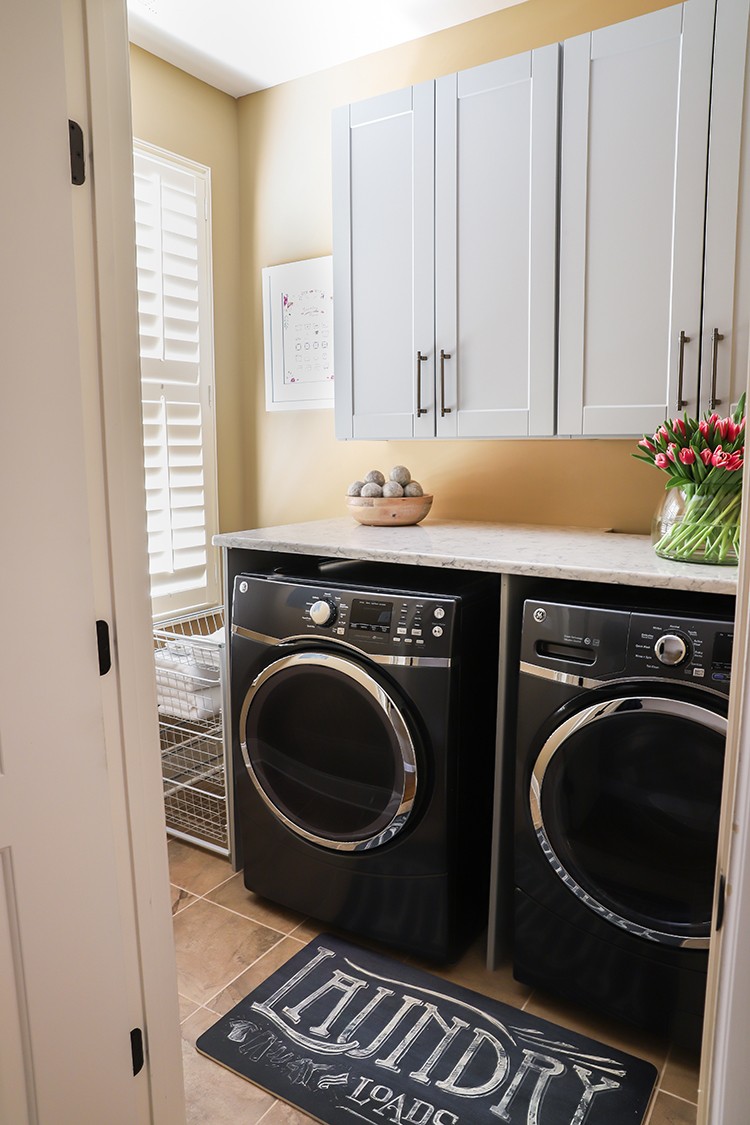
These Hampton Bay Shaker cabinets in Dove Gray add so much functionality and storage to the room! We ordered them from HomeDepot.com and good news: because they’re in-stock, they’re delivered in 3 days or less! They came preassembled – we just had to hang them up on the wall.
Hanging wall cabinets may seem intimidating, but it’s easier than you think! First, you’ll want to remove the doors from the cabinets. Simply unscrew the hinges and doors and set them aside. Next, use a stud finder to locate the studs in the wall. The cabinets will be screwed to the studs in the wall with 2 ½-inch wood screws.
To make this job much easier, use a ledger board – a scrap 2×4 board that you’ll put in place temporarily to act as a ledge for the cabinets to rest on while you attach them to the wall. Determine how high you want the cabinets to be, then screw the ledger board to the wall studs. Make sure this board is level. Then, lift the cabinet carcass up on the wall, rest it on the ledger board, and screw the cabinets to the studs in the wall. Replace the doors and install the cabinet pulls. After the cabinets are hung, remove the ledger board, spackle any holes in the wall, and repaint. Simple, right?
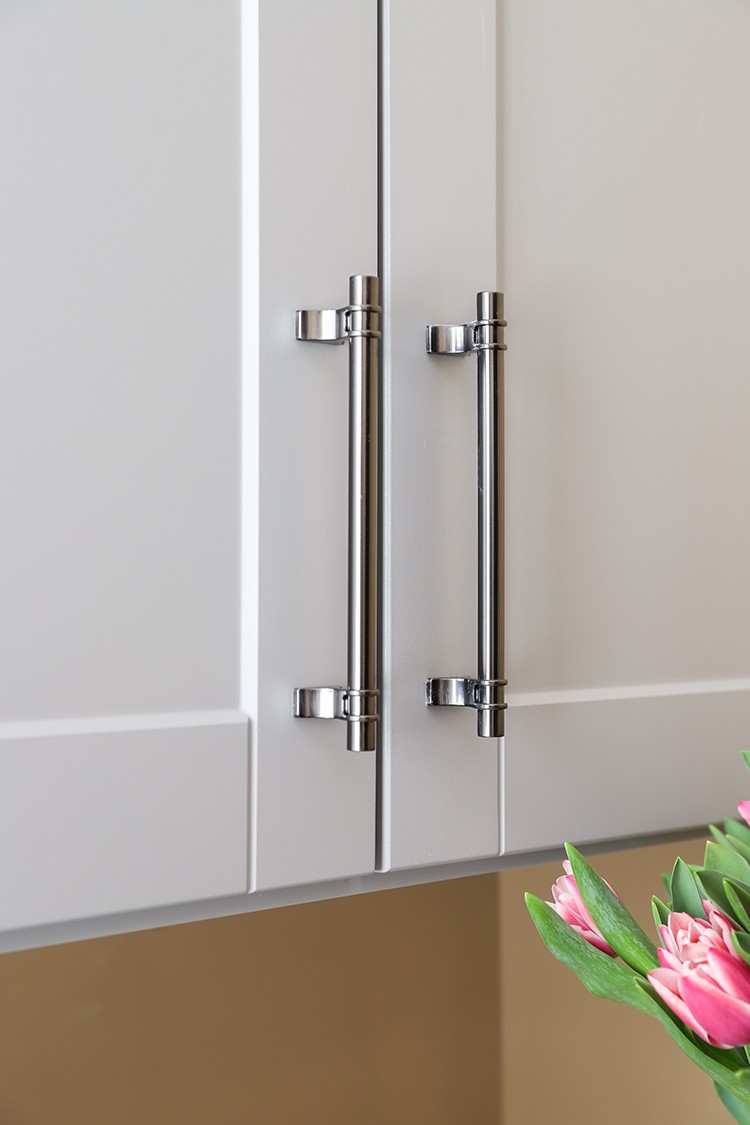
We chose these beautiful cabinet pulls by Amerock in Gunmetal. Aren’t they gorgeous?

Now that we have the cabinets hung, it’s time to install the countertop. The Home Depot called on one of their local Nashville vendors, Stone World TN, to fabricate and install the countertop. The entire process was incredibly easy from start to finish – the folks at Stone World were prompt, communicative, and friendly.
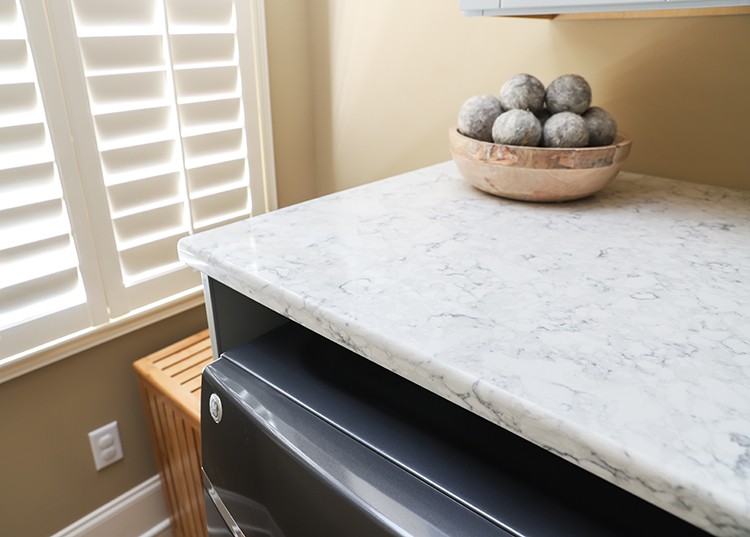
We chose a beautiful marble-looking quartz countertop called Viatera Rococo. First, I determined the height of the countertop – it had to be tall enough so that the washer and dryer could fit underneath, allowing for a couple of inches clearance. Then I screwed 2×4 cleats to the studs in the wall and checked for level.

The counter will rest on these 2×4 cleats. I also built a base carcass out of ¾-inch plywood to help support the weight of the countertop. Then on installation day, the guys from Stone World simply laid the countertop into place and sealed the joints with silicone.
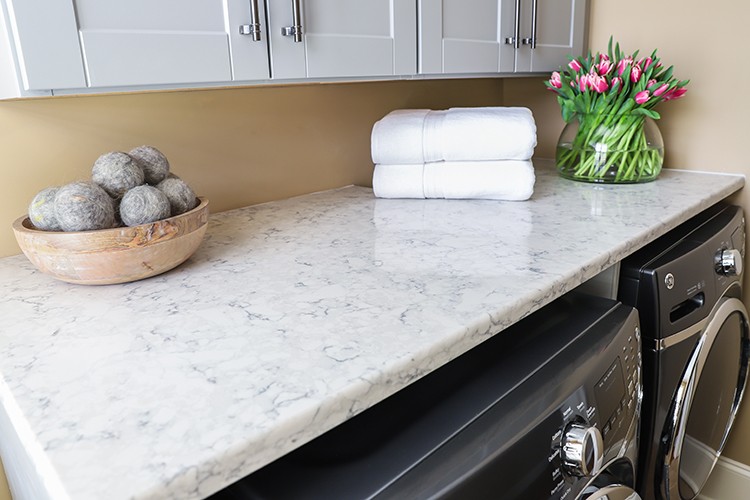
We chose a full ¼ round edge profile, to match the existing counters in my parents’ house. I just can’t get over how gorgeous this countertop is! Thank you Stone World TN!
Now, let’s get our Spring cleaning game on!
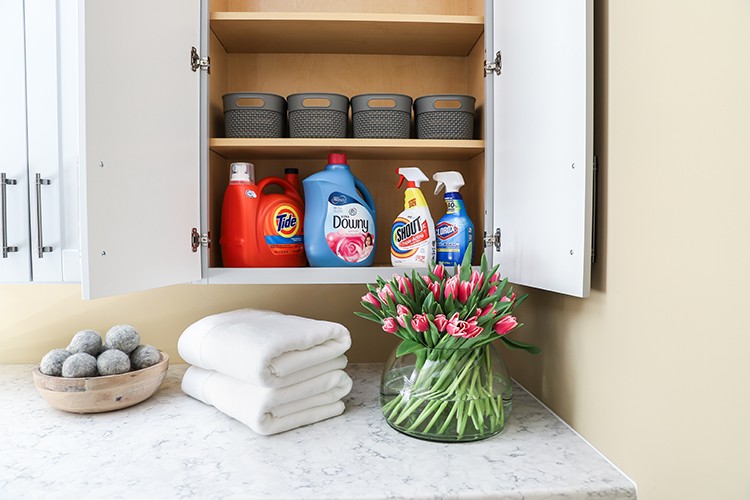
My mom loves a clean house, so when it comes to cleaning and disinfecting all of the hard surfaces in their home, Clorox Clean-Up Cleaner Spray is our go-to product.
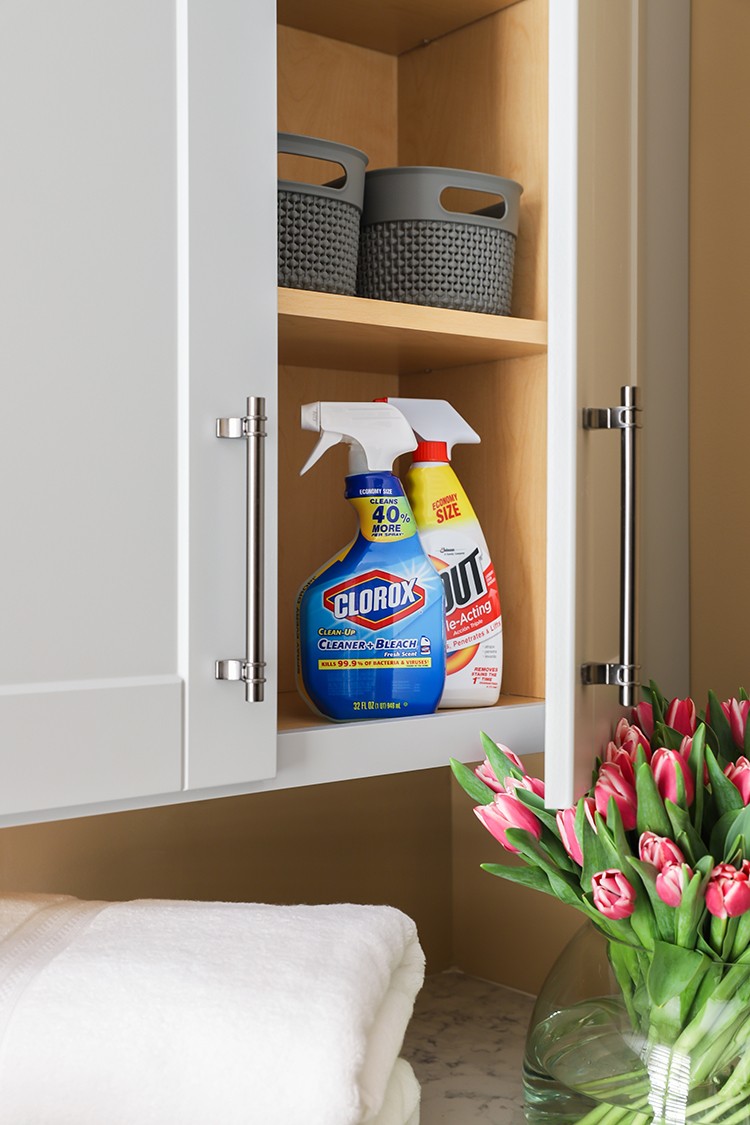
For those hard-to-remove stains, we use Shout Trigger Stain Remover to pre-treat fabrics before throwing them in the washer. I should be a grass-stain-remover pro by now – I’m pretty sure I get more than my share. #boymom
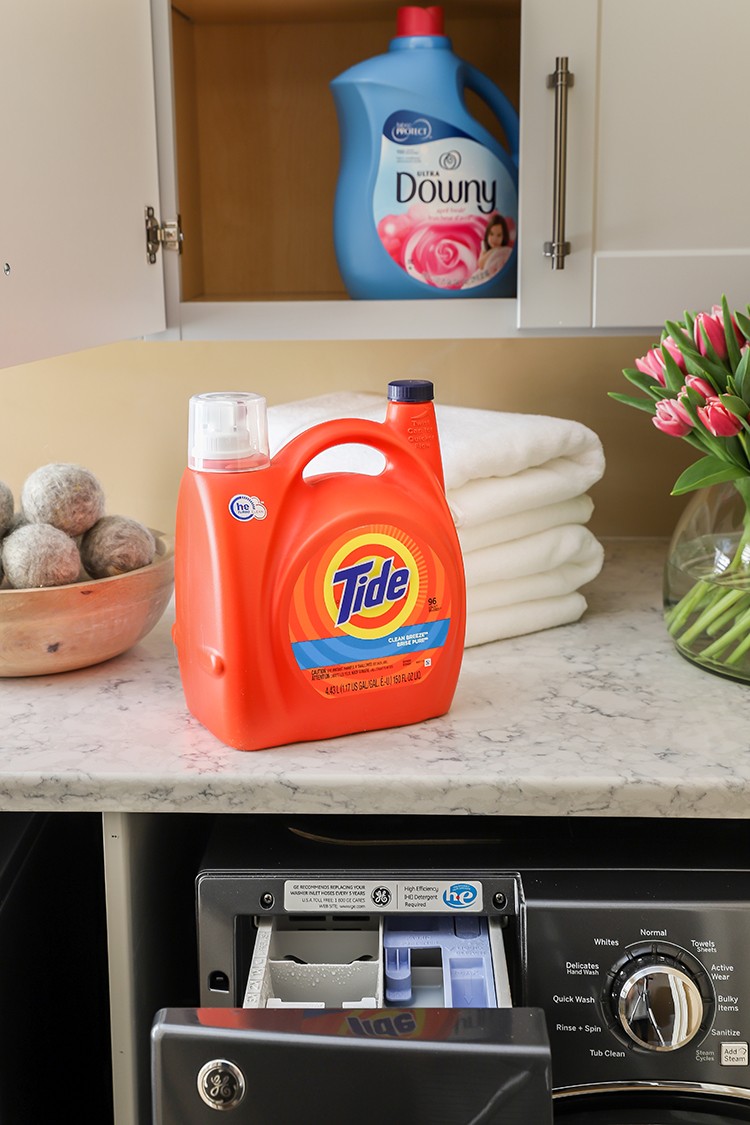
Of course, Tide HE Liquid Detergent and Downy Fabric Softener are a staple in both of our homes. This liquid detergent is made for high efficiency machines.


Downy makes our towels so fluffy and soft. And they smell so good too.
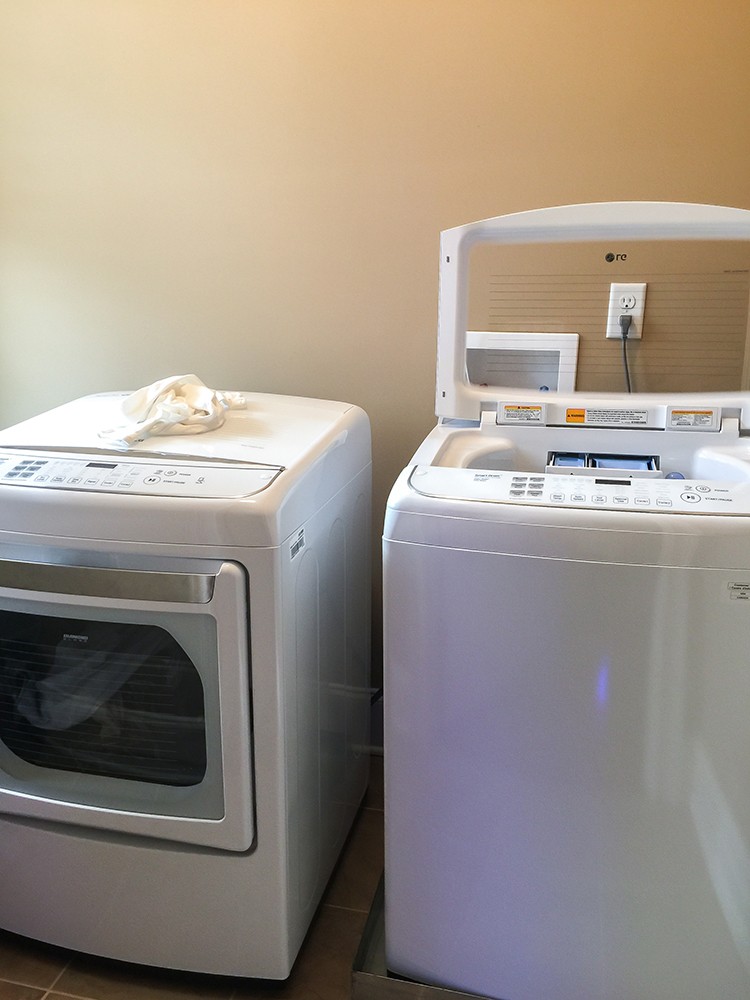
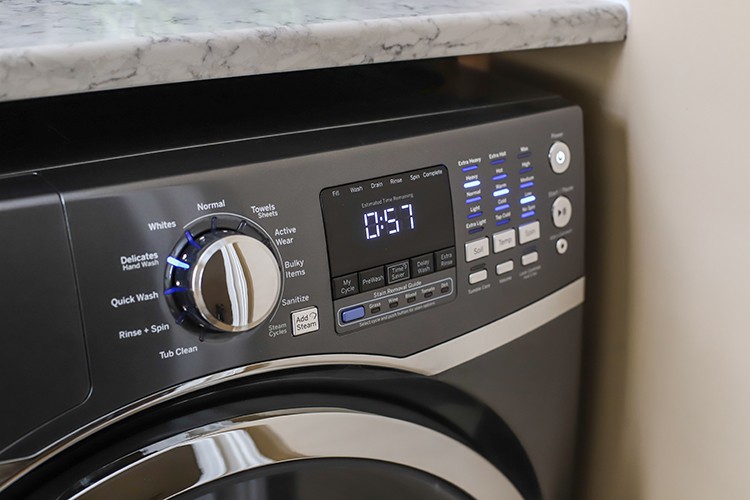
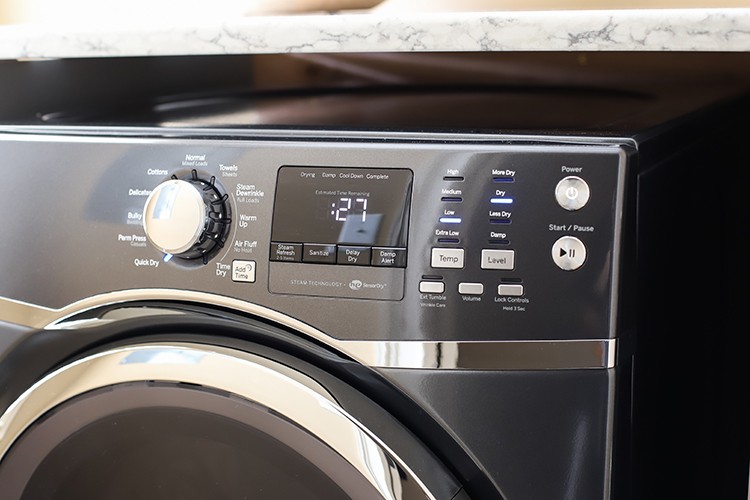
We got this GE High-Efficiency Front Load Washing Machine and GE Electric Front Load Dryer from The Home Depot.
Yes, please! Give me ALL THE OPTIONS! I’m a bit of a germa-phobe, so I absolutely love the ‘sanitize’ setting. So does my mom. She’s a clean freak. Maybe it’s hereditary?
My sister drove into town for the weekend to join in on the fun. It’s a family affair! I asked her to be my hand model and this is what she gave me:
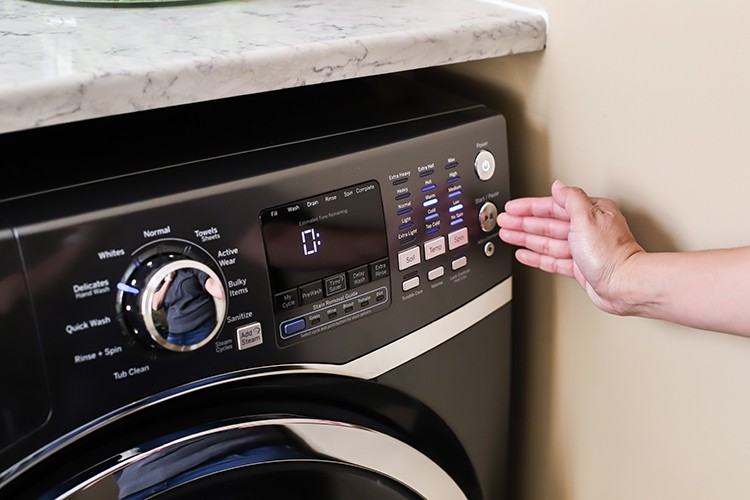
Hilarious. She gave me a few other hand-model poses, but I can’t post those publicly.
The dryer is no less impressive. All of the different settings make me feel so fancy. I especially love the ‘steam refresh’ and ‘steam de-wrinkle’ features. If you’re like me, you may forget about those clean clothes in the dryer for days at a time. This setting will help you pretend that you have your act together and you make smart life decisions.
Yay, you! You are a rock star.


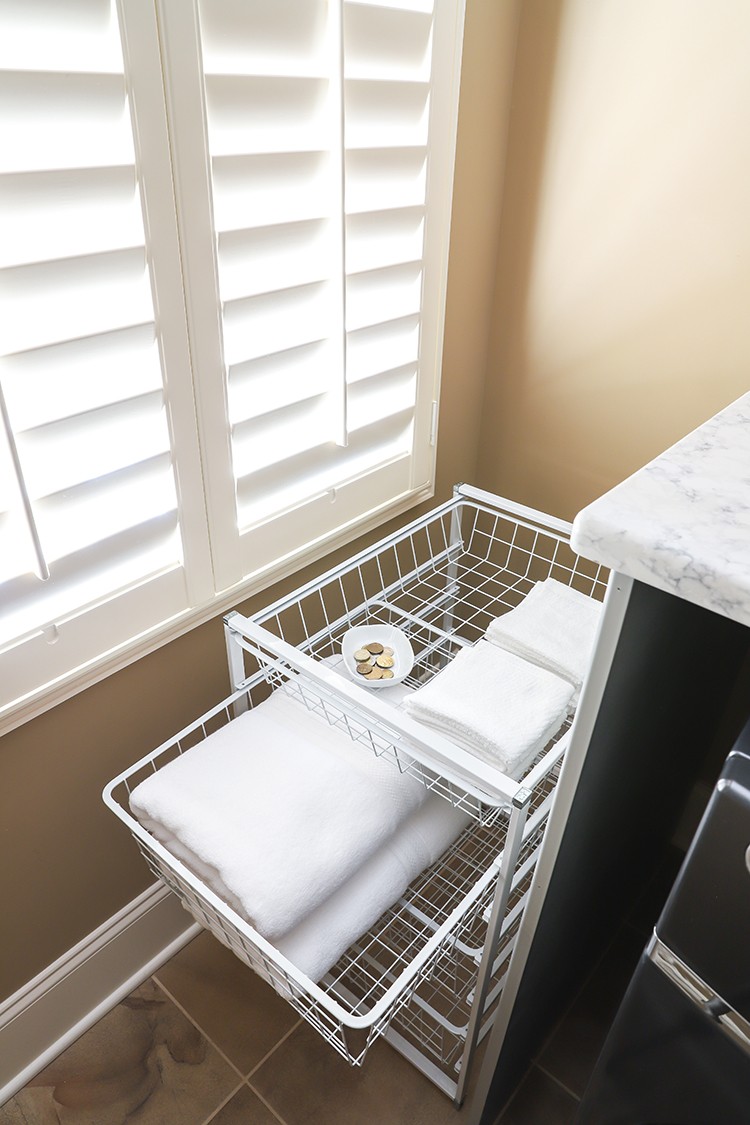
This handy little ClosetMaid wire bin is great for organizing. After all the laundry is folded, I can separate it into different bins, then take the bins to their respective owners. Work smarter, not harder, right?
On second thought, it would be smarter for my family members to do their own dang laundry. #iquit
Moving on.
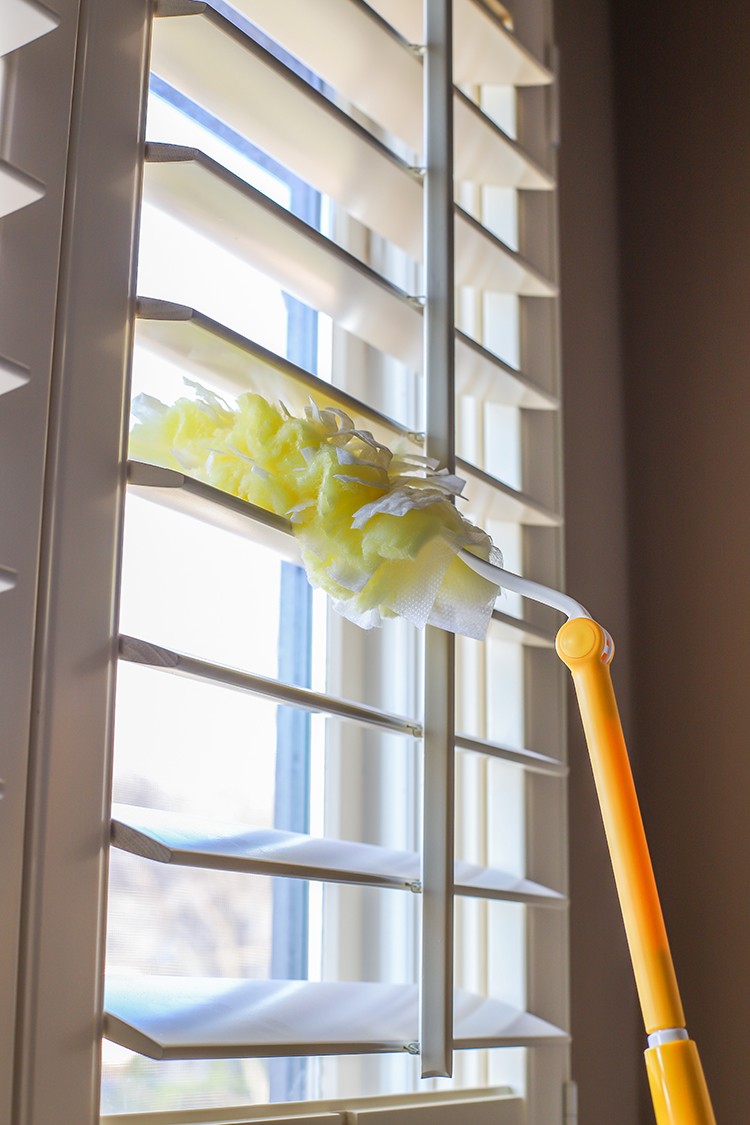
This Swiffer duster is great for dusting plantation shutters and blinds. The dust is magically drawn to the duster, like a moth to a flame. The extender arm helps with hard-to-reach areas. This works great for dusting ceiling fan blades too!
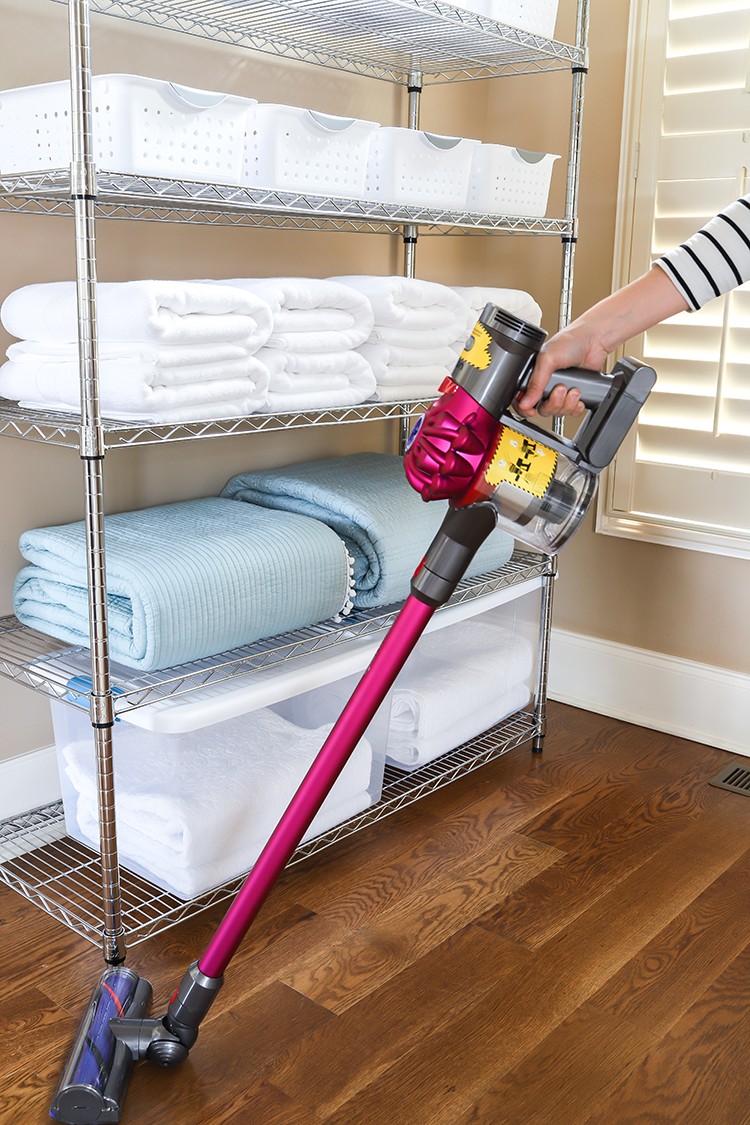
I love that this Decorative Wire Chrome Heavy Duty Shelving Unit offers additional storage space. These decorative plastic storage baskets and Sterilite 64-Qt. Latching Storage Boxes make everything look neat and tidy.
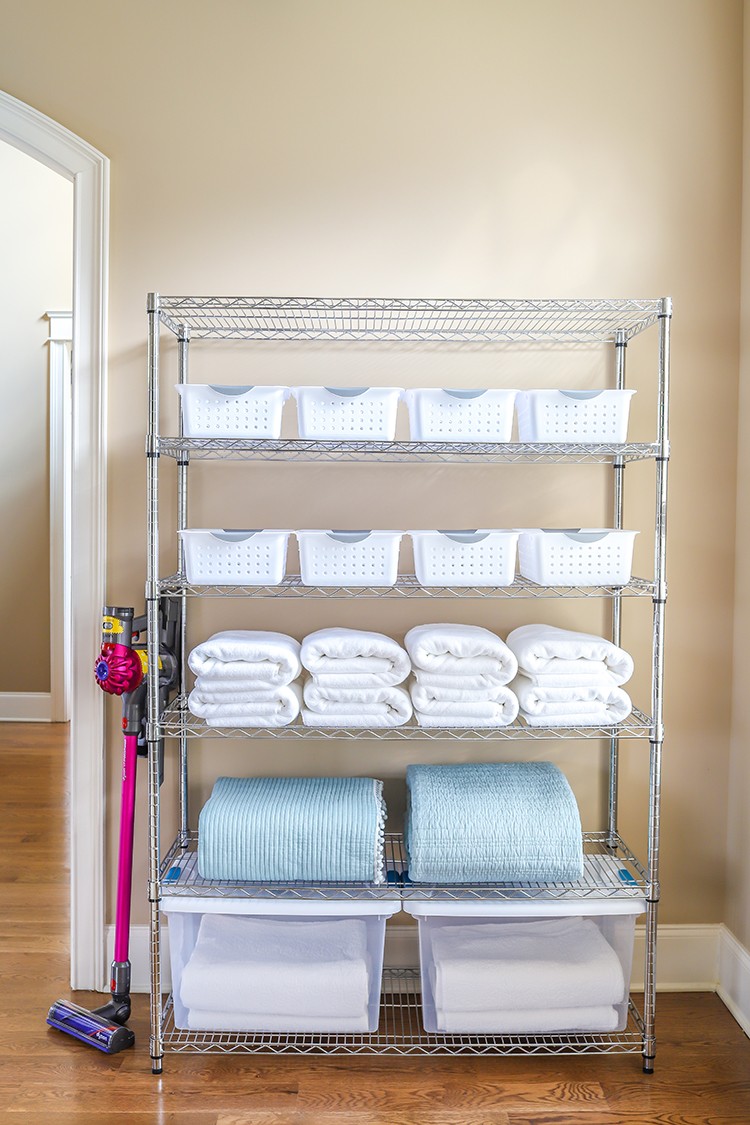
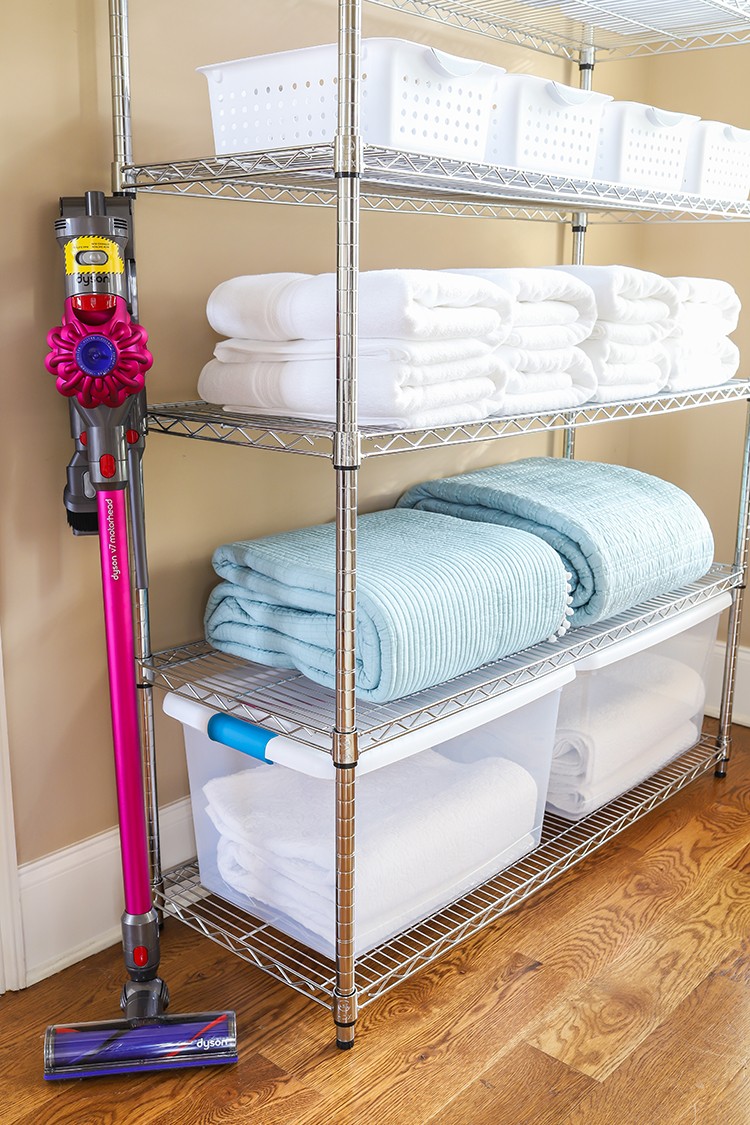
My dad loves his new Dyson V7 Cordless Stick Vacuum Cleaner. It makes clean-up a breeze. I want one for my own house now! Sadly, it won’t fit in my carry-on. (I tried.)
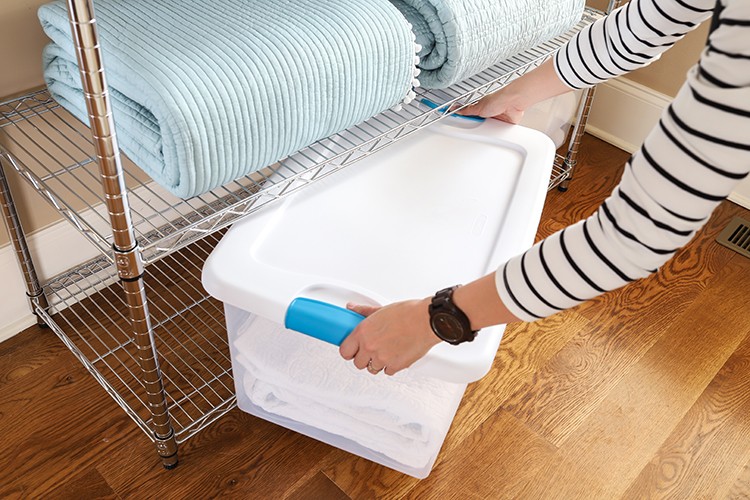
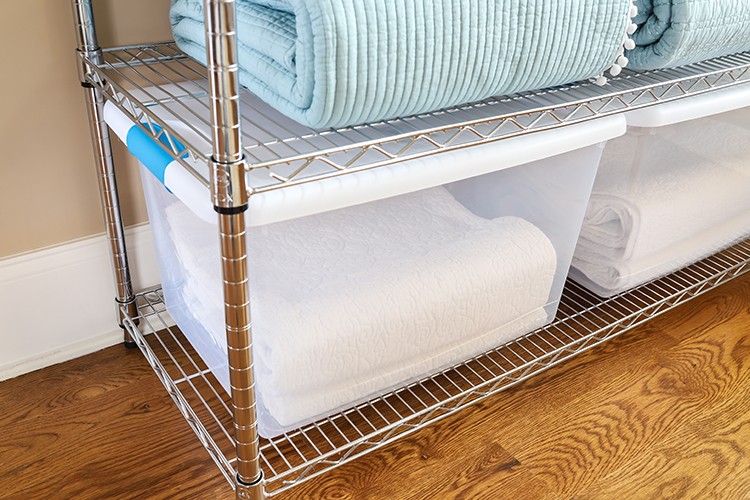
My mom uses these Sterilite Latching Storage Totes to store extra linens and blankets. We love that they’re clear so we can easily see what’s inside.
The Home Depot made it super easy to plan, shop for, and complete this laundry room makeover in under a week. My parents absolutely LOVE their new laundry room and I love that I got to spend my Spring Break improving an otherwise neglected space in their home. Thank you Home Depot!
Click here to shop the items you’ll need to complete your garage makeover like Jen Woodhouse from House of Wood.
The post Spring Cleaning: A Laundry Room Makeover appeared first on The Home Depot Blog.


