Katie Bower, of Bower Power, was looking for a way to give her sister’s bathroom a high-end look on a budget.
Read on to see how Katie added the perfect amount of contrast by adding Smart Tiles.
A Smarter Way to Lay Tile
If something walks like a duck, quacks like a duck, it usually is (say it all together now) a duck. Well, the same applies to DIY products. Very rarely am I surprised by any cool new product boasting claims to be ‘easier’ or ‘faster’ or ‘innovative’. But today I am gonna share with you the one thing that really shocked me in the best possible way. They are called Smart Tiles and I can’t wait to show you how they were a easy solution to lay tile for a quick bathroom makeover.
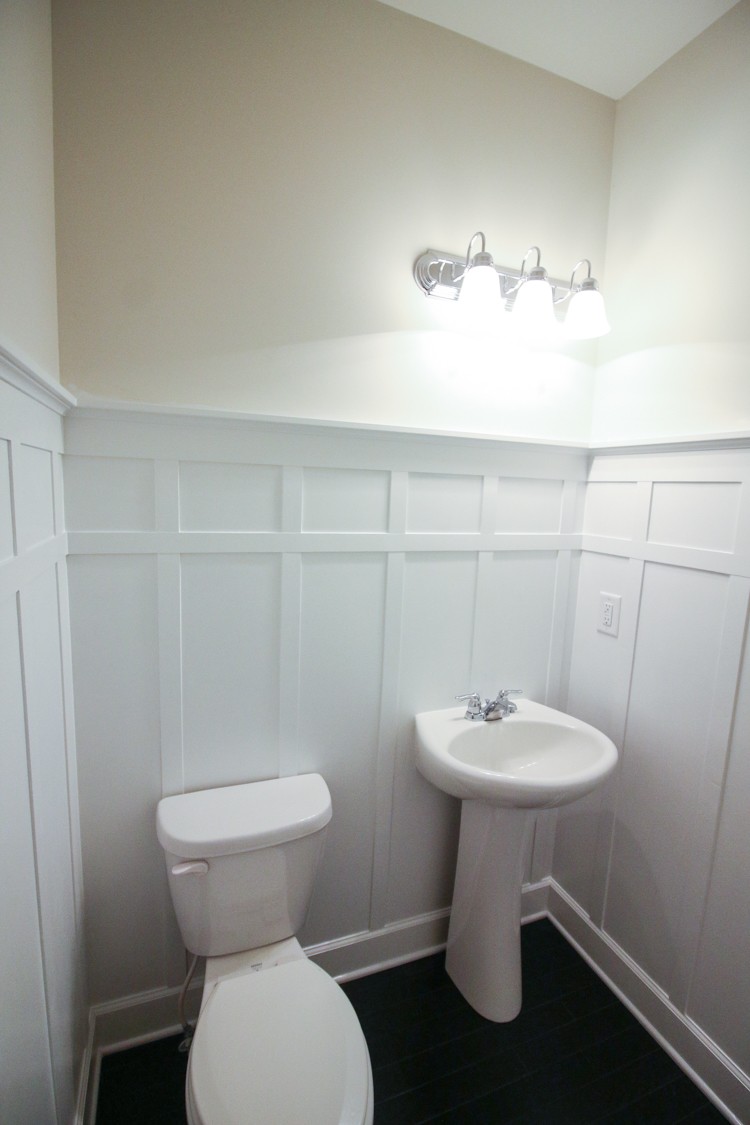
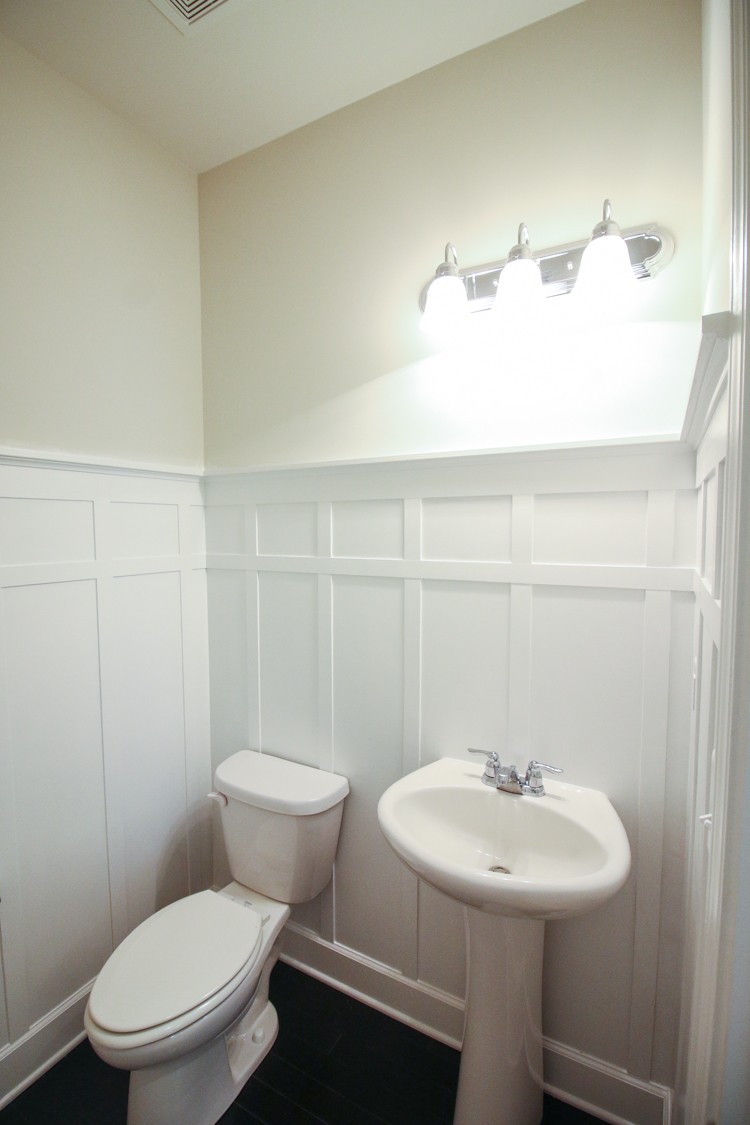
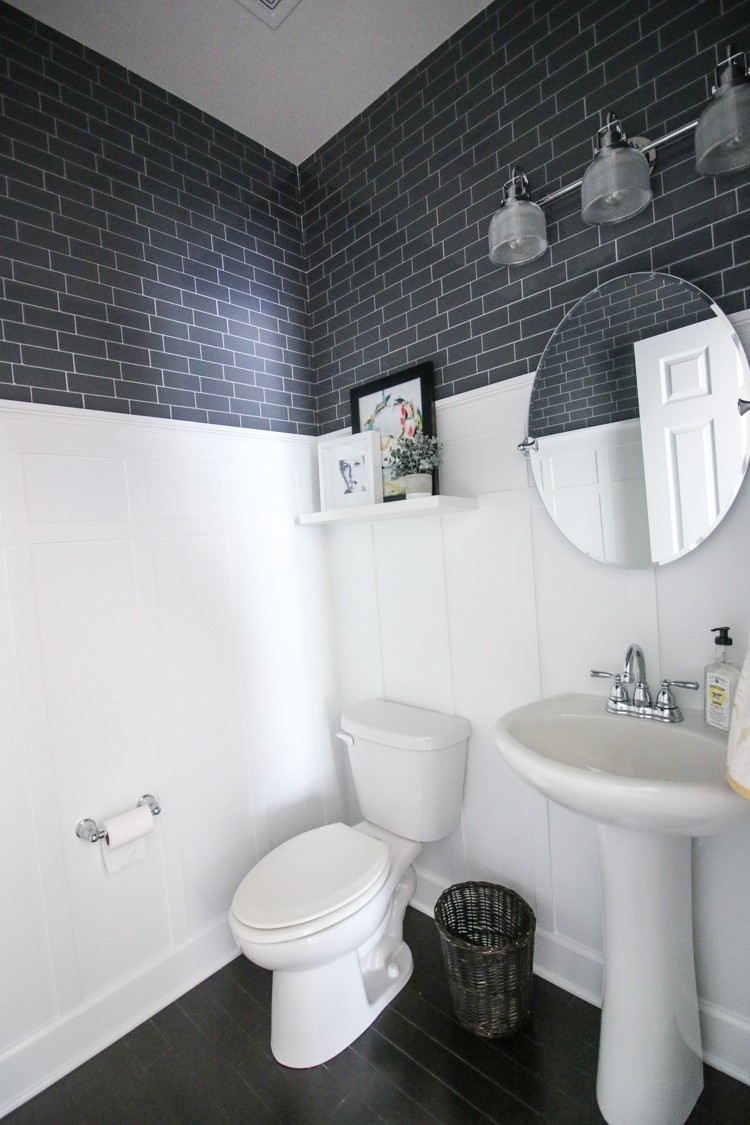
My sister had a very basic bathroom and we installed some board and batton to add interest on the bottom half. The top half was craving some pattern and contrast and my first thought was to add tile. I heard great things about Smart Tiles but I doubted whether they would actually look like real tile. In the past, peel and stick tile backsplash looked like printed contact paper. It looked okay if you squinted your eyes and stood very far away, in the next county.
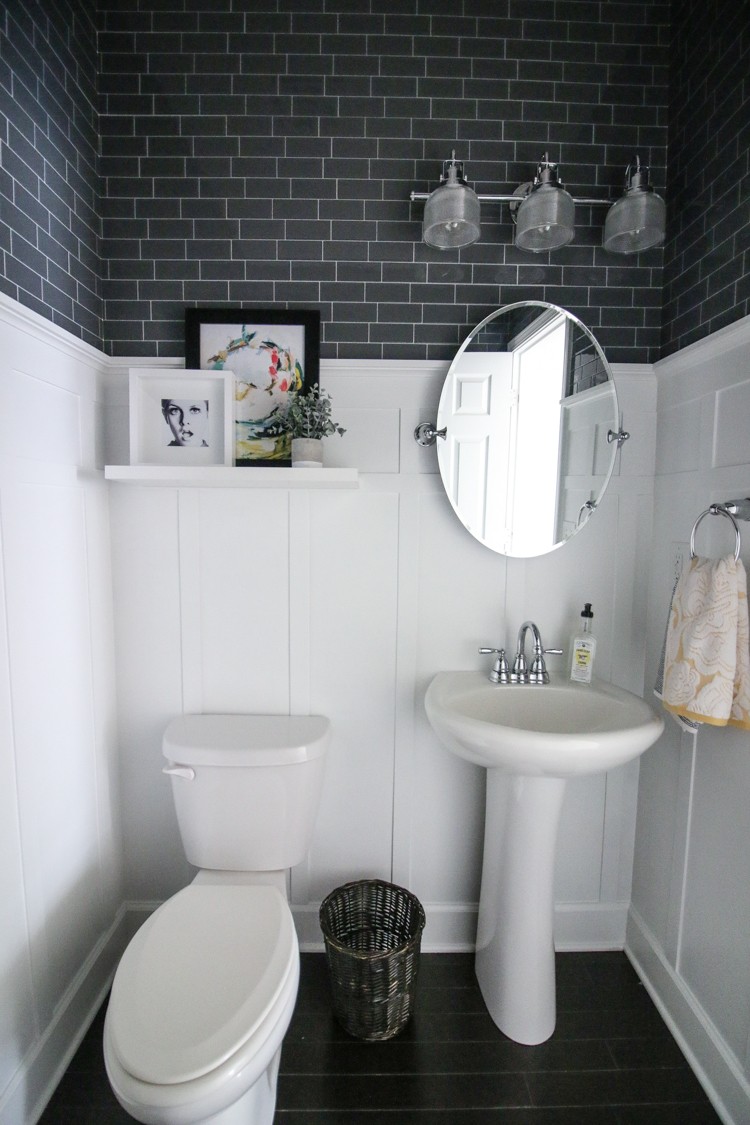
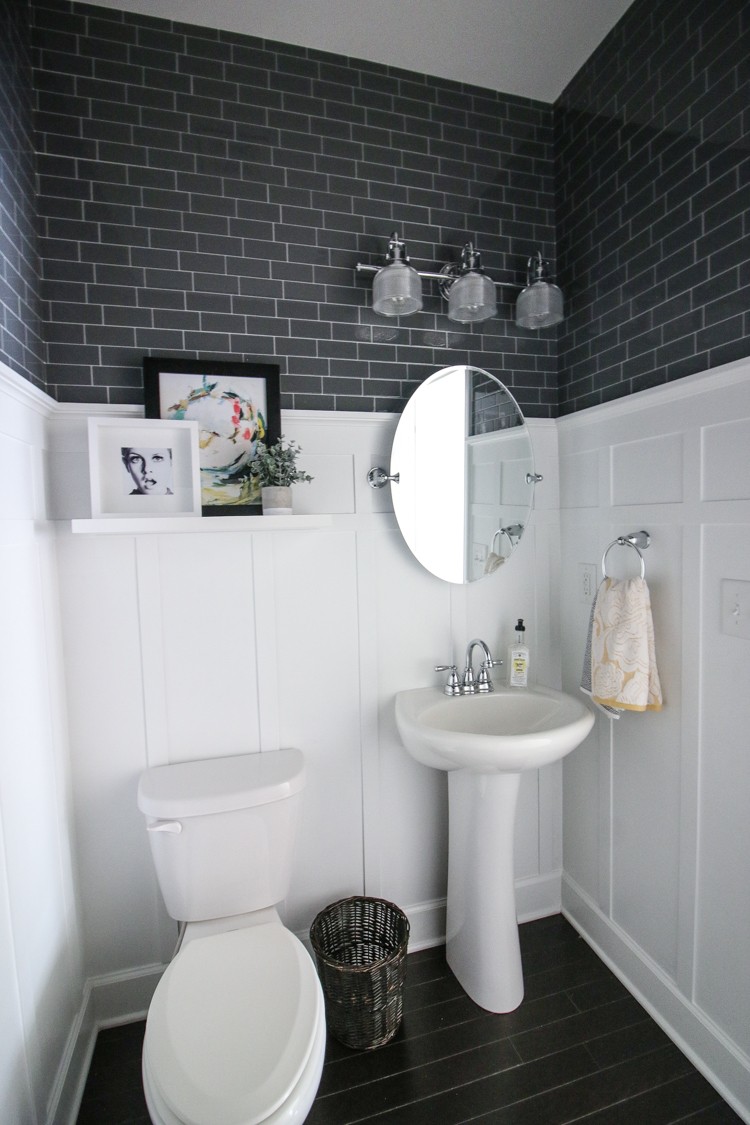
After a little research, I saw some photos of the Smart Tiles in action and it was worth checking out in person. I picked the Metro Grigio – a charcoal subway style tile that would add modern lines and contrast to the bland space. Even as I saw them in the box, I had doubts whether it would produce a realistic tile look. It wasn’t until after we installed them, that I thought “Dang! These actually look great!” Just check out this before and after.
Wanna see how easy it was? It required no tools. It doesn’t require any adhesive or grout and it can be installed directly over existing tile and removed! For installation, you need some simple items.
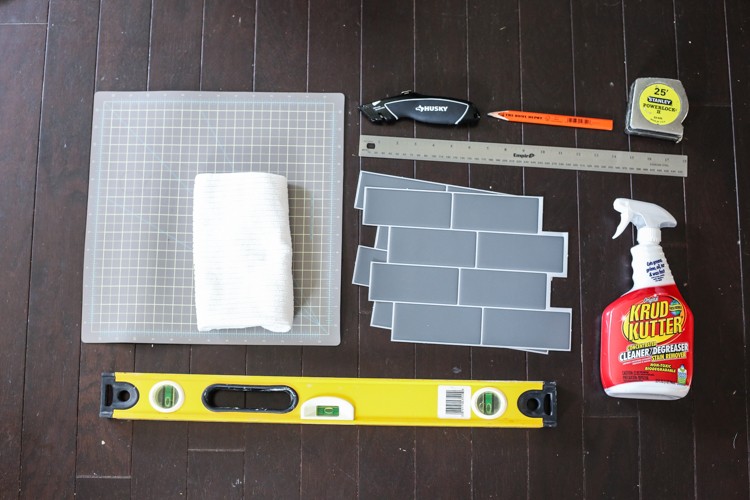
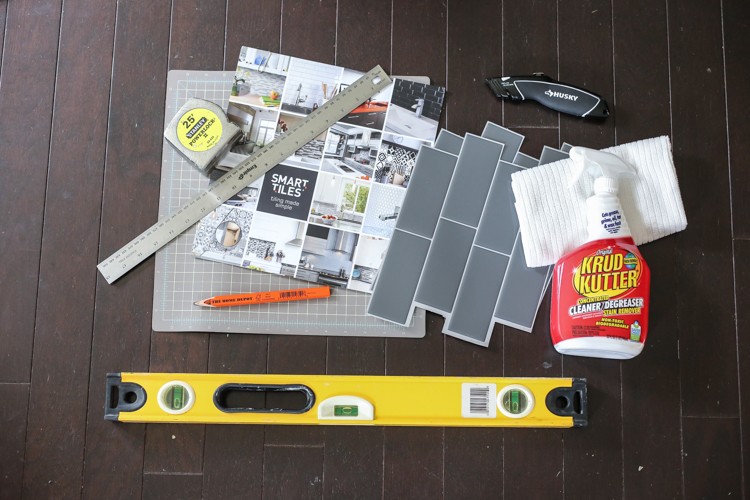
Materials
- Cork backed ruler
- Pen
- Degreaser spray with towel
- Level
- Cutting board
- Smart Tiles
- Retractable razor
General Installation
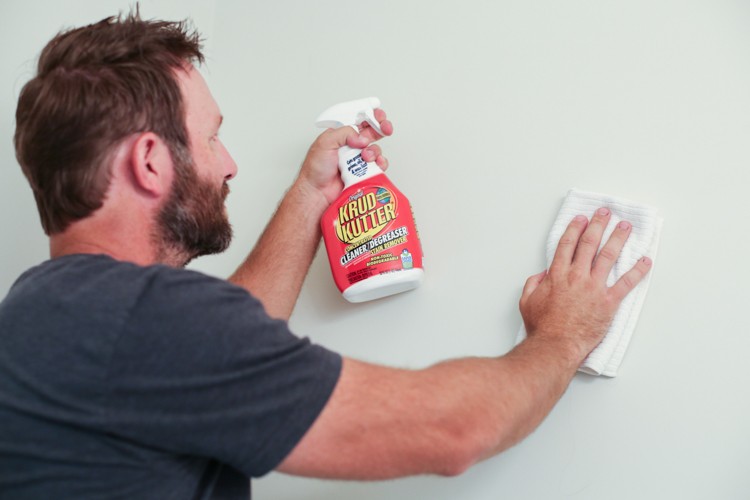
Installation steps are super simple. First we made sure that the walls were dry and clean. If there is any holes, make sure they are smooth to the touch. Wipe down all the surfaces with a degreaser before you begin.
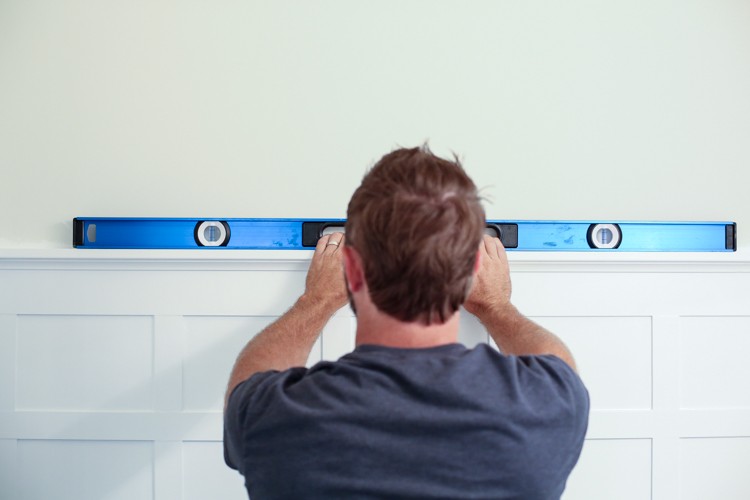
Then mark your starting guide line. We were using the top ledge as our guide line so we double checked it for levelness.

If your guide line is off, then your entire tile job will be crooked so this step is vital. Mark your guide line with a pencil.
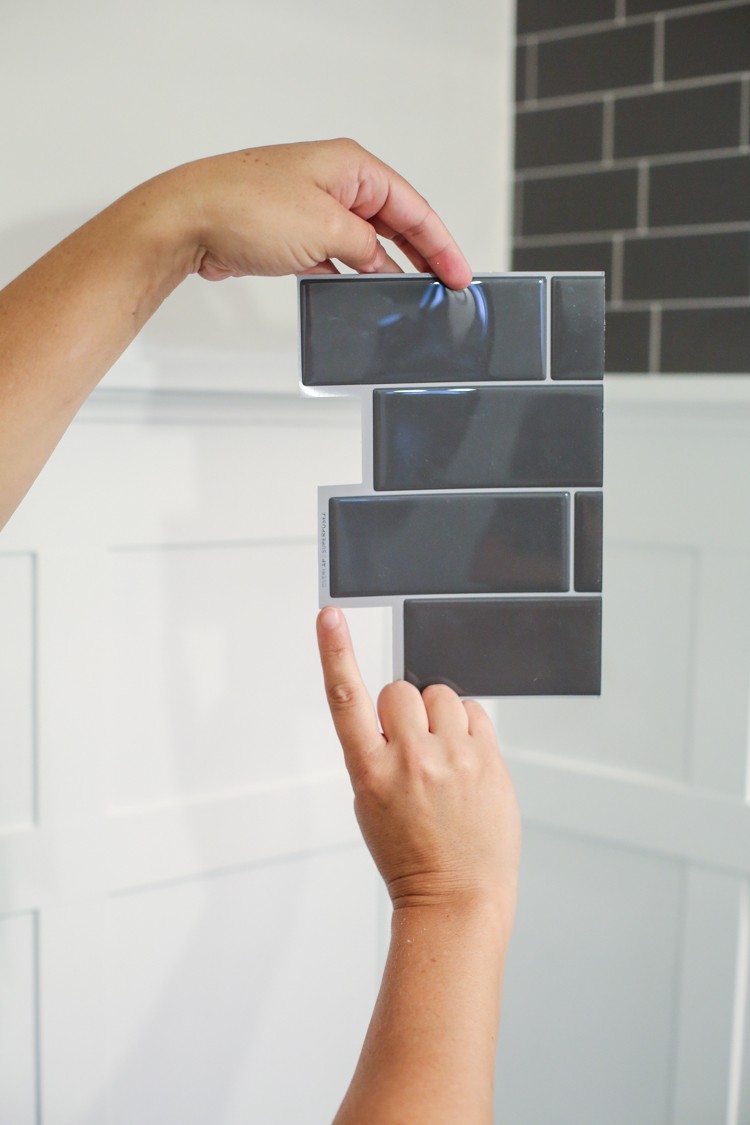
Next you want to pick a starting point. You will lay tile from left to right so keep that in mind. We decided to start at the door way and work over. In hindsight, we should have started in the corner because working backwards is nearly impossible.
Trim your first piece on the right hand side. You will know it is the right hand side of the tile because the left hand side has a thicker ‘grout’ line.
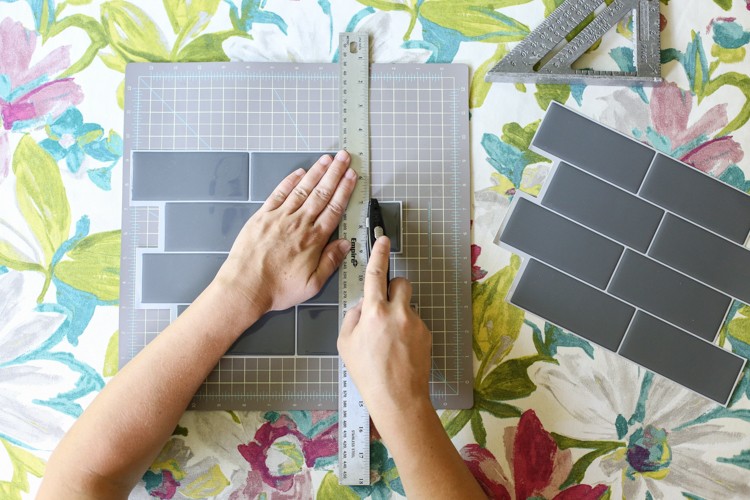
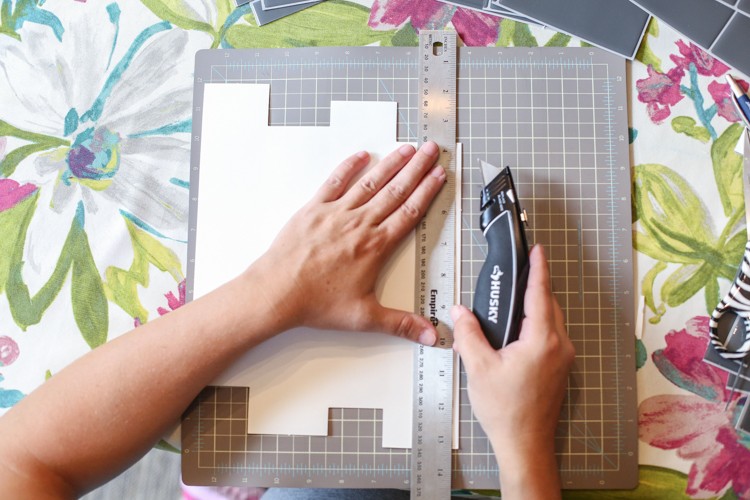
In order to trim the tile, lay the tile down on your cutting board or another cutting safe surface.
Using a straight edge as a guide, cut your tile with the retractable knife. I found that two passes with gentle pressure is best and creates the cleanest line.
That first edge needs to be straight all the way down from top to bottom. This will be your starting tile in the corner.
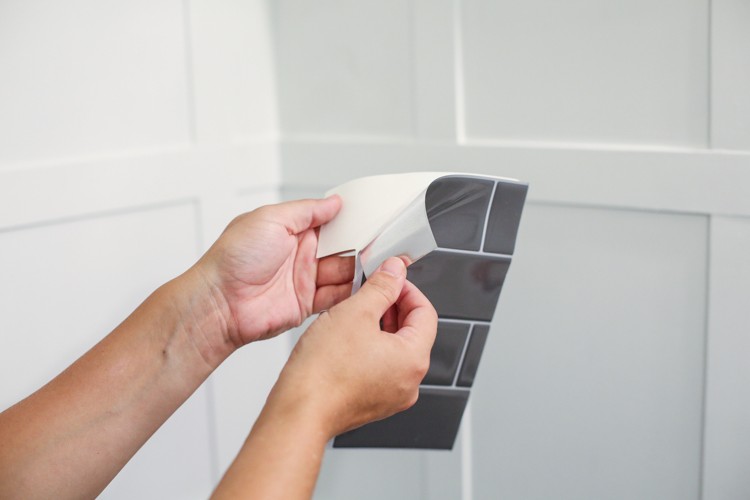
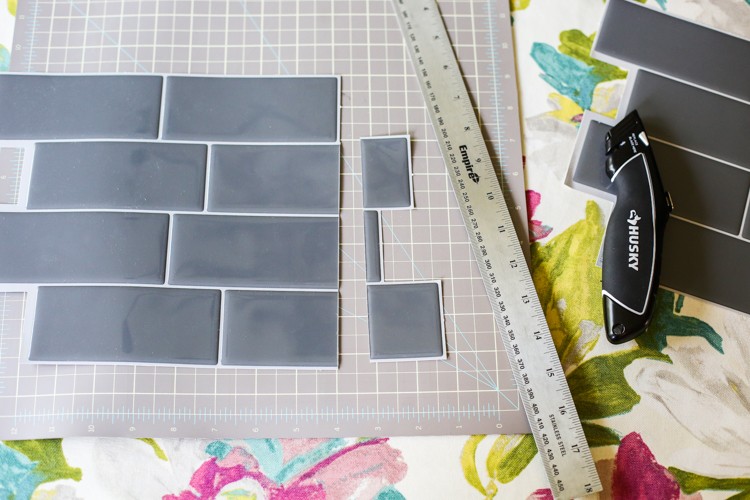
After you dry fit the tile, peel the paper backing off and align it in your starting corner along the guide line.

Setting it in place is easy. Then press firmly all over the tile to get it to stick.
Continue going down the line and then up as well. Each tile will overlap the one already in place.
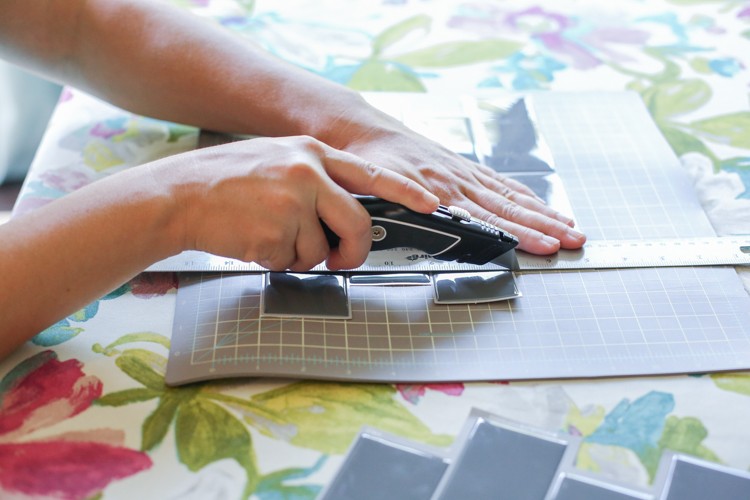
How to cut the tile
As I mentioned before, this tile can be cut with no tools! Most tile requires a dry or wet tile saw, a clipper or some sort of expensive tool. The Smart Tile can be trimmed with a razor!
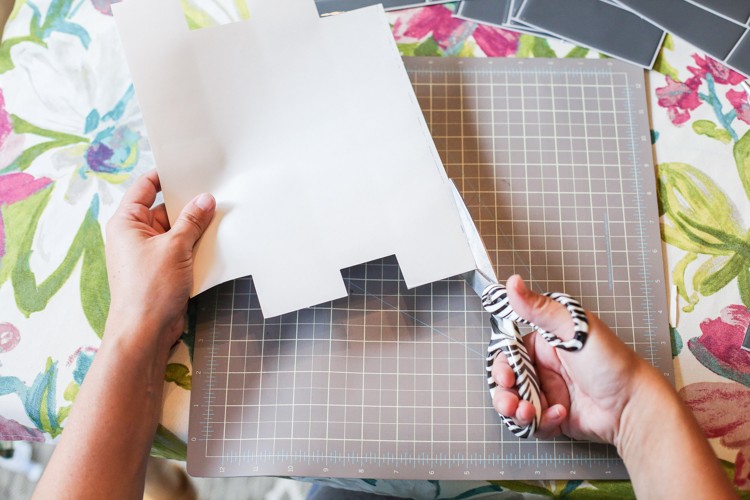
Another alternative is sharp kitchen scissors. They also work great for this project. I recommend cutting it from the back side for the cleanest line.
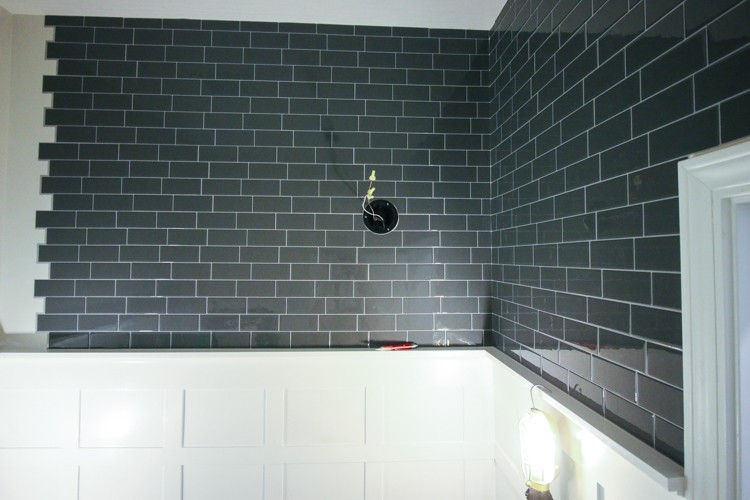
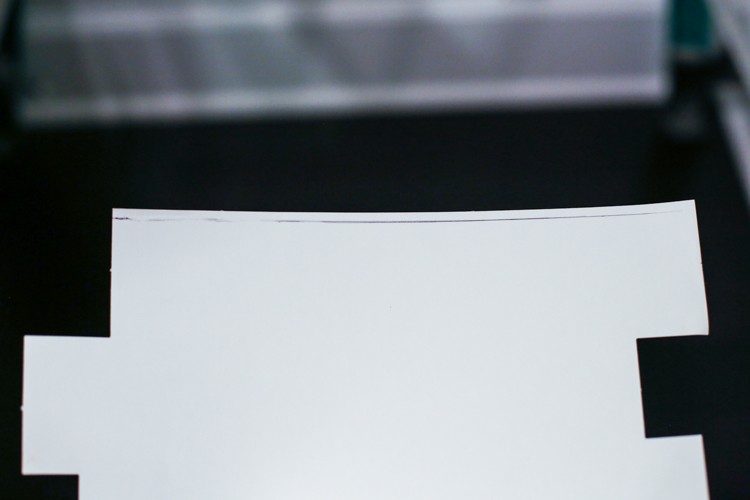
How to cut around outlets or lights
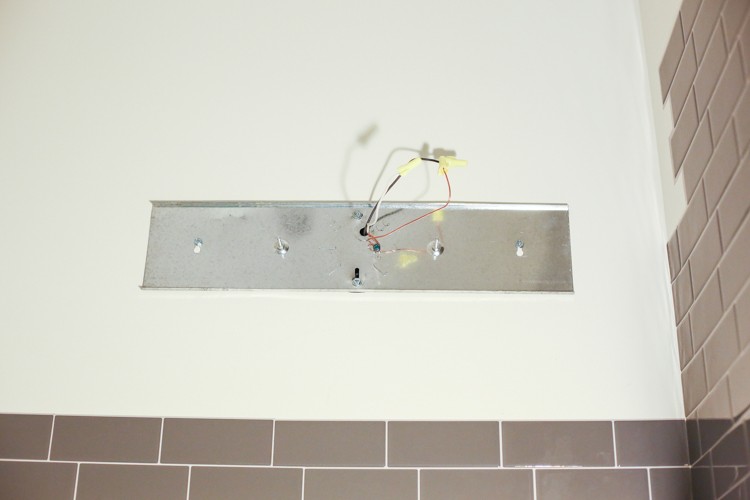
In some cases, you may need to cut around an outlet or a light box. In my sister’s bathroom, the existing light had a large back plate that we needed to remove. Make sure you turn off the power at the breaker box before removing any outlet plate or existing light fixture and double check with a power sensor.

Once the light is removed, the part you want to remove can be marked on a Smart Tile and safely cut away.
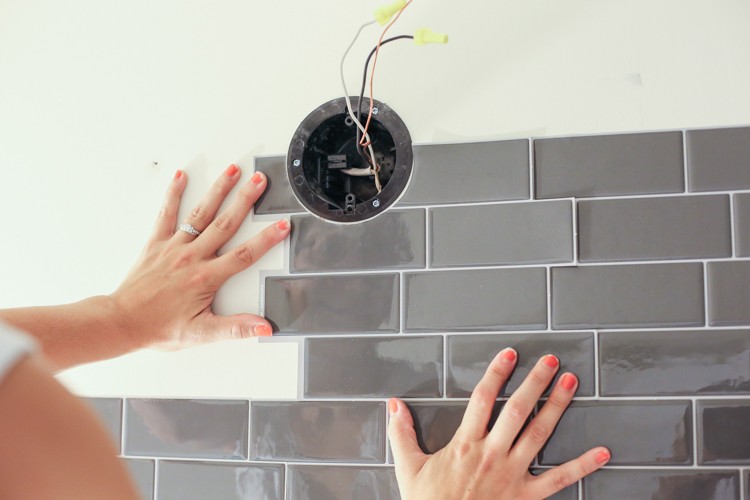
Always dry fit it to see if it lines up with neighboring tile and be sure to pay attention to your grout lines to make sure those are even!
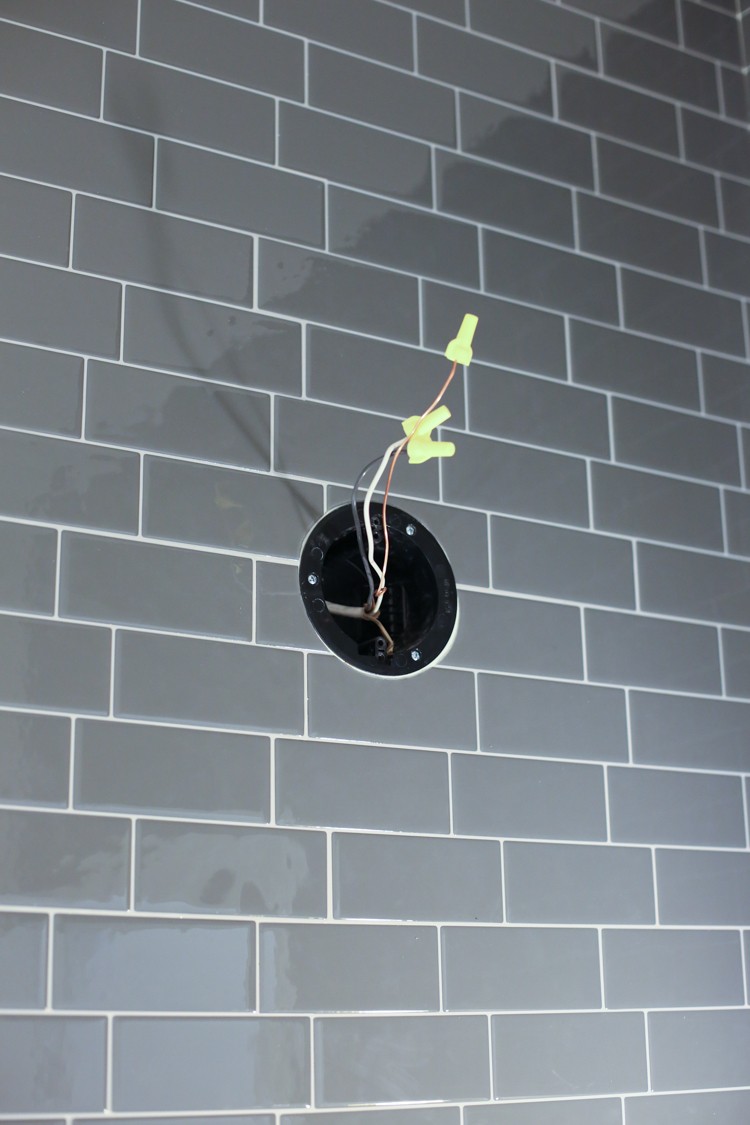
The advantage to using this especially when it comes to outlet boxes of any shape or size is that the profile of the Smart Tiles is very thin compared to real tile. Real tile can be 1/4 in. to 1/2 in. thick with adhesive on the back and would require the outlet box to be unfastened and pulled forward. This product allows your outlet boxes to stay in place!
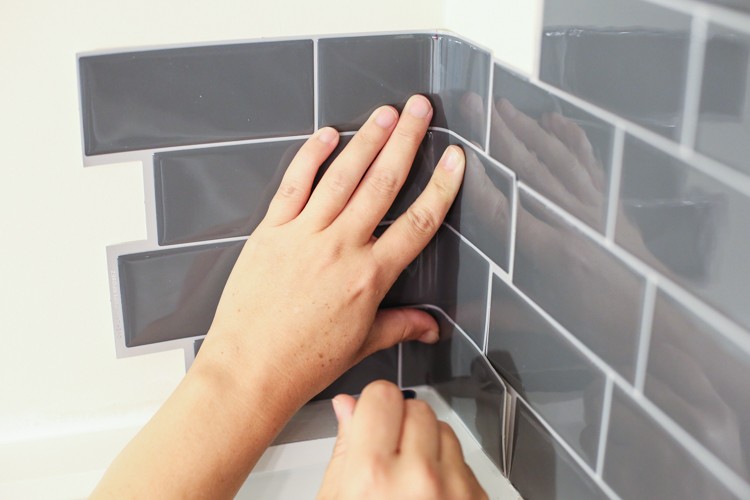
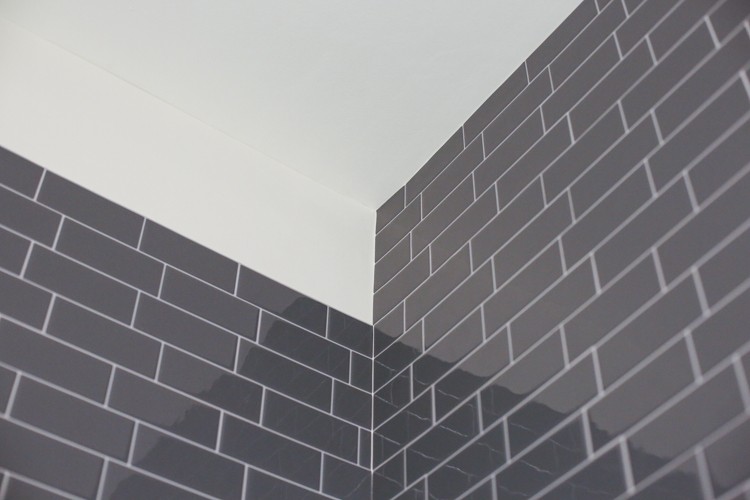
How to use Smart Tiles around an inside corner
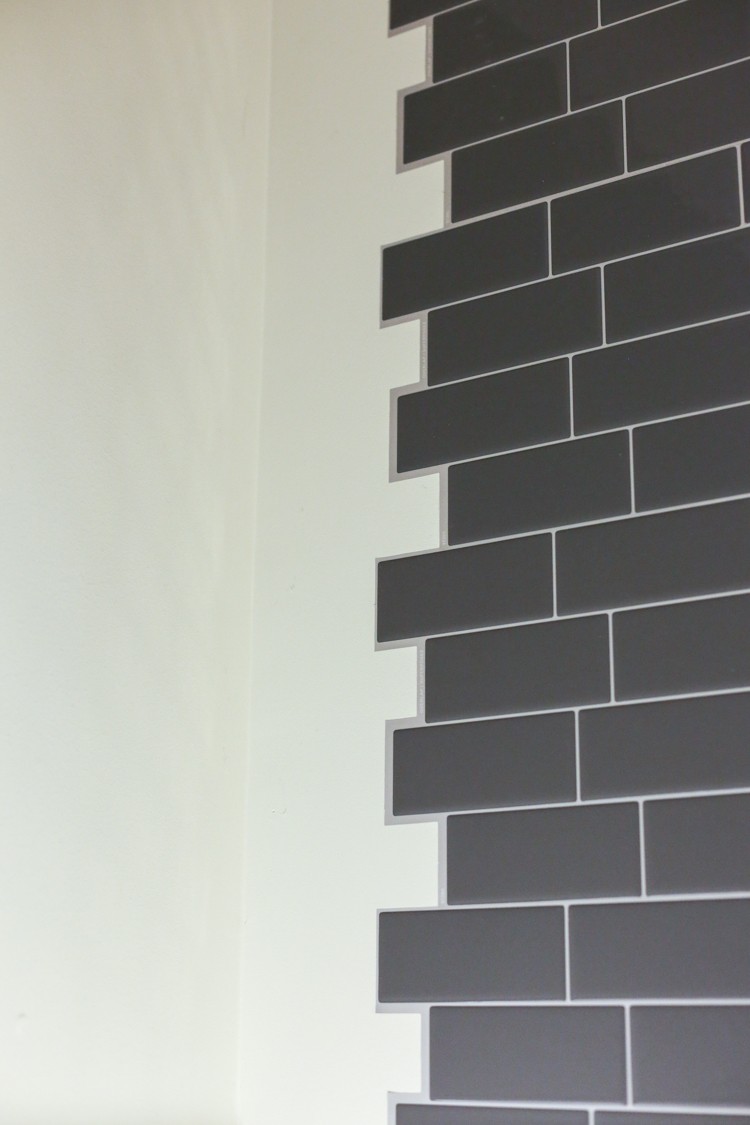
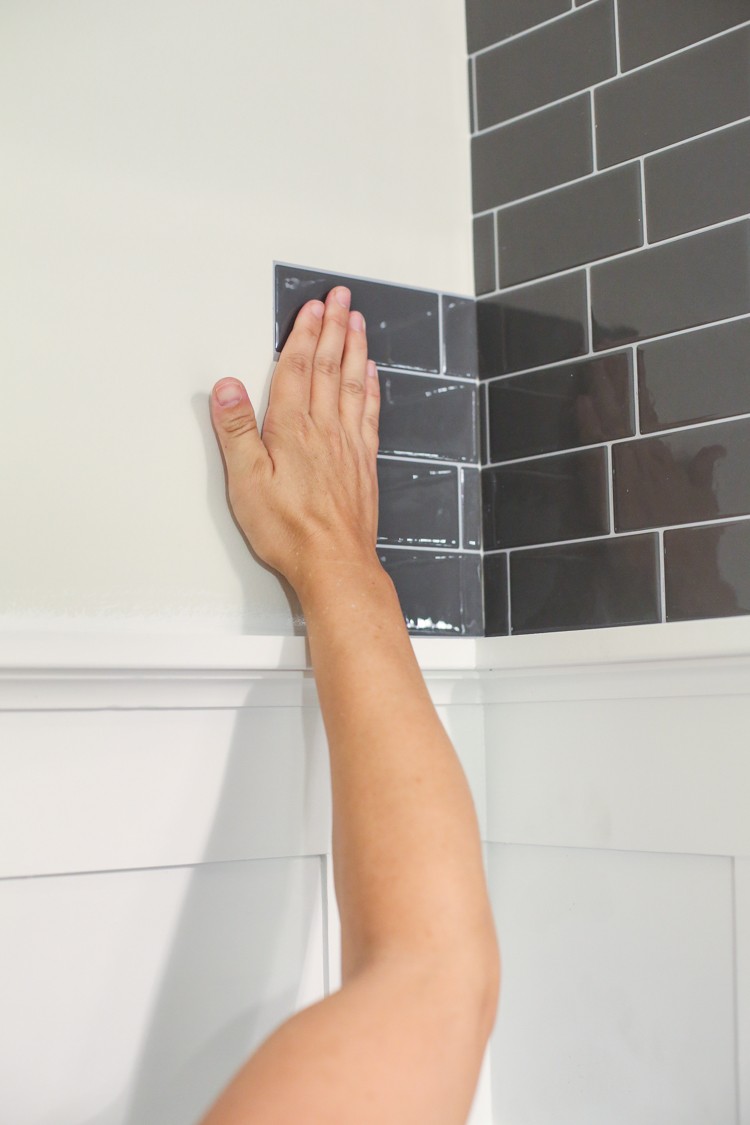
For this space, we wanted to make sure that the tile completed the entire wall above the board and batton. This required us to do all four walls from the ledge to the ceiling and we wanted to carry that tile around the inside corners.
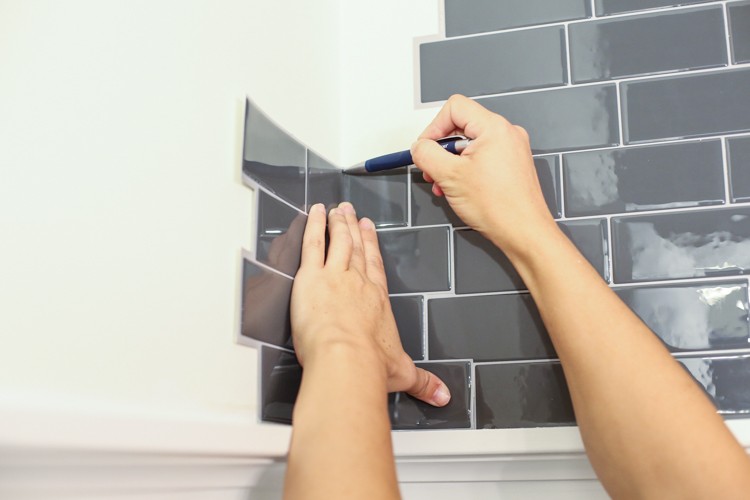
Once each wall was covered with the tile, the corners still required a finish tile. This meant that we needed to bend a piece of Smart Tile into the corner and mark the top and bottom where we needed to cut. We could have done this with a measuring tape but our method proved to be faster. Since the Smart Tile is very flexible, you can easily curve it into the corner making sure to align it.
A regular pen worked well at marking the face of the tile and easily came off with a wipe.
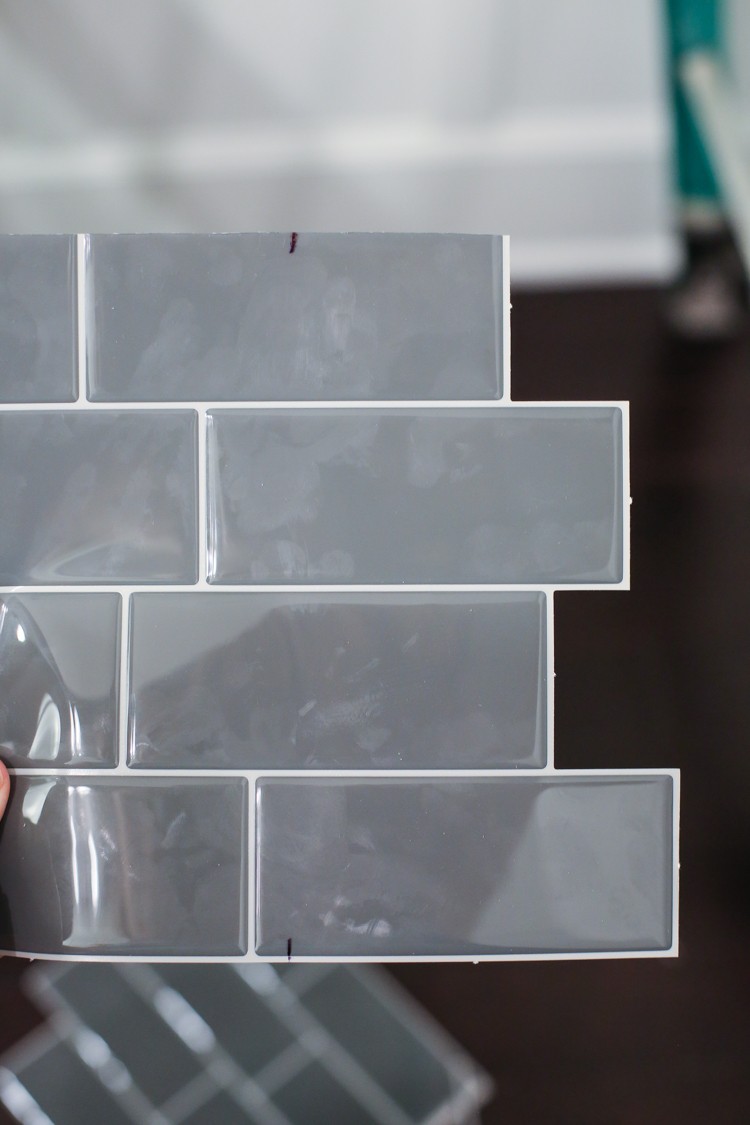
Here is the way we would mark the tiles.
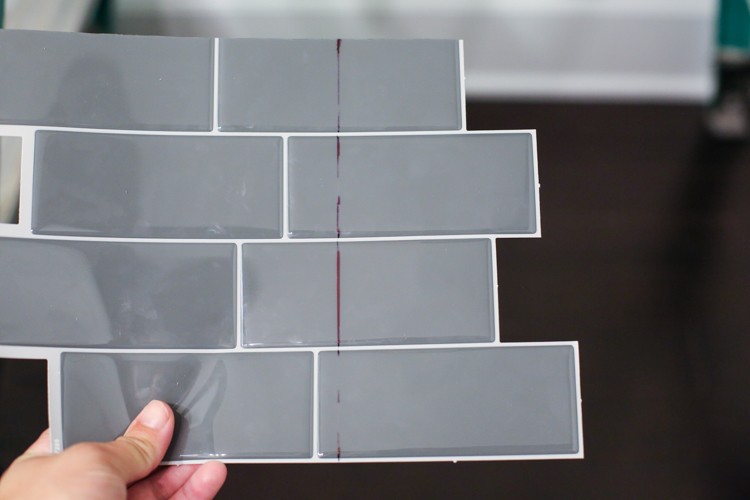
And then we would use the straight edge to draw a line connecting the two spots to cut.
That right hand side would be dry fit and then installed.

The remaining piece would go on the adjoining wall.
We would simply peel and stick it and it always gave the appearance of that tile being wrapped around the inside corner.
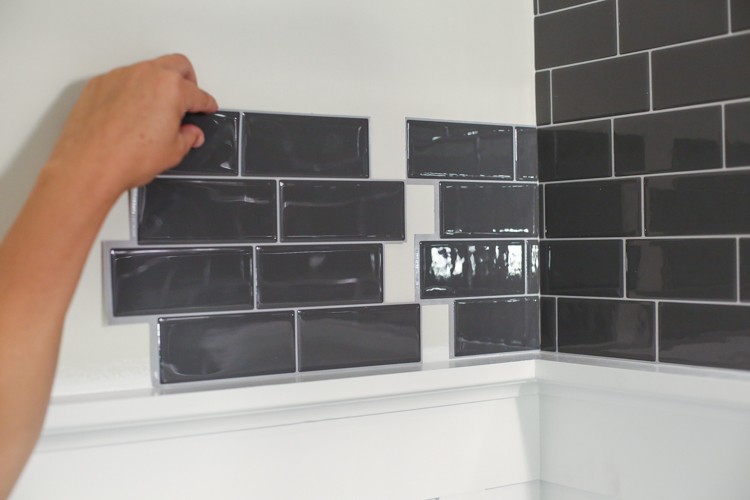
The next piece is a full piece and goes into place easily – making sure to align with your bottom guide line.

My best tip for best alignment is to adjust the bottom right hand corner and make sure the bottom guide line is used and then roll the Smart Tile up into place.
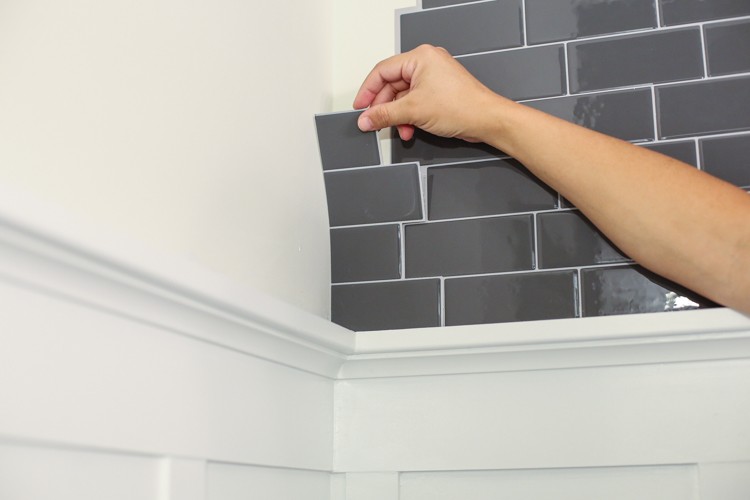
How to trim for the ceiling
Once you lay tile from corner to corner, you will need to do the next level up.
Trimming for the ceiling is easy. Measure the distance from the top wall tile to the ceiling and use a straightedge and razor to trim the excess.
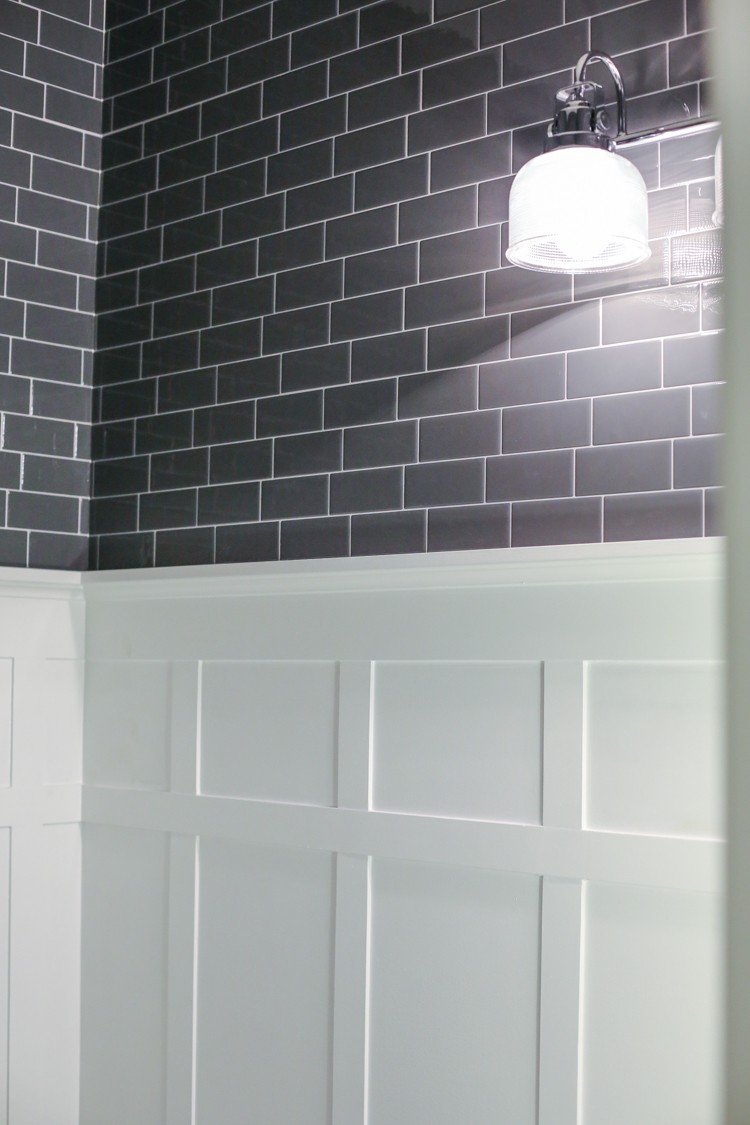
The finished result is very impressive. The Smart Tile has a very realistic sheen and reflective quality that is especially evident when lights are nearby. The texture can also pass as the real thing once it is installed.
The biggest advantages for using this product though are the time saved and the little skill necessary for installation. A space of the size we did would have taken me three full days to cut, install and grout. This product took only one day! As for skill, you need no DIY skills. In fact, I kept saying that anyone with an eye for detail and a steady cutting hand could rock this tile installation.
If you plan to lay tile, I highly recommend using this product for rentals (because it is removable when installed over existing tile!) and for areas that could use a quick fix – like outdated backsplashes or fireplace surrounds.
Final Reveal
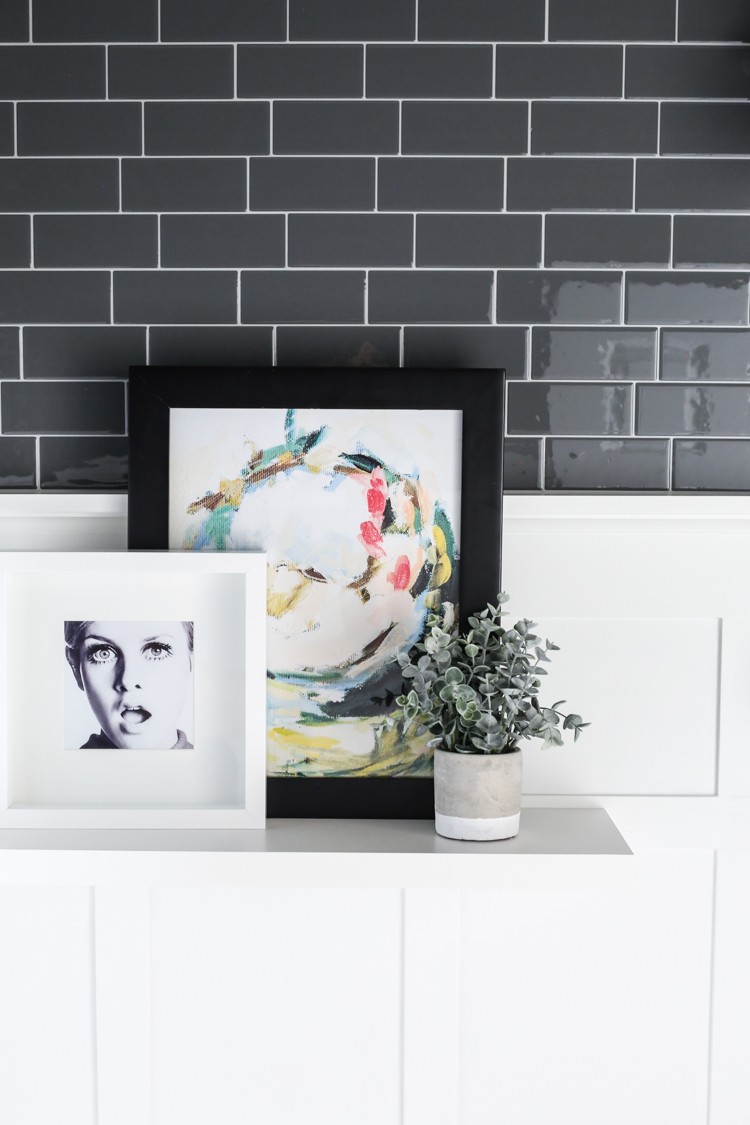
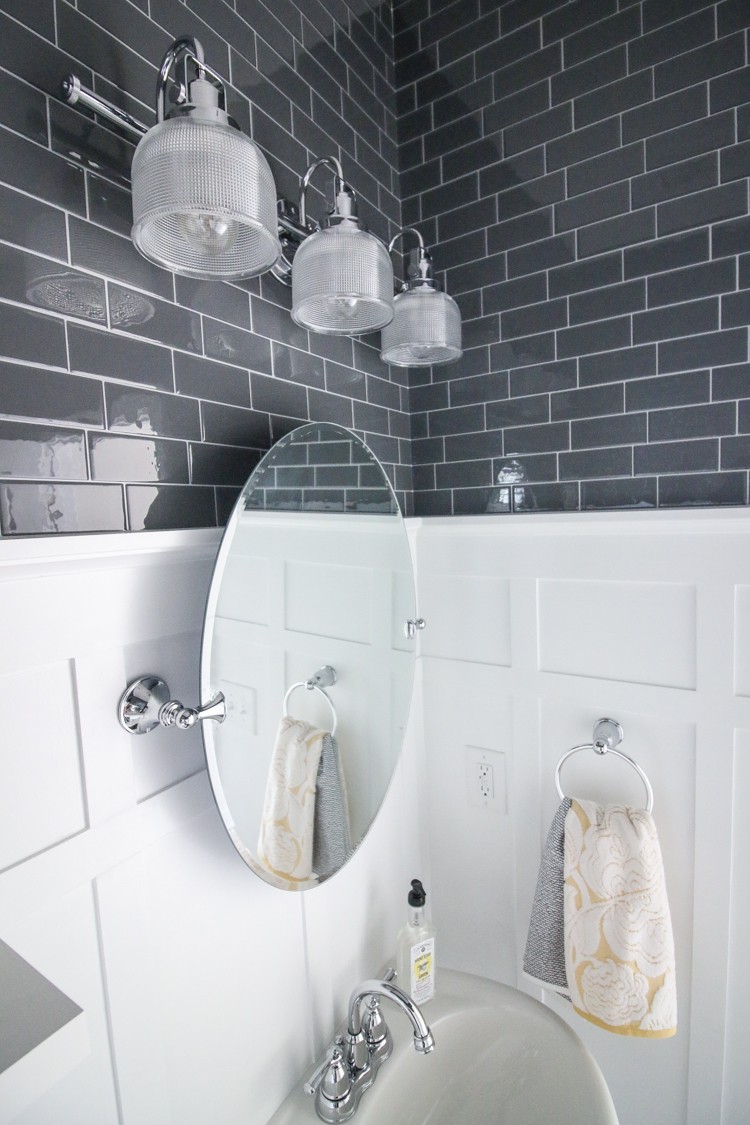
As for the bathroom makeover, you can read about more details on the blog Bower Power. The addition of the mirror, new light fixture, faucet and shelf compliment the tile and are affordable options that give a modern high end look. The before and after are a stunning testimony to the Smart Tile product.
The post The Smarter Way to Lay Tile appeared first on The Home Depot Blog.

