
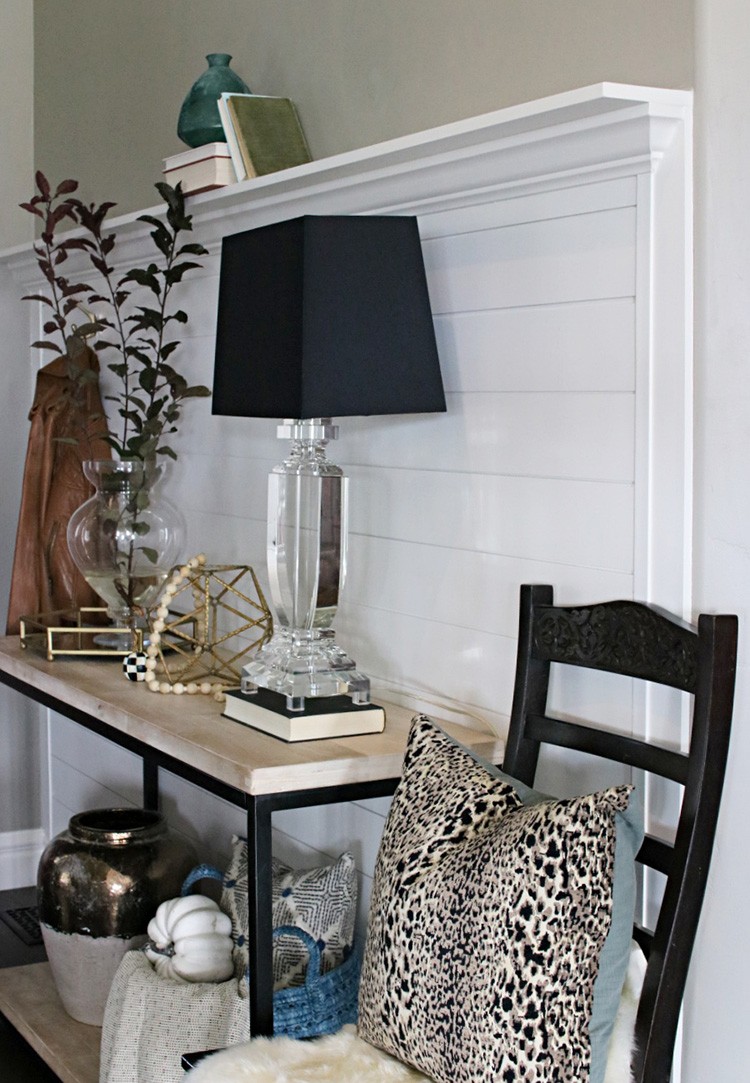
See how DIY Blogger Mysha Bolen of Remington Avenue used shiplap paneling to transform her home’s entry way into a sleek and inviting space.
Create a Sleek Entry Way Using Shiplap Paneling
I LOVE shiplap paneling…but what I love even more is “easy to install shiplap paneling”! I’ve seen my way around a few shiplap projects and methods, but this entry way shiplap accent wall takes the cake.
Unfortunately, my entry way has been a neglected space since moving into our home two years ago. An entry ways is the first space to greet our guests and loved ones at the door. It is also the space that leaves a lasting impression when they leave.
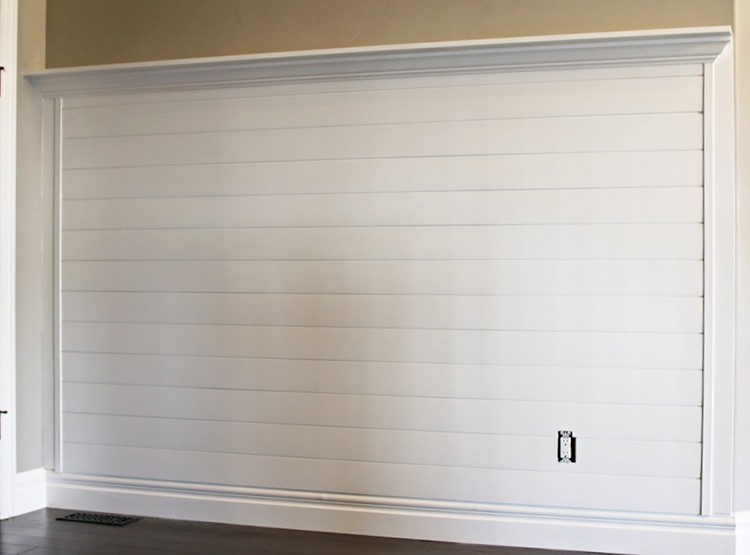
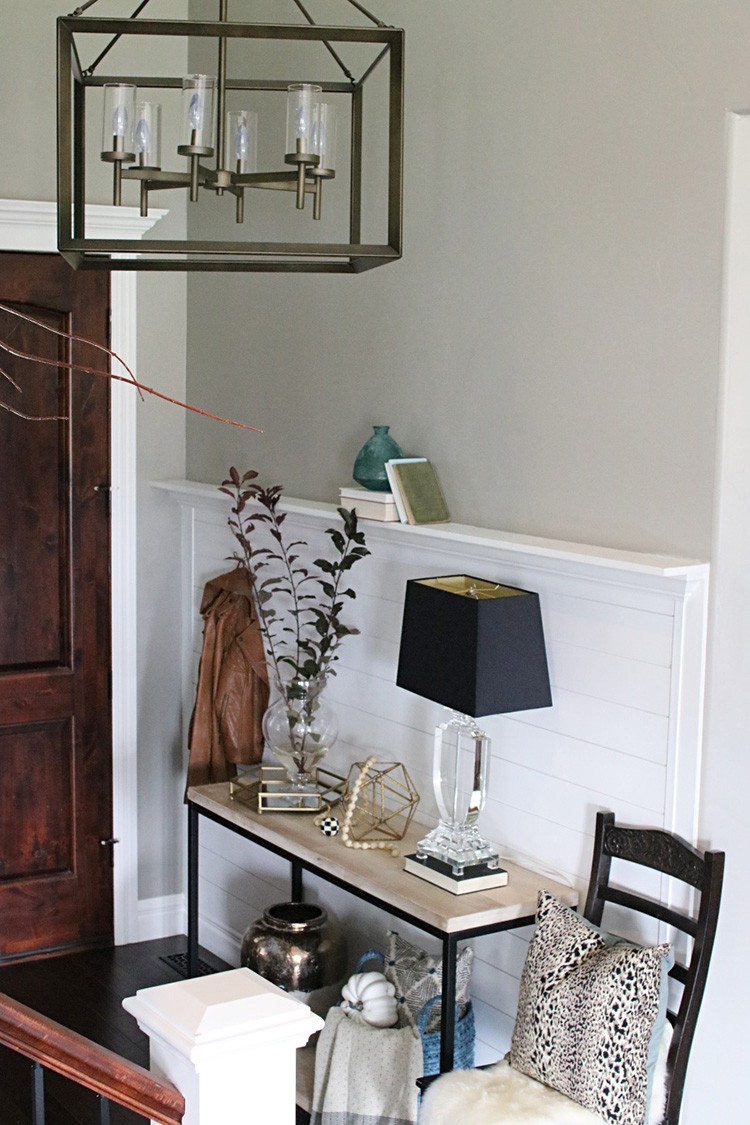
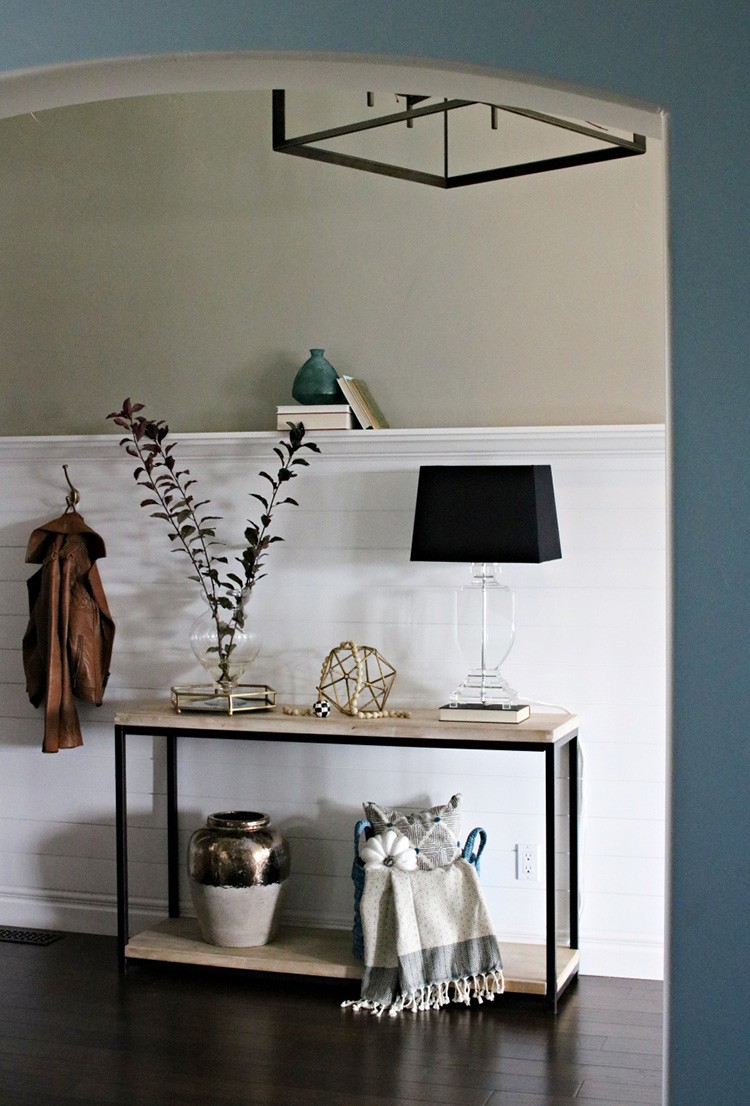
This is exactly why I finally dressed my entry way up with some shiplap molding and a decorative shelf. Finally, an entry way with some personality! Read on as I share exactly how to create this DIY shiplap entry way with shelf. Check out my entry way before this shiplap accent wall.
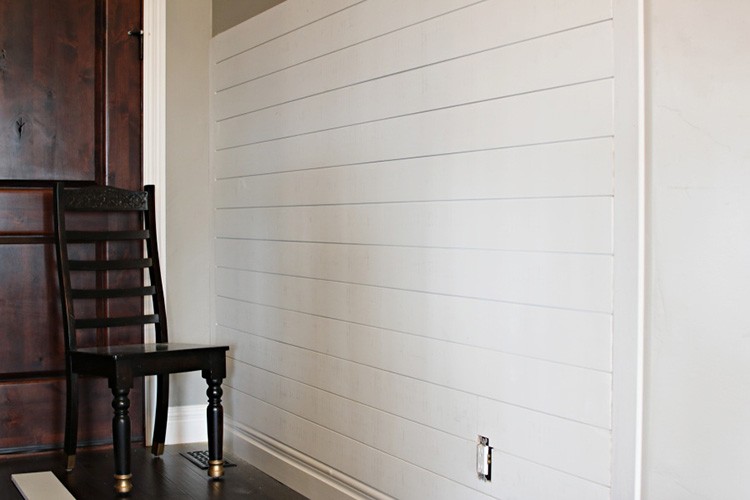
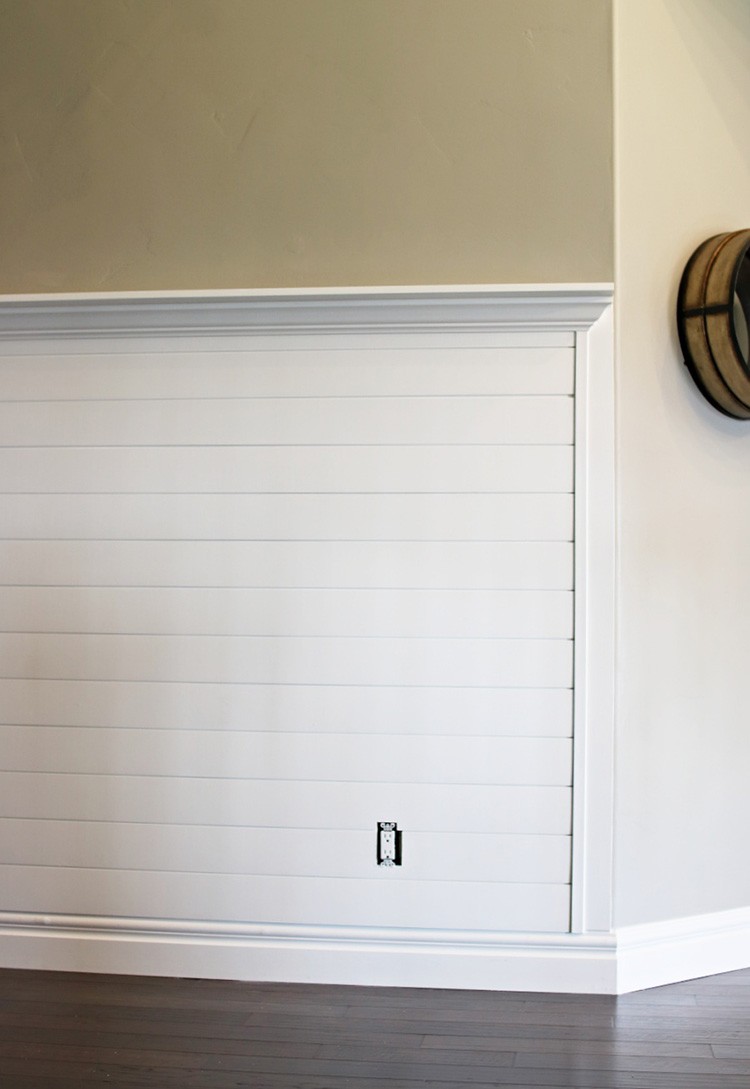
I used these pre-primed, tongue and groove appearance boards to create my horizontal shiplap accent wall. We have all seen full walls of shiplap (which are gorgeous I might add), but what about using shiplap as a form of molding and finishing it off with a functional shelf? What a fun way to integrate this amazing trend into a lasting design. Remember when I said I love “easy to install shiplap”… well this is a dream to install and the finished product is so clean.
Materials
- 8-ft. Primed Shiplap Boards
- Level
- Pencil
- Caulk
- Wood Filler
- Sandpaper
- Crown Molding
- 1 x 6 Board
- MDF Cut to Specified Size for End Caps
- Thin Molding for Finish (I used composite lattice moulding)
- Paint
- Angled Paint Brush
Tools
- Miter Saw
- Nail Gun or hammer and nails
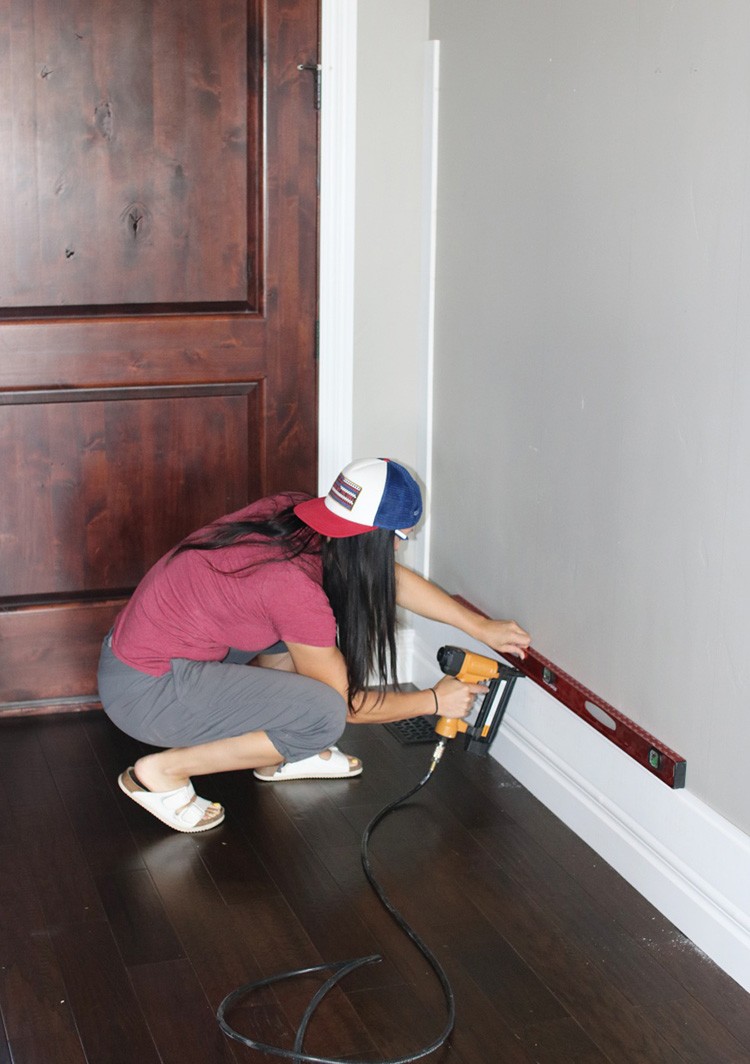
Step 1: Find the Studs

No I’m not talking about you, I’m talking about the framing in your walls. Mark the studs by drawing a vertical line up the wall using a level. These lines will be used as a reference when nailing the shiplap to the wall.
Step 2: Design
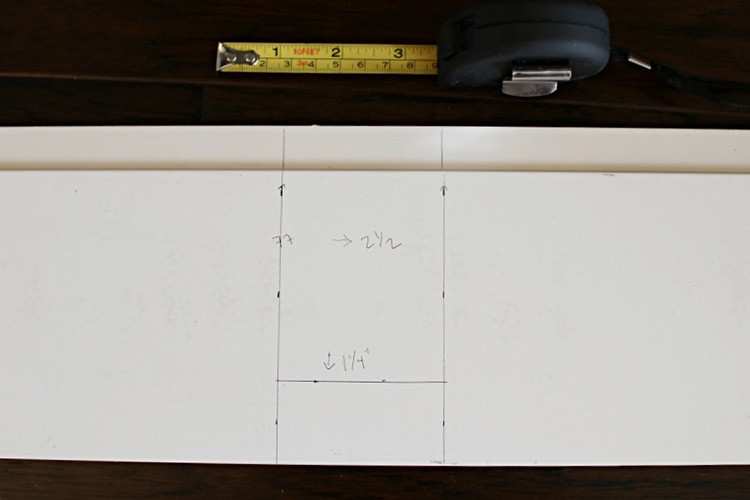
My entry way wall measures 8½-ft. across. The shiplap comes in 8-ft. boards…uh perfect! Not wanting to add small pieces of horizontal shiplap, I split the difference of the remaining 6 in. of wall space between my two MDF end caps. I cut two boards measuring 3-in. wide and 60-in. tall out of an extra sheet of MDF board I had leftover from a different project.
Step 3: Install One MDF End Cap
I chose to nail up the corner piece first. This provided a level corner to help guide my shiplap boards up the wall. *If your shiplap molding will run the whole length of the wall and end in two corners you may not need the end caps.
Step 4: Install the First Shiplap Paneling
Now I know you may be thinking I should have removed my baseboard, but I am all about “easy that looks good!” Because of the tongue and groove feature, I simply placed the tongue where it overlapped my baseboard about ¼ in. This created a seamless transition. Just make sure that the first shiplap board is level! Do not expect the baseboard to be level. Mine was slightly off – I just adjusted the first shiplap board accordingly.
Step 5: Measure and Cut for Electrical Outlets

This was the hardest part of the whole install! I marked my shiplap board where the electrical outlet would be. Using a jigsaw, I cut out the specified measurements. You could also use an oscillator or a hand saw. Just be precise.
Step 6: Use Extenders
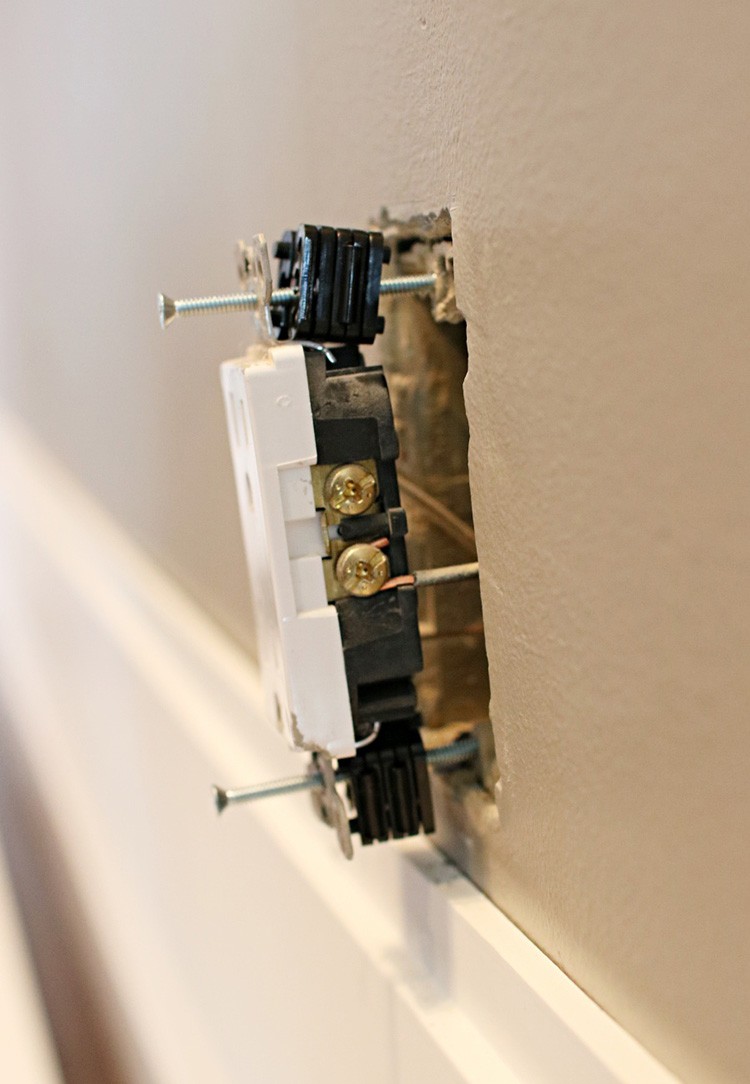
If you neglect to do this, your outlet will be too shallow once your boards are installed. I found these handy adjustable ones and they were super easy to install. Just follow the instructions on the back. (Oh and turn off your power of course!)
Step 7: Install the shiplap molding up the wall using a nail gun.
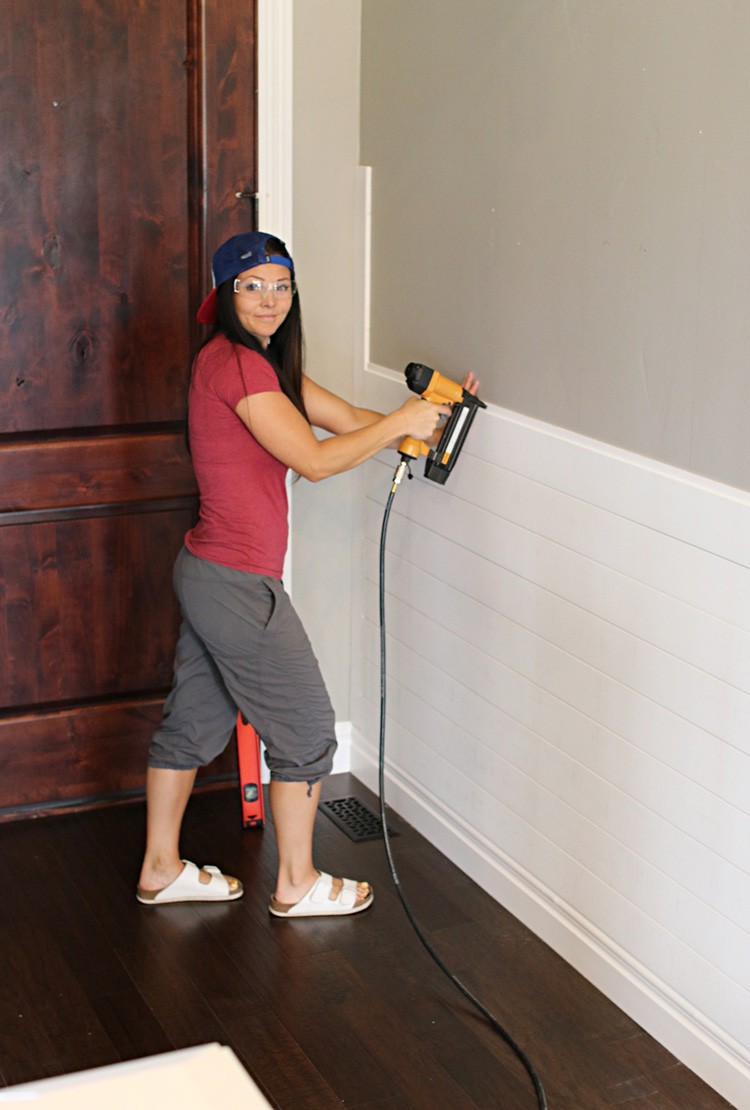
Once the electrical outlet was accounted for, this part went up fast. Using my stud lines as a guide I nailed the shiplap boards to the entry way wall mostly on the grooves that would be overlapped my the following shiplap board.
I would say about 80% of my nails holed were hidden this way. You will have to secure the boards on the bottom of the boards throughout, but this little trick will save you a lot of patching! You’re welcome! Use your level through out this process to keep the boards in line.
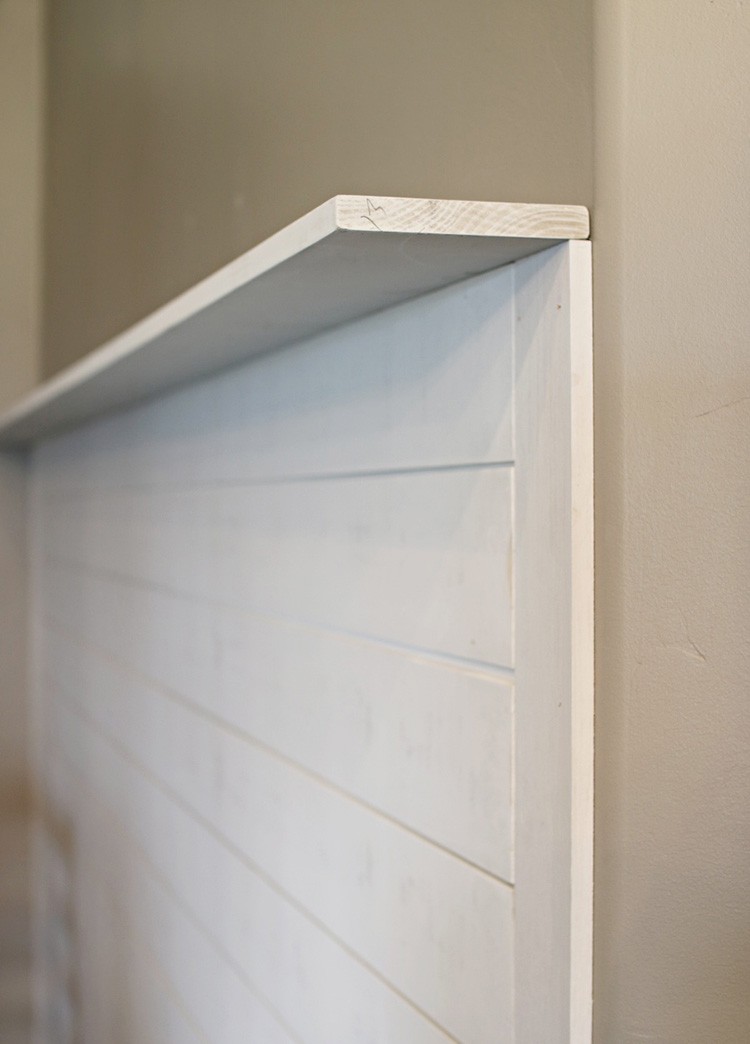
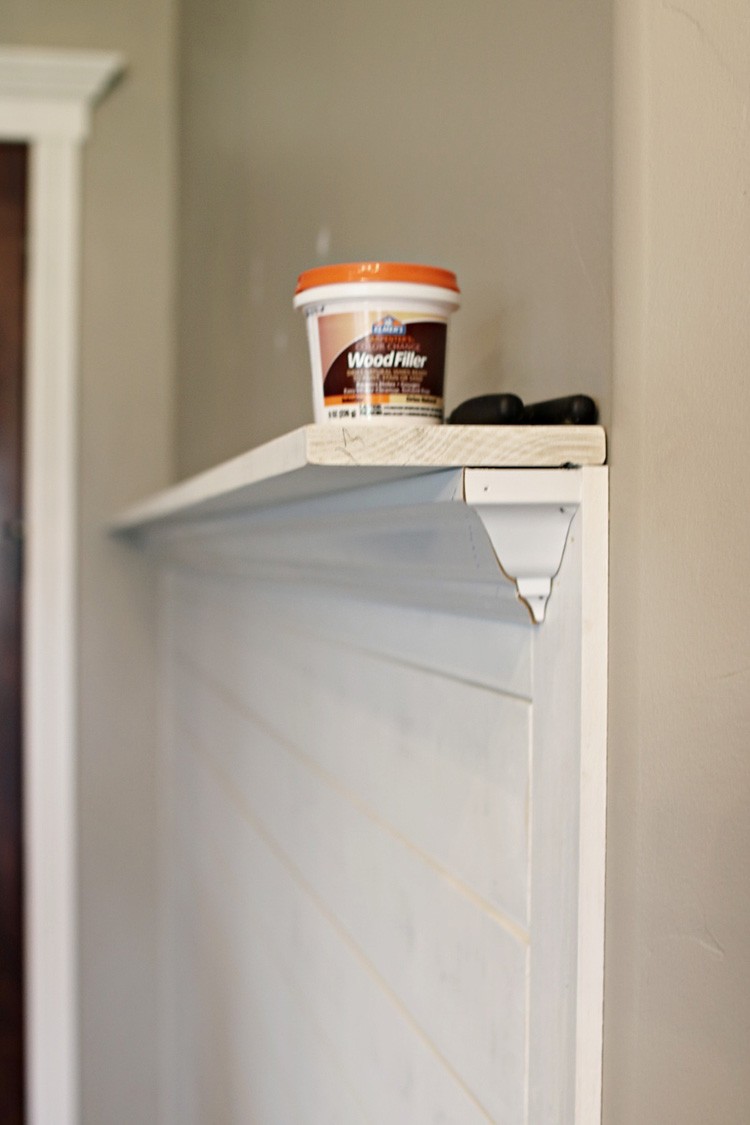
Step 8: Secure the Top Board
I removed the groove to create a flat board to hang my shelf.
Step 9: Secure the Shelf
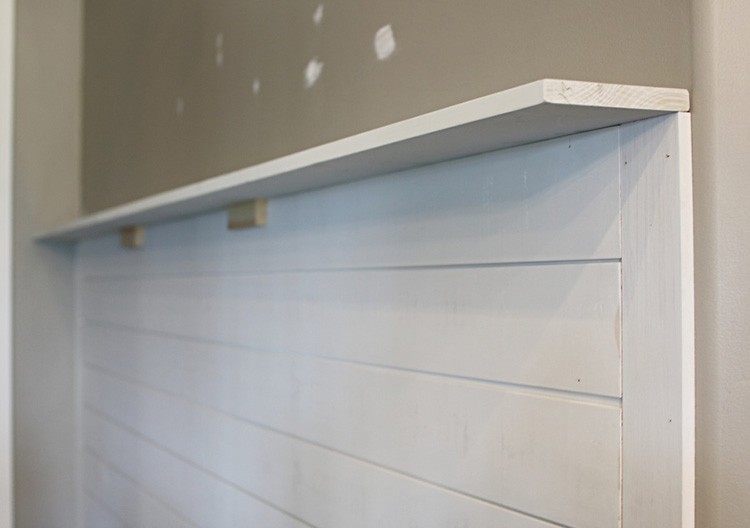 I nailed my 1 x 6 board to the wall at a 45° angle from the top. I nailed only into the studs. To add extra support, I used scrap wood to create support blocks. I secured two blocks into the studs. Be sure when cutting the support blocks that they won’t obstruct the crown molding that will conceal them. Now this shelf isn’t going anywhere!
Step 10: Cut the Crown Molding
Since one end of my entry way wall ends at an angle, I had to cut an outside corner to finish the crown molding. Crown molding can be tricky and I am no pro. Words of advice … measure three times before you cut and remember caulk is your best friend! If your shiplap molding ends at two corner walls, then you don’t have to worry about the outside corner. Lucky!
Step 11: Fill and Sand Nail Holes
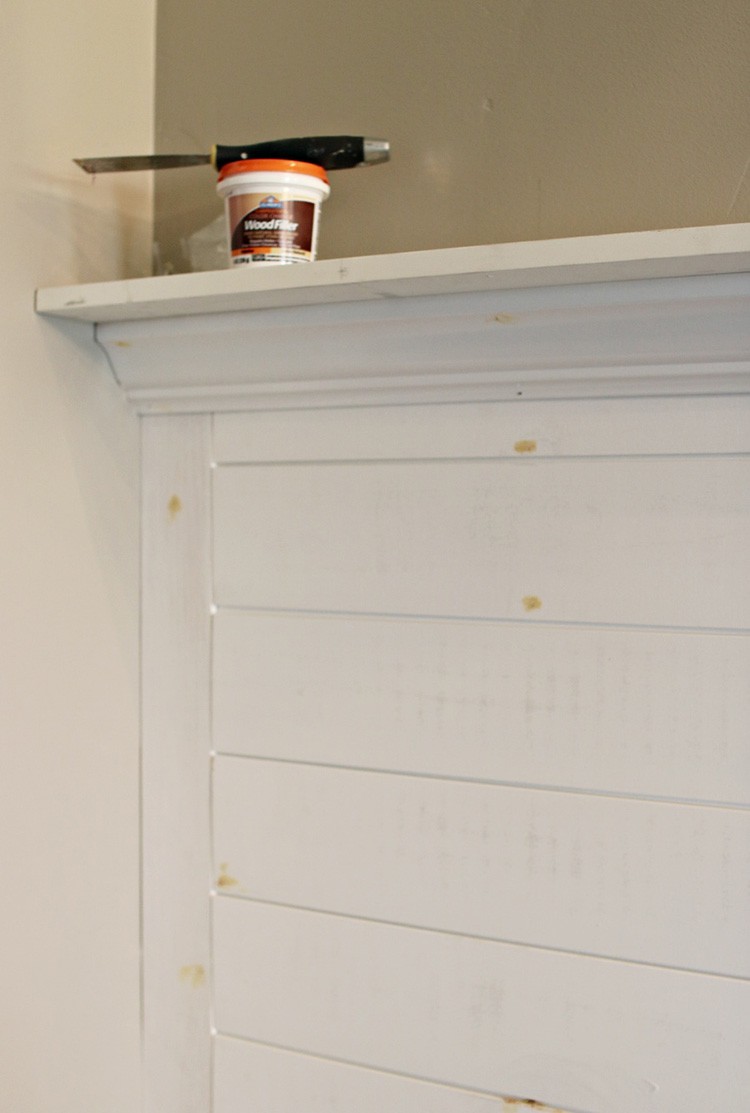
Now you’re thanking me for that little trick earlier. Not too many holes to patch and sand!
Step 12: Secure the Finishing Molding
This thin molding is a lifesaver. Some of the shiplap paneling ended a hair longer or shorter then others. This finishes and transitions perfectly into the crown molding shelf.
Step 13: Caulk and Paint
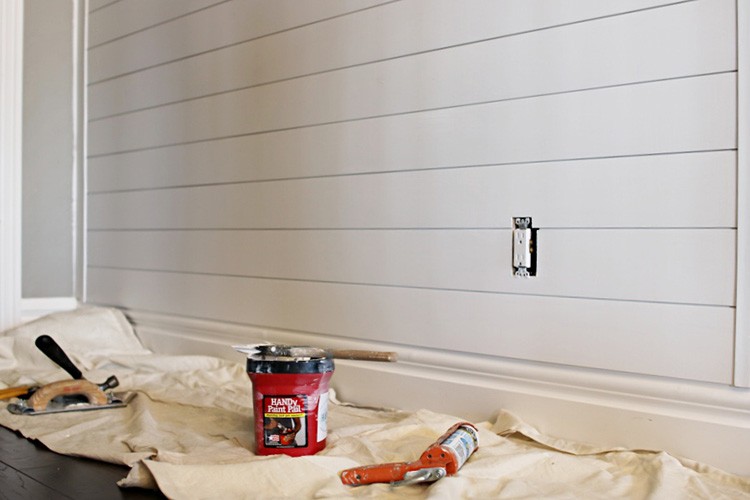
In the home stretch now! Caulk all he seams the transition into walls or other molding. This makes a world of difference in the final look. Using an angled brush, I painted two coats of whisper white enamel paint onto my shiplap entry way wall. This color matches all the molding throughout my home.
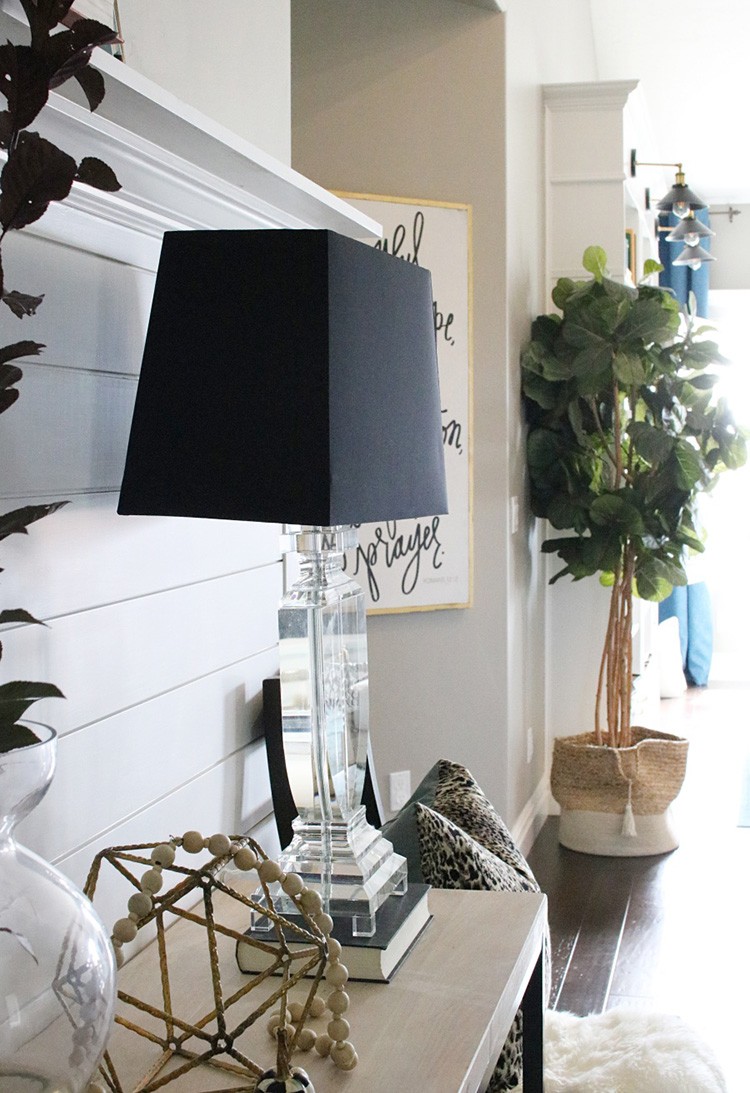
And that’s a wrap! What do you think of my new DIY shiplap paneling entry way? I’m loving the shelf… I can’t wait to rotate other seasonal decor and family photos here. Add a console table, a statement light, and some seating and you’ve got your self a functional entry way with style and personality to remember.
The post Create a Sleek Entry Way Using Shiplap Paneling appeared first on The Home Depot Blog.

