Marc Lyman of Home Fixated shares simple steps to help create a safe and user-friendly work space. These long-lasting, economical LED shop lights will transform any work shop, basement or garage.
How To Install LED Shop Lights
Why Install LED Shop Lights?
Installing LED shop lights in your workshop, basement or garage is an easy way to make your space more user-friendly and safer. LED shop lights are a great choice for a lot of reasons:
- More economical to operate
- No costly bulbs to replace
- No warm-up required
- Come on immediately at full brightness
They also last a long time; the Commercial Electric lights featured in this tutorial should last for up to 50,000 hours!
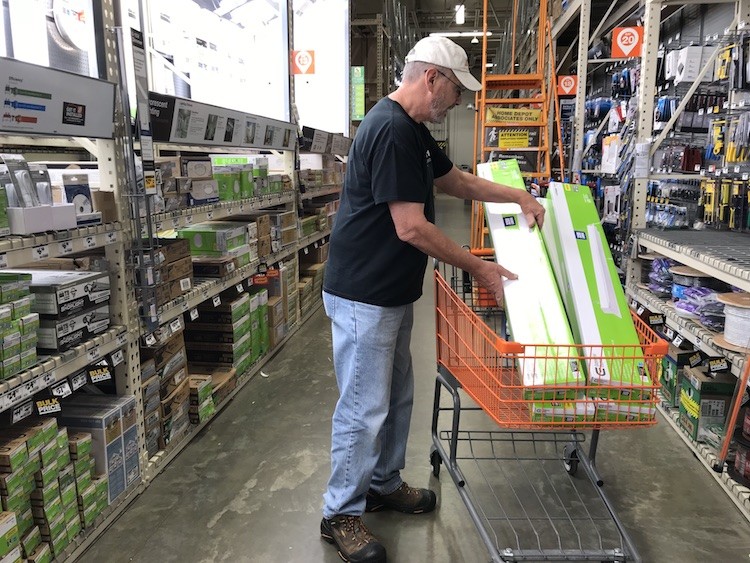
The Home Depot offers a wide assortment of fluorescent and LED shop lights. For this project, I chose the four-foot Commercial Electric LED Linkable Shop Light. It cranks out a nice, bright 3,200 lumens of light, it’s Energy Star rated, it comes with a five-year guarantee and it’s simple to install. Not to mention its “instant on” capability down to -4° makes it a great choice for my unheated shop in the chilly Northeast.
Determine Number of Lights Needed
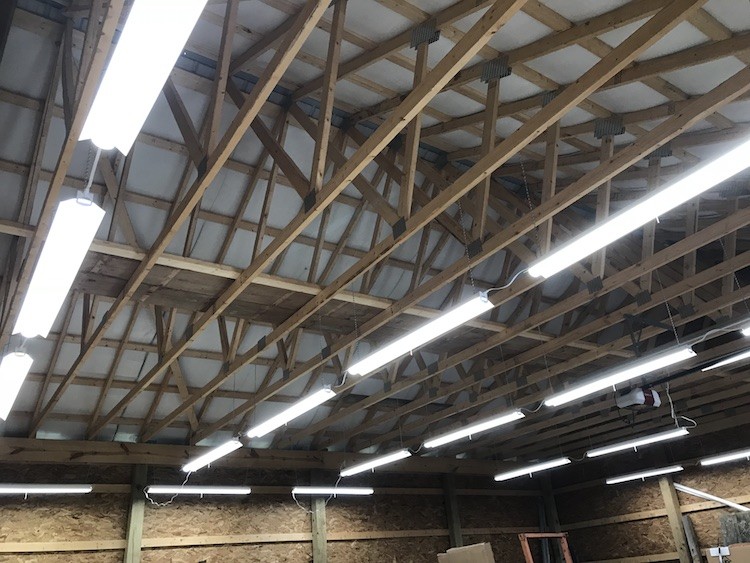
Before you head for the lighting aisle, think about your lighting needs. If the lights are for general lighting in a garage or basement, you’ll need far fewer than you would for a workshop meant for doing intricate work. In our 24’ x 24’ garage, for instance, there were four 4’ fluorescent fixtures there when we bought the place. Since all we do is park the cars and stow yard gear there, it has worked out okay.
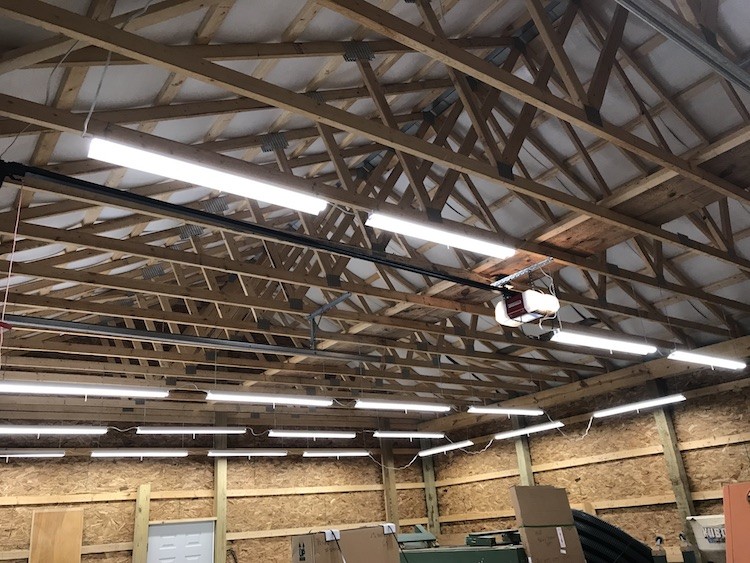
For my 28’ x 32’ workshop on the other hand, I ended up with a total of 25 four-foot LED shop lights. I’ll be doing a lot of woodworking and a restoration of an old motorcycle, and I want my work area to be very well lit. I put a row of lights two feet out from the end wall and wrapped them around the corner. All my workbenches will be against these walls, so this will give me plenty of light. The rest of the lights (spaced in rows six feet apart) light up the rest of the shop beautifully.
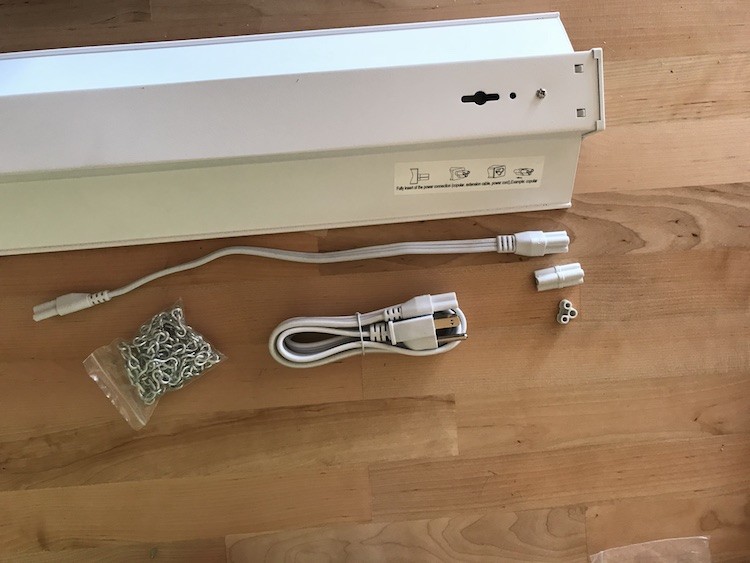
Along with a five-foot power cord, the Commercial Electric LED shop lights come with a 13” linking cord and an end-to-end connector, allowing you to chain up to nine of the lights together. I used the 13” cord, which actually spaces the lights a foot apart. That setup provides plenty of light.
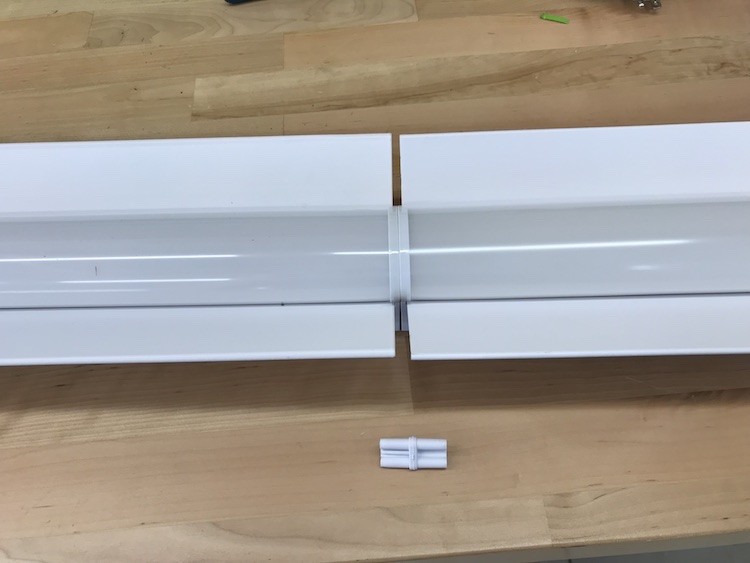
For maximum brightness (or a sleeker look), the end-to-end connectors give the appearance of one long, continuous light. If you want the lights further apart, or to turn a corner like mine did, there’s also a five-foot connector available.
Check for Available Outlets
The other consideration is a power source for the lights. If there’s already an outlet in the ceiling, life is good. And, if it’s a switched outlet, you’re leading a charmed life; however, if you need to add an outlet to power your lights, or want to add a switch to an existing outlet, check out our how-to article on HomeFixated. In any case, try to plan your layout so that your first light’s power cord will be close enough to the outlet that you won’t need an extension cord.
Determine Lighting Layout
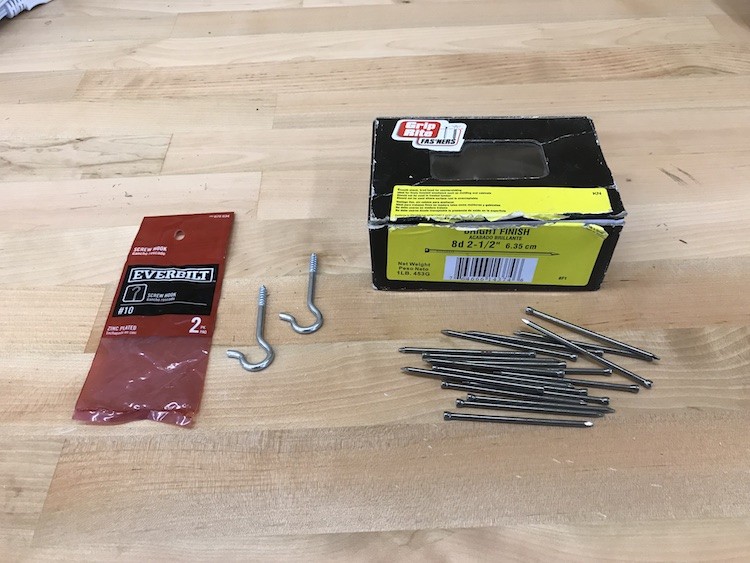
There are a couple of options for hanging your LED shop lights. They’re not very heavy, so a simple 8-penny finish nail or a small hook will do the trick. If the light will be used in an area with exposed ceiling joists with no plans to cover it with drywall, finish nails are an easy and inexpensive way to get the job done. If you have a finished ceiling or plan to cover up the joists, grab some hooks for your install.
If you’re only adding a couple of lights, the job will go quickly if you just position the lights so the outlet is within reach of the light’s power cord. If you’ll be chaining the lights, measure and mark where your nails or hooks will go and put them all in. That way, once you start installing the lights, you can zoom right through.
Here are the layout measurements… The chains on each light are roughly 42” apart, so make your first two marks 42” apart. If you’re chaining lights, and using the 13” connectors, mark the first hanging point for the next light 18” from the last mark. For end-to-end connectors, make the mark 6” from the last mark. For the five-foot extension, the next mark would be 54” away. In each case, the next mark, for the second chain on that light, would be 42” further along.
Now just repeat that process until you’ve marked out where all your hanging points will be.
Install Hanging Hooks or Nails
Once your marks are made, go back and install your finish nails or hooks. If you’re using nails, hammer one in on the side of each joist about an inch up from the bottom of the joist with the top angling upward. The nails only have to go in about ¾” – 1”, so try to get them roughly the same distance up from the bottom of the joist.

If you’re using hooks, they need to be anchored into wood. If they’re only screwed into drywall, things are guaranteed to end badly. Usually, the hooks can be screwed into place by hand or with a pair of pliers. If you have particularly stubborn wood, you may want to pre-drill before putting them in.
Assemble LED Shop Lights
The Commercial Electric LED shop lights come almost completely assembled. All you have to do is attach the chains and power cord or linking cord and they’re ready to hang.
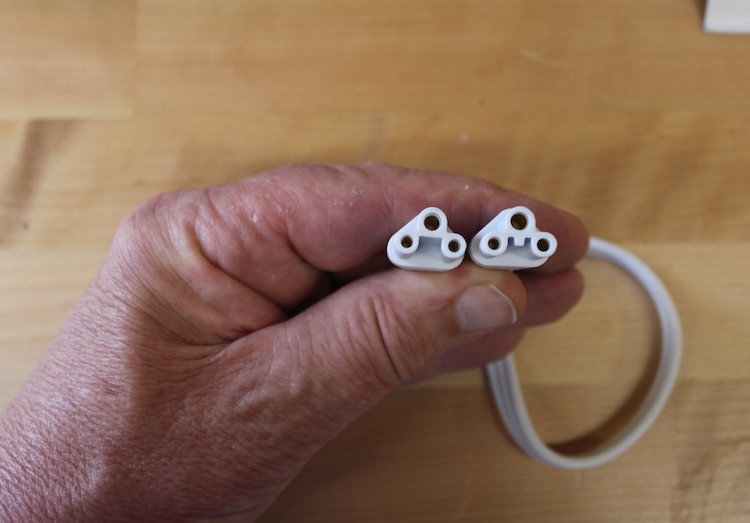
Each end of the LED fixture has a three-pronged recessed connector. They’re very similar, but the “Power in” end (identified by some printing on the top of the light) has a little notch that matches up with a nub on the power cord. Fully insert the power cord; if another light will be connected to it, insert the linking cable or end-to-end connector into the other end using the end without the nub. For lights that will be added to the chain, connect a linking cable to the power-out end, inserting the smooth connector.
The lights come with two chains with S-hooks attached to one end. Simply insert the end of the hook into the slot provided near each end of the light and crimp the end in with a pair of pliers. There are two extra S-hooks, which can be used to connect the top of the chain to larger nails or hooks if needed.

Each LED light comes with a pull-chain in the center to turn it on and off. If you’ll be controlling the lights with a switch, temporarily insert a power cord to make sure the pull chain is in the “ON” position before installing the light. If you’ll be controlling the lights with the pull chain, you may want to lengthen the short piece dangling from the light. It’s easy: Just snap on the extension chain provided with the light before you hang it from the ceiling.
Hang LED Shop Lights
Now simply hang your lights from the nails or hooks you installed. Make sure the first one has the power cord end facing toward the outlet. Get your next light, hang it, and insert the end of the linking cable or flush connector from the previous light into the “power in” connector, to firmly connect the two lights together. Repeat until all the lights are connected. For lights at the end of the run, a little end cap is provided to fill the connector recess. This is to keep the bugs, dirt and random cooties at bay.
One last thing to keep in mind… If you’re installing your LED lights in a building with an overhead door, check for adequate clearance. With the door raised, make sure the lights and wiring will be well clear of the door. This will prevent unnecessary foul language and a trip to buy replacement lights after they get sheared off the ceiling.
Materials needed:
- 4 ft. Bright White Integrated LED Linkable Shop Light Fixture
- 8d finish nails or screw hook 50 pack (also available in r-pack bagged goods)
- Five foot linking cord
Tools needed:
- Pencil
- Hammer
- Pliers
- Step ladder
- Tape measure
Need to add LED shop lights to your workshop, basement or garage? Browse all available LED lighting options at The Home Depot.
The post How To Install LED Shop Lights appeared first on The Home Depot Blog.


