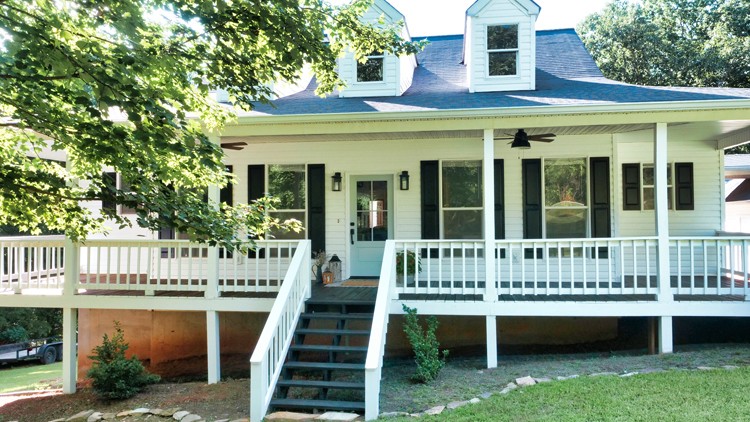
Southern Front Porch Makeover Steps
- Clean Vinyl Siding
- Prep Painted Surfaces
- Strip & Condition Decking
- Install Fans
- Install Outdoor Lights
- Replace Doorbell Button
- Paint Railing and Shutters
- Stain Deck
- Install New Front Door
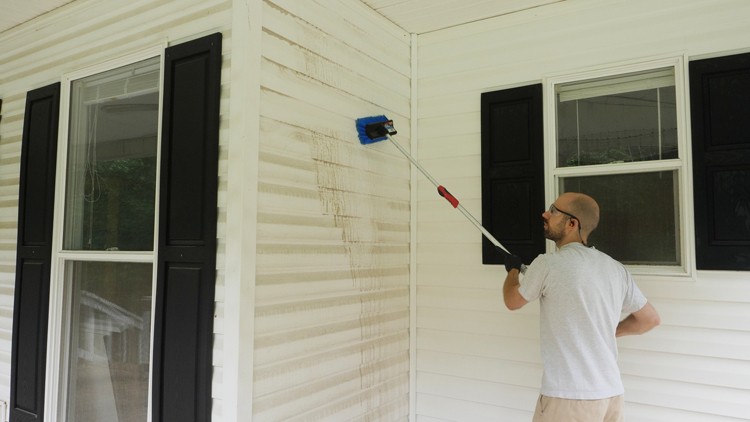
Step 1: Clean Vinyl Siding
To kick off this front porch restoration, I sprayed the vinyl siding down with Wet and Forget with my low pressure sprayer and let it soak on the surface for 15 minutes. This product is typically meant to be applied and then left to work its magic as rainwater washes it off, but I knew that would be difficult under the roof of my front porch. I grabbed a soft wash brush and scrubbed the surfaces, then sprayed everything down with water. The amount of grime that trailed down the siding was truly impressive! Who knew the house was actually white?
Step 2: Prep Painted Surfaces
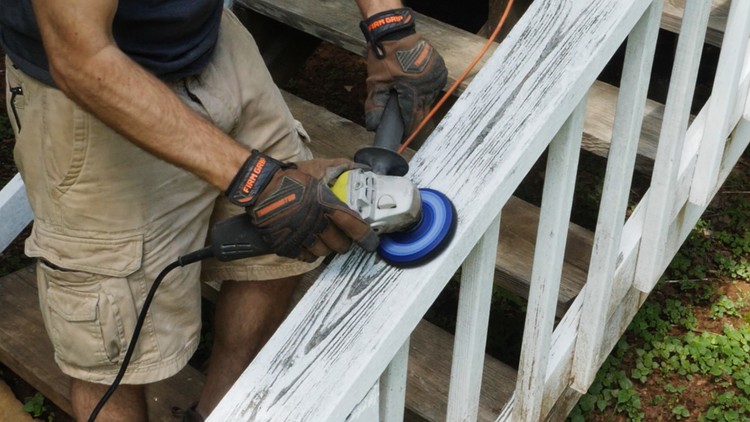
Step 3: Strip & Condition Decking
Sections of our decking had poorly applied remnants of an orange stain, while others were worn down to bare wood. I needed to get everything back to a clean slate before applying new stain. I used Behr Wood Stain & Finish Stripper stain on our back porch project and loved it so much that I bought it again for this front porch restoration. Then, I applied it liberally with a polyblend roller and allowed it to set for about 45 minutes.
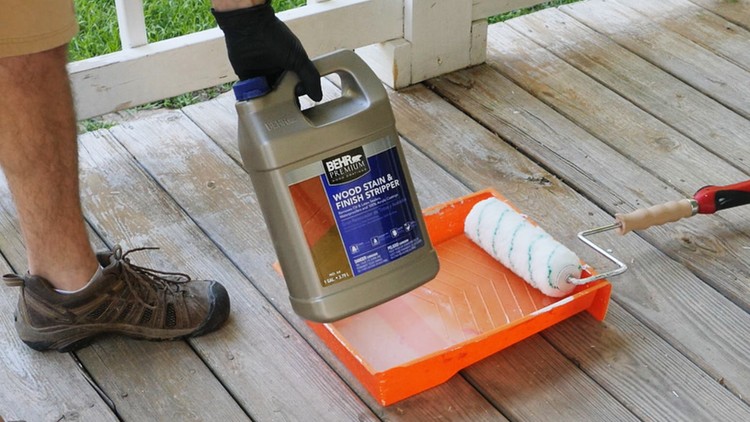
Using a deck brush I scrubbed the surface and watched as the old stain came up easily! I repeated this process across the entire deck and then used the pressure washer to rinse everything off.
To neutralize any residual chemicals from the stripper and condition the boards for new stain, I applied Behr All-In-One Wood Cleaner using a roller. After 15 minutes, I scrubbed the deck and sprayed everything down with the pressure washer once more.
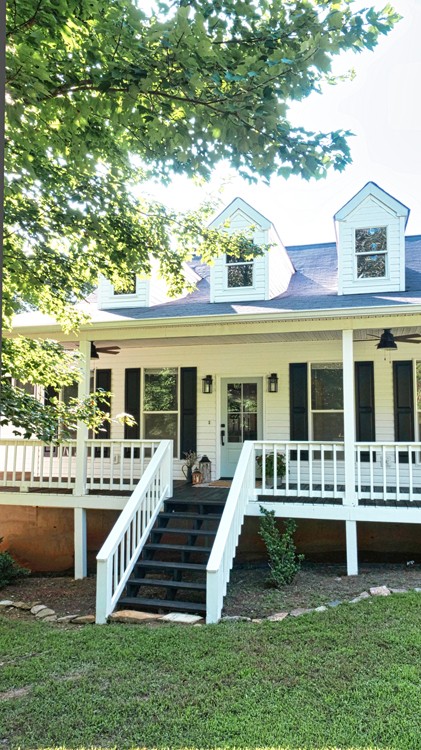
Step 4: Install Ceiling Fans
The first thing my wife noticed about this house was these terrible fans. They were too small for such a big front porch, as well as rusted and completely useless. We couldn’t wait to install new fans and actually catch a breeze from them!
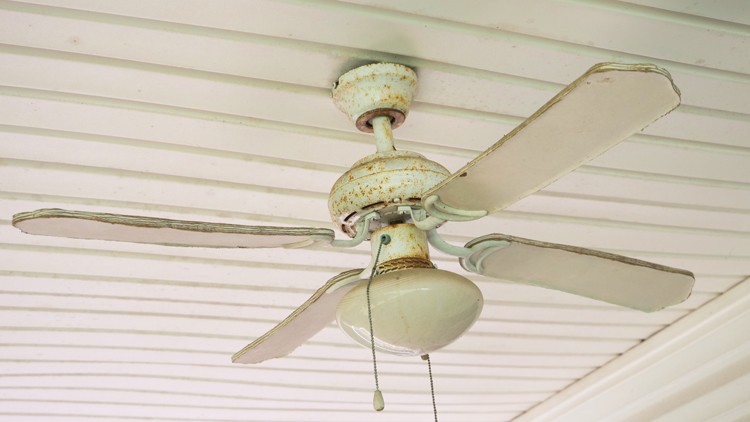
First, let’s remind everyone at home that electricity can kill you! If you aren’t comfortable taking on this step of the project on your own, please hire a professional.
I first cut power to the fans, removed the old ones, and trimmed the vinyl siding to fit the new fan’s mounting plate. I then installed the new Hunter Mill Valley Fans according to the manufacturer’s directions.
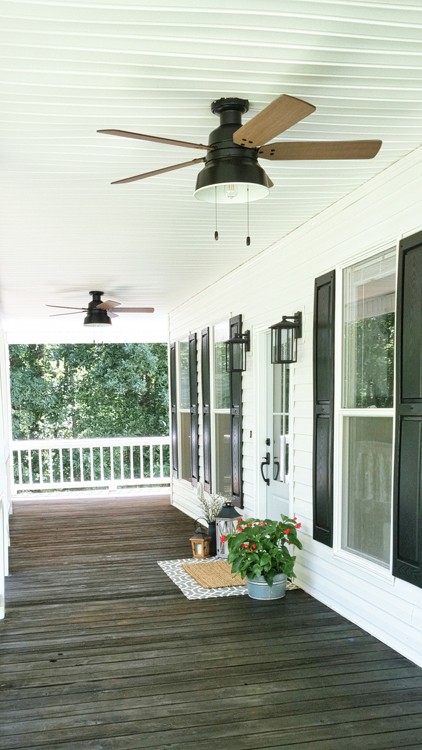
Now, isn’t this view a far cry better than before?
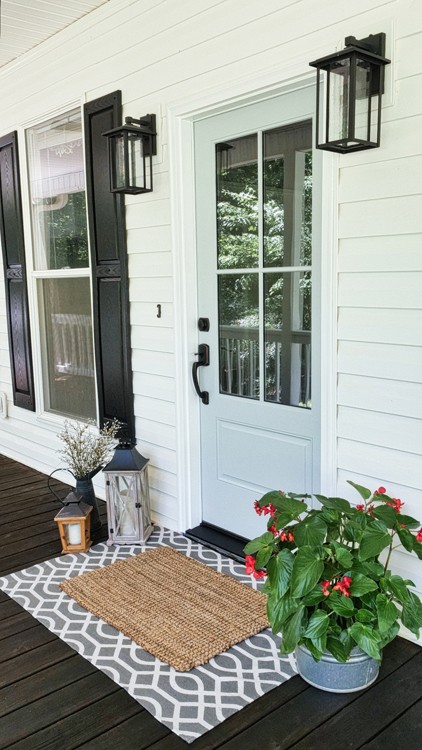
Step 5: Install Outdoor Lights
We decided to add extra lighting and style to the front porch with new outdoor light fixtures on both sides of the front door. Since we didn’t have existing lights already in place, this job had a few extra steps involved.
First, I marked where we wanted the lights to hang and used a multi-tool to cut out the footprint of a vinyl siding mounting block. I secured the vinyl mounting block with screws. To run the electrical, I had to remove a few sections of our vinyl ceiling, which was made easier by my Malco SideSwiper tool. I wired the lighting according to the instructions and installed the lights.
We love that these have photocells on top to sense when it’s dark enough to turn on automatically at dusk. Plus, they have LED lights, which help to keep our electrical bill down.
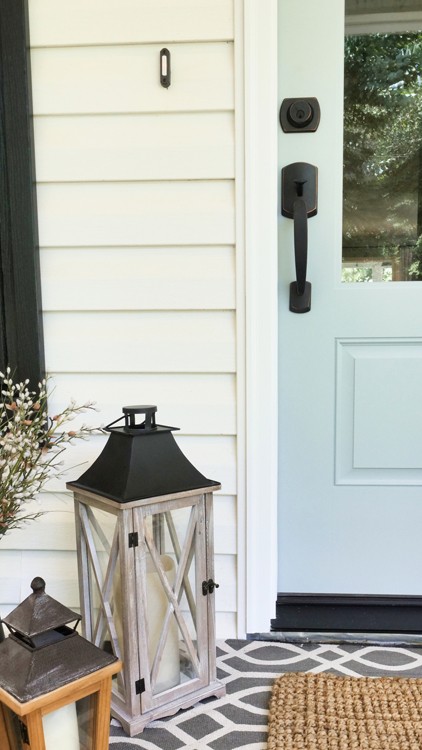
Step 6: Replace Doorbell Button
The doorbell button original to the house kicked the bucket sometime before we moved in, so we bought a replacement button, shut off the power at the breaker, and installed it following the manufacturer’s instructions. Again, only tackle this if you’re comfortable working with electricity!
Step 7: Paint Railings and Shutters
The original paint was oil based, which we wanted to cover with acrylic paint. To do this without issue, we first applied a coat of Gripper primer. This product works wonderfully and dries within an hour so you can start painting quickly. We then applied one coat of PPG Timeless paint which really transformed the railings to look like new. We used a few key Wooster paint supplies like a shortcut brush, 4-1/2″ roller, and a Pelican bucket for painting all of the handrails and trim.
Our black shutters were faded and dull, so I removed them and applied a fresh coat of Behr Premium Plus in the color “Carbon.” It’s amazing what a fresh coat of paint can do!

Step 8: Stain Deck
We chose to use PPG Timeless Transparent Stain in “Oxford Brown” after loving how well it’s held up since our back porch renovation last fall. I brushed it on using a stain brush. This stain was dry to the touch in 30 minutes, and ready to walk on 24 hours later!

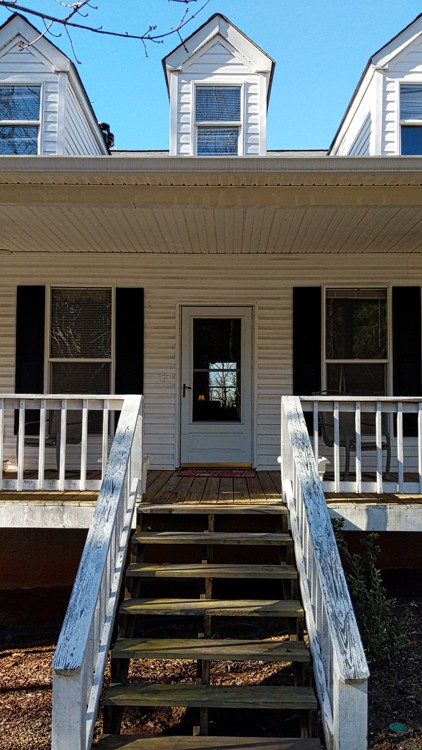
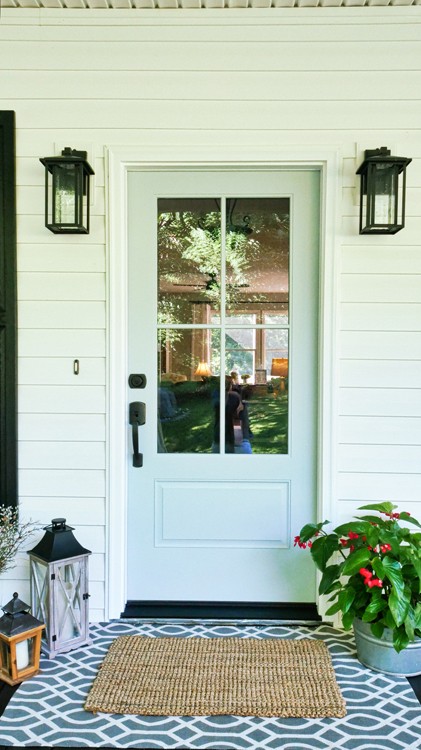
Step 9: Install New Front Door
After changing the layout of some interior walls at the front of our house, the amount of natural light coming in from our south-facing front porch was really diminished. We wanted a door that would let in as much light as possible. We chose a pre-hung 3/4 light farmhouse style door from ThermaTru and painted it “River Rock” with Behr Premium Plus paint using a sprayer before installation.
To test the fit we removed the old door and lifted the new door in its place. I trimmed down some drywall, hardwood flooring at the doorway, and cut new vinyl trim to ensure a perfect fit. We then lifted the new door back in place and secured it to the door frame using the supplied screws.
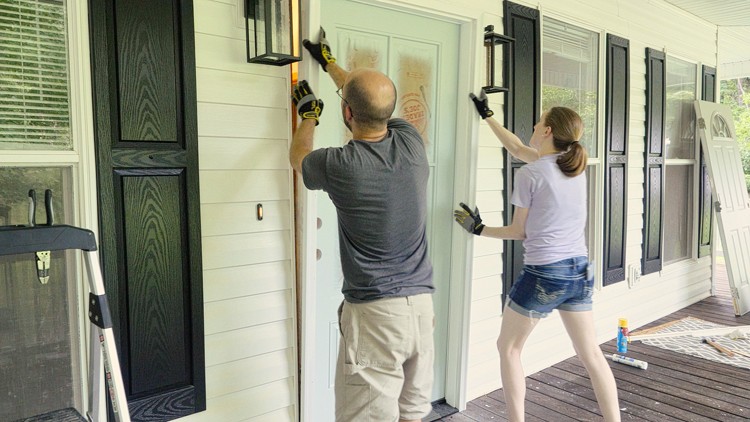
I transferred the handle hardware (which we’d installed a few years prior) from the old door and then filled the gap between the door casing and rough opening with Great Stuff.
I think it’s safe to say that after all that hard work, the delivery guy might recognize that someone lives here now! We’re thrilled with how updated and inviting the space looks, and already find ourselves drawn to spending time there, especially with an ice-cold lemonade in hand while the Hunter fans cut through the summer heat.

We hope you’ve enjoyed our front porch restoration project, and would love to see how this post has inspired you! Just use #woodshopmikeibuiltit with any photos of your own porch projects.
The post Southern Front Porch Makeover appeared first on The Home Depot Blog.
