Ariel Nathan, of North Detail, knew she was in need of more storage. With boxes full of memories gathering dust, Ariel decided it was time to create a DIY shelving unit that would give her décor a home.
Find out how Ariel built a beautiful rustic DIY shelving unit!
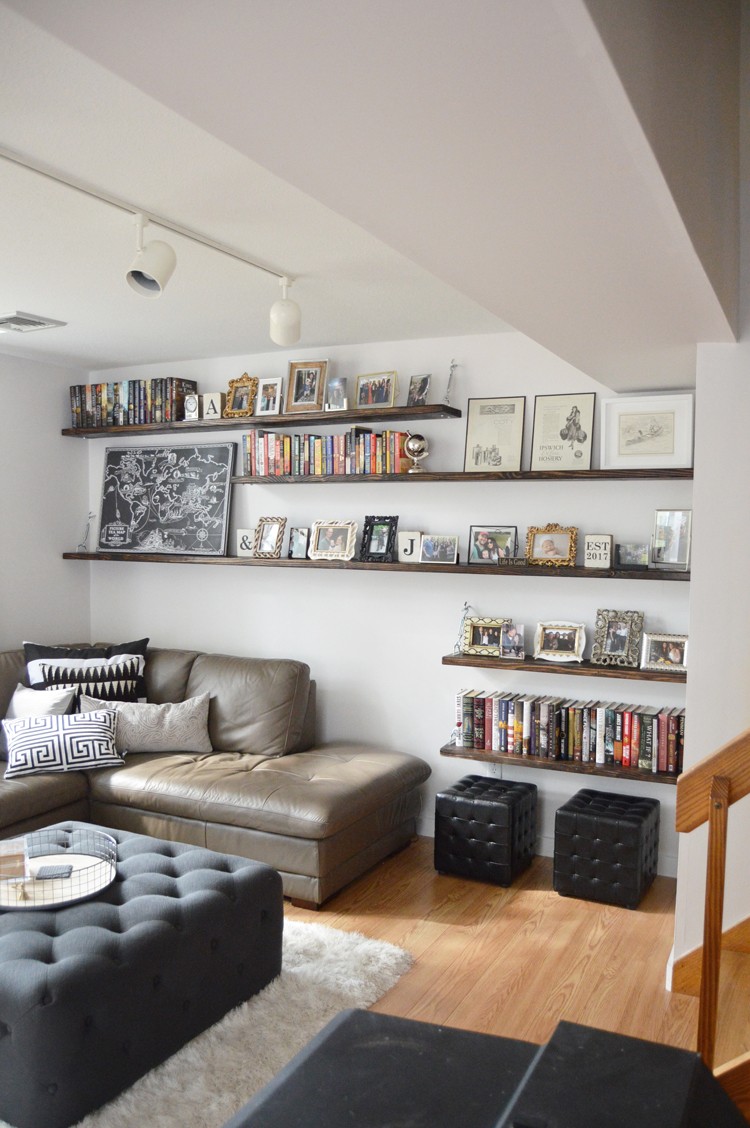
Rustic DIY Shelving Unit

After eight months of living in my first home, I was ready to take on a big project and was in need of more storage! I have collected so many treasures over the years. Post-move, my memories were still packaged up in boxes. Filling a home with essentials is important, but with that–I believe that home décor should be a representation of memories made, travels, age, and life.
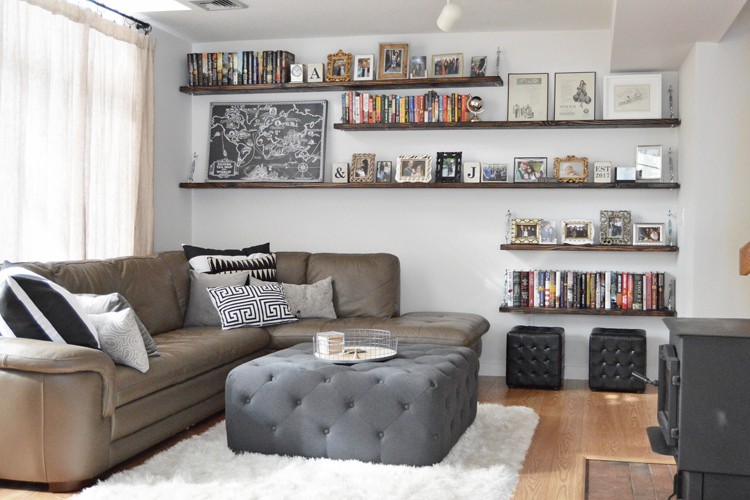
While I wasn’t ready to invest in any structural additions, I needed to build a place a space for my collected goods, photos, books and seasonal décor. I teamed up with The Home Depot to create a rustic DIY shelving unit, perfect for any living room, kitchen or office area.
Materials

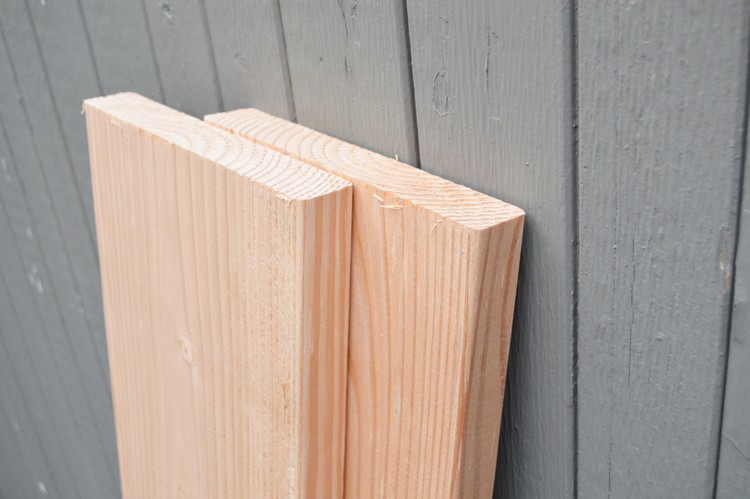
- 2 in. x 10 in. Ground Contact Pressure-Treated Lumber
- Zinc-Plated Turnbuckle Hook/Eye (2 per shelf)
- Zinc-Plated Lag Thread Screw Hook (2 per shelf)
- 220 Grit Sandpaper
- Zinc-Plated Steel U-Bolt with Nuts and Strap (2 per shelf)
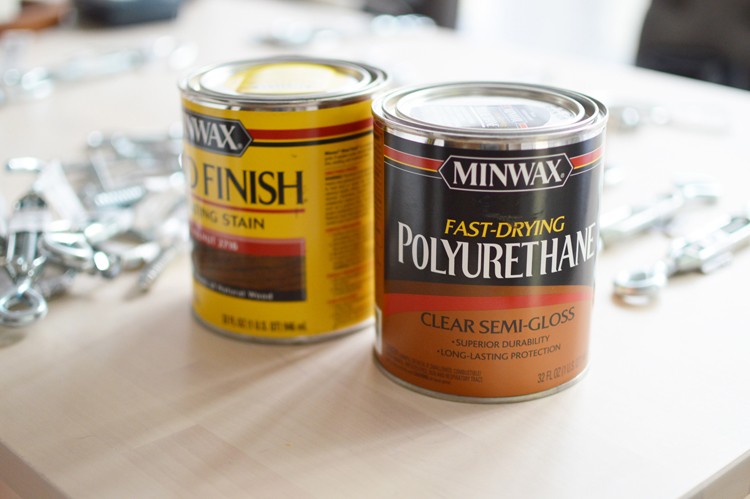
- 1 qt. Wood Finish Red Mahogany Oil-Based Interior Stain
- Minwax 1 qt. Semi-Gloss Fast-Drying Polyurethane
- 2 in. Purdy Paint Brush
- ½ inch threaded rods
Tools
Step 1: Pick the Location
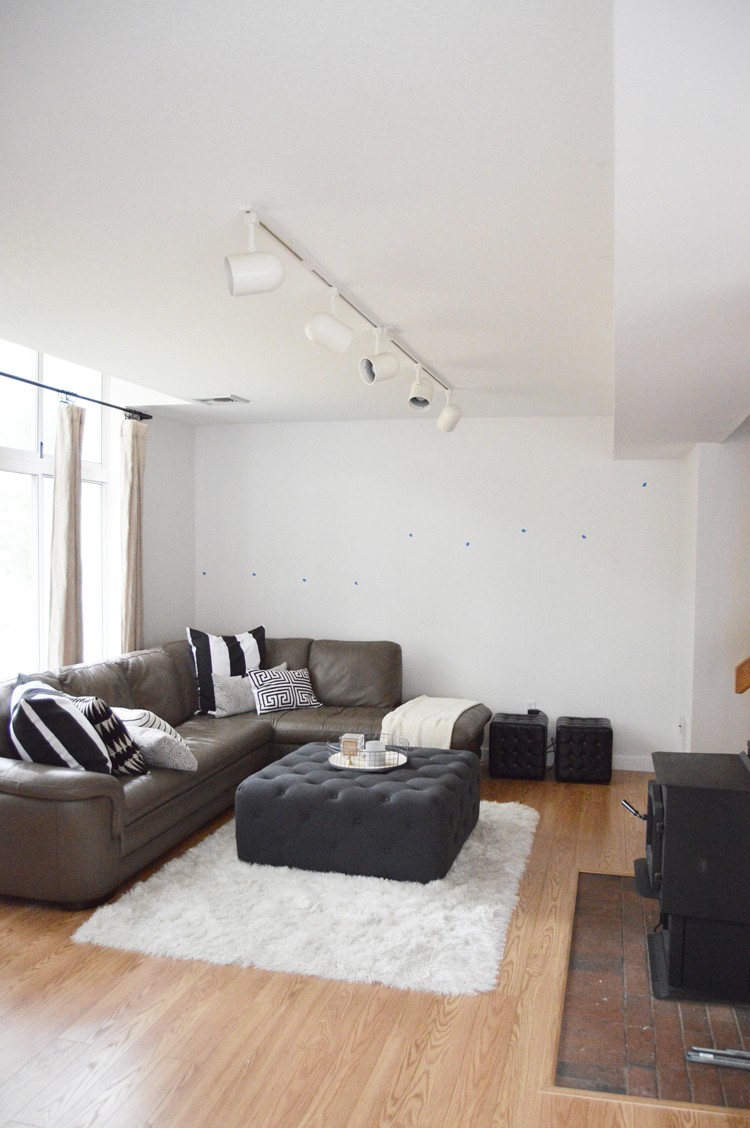
Pick the location of your shelving unit. Measure the space to determine length and height of shelves. Note: For this project, I used lumber that was 2 in. thick and 10 in. wide, measure based on that, leaving at least 2 in. of extra space between every shelf. Due to the weight of the shelf, you will want to be sure that you are hitting studs. Use a stud finder and mark each stud with a pencil.
Step 2: Draw Out Your Plan
Draw out your plan. I find it easiest to map out my project on paper. Measure the exact length of each shelf. Write all measurements down on your shopping list. If you plan to put heavy objects on your shelves (dishes, books, serving platters, etc.) I would recommend with every stud, to use a 10-in.-long threaded rod. The threaded rods are the main source of support; turnbuckles and hardware are just for aesthetic. The longer your selves are the larger your turnbuckles and hardware should be for a consistent rustic look.
Call your local Home Depot to inquire about their cutting services! My local Home Depot was able to cut all the wood for this project, making it a smooth process. No table saw necessary and easy for transportation home!
Step 3: Prep the Shelves
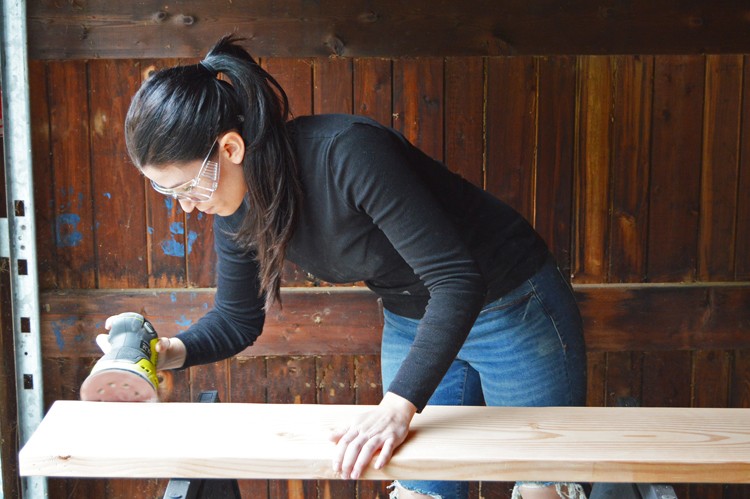

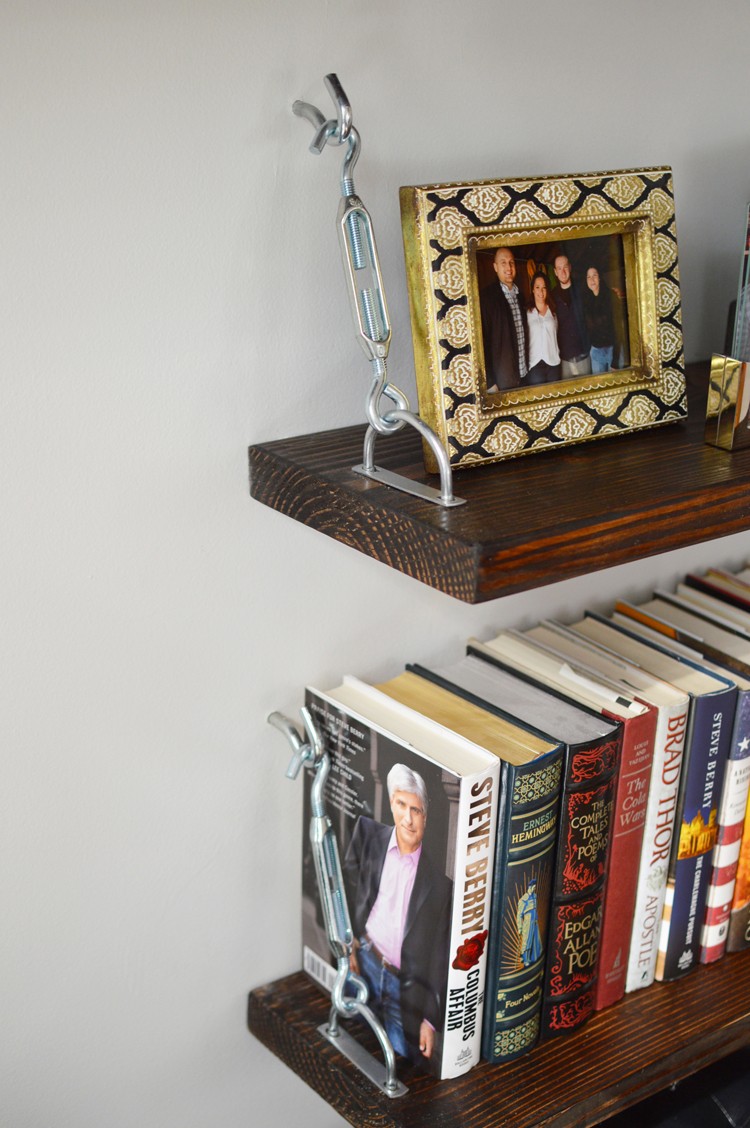
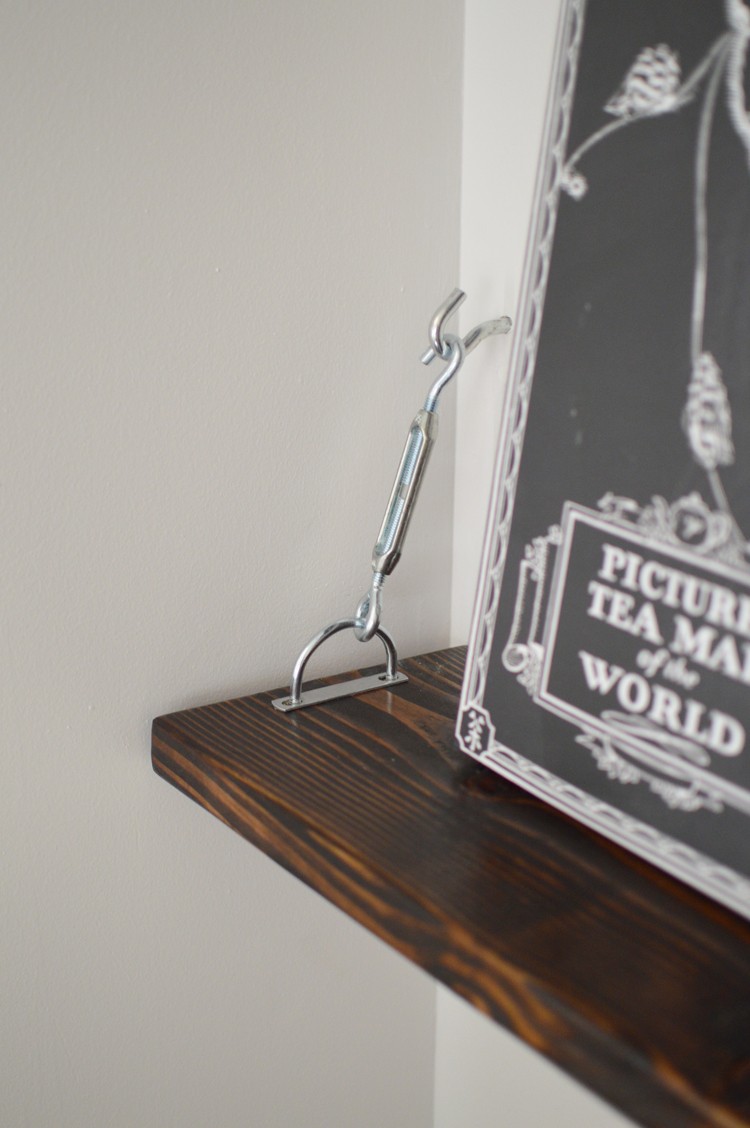
Prep the shelves. Once you are home with all your materials, it’s time to prep! Depending on the hardware you purchased, use a drill to make holes on each end of every board for the U-Bolts. On the side that will meet the wall (the 2 in. side you want to use as the back of the shelf), measure and drill the proper size hole for the threaded rods (for 10-in.-wide boards, I drilled 7 in. into the board – leaving 3 in. to go into the wall).
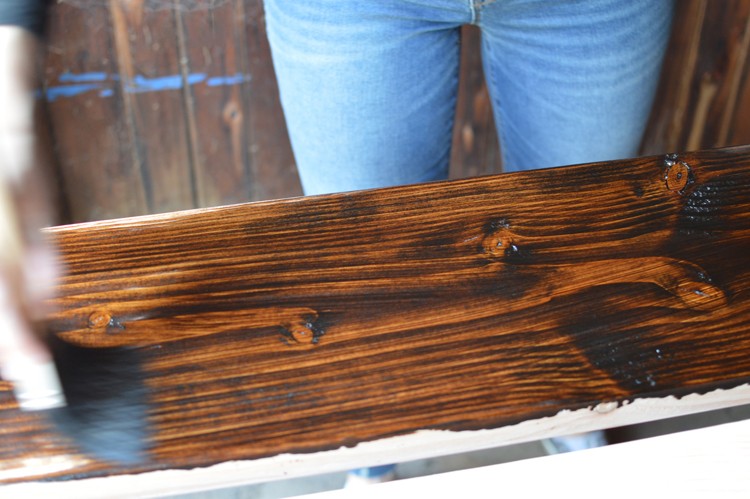
Once all drilling is complete, use the sander to smooth out your wood pieces, be sure to sand all sides. After everything has been sanded, use a clean rag to remove all dust and debris. With the paint brush, starting in the middle of each piece, spread the stain color, covering the surface evenly with a light coat. Stain all sides. Let it dry for 24 hours. Then, apply a light coat of polyurethane (you can use the same brush, be sure to clean it thoroughly). Let that dry for 48 hours.
Step 4: Prep the Supports
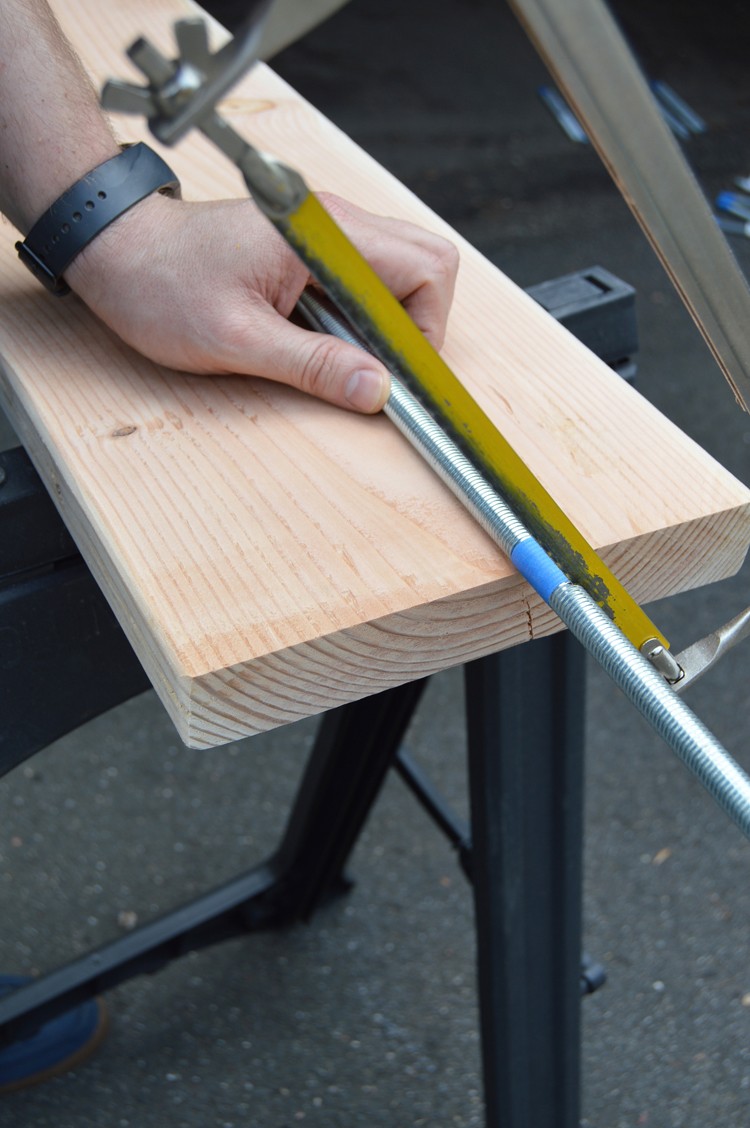
Prep the support. While your boards are drying, use that time to prep the threaded rods for support. Use the hack saw to cut each threaded rod 10 in. long (3 in. will go into the wall and 7 in. will be left for the shelf). At the location of the shelving unit, measure out each stud that will meet with a threaded rod. Drill 3 in. into each stud and insert the threaded rod into the wall.
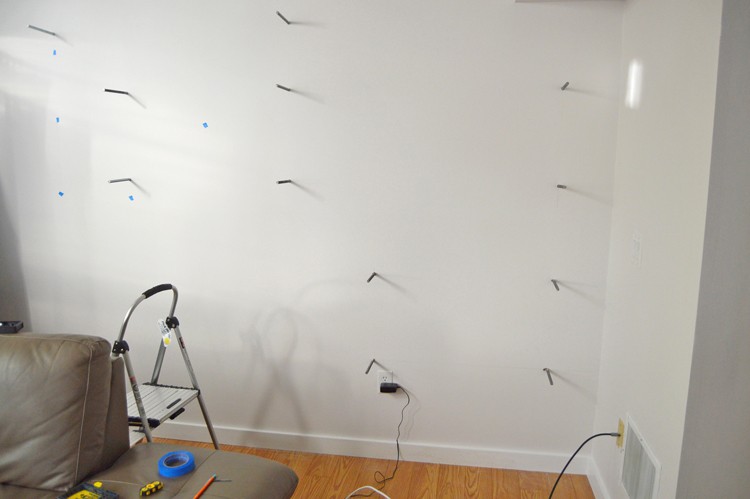
Step 5: Mount the Shelves
Mount the shelves. Once your boards are dry they are ready for hanging! Take the board to your location–at this point, all holes should be drilled, rods should be in the wall. Line up the board with the threaded rod holes; push the board into place. This might take great force. These rods should be pretty sturdy, but if need be place a dish towel over a hammer and gently hammer the board into place.
Once the shelves are in place, insert the U-Bolt into the pre-drilled holes. Loop in the turnbuckle and measure the placement on the wall for the screw hook. Drill a small hole into the proper place for the screw hook and then insert the screw hook. Once everything is properly in place, fasten all bolts tight! Voila! A rustic DIY shelving unit!
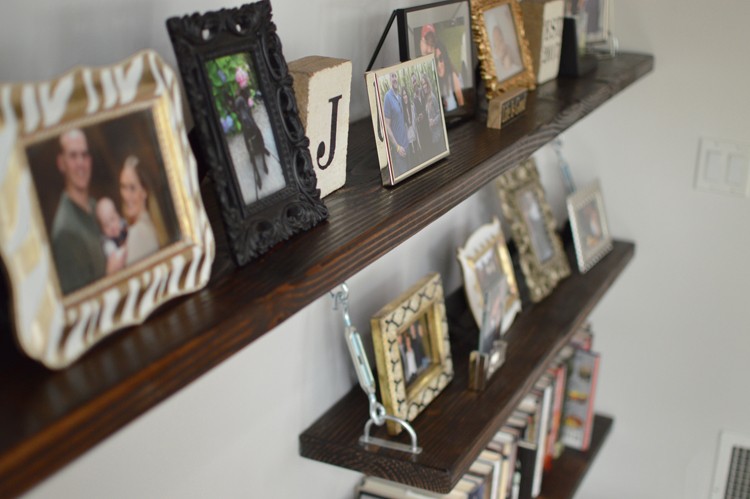
I hope you loved this project and will give it a try! It has turned into the perfect storage solution. With empty boxes and a much prettier wall, I can now display all memories, new and old! I really loved how this turned out, and plan to do a smaller version in my kitchen, open shelving for all my coffee mugs and dishes.
The post Rustic DIY Shelving Unit appeared first on The Home Depot Blog.
