Replacing your shower head can seem intimidating, but it doesn’t have to be! Follow along as Alexi Politis of Seeking Alexi takes you through 5 simple steps to replacing your shower head with a new Moen Magnetix model.
Simple Shower Head Upgrade with Moen Magnetix
Has anyone else been kind of terrified to replace their shower head? Before I replaced my first shower head, I thought it was going to be sooo hard because well, #plumbing. But I can honestly say that replacing a shower head is extremely simple! Today I’m going to show you just how simple it is…
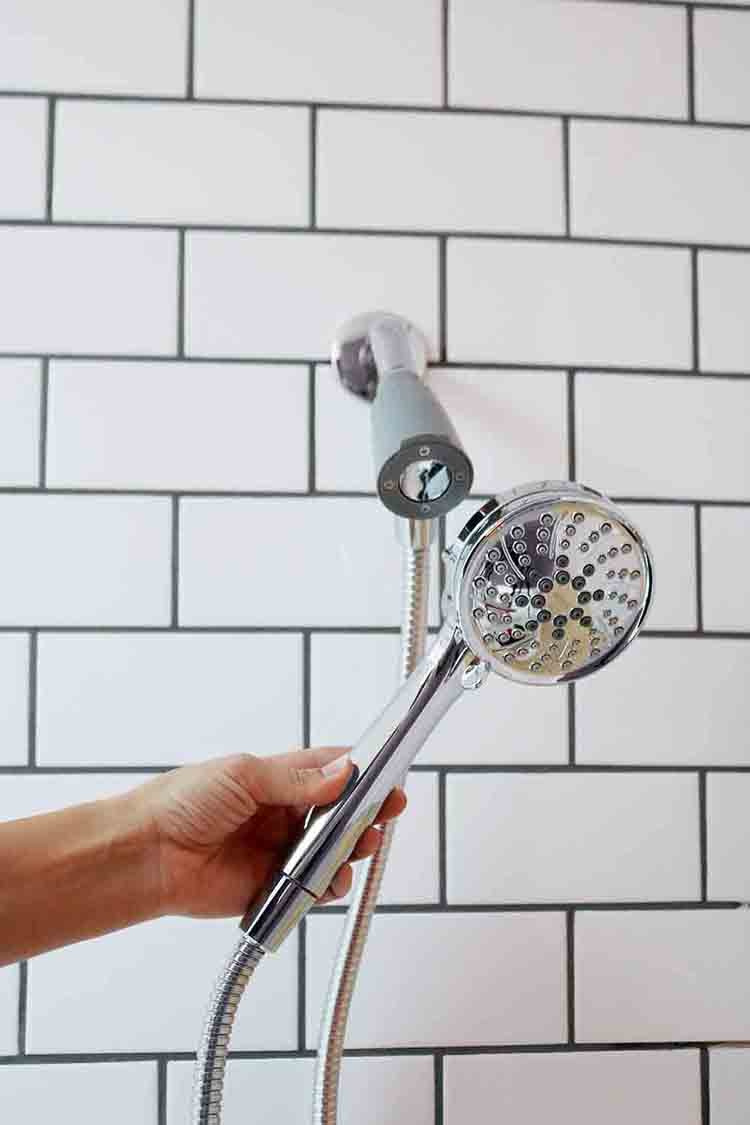
And not only that, I’m going to show you how you can transform a space with just a few updates! Today we are highlighting this beautiful, new Moen shower head. Combine that with a little subway tile and you’ve got a magic combo!
Especially when you see this before photo of the shower head that was in The Beam House before we replaced it. (See more of what we’ve done at #thebeamhousereno) The clip was broken so it wouldn’t even stay in place! So this Moen shower head was a heaven-send.
Before:
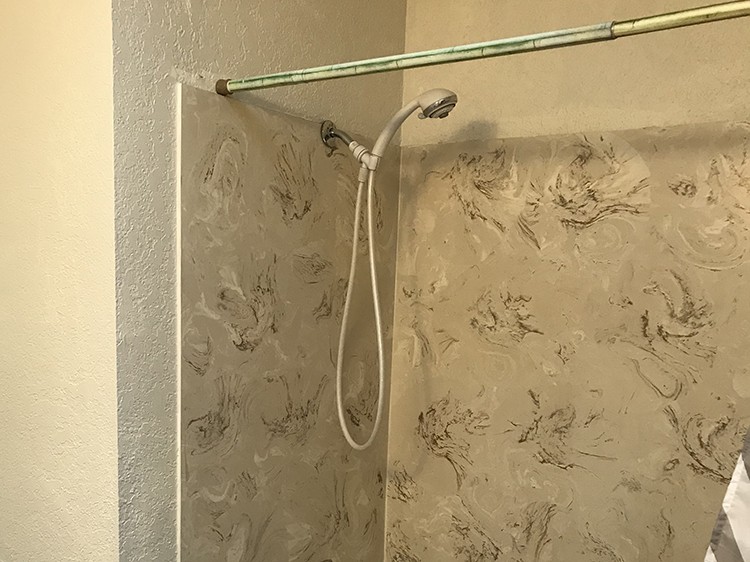
Isn’t this just an awful before photo?! Need guidance on dealing with formica / solid state / acrylic shower surrounds? Read about what to do over here! (You will not believe what the rest of the bathroom looked like before.)
After:
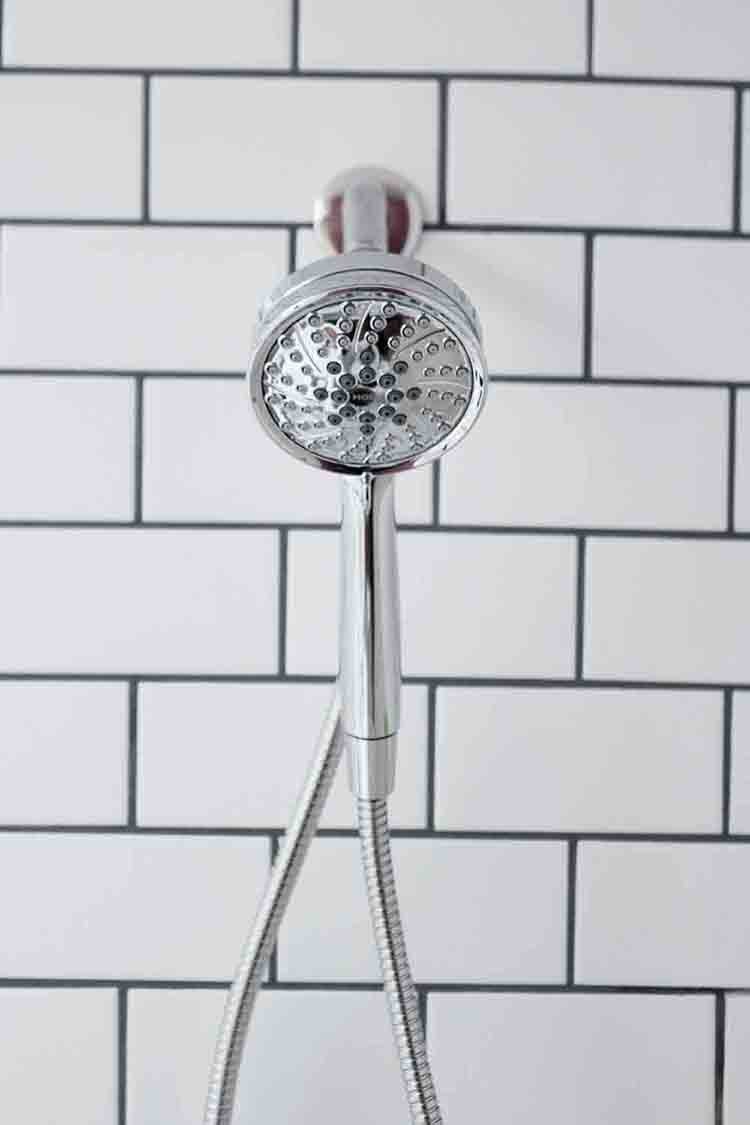
What a transformation, right?? I agree! If your bathroom is as bad as mine was at The Beam House, stripping it down to the studs and tiling takes a long time, but the FASTEST part was adding this shiny new shower head. This bathroom feels brand-spanking new with that sparkly chrome against the clean white!
Okay, let’s show you how to do it.
Materials Needed:
- Wrench
- Shower arm (optional)
- Plumber’s Tape
- Cotton rag
- Moen Magnetix showerhead
Step 1: Remove old shower head.
To do this, you just have to find a way to muscle it off! It might have some hard-water stains that make it tricky, but it just needs to be unscrewed.

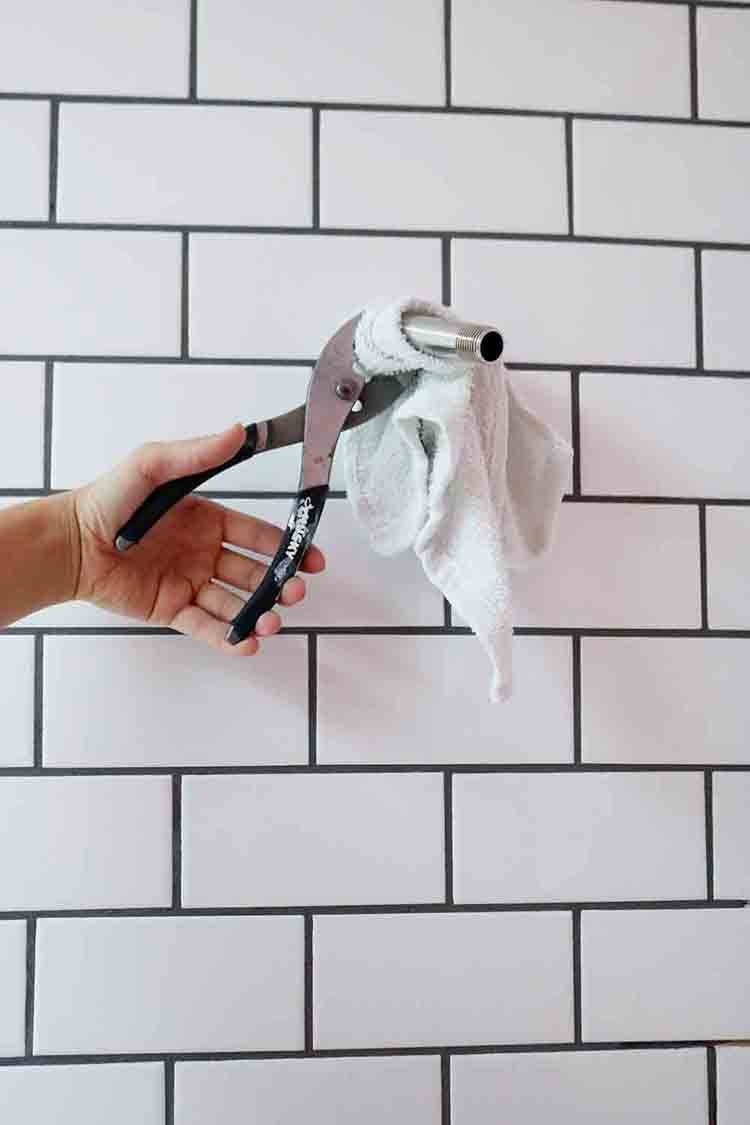
Step 2 (optional): Replace shower arm.
My shower arm was old and damaged, so I opted to add a new one. To do so, add some Plumber’s Tape on the threads, and screw it in by hand as tight as you can. Then, wrap a cotton rag around the arm, so you don’t scratch it, and tighten it further with a wrench. Then add the supporting arm base to cover where it comes out of the wall.
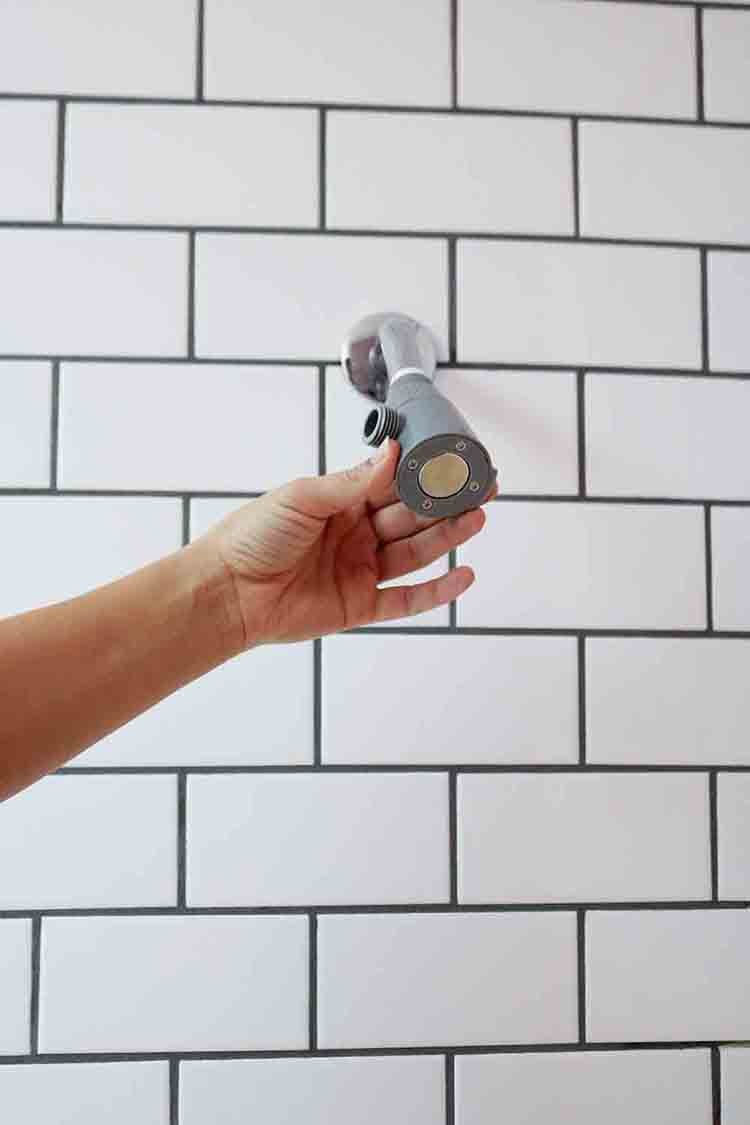
Step 3: Screw on the new shower base.
This part is pretty easy, just screw it in by hand. Don’t over-tighten, it, though!


Step 4: Screw in hose.
Screw the supplied hose to the shower head and then to the shower base; make sure the black, plastic nut is in each side first. You also screw these in by hand.
Step 5: Turn on water and check for leaks.
If there are leaks, tighten it a little more and you should be good to go!
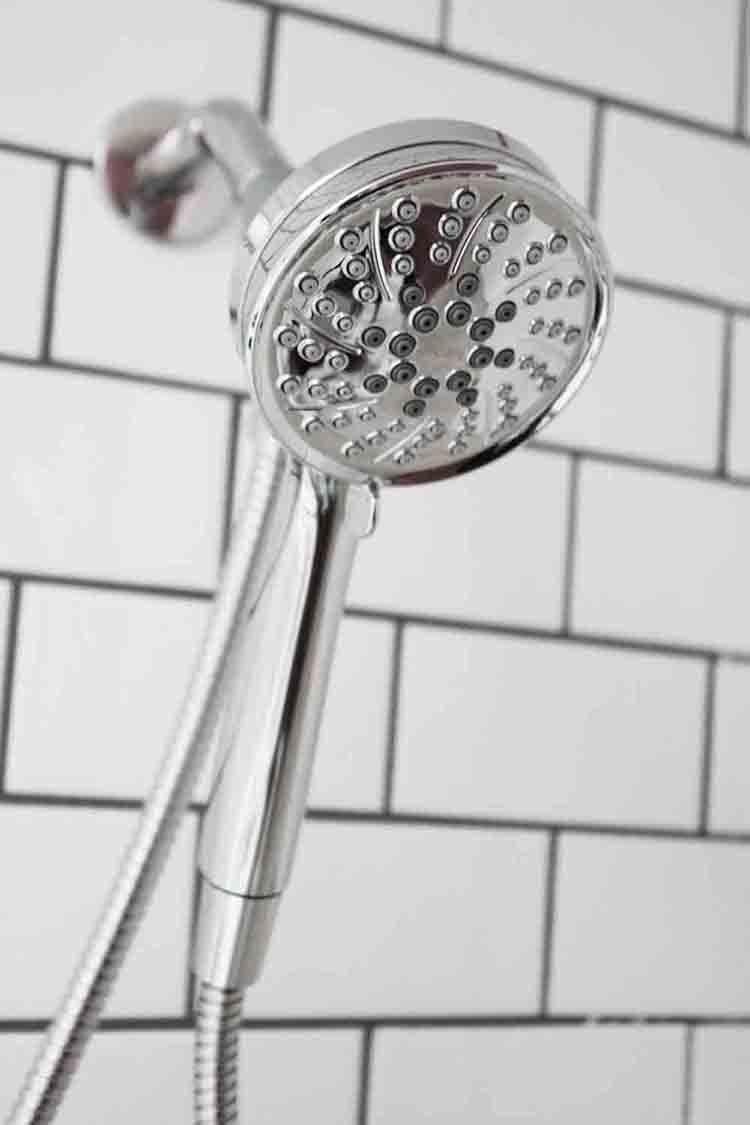
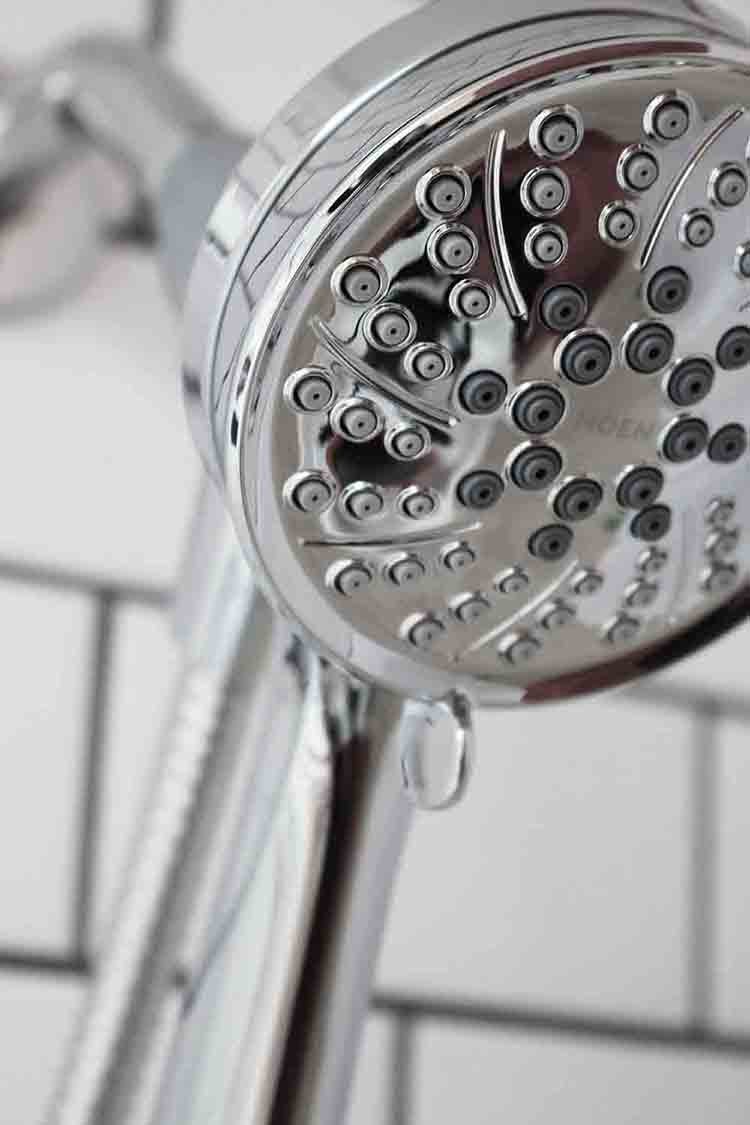
That’s all! See how easy it is to update your shower head? Like I mentioned, it was the simplest part of my whole bathroom renovation! #thebeamhousereno Thanks for reading this tutorial, I hope it was helpful!
Update pain points around your home with the help of Home Depot. Find more products from the Moen Magnetix line here.
The post Simple Shower Head Upgrade with Moen Magnetix appeared first on The Home Depot Blog.

